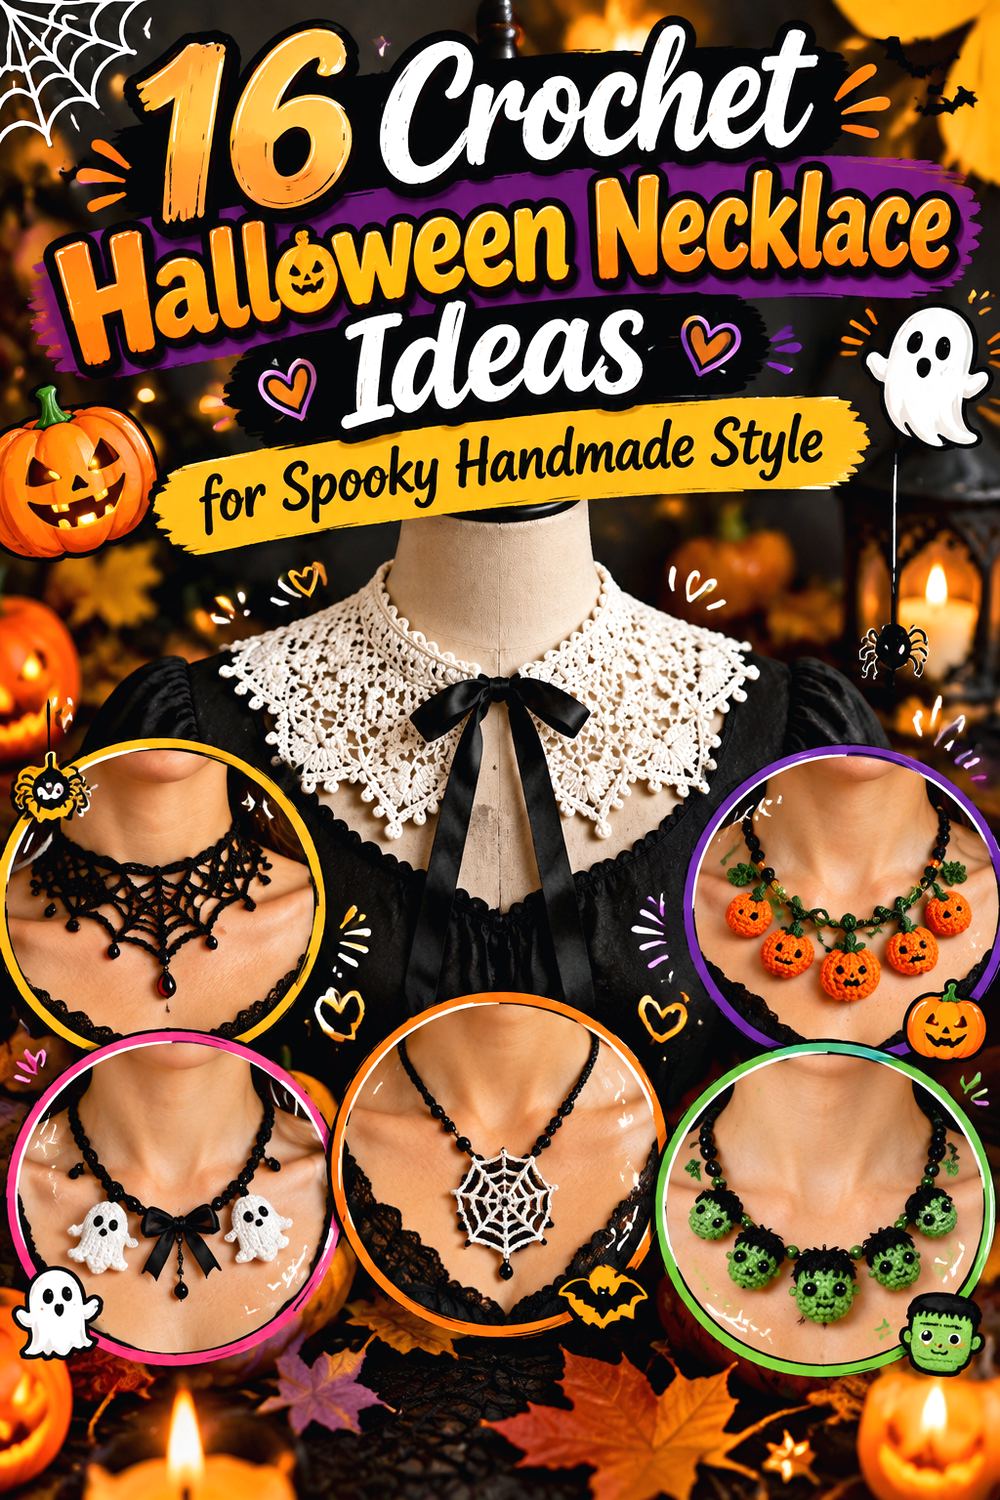
16 Crochet Halloween Necklace Ideas for Spooky Handmade Style
Halloween necklaces can range from one tiny crocheted charm on a simple cord to an entire lace collar that becomes the main feature of an outfit. The ideas below cover compact spiders, pumpkins, bats, ghosts, skulls, an eyeball, a Frankenstein-inspired charm, web motifs, candy corn, a crescent moon, and multi-motif statement pieces.
Some of the original tutorials are specifically designed as necklaces or chokers. Others teach jewelry-scale earrings or small accessories that can reasonably inspire a single pendant; those adaptations are identified clearly so you can follow the creator for the motif itself without assuming the source includes necklace construction. Along the way, the notes focus on scale, comfort, attachment points, structure, embellishments, and the differences between flat and dimensional crochet jewelry.
Quick List
- Crochet Spider Pendant Necklace
- Crochet Pumpkin Charm Necklace
- Crochet Mini Witch Hat Pendant Necklace
- Crochet Candy Corn Cluster Necklace
- Crochet Glowing Ghost Necklace
- Crochet Spiderweb Choker Necklace
- Crochet Bat Silhouette Pendant Necklace
- Crochet Mini Ghost Charm Necklace
- Crochet Stuffed Skull Pendant Necklace
- Crochet Dimensional Pumpkin Pendant Necklace
- Crochet Eyeball Orb Necklace
- Crochet Frankenstein Head Necklace
- Crochet Spiderweb Medallion Necklace
- Crochet Gothic Lace Collar Necklace
- Crochet Mixed Halloween Motif Necklace
- Crochet Crescent Moon Pendant Necklace
Choose the Necklace Scale Before You Choose the Motif
A Halloween motif that works as a decoration does not automatically work at the neckline. Large dimensional pieces can become heavy or bounce when worn, while very small shapes may lose the details that make a bat, skull, pumpkin, or witch hat recognizable. Decide first whether you want a subtle charm, a centered statement pendant, a close-fitting choker, or a wider collar.
For pendant adaptations, a simple paper cutout can help you judge visual scale before you crochet. Hold it where the finished motif would sit and check whether it overwhelms the neckline or disappears against clothing. For chokers and collars, comfort matters more than decorative impact alone. Allow for normal neck movement and avoid designing a close-fitting piece that depends on excessive stretch to go on or come off.
Match Yarn or Thread to Structure and Detail
Fine crochet thread can preserve small points, openings, and lace details, making it useful for spiderwebs, crescents, and compact jewelry motifs. Thicker yarn makes stitches more visible and can give pumpkins, ghosts, skulls, and other dimensional pieces a softer, more substantial appearance. Neither approach is automatically better; the finished scale and construction should guide the choice.
Substitution can change more than size. A thicker or heavier yarn may make a pendant hang lower, make a dimensional charm bulkier, or cause an open choker to stretch more under its own weight. Very soft yarn can also blur sharp silhouettes such as bat wings or witch-hat points. When departing from a tutorial’s suggested material, make a small sample or first motif before committing to a full necklace.
Plan Closures, Hardware, and Embellishments for Wear
Several Halloween jewelry designs combine crochet with jump rings, chains, buttons, beads, earring findings, glow sticks, paint, or other non-yarn components. These additions can make a necklace more polished, but every connection becomes a place worth checking before wear. Confirm that rings are closed, knots and sewn joins are secure, and sharp hardware cannot rub against the skin.
For necklaces intended for young children, detachable beads, buttons, glued eyes, charms, and similar small components require particular caution. An embroidered detail may sometimes be a more appropriate adaptation, although changing a creator’s finishing method can alter the appearance. Care also depends on all materials used: a washable yarn does not necessarily mean jewelry hardware, paint, stuffing, or embellishments should be washed the same way.
1. Crochet Spider Pendant Necklace
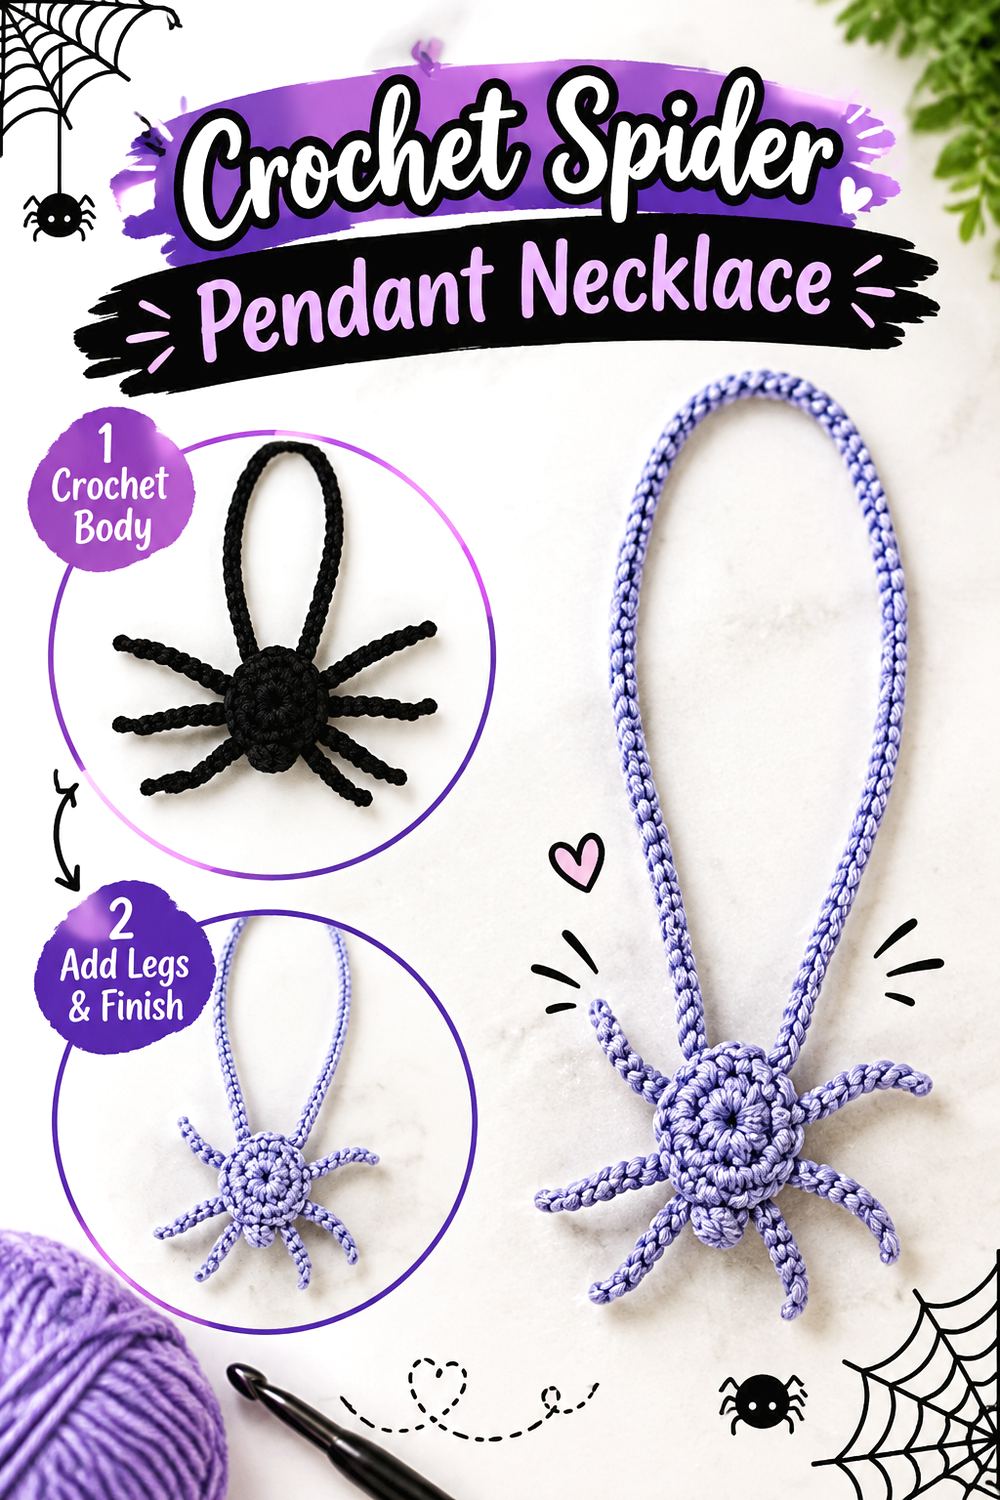
A crocheted spider creates an immediately readable Halloween focal point without requiring an entire themed collar. Katia Creates’ tutorial is specifically a spider necklace rather than a general spider appliqué, and the finished design combines a compact crocheted body with distinct legs before turning the motif into wearable jewelry.
This direction works well when you want one recognizable motif centered over a plain shirt, dress, or costume. Because the legs extend beyond the central body, visual balance matters more than it would with a simple round pendant. The spider should remain large enough for the legs to read separately without becoming so wide that they fold against the wearer’s chest.
Motif Readability Matters
Spider motifs depend heavily on silhouette. If the yarn is excessively fuzzy or the finished stitches are unusually loose, the legs can visually merge with the body. Before finalizing the necklace, place the spider against the type of clothing you expect to wear. Strong contrast usually makes the outline clearer, while a highly patterned background can make fine leg details harder to see.
Balance the Pendant With the Cord
A bold spider attached to an extremely delicate cord can look visually top-heavy, while an oversized crocheted chain can compete with a small motif. Consider the relationship between pendant scale and necklace line. A simple cord keeps attention on the spider; a crocheted chain creates a fully fiber-based accessory but may add stretch. Check how the complete necklace hangs rather than judging the spider separately.
Control Rotation at the Attachment
A central pendant can twist when its attachment point is narrow or when the weight is uneven from side to side. Before securing the final connection, hold the necklace upright and check the spider’s natural resting position. If it consistently turns, the attachment arrangement may need adjustment. The goal is not to make the pendant rigid, but to give it a stable enough connection that the recognizable side generally faces outward.
Original Tutorial and Creator Credit
Creator: Katia Creates
2. Crochet Pumpkin Charm Necklace
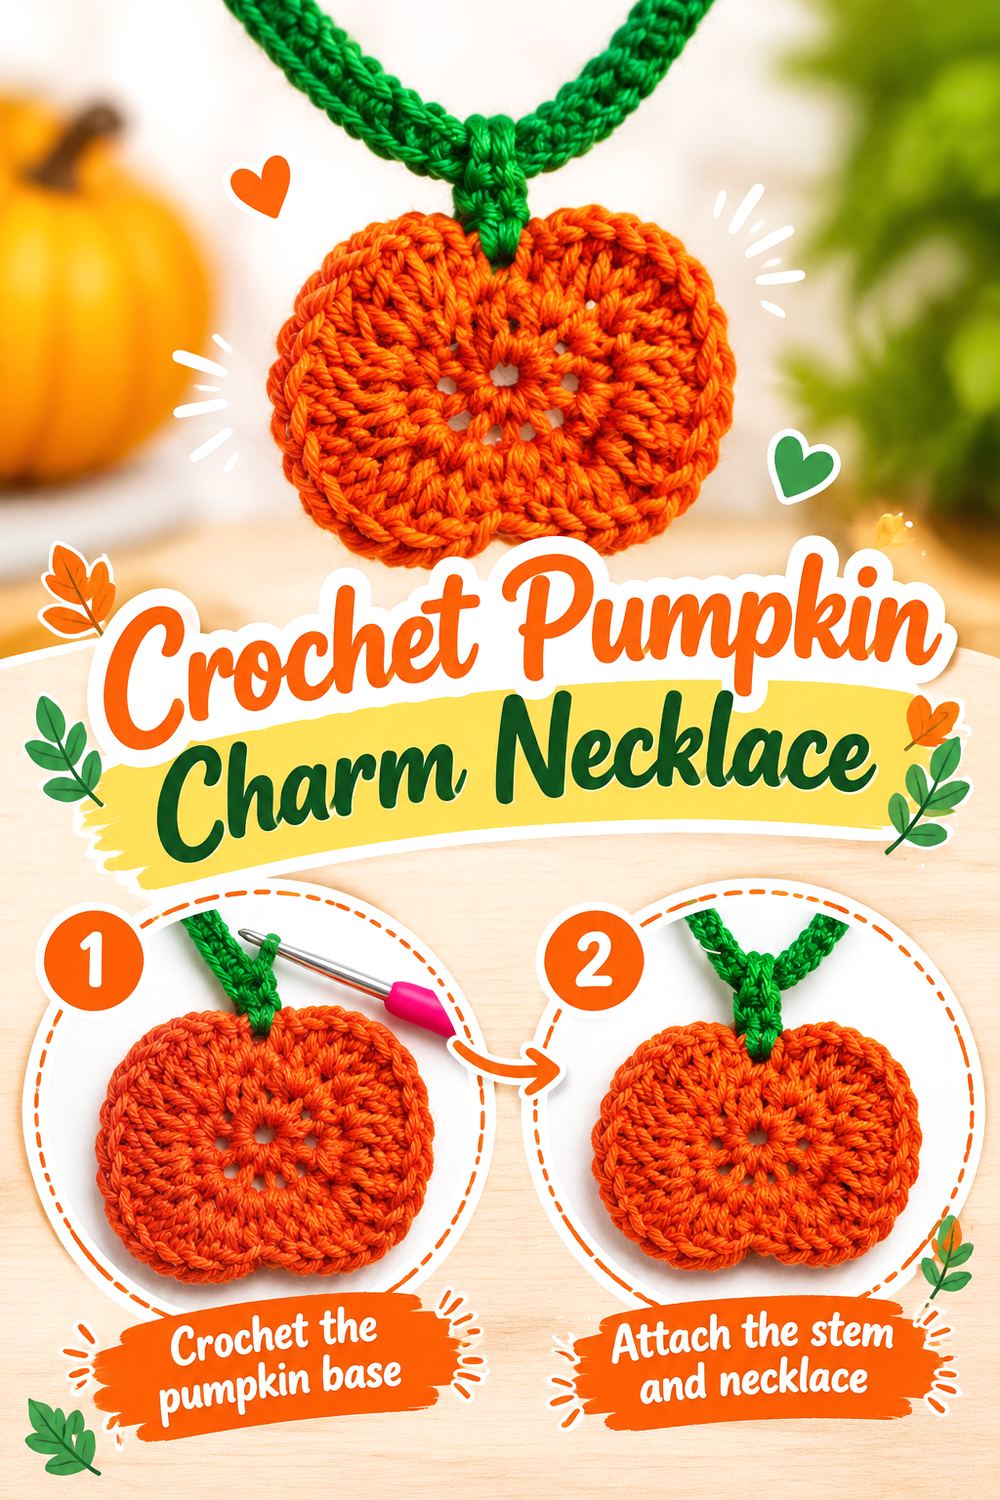
For a classic Halloween accessory without a large statement collar, a compact pumpkin charm gives the necklace a clear seasonal identity. All Craft TV’s tutorial specifically covers both crochet pumpkin earrings and a necklace, so the jewelry application is part of the original project rather than an adaptation from unrelated decor. The creator also describes it as a small-yarn project suited to Halloween accessories.
This version suits readers who prefer one simple motif instead of a cluster of charms. A pumpkin can work with costumes, fall outfits, or October everyday wear, and the rounded shape makes it less likely to snag than motifs with long projecting points. The main planning decision is how prominent you want the pumpkin to look at the neckline.
Keep the Pumpkin at Jewelry Scale
Changing yarn thickness can quickly turn a jewelry motif into something that feels more like a hanging ornament. If you substitute yarn or change tension, check the first completed pumpkin against your neckline before making additional pieces or constructing a cord. Smaller is not always better either; the motif still needs enough definition for its pumpkin shape to remain obvious from normal viewing distance.
Center the Hanging Point
A pumpkin looks most intentional when it hangs in the orientation you expect. Before securing the final connection, temporarily suspend the motif and observe whether it tilts. Small differences in where a loop, ring, or yarn connection is placed can alter the resting angle. Make that check before weaving away every tail so you retain some flexibility for correcting the attachment.
Original Tutorial and Creator Credit
Creator: All Craft TV
3. Crochet Mini Witch Hat Pendant Necklace
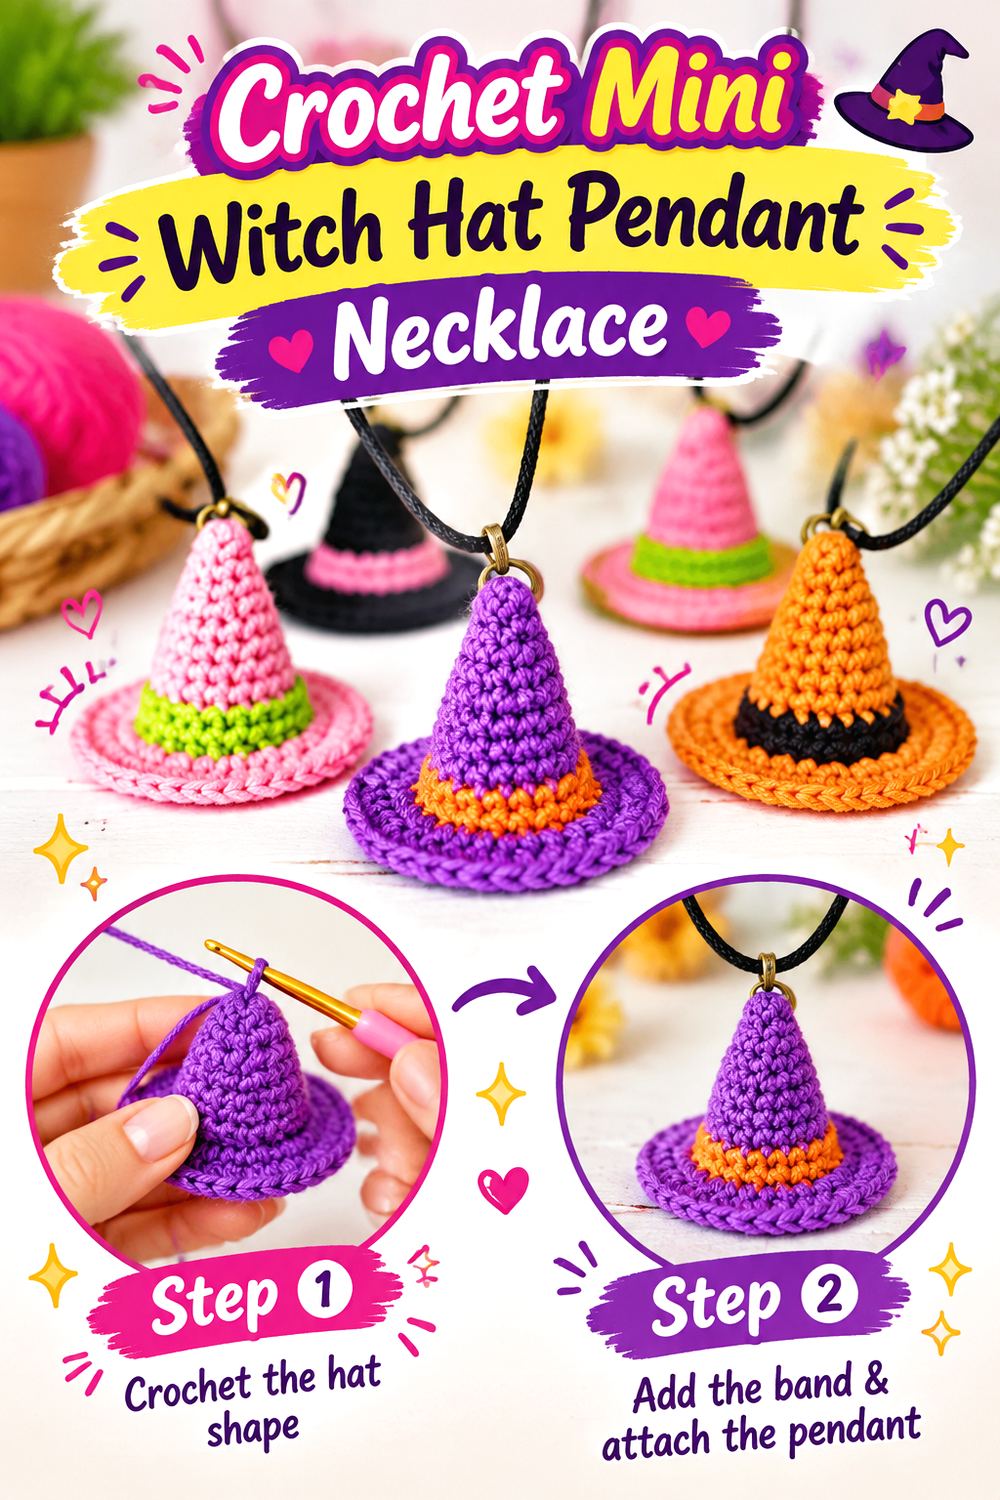
A tiny witch hat brings height and a three-dimensional profile to the list, making it noticeably different from flat webs or round charms. A Crafty Concept’s original tutorial teaches a miniature crocheted witch hat with a contrasting brim and discusses several accessory uses, including making smaller versions for earrings with finer yarn. It does not present a necklace construction, so using one finished hat as a pendant is an adaptation.
The idea works best when the miniature hat remains light enough to hang comfortably. Because its point and brim create a more sculptural silhouette, it can stand alone without additional Halloween motifs. A single hat on an uncomplicated cord also gives the shape room to remain visible instead of being crowded by other charms.
Preserve the Hat Silhouette
The source notes that the brim can naturally turn upward and discusses blocking as one way to influence its shape. For a pendant, that behavior matters because the brim is visible from several angles. Check the hat after it has rested rather than judging it only immediately after crocheting. A clean brim and recognizable point will contribute more to the final effect than extra embellishment.
Convert a Mini Hat Carefully
This tutorial is for the hat itself, not for necklace assembly. If adapting it, choose an attachment point that supports the hat without collapsing the crown or pulling one side of the brim upward. Temporarily thread a removable loop through the proposed location and hang the piece before making the connection permanent. That small test reveals whether the miniature wants to lean, spin, or sit upright.
Original Tutorial and Creator Credit
Creator/Site: A Crafty Concept
4. Crochet Candy Corn Cluster Necklace
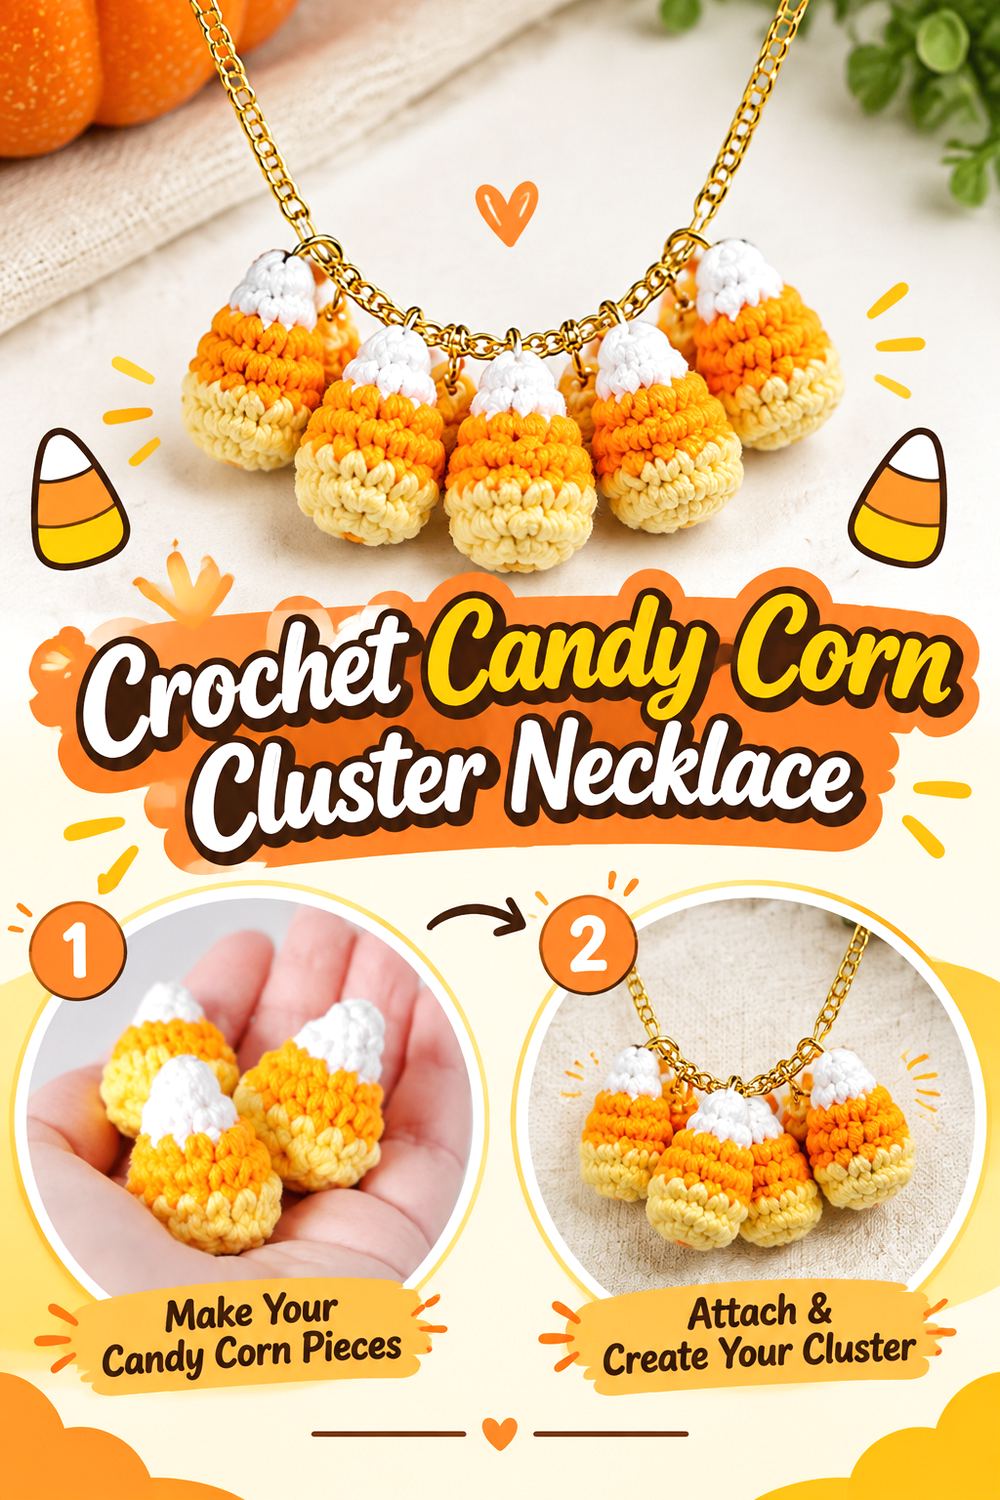
A candy corn cluster shifts the design from a single pendant to a repeated-motif statement necklace. The Pudgy Rabbit’s original tutorial specifically shows the crocheted candy corn turned into a necklace using multiple pieces, beads, a chain, jump rings, and jewelry tools. The creator also recommends planning the visual arrangement before attaching the components.
That construction makes this idea useful for readers who want more movement and color across the front of the neckline. It is also a good example of why necklace planning is different from simply crocheting several small objects: spacing, cumulative weight, hardware, and motif orientation become part of the design. A restrained arrangement can feel like seasonal jewelry, while a fuller cluster produces a more costume-forward result.
Arrange the Cluster Before Committing
Lay the finished motifs and any beads beside the chain or cord before connecting them. The source itself uses a layout stage to experiment with the arrangement. This is a valuable checkpoint because crochet pieces often occupy more visual space than loose components suggest. Look for balanced gaps and make sure the center of the necklace has a deliberate focal point.
Watch Cumulative Weight
One tiny stuffed motif may feel almost weightless, but several motifs plus beads and metal findings can behave differently. Hold the planned components together before assembly to get a practical sense of the finished weight. If the necklace starts to feel bulky, reducing the number of components can preserve the Halloween theme while making the accessory more comfortable and less likely to pull forward.
Check Beads and Jump Rings
Mixed-material necklaces benefit from a final connection check. Run your fingers carefully around closed jump rings to identify gaps or rough edges, and make sure beads cannot slide into places where they distort the motif spacing. If this necklace is intended for a young wearer, remember that beads and other detachable components are small parts; a simpler all-yarn version may be more appropriate.
Original Tutorial and Creator Credit
Creator/Site: The Pudgy Rabbit
5. Crochet Glowing Ghost Necklace
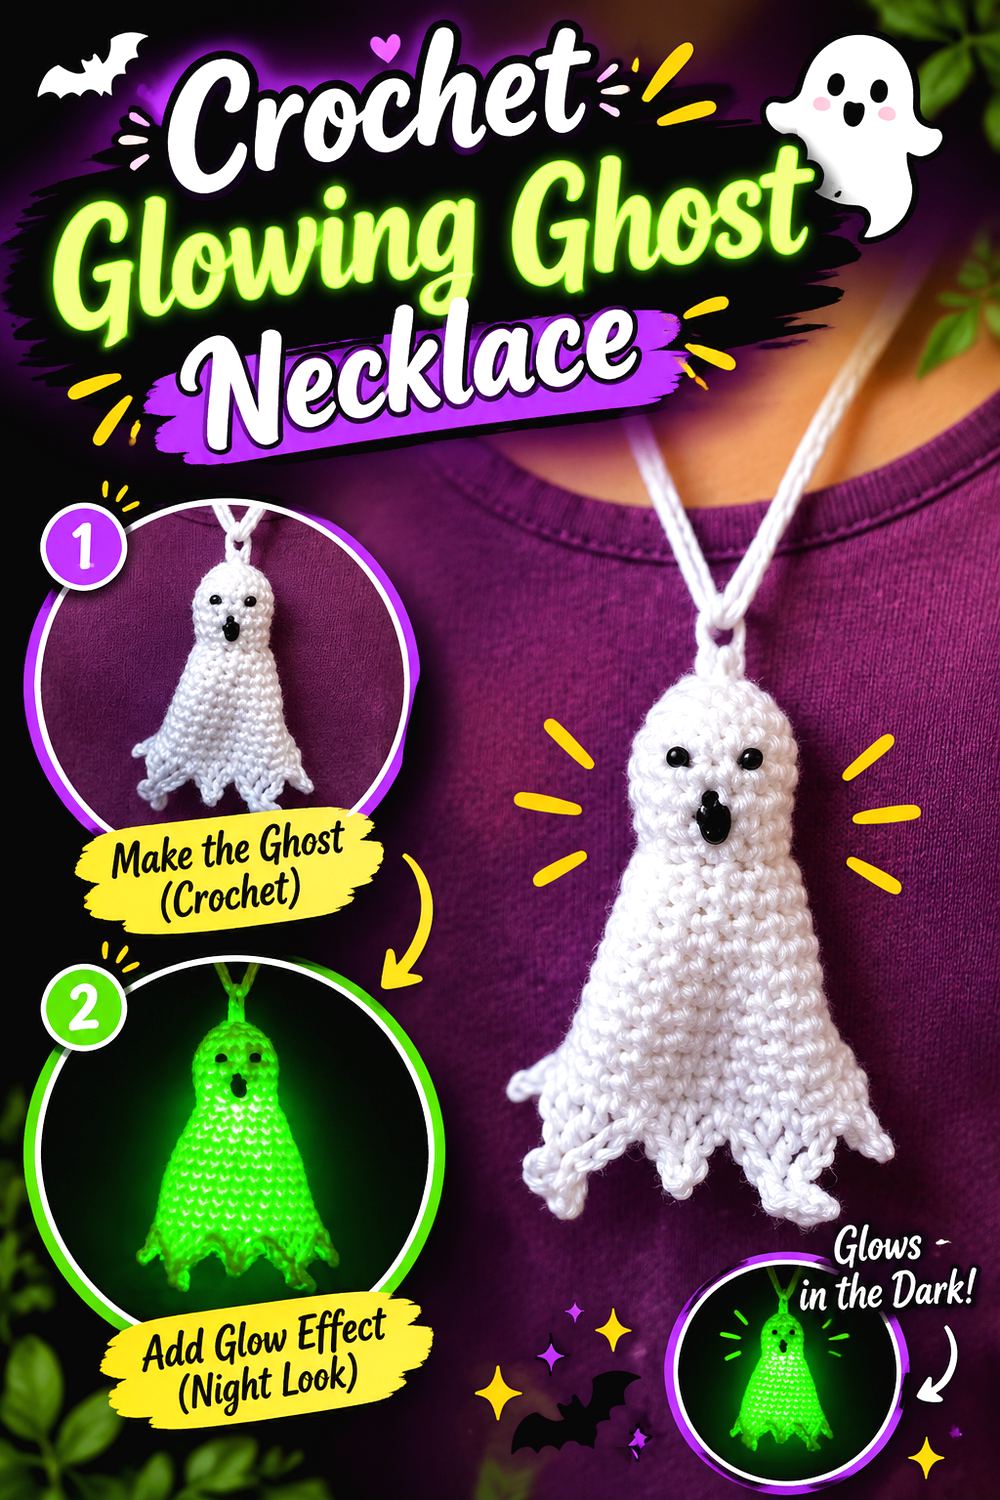
This ghost necklace adds a functional light element rather than relying entirely on yarn. Jennifer Renaud’s “Ghostly Lights” project is designed around a crocheted ghost that incorporates a glow stick, with the original tutorial explaining that a yarn strand or crocheted chain can form the necklace.
Visually, the result is much more dimensional than a flat ghost charm, making it a strong choice for a nighttime Halloween party or costume accessory. The replaceable non-yarn component is also the project’s biggest planning difference. Instead of treating the ghost as a permanently sealed amigurumi pendant, the design needs to remain compatible with the light element. Follow the creator’s tutorial for its construction rather than closing or reshaping openings based only on appearance.
Design Around the Replaceable Glow Element
The source specifically discusses inserting the glow stick and replacing it as needed. That means access is part of the design rather than a finishing flaw. When checking the completed ghost, make sure decorative changes do not block the intended insertion point. Adding extra sewn details or tightly closing an opening could interfere with the feature that distinguishes this necklace.
Keep the Ghost Face Forward
A glowing body will attract attention, so facial placement has an outsized effect on the finished look. Once the ghost is assembled according to the tutorial, hold it by its necklace connection and see which side naturally faces outward. If you plan your own facial variation, orient the piece first so the expression is not accidentally placed on a side that tends to rotate away from the viewer.
Treat Glow-Stick Use as a Separate Safety Check
The glow stick is a manufactured product, not crochet material. Follow its own packaging and safety guidance, do not puncture or alter it to fit the project, and replace damaged components rather than trying to conceal them inside the crocheted cover. If the necklace is being made for a child, adult supervision and the manufacturer’s age guidance matter independently of the crochet construction.
Original Tutorial and Creator Credit
Creator/Site: Jennifer Renaud / A Crocheted Simplicity
6. Crochet Spiderweb Choker Necklace
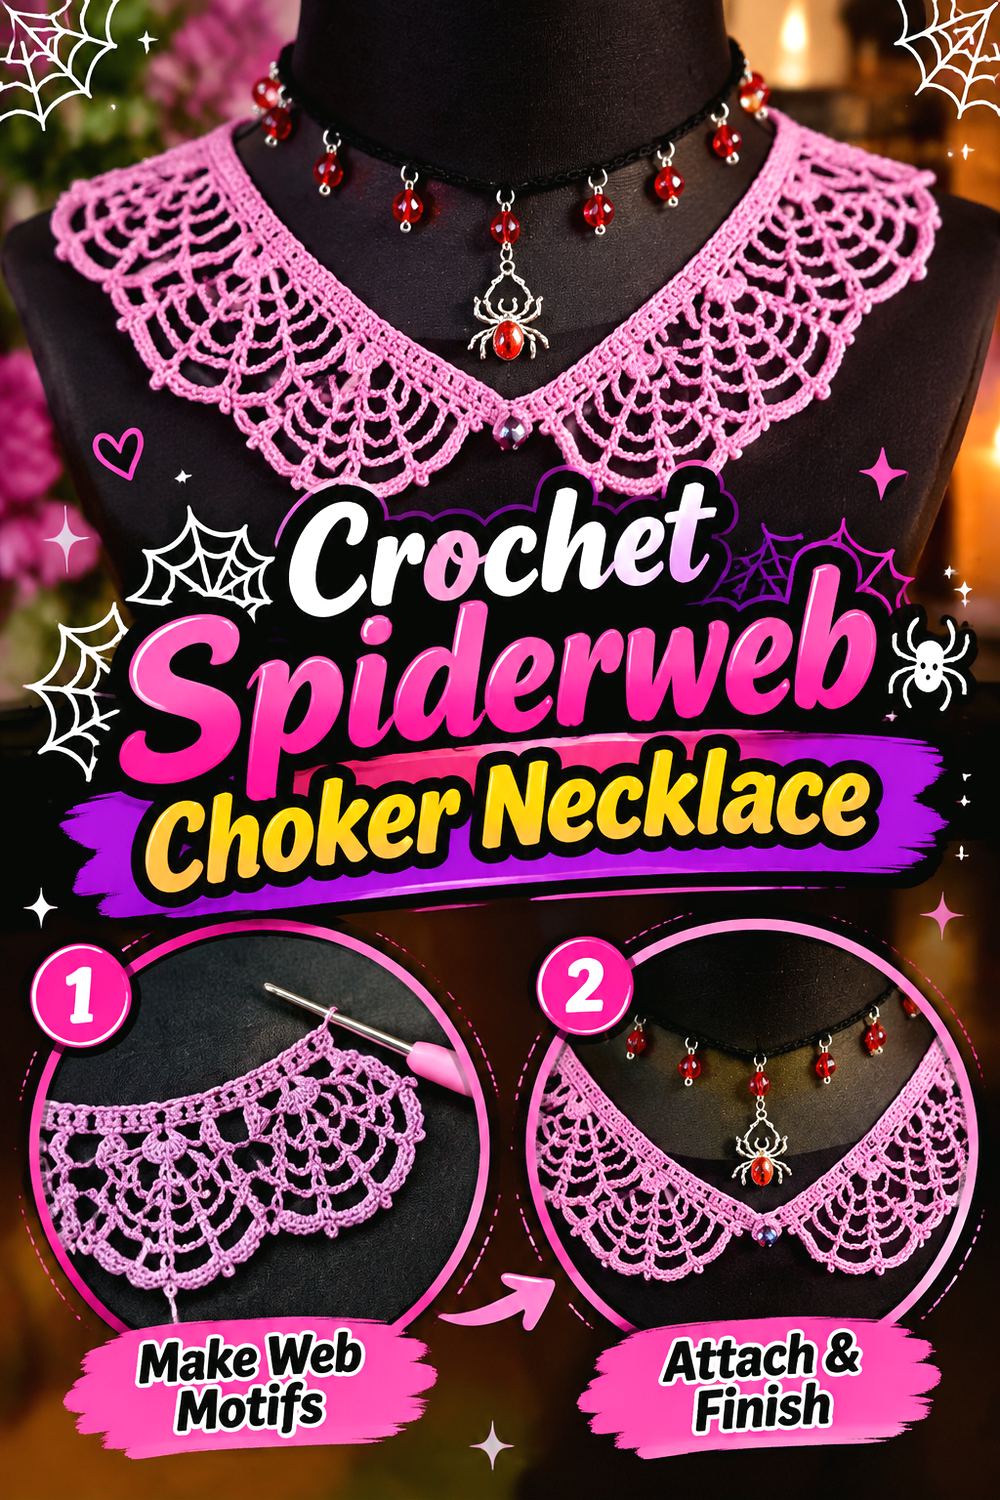
A spiderweb choker creates Halloween impact across the neckline rather than concentrating everything in one dangling pendant. Weaving Wyrd Studio’s video presents a three-in-one spiderweb design that can function as a choker, collar, or trim, giving the web itself the starring role.
This style is useful when you want the necklace to read almost like lace clothing. Open web spaces make the background garment part of the appearance, so contrast matters: a dark web over a pale neckline and a pale web over dark clothing produce very different effects. Because the necklace sits closer to the neck than a long pendant, fit and stretch deserve attention before decorative extras are added.
Fit the Choker Before Finishing
Do not rely solely on a chain count or another person’s finished measurement when making a close-fitting neck accessory. Follow the tutorial’s construction, then check the developing piece against the intended wearer at the appropriate stage if the design allows it. It should lie neatly without requiring uncomfortable tension. Also confirm that normal head and neck movement does not cause the lower web edge to pull upward.
Manage Stretch in Open Web Fabric
Open crochet can elongate differently from dense fabric, particularly when the yarn is smooth, heavy, or very elastic. A web that looks perfectly proportioned on the table may open more when worn. Before adding beads or other weight, let the piece hang briefly and observe whether the web spacing changes. If substituting yarn, this checkpoint becomes especially useful because fiber and thickness can change the drape.
Keep Web Points From Snagging
Decorative web edges can catch on zippers, textured fabric, sequins, or other costume accessories. Try the finished choker with the garment you intend to wear rather than assessing it in isolation. If the combination constantly catches, changing the clothing layer may preserve the crochet better than altering the finished lace. Storage is also easier when the choker is laid flat instead of tangled with metal jewelry.
Original Tutorial and Creator Credit
Creator: Weaving Wyrd Studio
7. Crochet Bat Silhouette Pendant Necklace
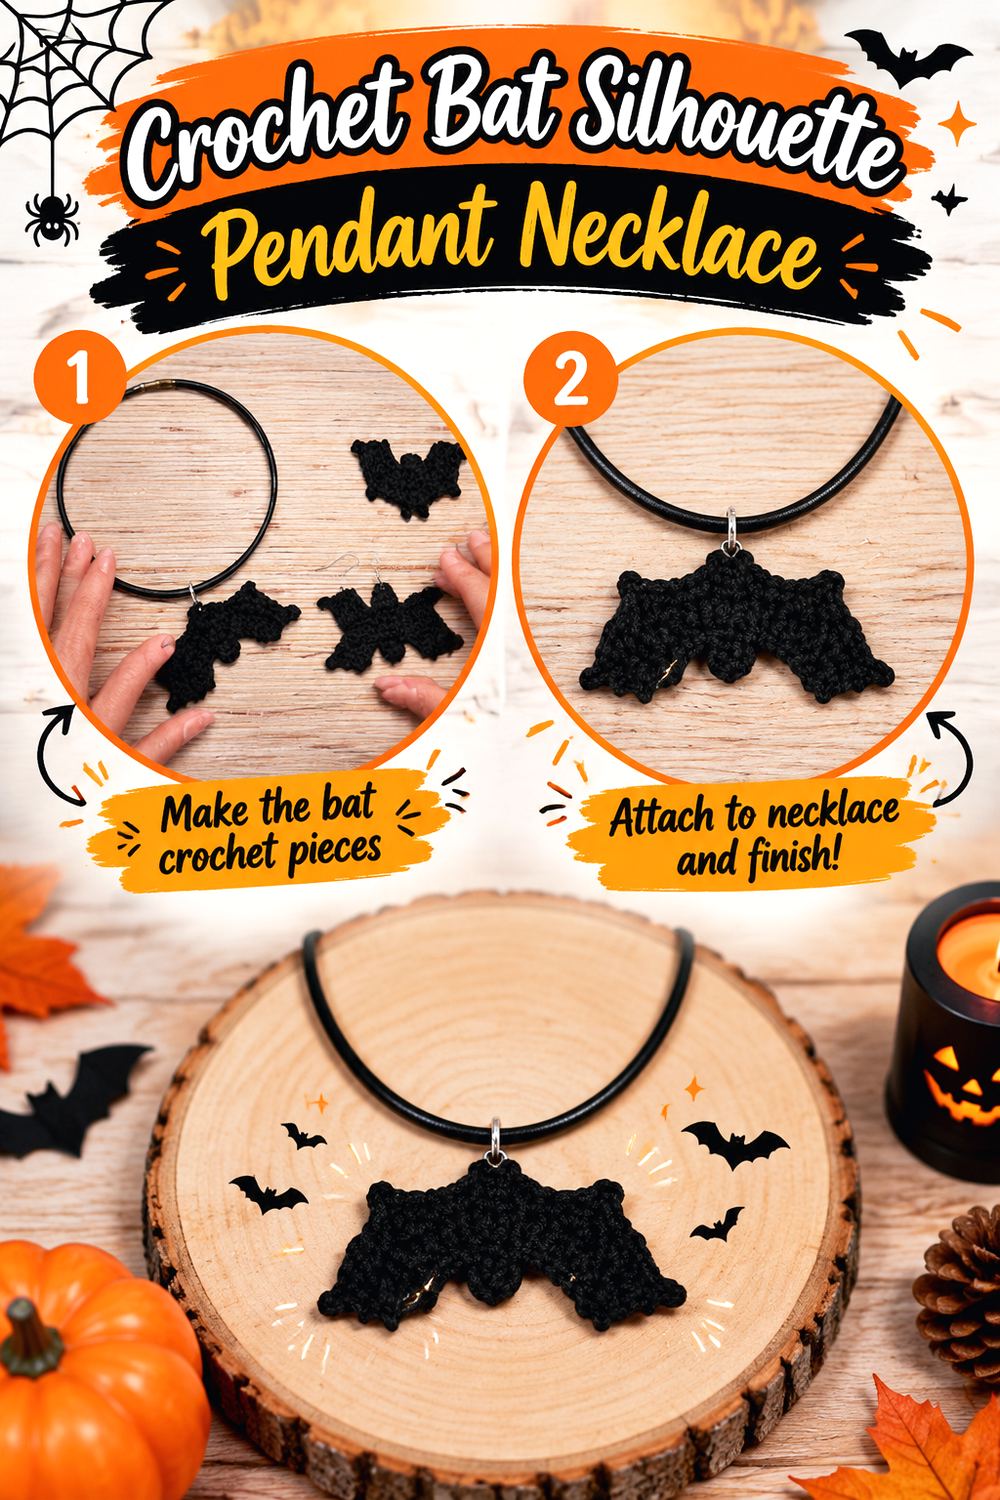
A bat works particularly well when you want a wider motif without the bulk of a stuffed pendant. Patronarte’s tutorial teaches a crocheted bat intended for several accessories, and pendants are specifically included among the suggested uses. That makes the motif a strong starting point for a necklace even though the video is not devoted to one particular necklace construction.
The outstretched wings distinguish this project from round pumpkins and compact ghost charms. A dark bat can read clearly against a lighter top, while other color choices can move the design away from traditional Halloween styling. Because the visual impact comes from the outer contour, maintaining a recognizable wing shape is more important than adding numerous embellishments.
Choose a Bat Size That Reads Clearly
A bat reduced too aggressively may lose the negative spaces and wing outline that make the motif recognizable. Conversely, increasing yarn thickness can create a pendant much wider than expected. If you substitute materials, crochet one complete bat first and hold it at the planned necklace position. Judge it from a normal viewing distance, not only from a few inches away on the worktable.
Stabilize the Wings Without Making Them Stiff
Flat motifs can curl at narrow points, especially after handling or storage. Gentle shaping or blocking may help depending on the yarn, but first check the fiber’s care guidance. The aim is to let the wings retain their visual spread while keeping the pendant comfortable and textile-like. Avoid adding rigid treatments unless you understand how they will affect skin contact, laundering, and long-term handling.
Original Tutorial and Creator Credit
Creator: Patronarte
8. Crochet Mini Ghost Charm Necklace
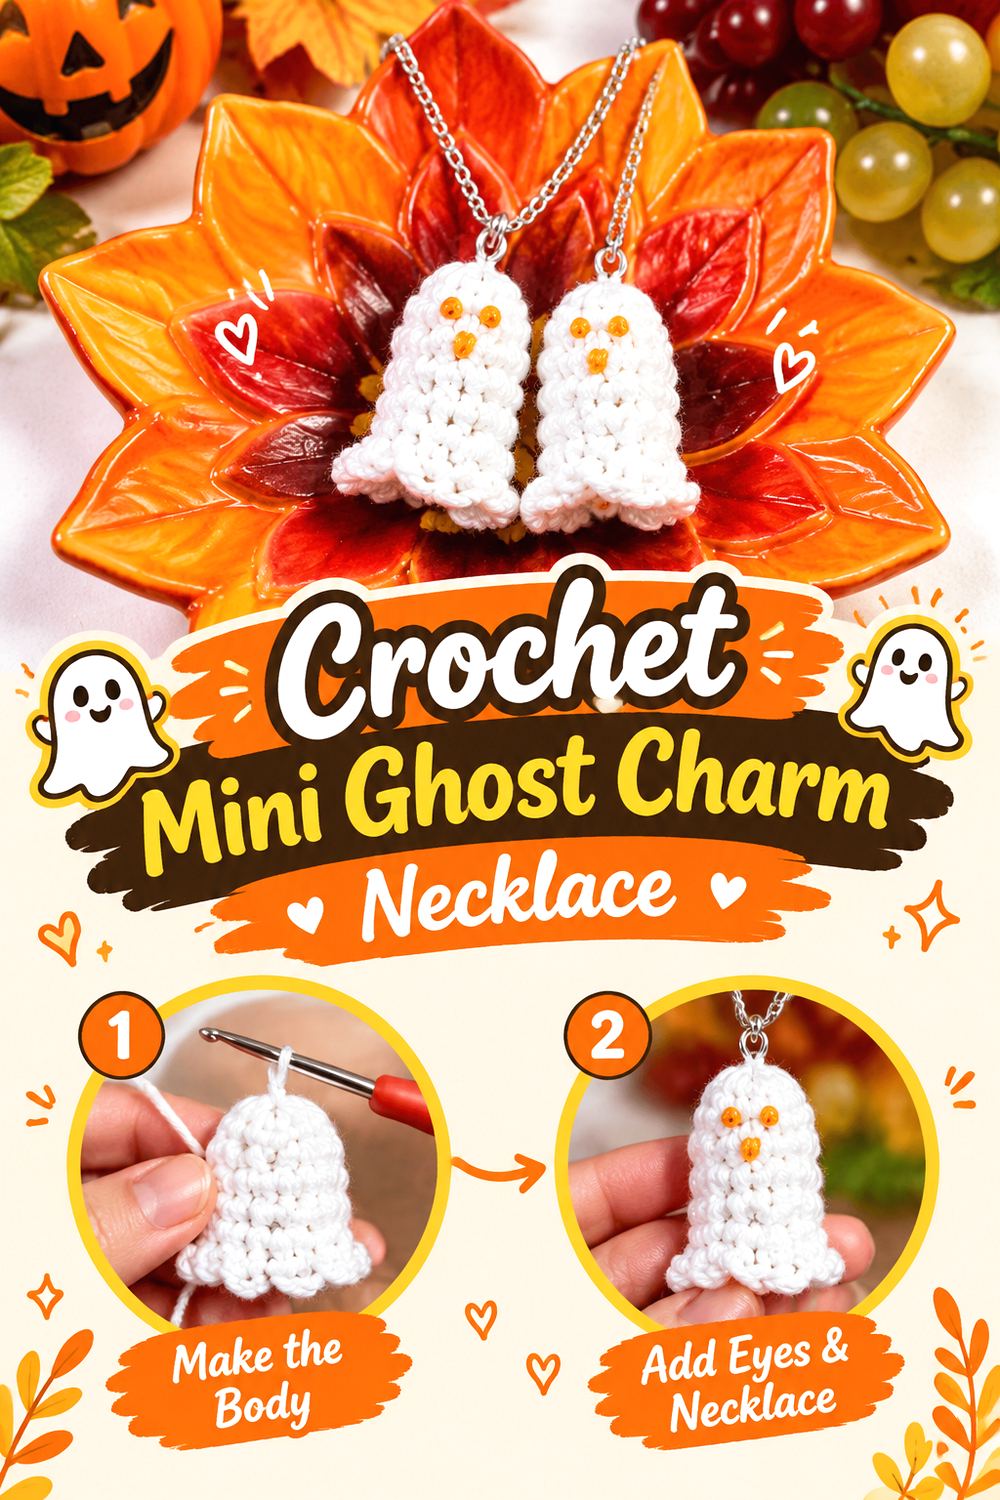
This version treats the ghost as a tiny jewelry charm rather than a larger illuminated pendant. Nicole Riley’s original Nicki’s Homemade Crafts tutorial creates small three-dimensional ghost earrings and adds the face after crocheting. The source does not teach a necklace, so using one completed ghost as a pendant is an adaptation of the jewelry-scale motif.
That distinction gives this idea a much more understated feel than the glowing ghost necklace. One little ghost could sit near the collarbone on a fine cord or chain, making the seasonal reference visible without turning the entire neckline into a costume piece. Because the charm is dimensional, check both its front-facing appearance and how it behaves when it swings.
Make One Ghost Work as a Focal Charm
An earring pair gains impact through repetition; a necklace uses one center point. If adapting the source, inspect the completed ghost by itself before deciding whether it needs anything else around it. A bead or secondary charm may add balance, but it can also make the composition busier. The ghost’s three-dimensional form is already enough to provide texture and depth.
Plan the Face Finish for Wear
The source uses fabric paint for the ghost’s face and instructs makers to let it dry completely before wearing or gifting the earrings. That advice matters just as much on a necklace adaptation. Consider how the chosen finish responds to rubbing against clothing and follow the relevant product care instructions rather than assuming the yarn’s washing method applies to the painted detail.
Original Tutorial and Creator Credit
Creator/Site: Nicole Riley / Nicki’s Homemade Crafts
9. Crochet Stuffed Skull Pendant Necklace
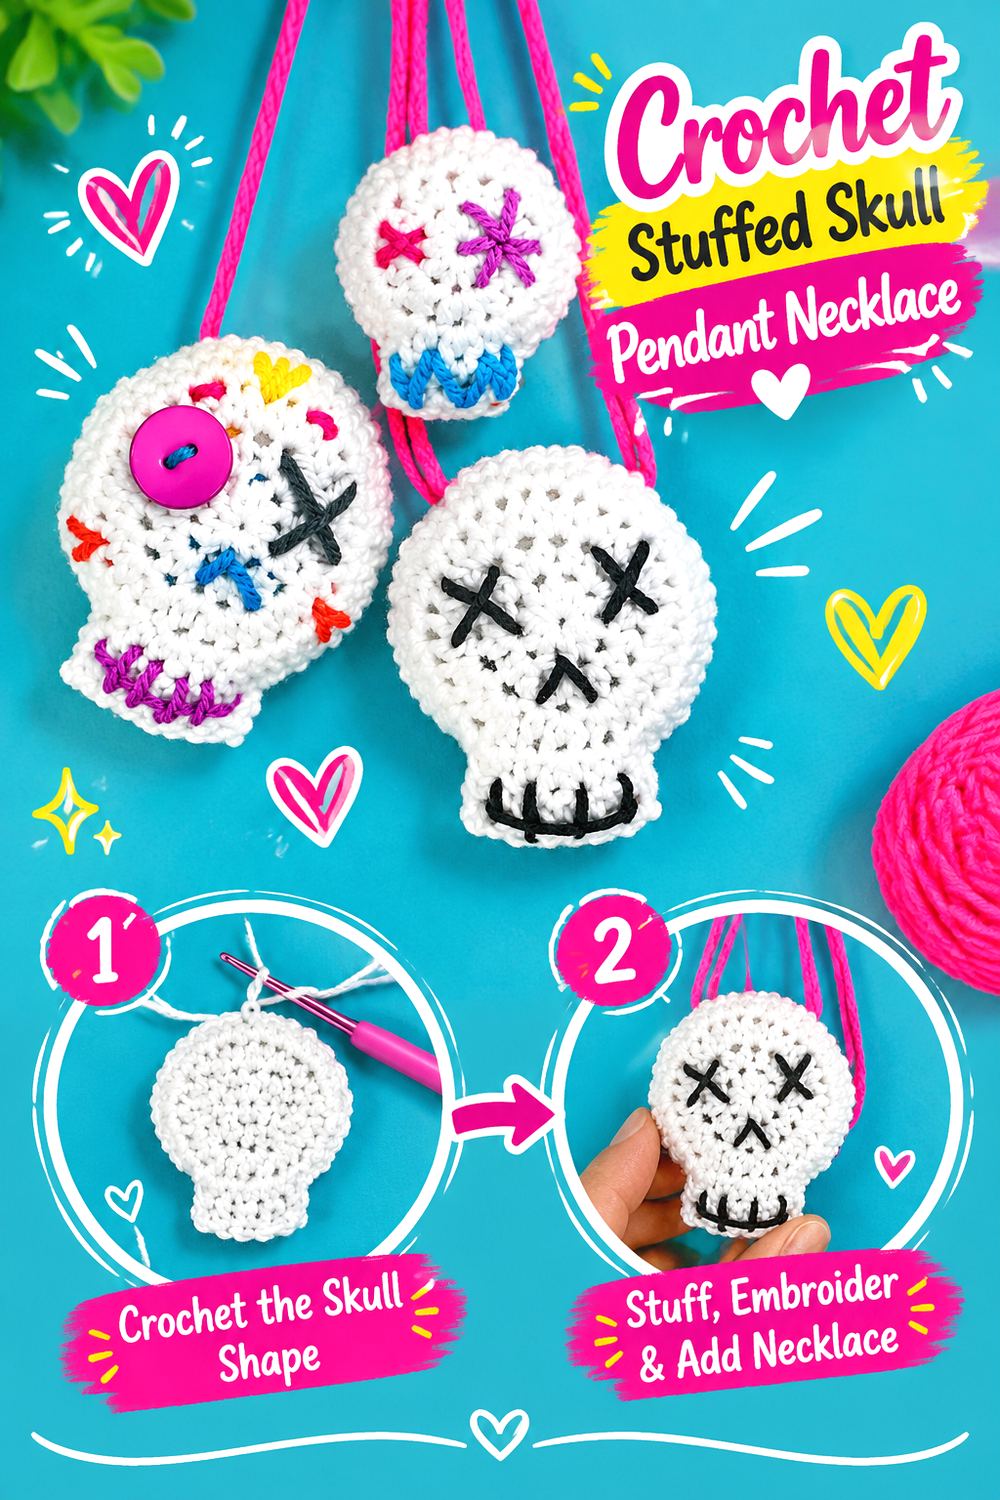
A stuffed skull offers more visual weight than a flat skull appliqué while still functioning as a single central pendant. Jessica Amey’s original tutorial is specifically for spooky crochet skull necklaces. It creates a front and back, adds facial stitching, joins and lightly fills the form, and threads yarn or another string through the top for wearing. The source also shows room for decorative variation.
This construction gives the necklace a handmade doll-like character rather than a fine-jewelry look. It can be styled monochromatically for a stark skull or decorated more elaborately. Because the pendant has thickness, however, it is worth deciding how much volume feels comfortable before adding further surface decorations.
Decide How Much Dimension You Want
Stuffing affects both appearance and behavior. A lightly filled pendant can retain shape without projecting far from the body; extra filling may make it rounder but can increase bulk. Follow the source for its intended construction, then assess the form before closing the final opening. The finished skull should show its shape clearly without becoming so firm that it feels awkward against the chest.
Secure Decorative Facial Details
The source demonstrates stitched facial details and also mentions a button-eye variation. Buttons can create a striking asymmetrical expression, but they also add a separate attachment point. Sew any embellishment securely and consider the intended wearer. For a young child or anyone likely to tug at the pendant, embroidered details may avoid a detachable small component.
Choose a Cord That Supports the Pendant
Jessica Amey’s project uses T-shirt yarn or another yarn/string option through the top. Whatever necklace material you choose, check how it behaves under the skull’s weight. A soft wide cord can suit the chunky handmade style, while a very thin line may visually disappear. Make sure the cord does not cut uncomfortably into the neck once the pendant is hanging from it.
Original Tutorial and Creator Credit
Creator/Site: Jessica Amey / Let’s Do Something Crafty
10. Crochet Dimensional Pumpkin Pendant Necklace
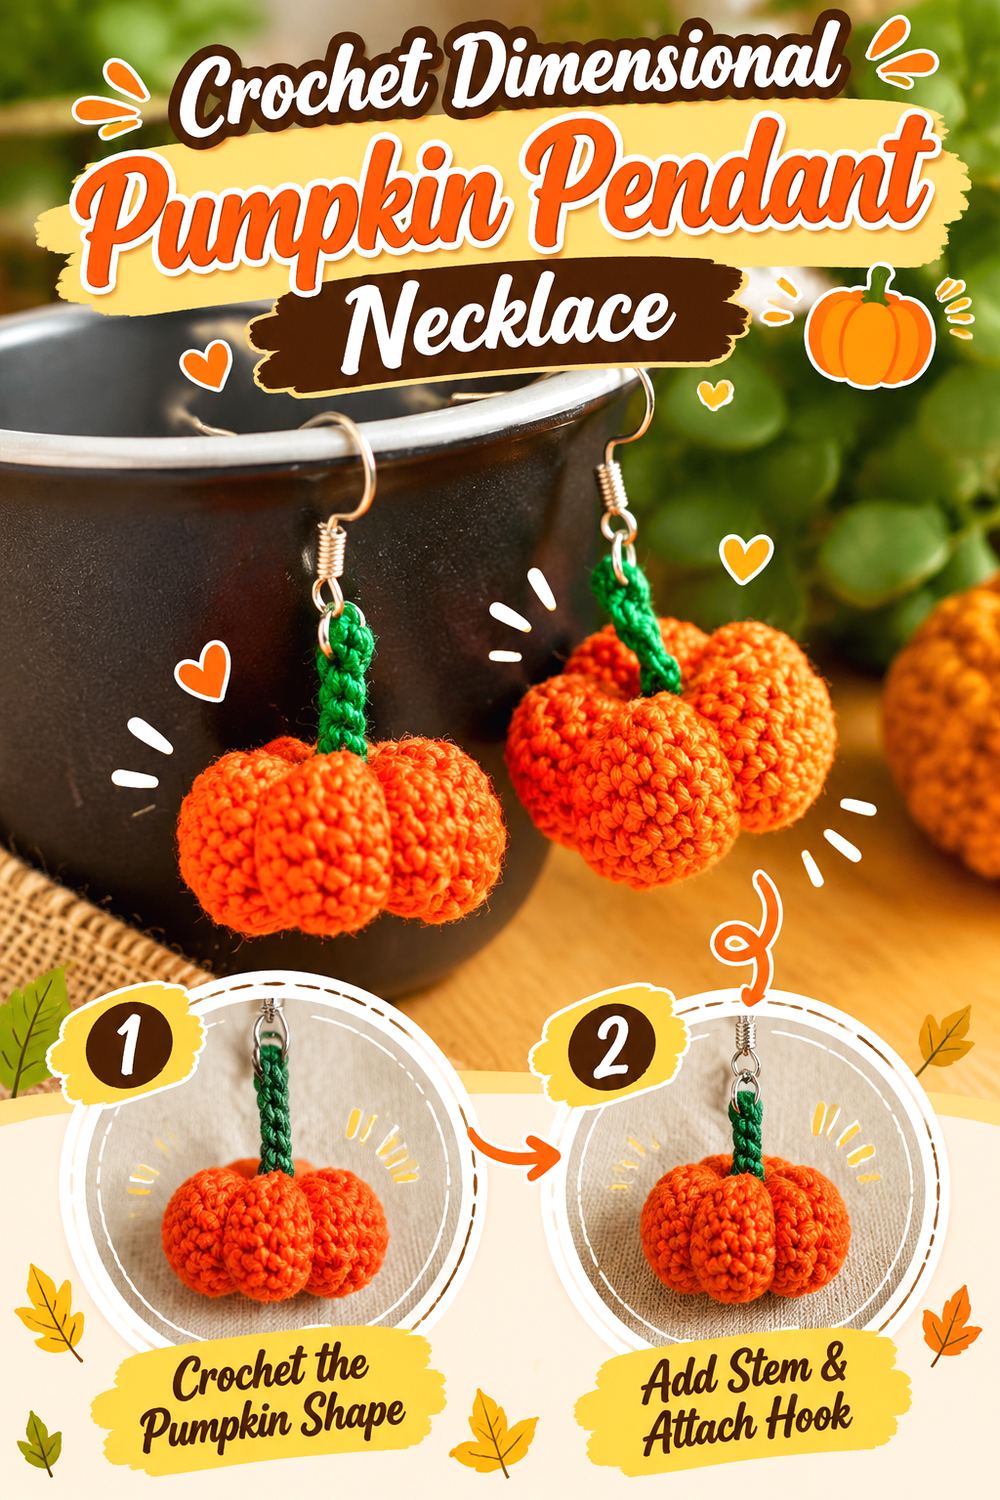
Unlike the simpler pumpkin jewelry idea earlier, this version emphasizes a truly three-dimensional miniature pumpkin with sculpted ridges. Patricia Castillo’s Pops de Milk tutorial makes pumpkin earrings in lace-weight material, forms the rounded pumpkin, creates the characteristic indented sections, adds a stem, and then attaches jewelry hardware.
For a necklace, one finished miniature can become a tactile central pendant. The tutorial itself is for earrings rather than a necklace, so the pendant conversion should be treated separately. The result is especially effective when you want the pumpkin to look like a tiny object rather than a flat graphic motif. That added volume also means weight and attachment stability deserve more attention.
Shape Is the Main Feature
The source’s dimensional effect depends on creating visible pumpkin ridges after the body is crocheted. When adapting the motif, avoid covering those contours with oversized hardware or decorative bows. Check the pumpkin from several angles: a good three-dimensional pendant should remain recognizable as it moves instead of having only one visually successful side.
Keep a 3D Pendant Comfortable
Dimensional jewelry stands farther away from the body than a flat motif. Before choosing the necklace length, temporarily hold the pumpkin at several positions around the neckline. A very high placement may cause a bulky charm to press against the throat, whereas a slightly lower position may let it hang more naturally. The best placement depends on the finished scale and the wearer’s clothing.
Build a Reliable Top Attachment
The source uses jump rings and earring hardware for its original jewelry format. A necklace adaptation needs its own stable connection. Attach through a structurally secure area rather than relying on a decorative stem alone unless the tutorial supports that method. Suspend the pumpkin briefly before finalizing the necklace to see whether the connection deforms the top or makes the pumpkin tilt.
Original Tutorial and Creator Credit
Creator/Site: Patricia Castillo / Pops de Milk
11. Crochet Eyeball Orb Necklace
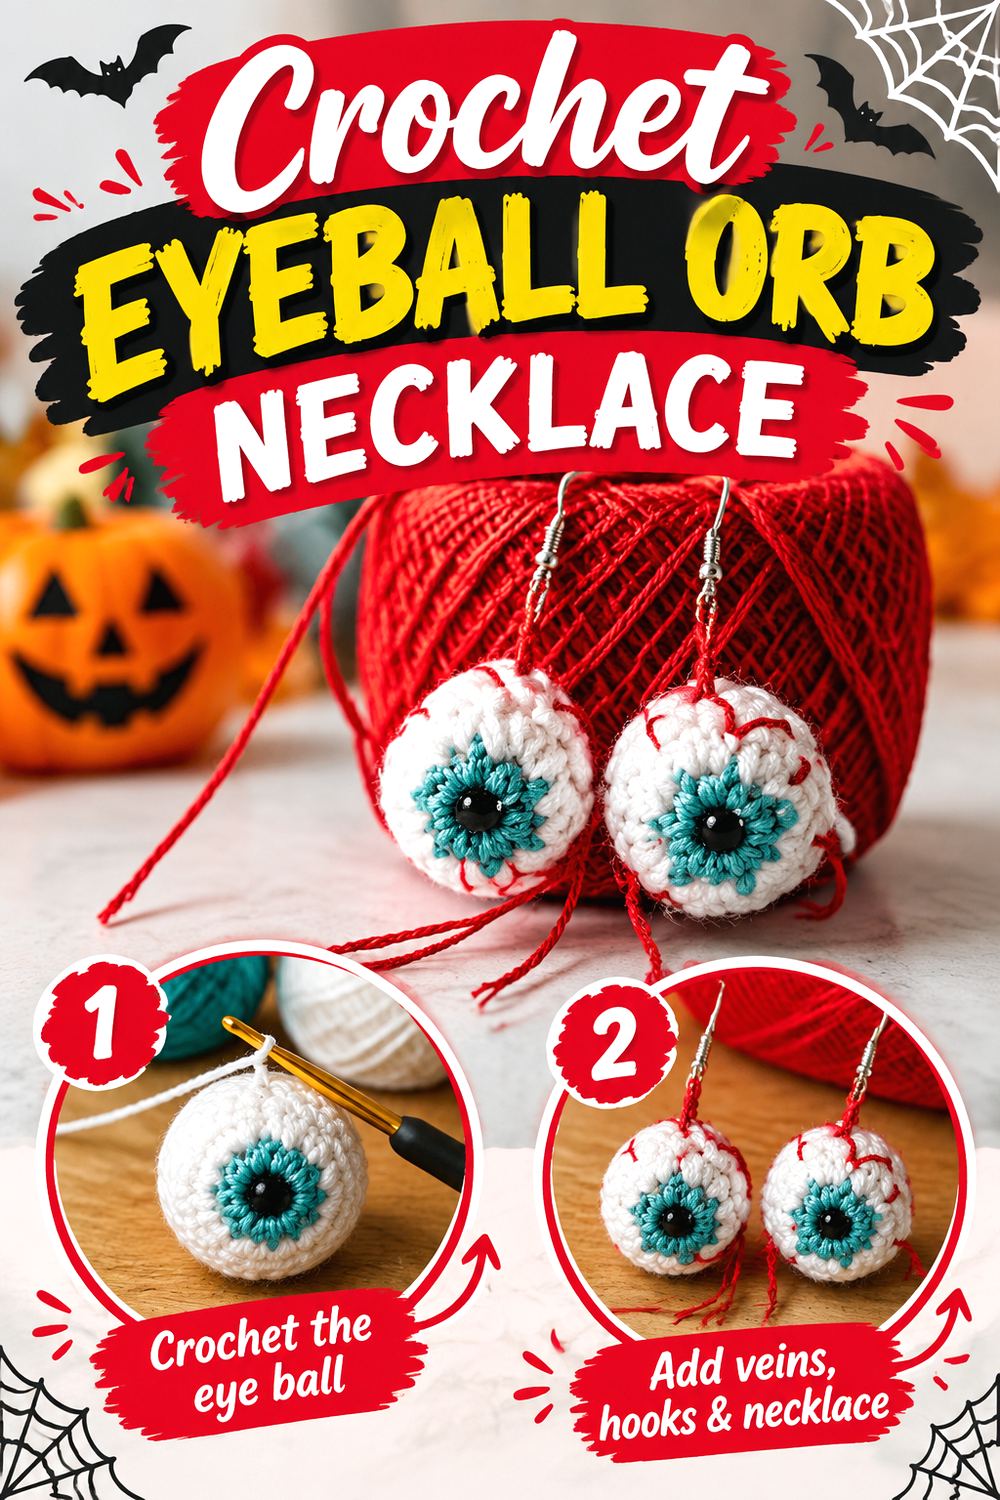
An eyeball pendant introduces a completely round focal charm with graphic color detail. Start Crochet’s original tutorial by May teaches small stuffed crochet eyeball earrings with a colored iris, pupil, vein details, stuffing, and jewelry findings. The source is for earrings, so using one eyeball as a necklace pendant is a separate adaptation.
This shape is particularly effective for an intentionally odd or surreal Halloween accessory because it does not depend on a conventional ghost, pumpkin, or spider silhouette. A round pendant can rotate more freely than a flat charm, which makes all-around finishing important. Consider what the back of the motif looks like as well as the front if the finished necklace is likely to move during wear.
Expect a Round Charm to Rotate
A spherical or near-spherical pendant rarely stays perfectly front-facing. Instead of trying to eliminate movement completely, use the attachment point to encourage a useful resting position. Suspend the finished eyeball from a temporary loop and let it settle several times. If the iris constantly points downward or sideways, adjusting the attachment location may improve presentation before the connection becomes permanent.
Keep Iris and Vein Details Balanced
Small color details can become visually crowded on a jewelry-scale object. Follow the source for its actual motif construction, and resist adding extra surface decoration merely because space remains. High contrast between the white eye, iris, pupil, and veins can make the design readable even when it is small. Additional beads or dangling charms may compete with that graphic effect.
Avoid Loose Small Parts for Young Wearers
The source materials include small eye components and glue as options within the earring project. If adapting the motif for a child’s necklace, consider whether detachable or glued parts are appropriate at all. Embroidered alternatives can reduce reliance on separate small pieces, though they change the source finish. Necklaces themselves also require age-appropriate supervision and fit considerations.
Original Tutorial and Creator Credit
Creator/Site: May / Start Crochet
12. Crochet Frankenstein Head Necklace
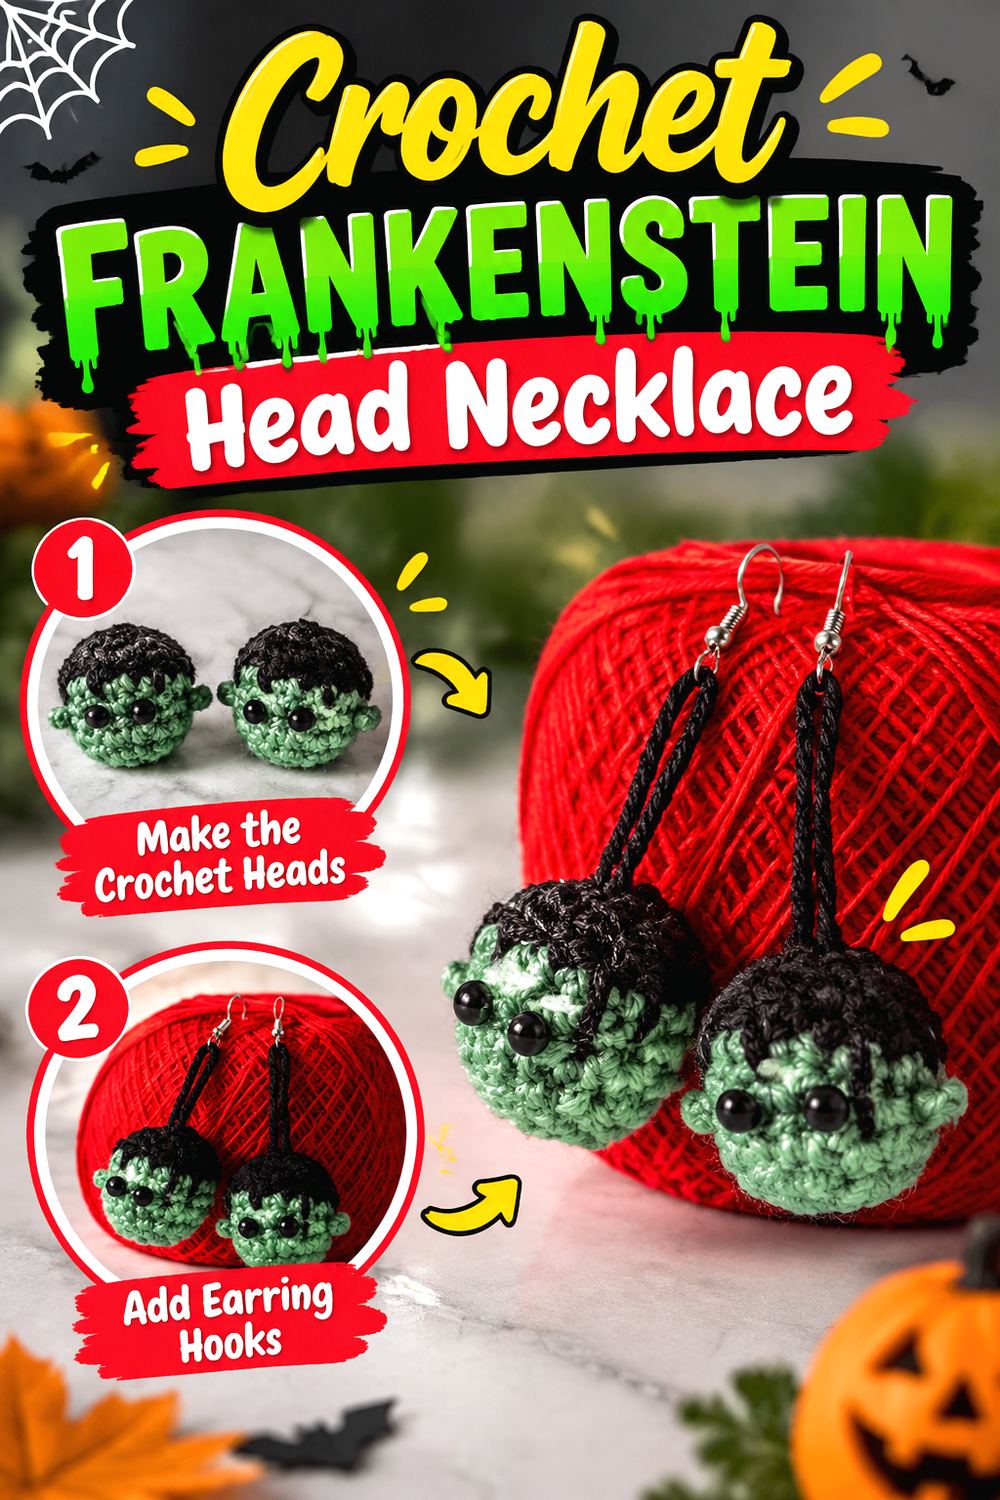
A tiny Frankenstein-inspired monster head gives the list a character-based pendant without requiring a full amigurumi figure. May’s Start Crochet tutorial creates small stuffed Frankenstein earrings using black and green yarn with added facial features and earring hardware. One finished head can be adapted into a necklace charm, although the original tutorial does not provide necklace assembly instructions.
This idea works best as a compact, graphic pendant where the hairline, face color, and expression do most of the visual work. Compared with the eyeball orb, the recognizable head shape benefits from staying oriented upright. That makes top attachment and facial finishing the two most important adaptation decisions.
Protect the Monster Silhouette
A tiny character pendant can lose its identity when excessive hardware is attached near the head. Keep the connection visually secondary and check that the finished piece still reads clearly when viewed from arm’s length. If you change yarn thickness, remember that every facial feature will also occupy a different proportion of the finished head, so evaluate the whole expression before attaching the necklace.
Reconsider Glued Features for Heavy Wear
The source includes glued stick-on eyes as part of its materials and finishing approach. A necklace may rub against clothing more often than an earring, so think about how that affects your chosen finish. Follow the adhesive manufacturer’s directions if using glued elements. For a frequently worn piece, securely stitched or embroidered details may be worth considering as an adaptation.
Original Tutorial and Creator Credit
Creator/Site: May / Start Crochet
13. Crochet Spiderweb Medallion Necklace
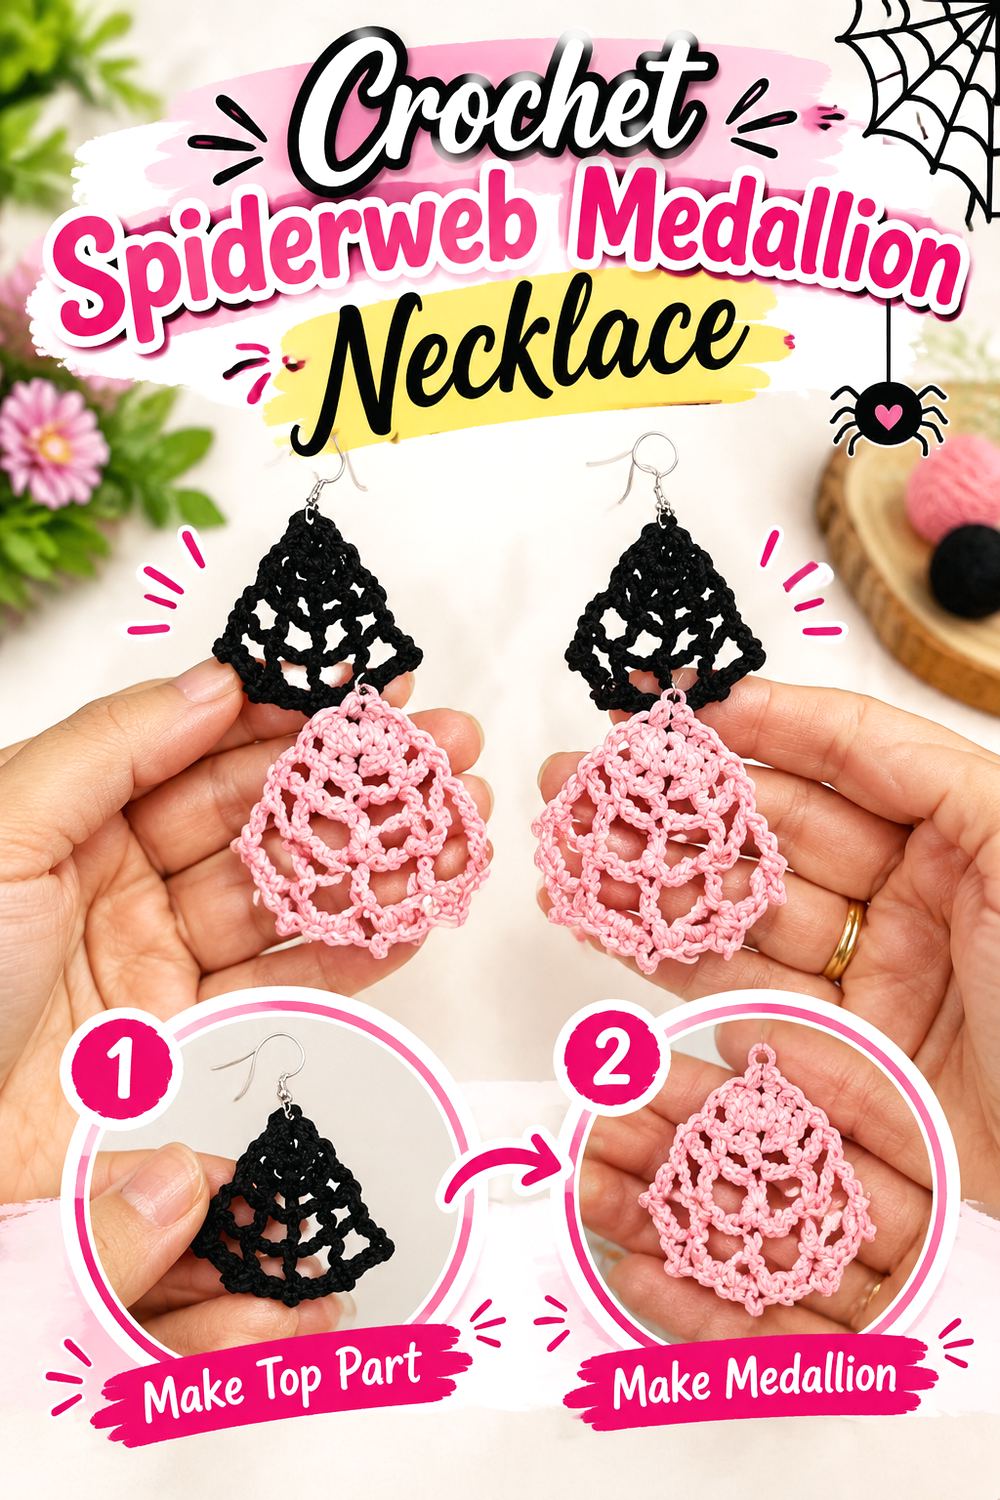
Instead of wrapping the neckline in web lace, this idea uses one small web as a central medallion. El Ganchillo de Maite’s video teaches spiderweb earrings, providing a jewelry-scale web motif that can be adapted by using one finished web as a necklace pendant.
The result can feel lighter and less costume-like than a full spiderweb choker. It also gives you more freedom over necklace length because the web functions as a discrete focal point. The main challenge is preserving symmetry: unlike a solid pendant, a web reveals distortion immediately through its spokes and open spaces. Finishing and shaping therefore contribute significantly to the final appearance.
Block the Web for Symmetry
After completing the motif according to the tutorial, compare opposite sides rather than focusing on individual stitches. If the yarn and care instructions permit blocking, gentle shaping can help open the web and clarify its geometry. Avoid aggressively stretching one section to compensate for uneven tension; that can create a new imbalance. Let the motif dry or settle completely before deciding where to attach the necklace.
Use a Single Web as a Medallion
The source creates earrings, not a necklace. For this adaptation, one web can become the central element while the second is omitted or used for another accessory. Test the hanging point along the upper edge so the web remains visually centered. An attachment that pulls one spoke more strongly than the others can distort the round or fan-like appearance once the pendant is suspended.
Original Tutorial and Creator Credit
Creator: El Ganchillo de Maite
14. Crochet Gothic Lace Collar Necklace
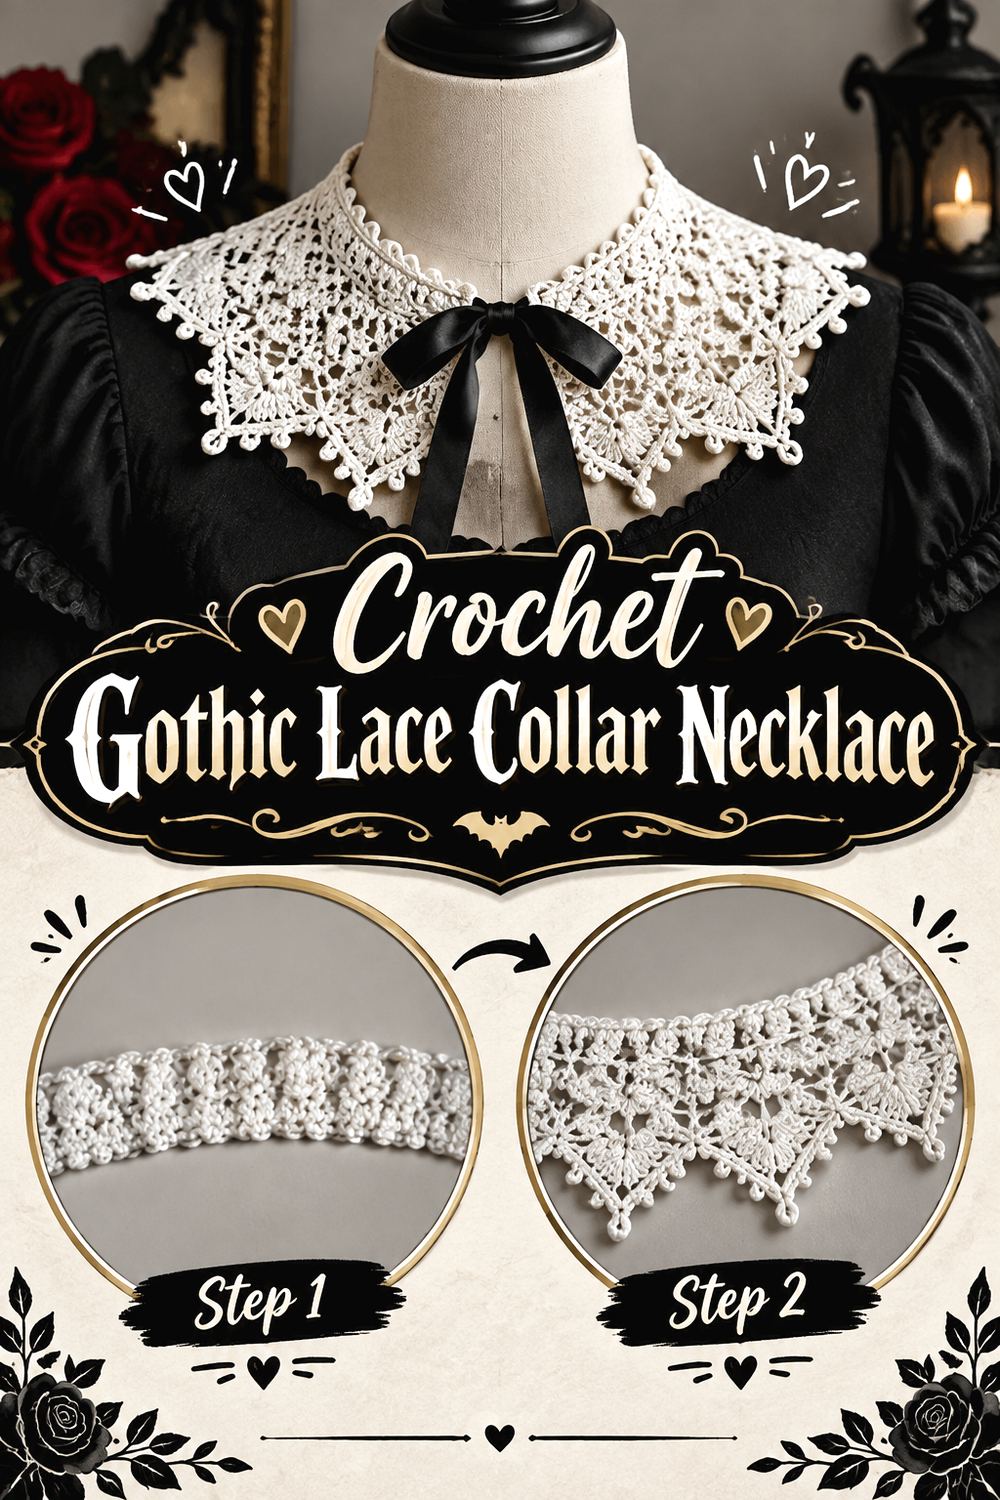
A lace collar is the most garment-like necklace option in this collection. Alysha Littlejohn’s original design is inspired by the crochet lace collar associated with Wednesday Addams and uses very thin yarn or crochet thread with a small hook. The page provides both written and video guidance.
Instead of one dangling motif, this approach spreads detail across the entire neckline. It can become part of a Halloween costume, but the lace structure also makes it usable as a gothic accessory beyond October. Because a collar interacts directly with the neck opening of a shirt or dress, its finished width and positioning should be planned alongside the clothing rather than treated like a generic pendant necklace.
Measure the Neckline, Not Just the Neck
A decorative collar can fit the wearer yet still sit poorly over the intended garment. Check where the shirt, dress, or top neckline falls and consider whether the crochet should overlap it, sit inside it, or frame it. Test with the actual clothing whenever possible. This is particularly important when adapting width or length because a small change can alter where the lace points land on the shoulders.
Fine Thread Changes the Character
Littlejohn’s tutorial specifically uses fine material for the lace look. Substituting a substantially thicker yarn will not simply enlarge the collar; it can also make the fabric heavier and the lace openings more pronounced. If you want a chunkier gothic collar, make a sample first and evaluate whether the new texture still suits close-to-neck wear.
Plan the Closure for Comfort
Whatever closure the tutorial specifies, inspect its position when the collar is worn. A hard component placed directly against a sensitive area can become irritating even when it looks neat on the table. Make sure the collar can be put on and removed without pulling excessively on the lace. Decorative closures should remain functional first; embellishment can come afterward.
Original Tutorial and Creator Credit
Creator/Site: Alysha Littlejohn / Littlejohn’s Yarn
15. Crochet Mixed Halloween Motif Necklace
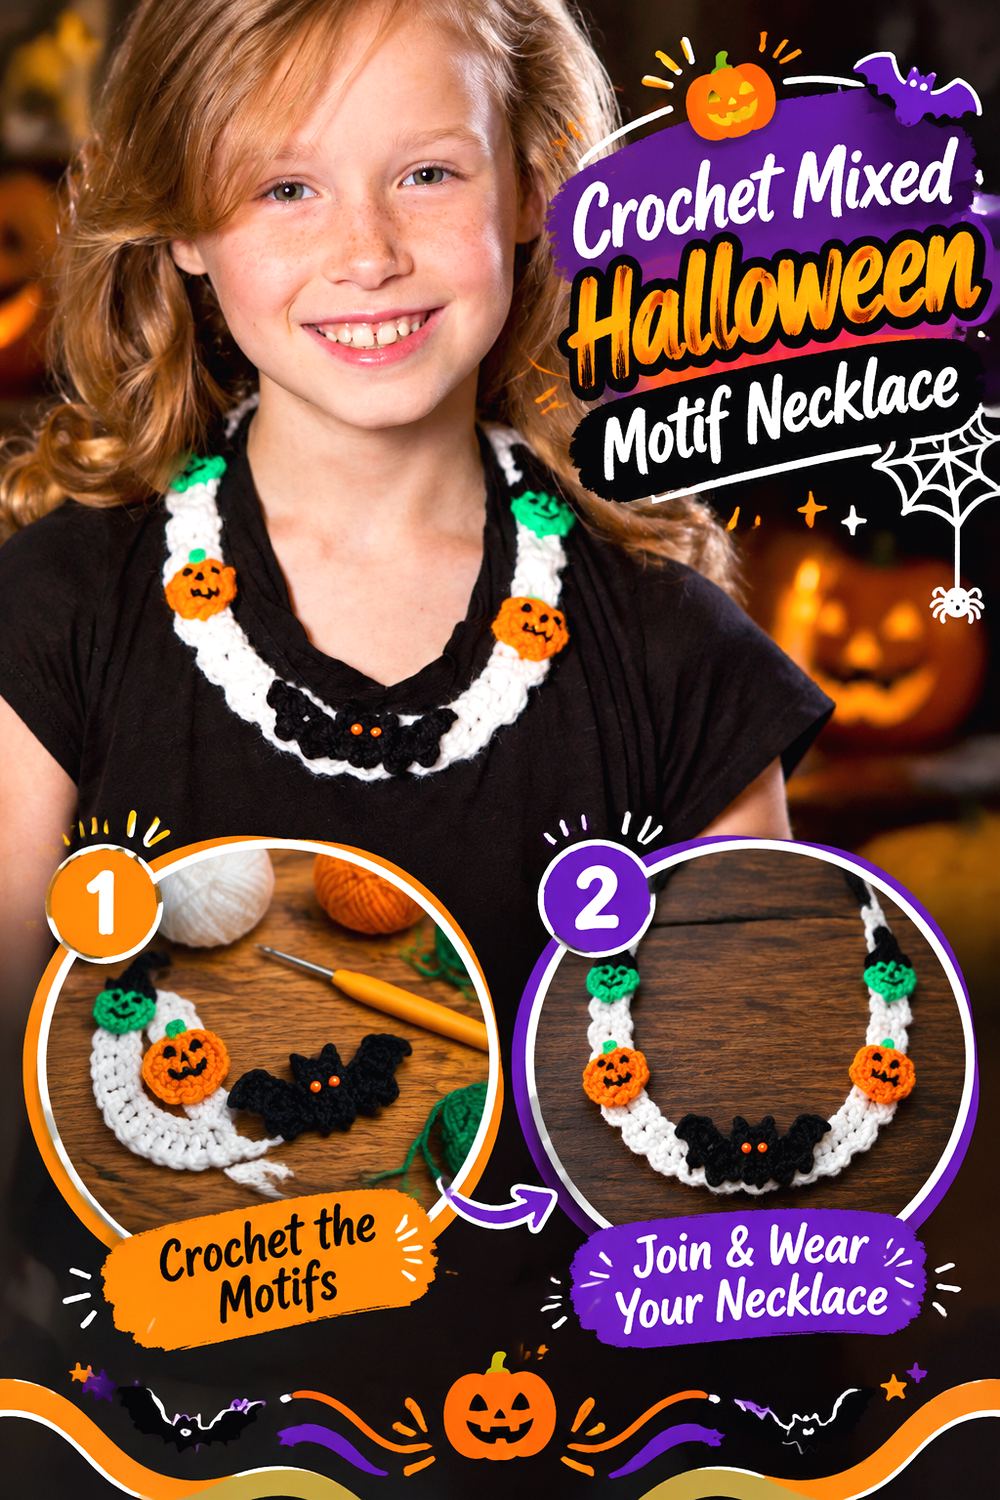
A mixed-motif necklace is the strongest option when one Halloween symbol is not enough. Red Heart’s pattern on Yarnspirations combines seasonal crocheted appliqués, with bats, witches, and pumpkins among the available motifs. The project also incorporates additional finishing components such as a button, seed beads, and embroidery floss.
Because several recognizable shapes share the same necklace, composition matters as much as individual crochet quality. A successful arrangement needs a clear rhythm rather than simply placing every motif at equal intervals. This makes the project useful for readers who enjoy planning color and layout as well as crocheting. It is also an alternative to dimensional charms when you want a broader statement across the neckline without a collection of stuffed pieces.
Create Rhythm Across Multiple Motifs
Before attaching anything permanently, lay the motifs in a gentle curve that approximates the necklace. Alternate shape, visual weight, and color rather than judging each piece independently. If two large motifs sit beside one another, the necklace may appear heavier on that side. Symmetry is one solution, but intentional asymmetry can also work if the visual balance still feels controlled.
Check Every Embellishment Connection
The source includes beads, a button, embroidery floss, and crocheted appliqués. Mixed materials create more connection points than an all-yarn pendant. Inspect each one after assembly and again after the necklace has been worn. If making the piece for a child, evaluate whether the small embellishments are suitable for that wearer instead of assuming a decorative pattern is automatically child-safe.
Verify Finished Sizing in the Pattern
Yarnspirations directs makers to the downloadable pattern for the project’s finished measurement information and emphasizes matching tension. Check those original details before changing yarn, hook, or overall layout. On a multi-motif necklace, even a modest increase in each appliqué can accumulate across the full width and change how the piece sits around the neckline.
Original Tutorial and Creator Credit
Creator/Site: Yarnspirations / Red Heart
16. Crochet Crescent Moon Pendant Necklace
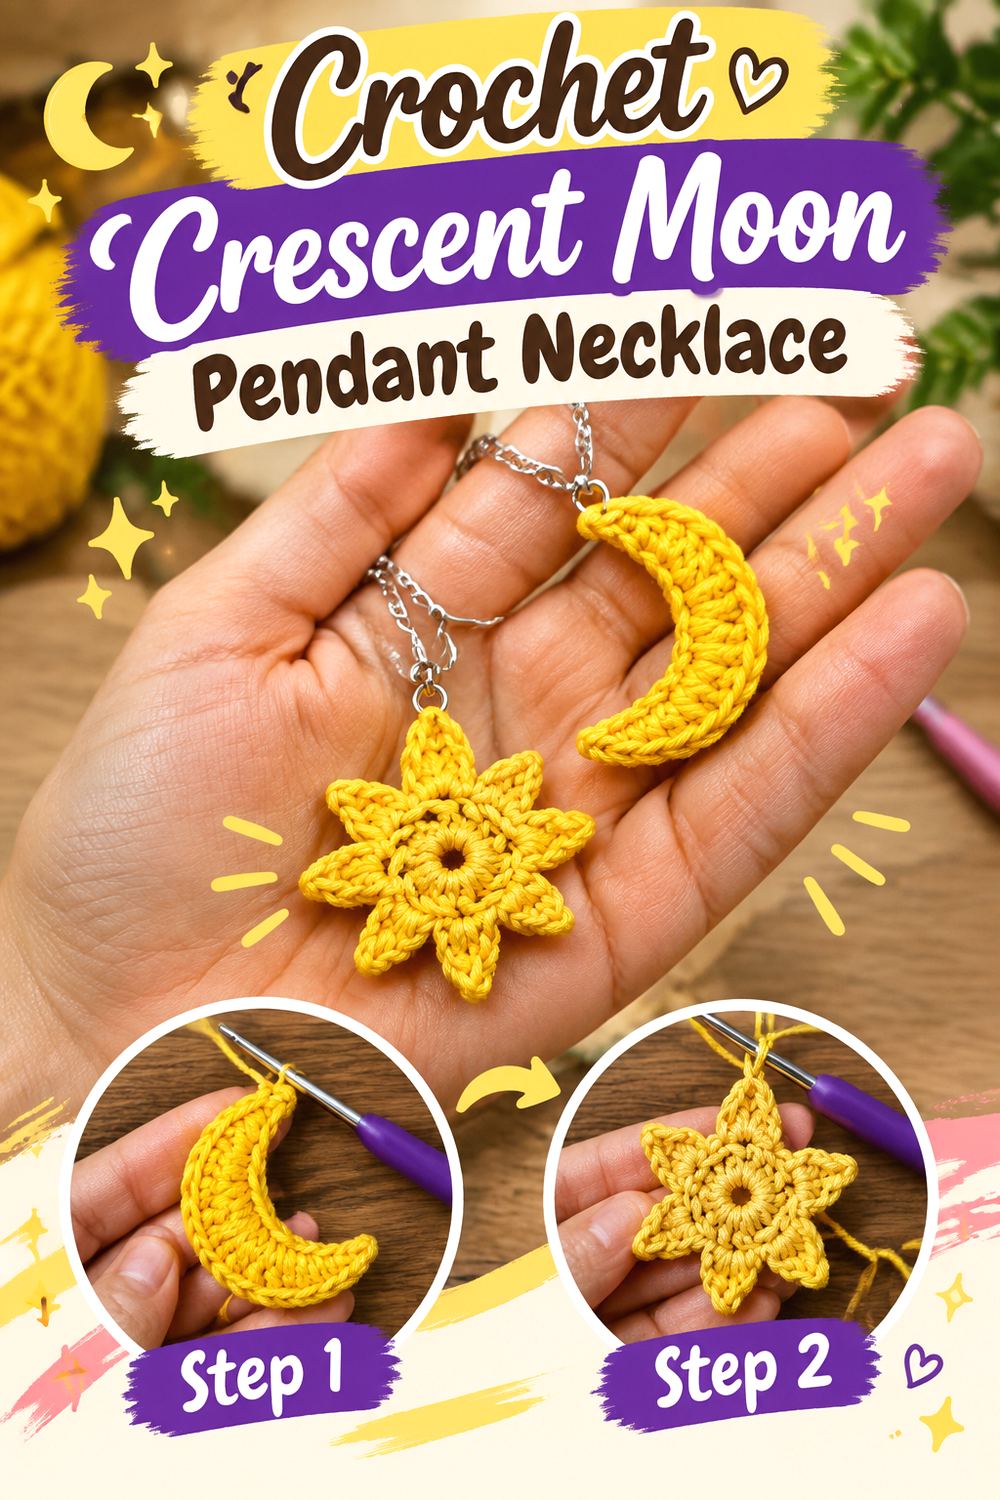
A crescent moon offers a witchy Halloween mood without depicting a monster or traditional holiday icon. Creggy’s Crochet teaches “Sun and Moon” earrings, including a separate crocheted moon motif made at jewelry scale. Using one moon as a pendant creates a quieter necklace that can stay wearable long after Halloween.
This is another adaptation rather than a necklace taught by the source. Its appeal comes from the open crescent silhouette, which needs enough definition to remain recognizable when hanging vertically. A dark moon can lean strongly gothic, while metallic, pale, or warm tones can move the finished piece toward celestial styling. Keep surrounding details restrained if you want the crescent itself to remain the focal point.
Let the Crescent Shape Stay Crisp
Crescents rely on the relationship between the inner curve and pointed ends. If yarn substitution makes the motif thicker or softer, those proportions can change. Finish one moon completely before deciding whether a different yarn will work better. If shaping is appropriate for the fiber, concentrate on opening the inner curve evenly rather than stretching the tips aggressively.
Turn an Earring Motif Into a Pendant
The original source uses earring findings and jump rings, so a necklace needs a different final connection. Temporarily hang the crescent from its proposed top point and confirm its orientation before attaching a cord or chain. The moon may look balanced on a flat surface yet tilt when suspended, especially if one side contains more crochet fabric than the other.
Original Tutorial and Creator Credit
Creator: Creggy’s Crochet
How to Choose Between These Crochet Halloween Necklace Styles
For the smallest visual commitment, start with a single bat, moon, mini ghost, pumpkin, witch hat, or Frankenstein charm. Dimensional pumpkins, stuffed skulls, eyeballs, and the glowing ghost have more physical presence, so placement and weight deserve extra attention.
Choose the spiderweb choker or gothic lace collar when you want crochet to cover more of the neckline and function almost like part of the outfit. The candy corn cluster and mixed Halloween motif necklace sit between those extremes: both spread multiple elements across the front without becoming full collars. If you dislike jewelry hardware, projects that can use crocheted or yarn cords may be more appealing; if you enjoy bead and chain assembly, the clustered designs provide more opportunities for mixed materials.
Conclusion
These 16 crochet Halloween necklace ideas offer very different ways to make a seasonal accessory. A tiny bat or crescent can add a subtle October detail, while a spiderweb choker, gothic lace collar, candy corn cluster, or mixed-motif necklace can take over the entire neckline. Stuffed skulls, eyeballs, glowing ghosts, and dimensional pumpkins bring additional texture when a flat charm feels too understated.
Choose the construction based on how you actually plan to wear the piece: pendant scale, movement, neck comfort, attachment security, and added hardware all matter. When you are ready to make one, use the linked original tutorials for the creator’s exact construction details rather than trying to reconstruct the project from a roundup description.
Frequently Asked Questions
Can I use a crochet earring tutorial to make a necklace pendant?
Yes, when the completed motif is appropriate in size and structure, but the necklace conversion becomes your own adaptation unless the creator specifically provides it. Make the motif according to the original tutorial first. Then evaluate its weight, top attachment point, orientation, and how it hangs before adding a necklace cord or chain. Do not assume earring hardware can simply be replaced one-for-one without checking how the motif behaves when suspended from a different position.
What yarn is best for crochet Halloween necklaces?
There is no single best yarn for every design. Fine thread can preserve lace, web spokes, crescent points, and small jewelry details, while thicker yarn can give dimensional ghosts, pumpkins, and skulls more body. Follow the source material when you want the closest result. If substituting, remember that yarn thickness, fiber, and tension can change scale, weight, stretch, drape, and motif definition, so make one sample before committing to the whole necklace.
How do I stop a crochet pendant from twisting?
Start by checking the attachment point. Hang the completed motif temporarily from the location where you plan to connect the cord or chain and let it settle naturally. If it consistently rotates sideways, shifting the attachment slightly or using two closely spaced attachment points may help, depending on the design. A completely motionless pendant is not always realistic, particularly with dimensional shapes, so aim for a stable resting position rather than rigid construction.
How should I size a crochet choker or lace collar?
Use the intended wearer and the actual garment neckline as your reference rather than relying only on a generic necklace measurement. A close-fitting choker should allow comfortable movement without depending on excessive stretch. A wider collar also needs to sit properly over or around the clothing beneath it. Follow the designer’s sizing guidance first; if you alter the dimensions, check fit during construction wherever the pattern permits instead of waiting until all finishing is complete.
Are beads, buttons, safety eyes, and other embellishments suitable for crochet necklaces?
They can be appropriate for adult accessories when securely attached and compatible with the design, but every separate component adds another connection that can loosen or catch. Small detachable pieces require extra caution when a necklace is intended for a child. Depending on the project, embroidered details may be an alternative to buttons or eyes. Also consider skin contact: rough jump rings, sharp edges, or poorly positioned closures can make otherwise attractive jewelry uncomfortable to wear.
How should I store and clean crochet Halloween jewelry?
Storage depends on construction. Flat webs and lace collars are generally easier to protect when laid flat, while dimensional pendants need enough space to avoid being crushed. Keep chains and cords separated so they do not tangle around crochet points. For cleaning, follow the yarn label and the original creator’s guidance where provided, while also accounting for paint, glue, beads, metal findings, stuffing, and other materials. The least washable component may determine how the whole necklace should be treated.