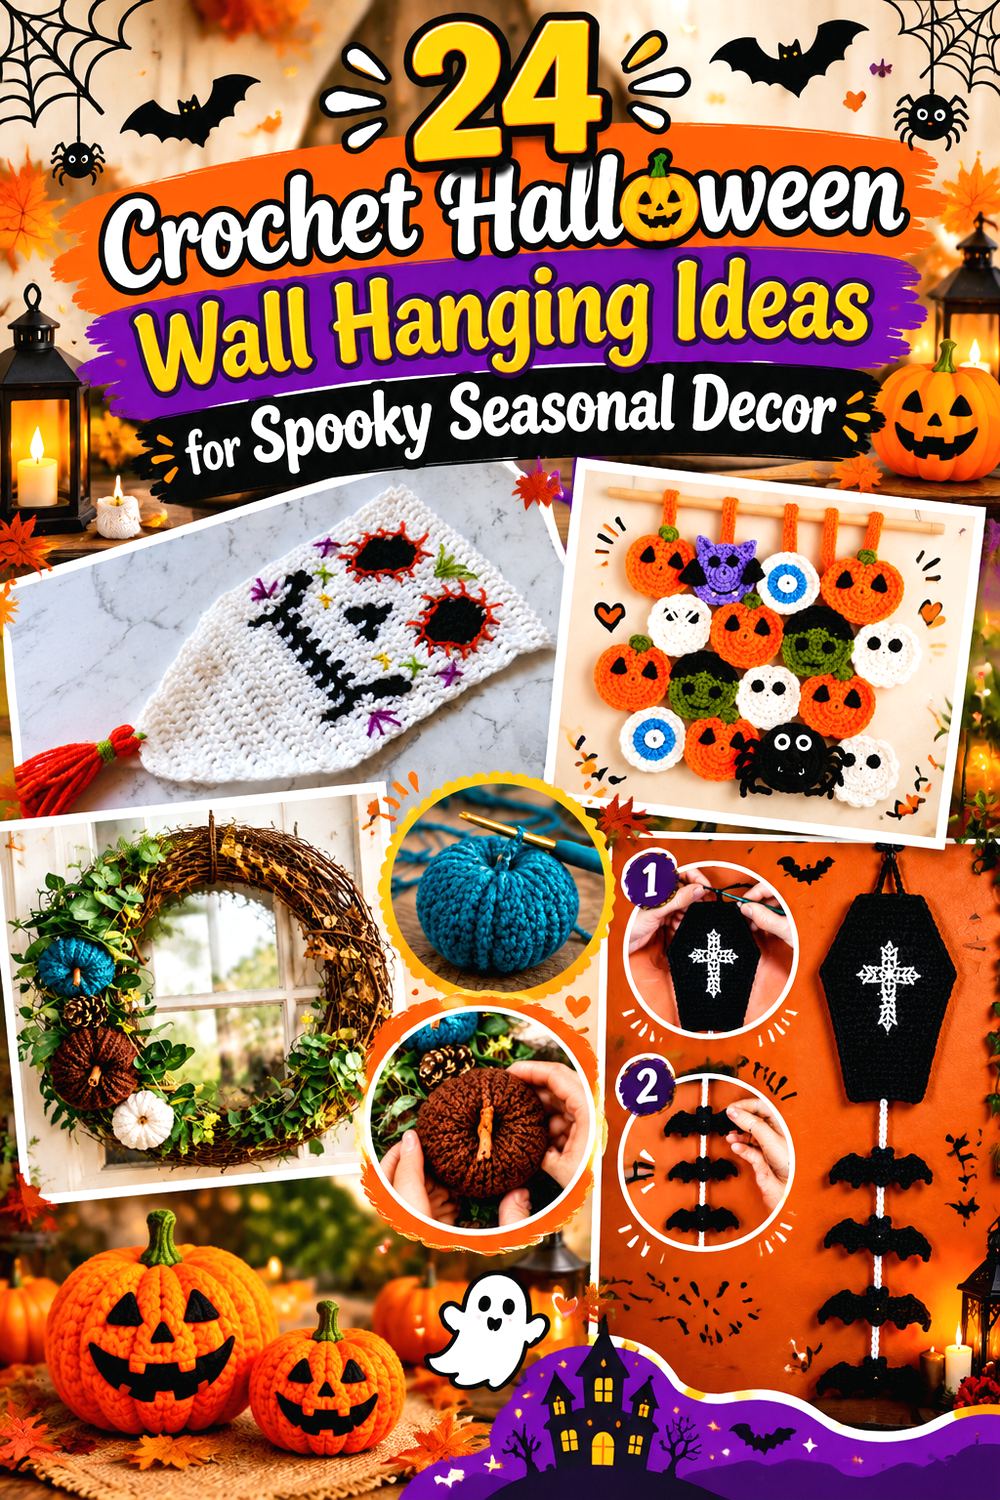
24 Crochet Halloween Wall Hanging Ideas for Spooky Seasonal Decor
Halloween wall crochet can take far more forms than a rectangular tapestry. A narrow word banner can fill the space beside a bookcase, an open spiderweb can stretch into an awkward corner, while dimensional ghosts, pumpkins, bats, wreaths, and motif garlands create depth without taking over tables or shelves.
These 24 crochet Halloween wall hanging ideas cover flat colorwork, openwork, framed shapes, amigurumi-style accents, pennants, wreaths, and both compact and wide garlands. The differences matter because each format asks something different of the yarn, mounting method, finishing, and available wall space.
Use the collection to compare silhouette, structure, display width, motif scale, storage, and finishing before choosing a project. Each idea also points back to an original creator tutorial for the exact construction details.
Quick List
- Crochet BOO Vertical Halloween Banner
- Crochet Bobble Pumpkin Ring Wall Hanging
- Crochet Macramé-Style Ghost Wall Hanging
- Crochet Twilight Bat Tapestry Panel
- Crochet Moonlit Haunted House Wall Hanging
- Crochet Black Cat C2C Wall Panel
- Crochet Poseable Hanging Bat Accent
- Crochet Corner Spiderweb Wall Accent
- Crochet Continuous Spiderweb Bunting
- Crochet Skull-and-Spider Chain Garland
- Crochet Witch Hat and Pumpkin Garland
- Crochet Eight-Character Halloween Pennant Bunting
- Crochet Costumed Ghost Garland
- Crochet Colorful Bat Wall Garland
- Crochet Cobweb Triangle Bunting
- Crochet Spooky Chic Bobble Bunting
- Crochet Mixed-Motif Halloween Wall Garland
- Crochet Pumpkin Cluster Garland
- Crochet Gothic Coffin Wall Hanging
- Crochet Chunky Ghost Wall Garland
- Crochet Frankenstein and Vampire Halloween Bunting
- Crochet Pumpkin Wreath Wall Accent
- Crochet Layered Halloween Motif Wall Hanging
- Crochet Skull Portrait Wall Hanging
Match the Hanging Format to the Wall
Start with the shape of the empty space rather than the Halloween character you like most. A tall banner, coffin, portrait, or individual ghost can occupy a narrow strip beside furniture, while garlands and bunting need enough horizontal room for their motifs to stay separate. Circular pumpkin hangings and wreaths work better as single focal points, and corner spiderwebs use space that conventional rectangular decor cannot.
Viewing distance matters too. Small color changes in a tapestry may disappear across a room, while a bold pumpkin, ghost, or bat silhouette remains recognizable from farther away. Before starting, roughly mark the intended footprint with removable tape or paper. That simple check can reveal whether the project needs more scale, less fringe, a shorter garland, or a completely different format.
Plan Weight, Support, and Yarn Behavior Before Crocheting
Wall decor does not receive garment-level wear, but gravity still affects it. Soft panels may sag on narrow hanging points, long garlands can dip more once every motif is attached, and three-dimensional pumpkins or ghosts put more load on their joining cord than flat appliqués.
Look at the whole material list before beginning. Some projects depend on dowels, branches, rings, wire, magnets, stuffing, adhesive, or other components that influence the final structure. Changing yarn weight can alter not only size but also how heavily the project hangs.
For flat panels, even side edges and a stable top attachment usually matter more than extreme stiffness. Open webs need enough tension to display their geometry without being pulled out of shape. Follow the creator’s mounting method as the starting point, then evaluate the actual finished weight before choosing a wall hook or alternative support.
Keep Halloween Motifs Readable at Display Distance
Halloween projects often depend on strong silhouettes: pointed bat wings, a ghost’s lower edge, a witch hat, skull features, crooked buildings, or web spokes. Check those details from the distance at which the finished decoration will normally be seen.
High contrast can help, but contrast does not always mean traditional black, white, and orange. A muted palette can work when neighboring shapes remain visually separate. What tends to cause trouble is using adjacent yarns that look distinct in your hand but merge under the room’s normal lighting.
For repeated motifs, consistency becomes more noticeable than on a single piece. Compare size and shaping as you go rather than discovering after assembly that one bat, pumpkin, or pennant sits differently. Blocking or careful shaping may help when appropriate for the yarn, but always use fiber-specific care guidance instead of assuming every crochet decoration can be treated the same way.
1. Crochet BOO Vertical Halloween Banner
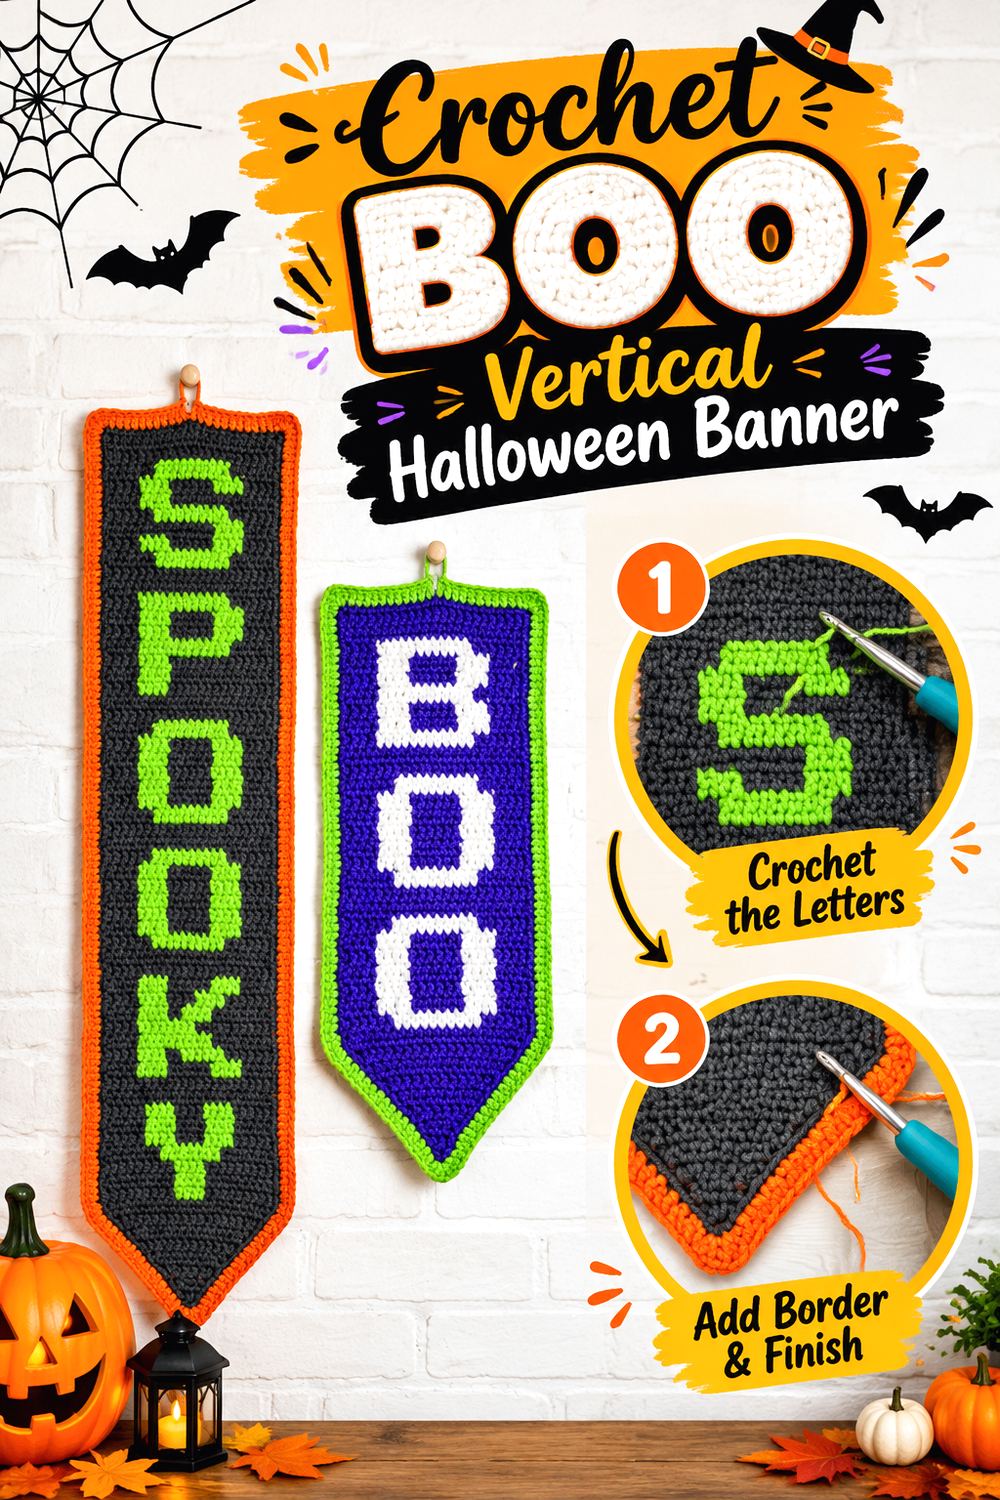
A narrow word banner is useful when you want Halloween decor without covering a broad section of wall. Winding Road Crochet’s source includes two vertical banner designs, including a “BOO” version, worked as graphic crochet with contrasting letters. The finished format emphasizes height rather than width, making it a practical option beside a doorway, cabinet, desk, or group of framed seasonal art.
Compared with motif garlands, this style keeps all the visual information inside one tidy panel. Lettering carries most of the Halloween message, so you can use a restrained color scheme without losing the seasonal theme. It is also a useful choice for readers who prefer geometric colorwork to sewing several separate shapes together.
Plan the Banner’s Vertical Footprint
Vertical pieces can appear surprisingly long once a hanger, cord, tassels, or lower point is included. Compare the intended display area with the full finished shape rather than only the crocheted lettering section.
This is especially important beside doorframes or shelves, where a banner that technically fits may still interfere visually with handles, switches, or nearby objects. Leave enough open wall around the edges for the narrow silhouette to look deliberate instead of squeezed into the remaining space.
Keep Lettering Legible From Across the Room
Letter-based crochet needs clean separation between the background and characters. Periodically hold the work upright and look at it from normal viewing distance rather than judging every color transition close to your hands.
If you choose different colors from the tutorial, compare them under the lighting of the intended room first. Similar-value colors can blur the edges of a letter even when the shades look different in the skein.
Straight Side Edges Matter More on a Banner
A vertical panel makes uneven width particularly visible because the viewer can compare each side against a doorframe, cabinet, or wall corner. Keep an eye on the first and last stitches of each row and follow the creator’s turning instructions carefully.
If the selected yarn and pattern are compatible with blocking, use appropriate fiber-care guidance to help settle the finished panel before mounting it. Do not try to disguise a strongly distorted edge by pulling one side tighter on the hanger.
Original Tutorial and Creator Credit
Creator/Site: Winding Road Crochet
2. Crochet Bobble Pumpkin Ring Wall Hanging
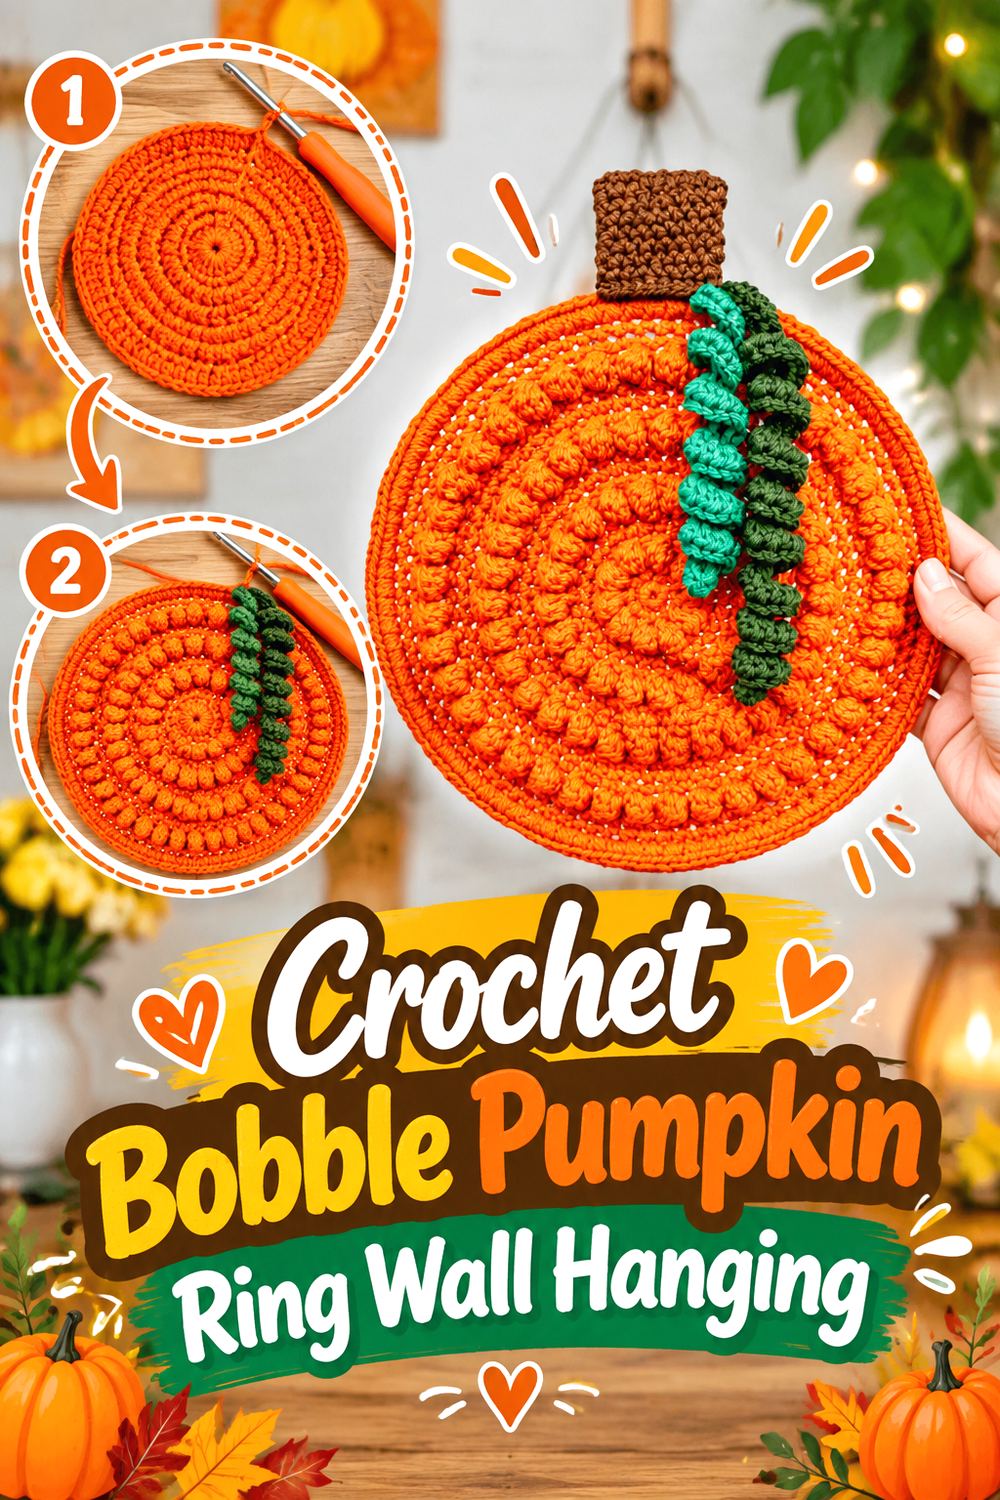
This round pumpkin wall piece offers a softer alternative to rectangular Halloween tapestries. A Crafty Concept builds the design around a metal ring, with textured crochet creating the pumpkin body and additional stem and vine details completing the silhouette. The round support makes the project read more like fiber art or a seasonal wreath than a flat appliqué.
It also transitions easily into general fall decorating because the pumpkin remains the main feature rather than ghosts, skulls, or monsters. That makes it useful for an entry wall, breakfast nook, craft room, or mixed autumn display where you want one substantial handmade focal point rather than a line of smaller ornaments.
Treat the Metal Ring as Part of the Structure
The supporting ring is not just decoration; it helps determine the finished outline. Check the tutorial’s supply information before beginning so the crocheted portion and structural support are planned together.
If you change yarn thickness substantially, do not assume the original relationship between the crochet and the ring will remain the same. A different fabric thickness can affect how comfortably the piece sits around its support and how bulky the finished edge appears.
Give the Bobbles Room to Show
Raised texture is one of the features that distinguishes this pumpkin from a plain circular panel. Very fuzzy yarn or extremely low-contrast lighting can make textured stitches less noticeable from across the room.
Before committing to a substitute yarn, crochet enough fabric to judge whether the texture remains visible. The best choice is not necessarily the stiffest yarn; it is one that lets the raised surface remain recognizable while working with the ring-based construction.
Check the Stem and Vines After Hanging
Decorative extensions may sit differently when the piece is upright than they do on a table. Temporarily hang the completed pumpkin before considering the arrangement final.
Look for vines that twist behind the main body or a stem that visually leans because of the hanging angle. Small finishing adjustments can improve the overall silhouette without changing the creator’s core construction.
Original Tutorial and Creator Credit
Creator/Site: A Crafty Concept
3. Crochet Macramé Style Ghost Wall Hanging
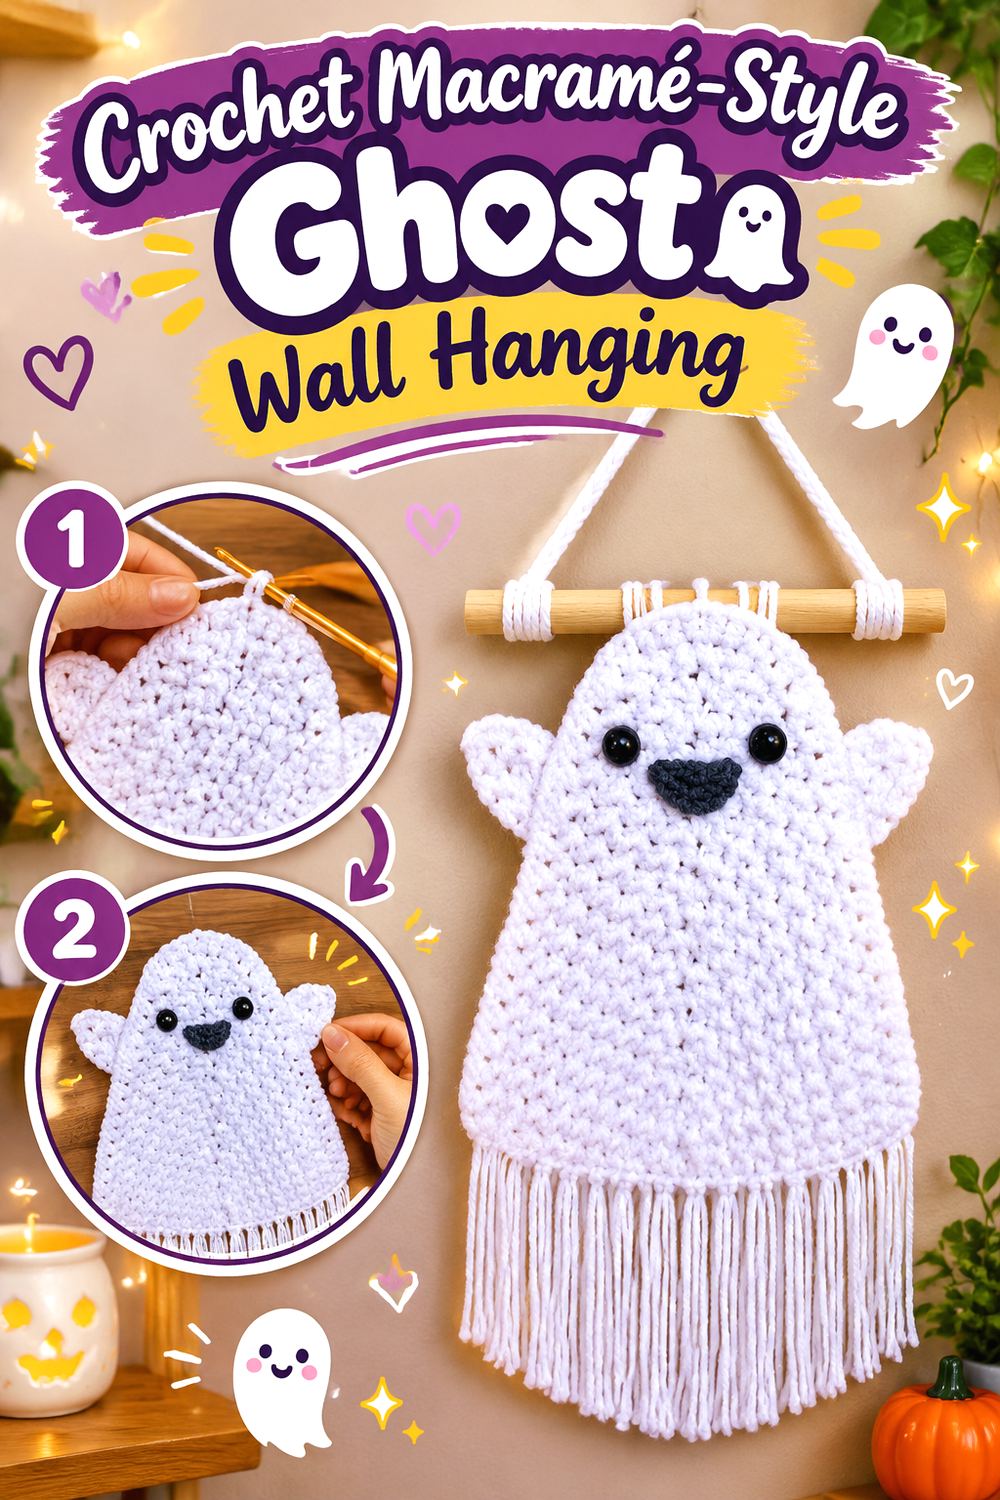
For a project with movement rather than a rigid panel, this dimensional ghost gives the wall a softer, flowing silhouette. StringyDingDing’s design is specifically presented as a crochet ghost wall hanging and uses a long hanging format with trailing lower details that create a macramé-like appearance while remaining crochet.
The light body contrasts strongly with the dark facial features, so the decoration remains recognizable without needing complicated colorwork. It suits a narrow wall, protected entry, bedroom, or gallery arrangement where a white floating shape can break up several darker Halloween pieces.
Balance the Ghost Before Final Hanging
Dimensional crochet can rotate slightly when the weight is not centered beneath the hanging point. Once the ghost is assembled, suspend it temporarily and see whether the face naturally points forward.
If the project leans, check attachments and lower decorative elements before changing the hanging point. Uneven embellishment weight can alter the balance even when the crocheted body itself is symmetrical.
Let the Lower Texture Hang Freely
Trailing strands or textured lower sections need open space underneath them. Avoid placing the ghost directly above shelves, frames, or hooks that can push the lower edge to one side.
If the finished piece will sit beside another hanging, leave enough separation for both silhouettes to remain clear. The movement is part of what makes this project different from a flat tapestry.
Protect Dimensional Details in Storage
A long ghost can usually be stored more compactly than a rigid framed piece, but crushing the face or tightly tangling the lower strands may create extra reshaping work next season.
Store the decoration loosely and keep any attached facial or structural components from snagging other crochet. Follow the yarn label and creator guidance for cleaning rather than assuming the complete mixed-material piece can be machine washed.
Original Tutorial and Creator Credit
Creator/Site: StringyDingDing
4. Crochet Twilight Bat Tapestry Panel
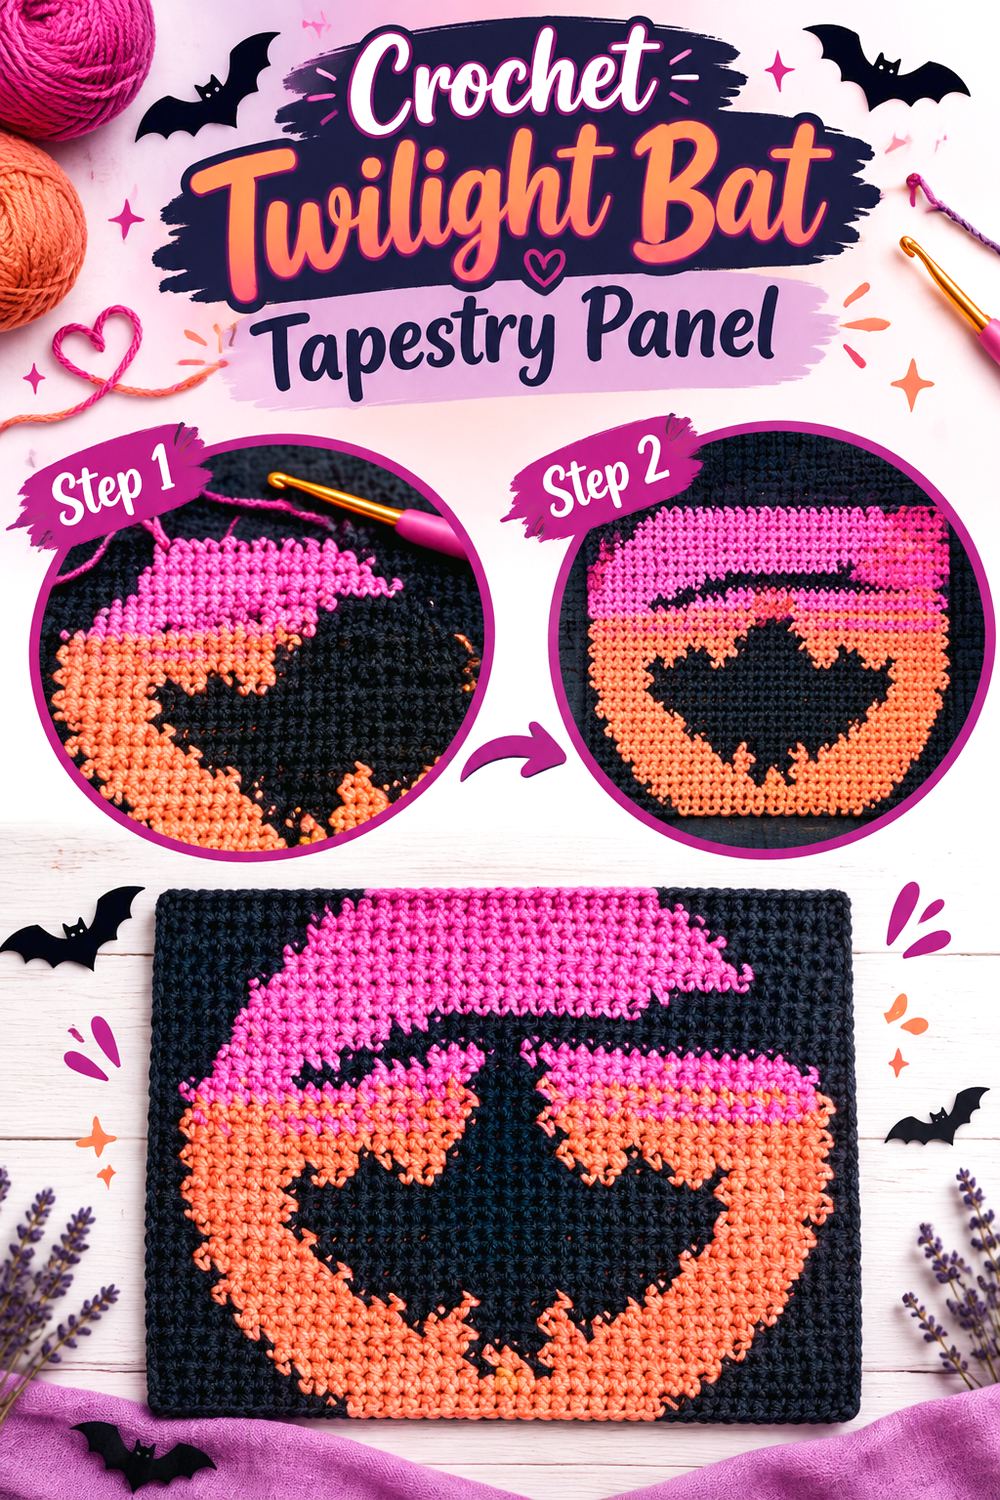
This mini wall hanging turns a single bat silhouette into graphic fiber art rather than a separate appliqué or stuffed figure. Esraa Riyad Designs uses a two-color panel format from the Halloween Twilight collection, with the bat image embedded into the fabric and the finished panel displayed from a branch or dowel with fringe below.
The project is compact enough to work in a small Halloween gallery wall while still carrying more visual weight than a tiny hanging ornament. It is especially appealing when you prefer controlled geometric colorwork to sewing several separate bat shapes.
Control Color Carries for a Flatter Panel
A colorwork wall panel needs the image to remain clean without the fabric becoming unnecessarily bulky. The creator discusses colorwork methods in the tutorial, so use that guidance rather than improvising yarn management midway through the bat.
Whatever method you choose, periodically check the back to make sure carried yarn is not pulling the fabric narrower. Tension problems that seem minor while crocheting can become obvious once the panel is hanging vertically.
Finish Fringe Only After the Panel Is Square
Fringe draws attention directly to the lower edge. If the panel is noticeably skewed, adding a perfectly straight fringe line can make that distortion easier to see.
Complete the main panel and appropriate shaping first. Then attach and trim the fringe while the project is lying evenly or hanging straight, rather than using the fringe to compensate for an uneven foundation.
Test the Bat Silhouette Under Room Lighting
A bat image depends on the contrast between positive and negative space. Hold the selected yarn colors together in the room where the panel will hang.
If the colors merge in dim evening light, the bat may lose definition even though the color combination looks attractive in daylight. Increasing tonal contrast is often more effective than adding extra embellishment.
Original Tutorial and Creator Credit
Creator/Site: Esraa Riyad Designs
5. Crochet Moonlit Haunted House Wall Hanging
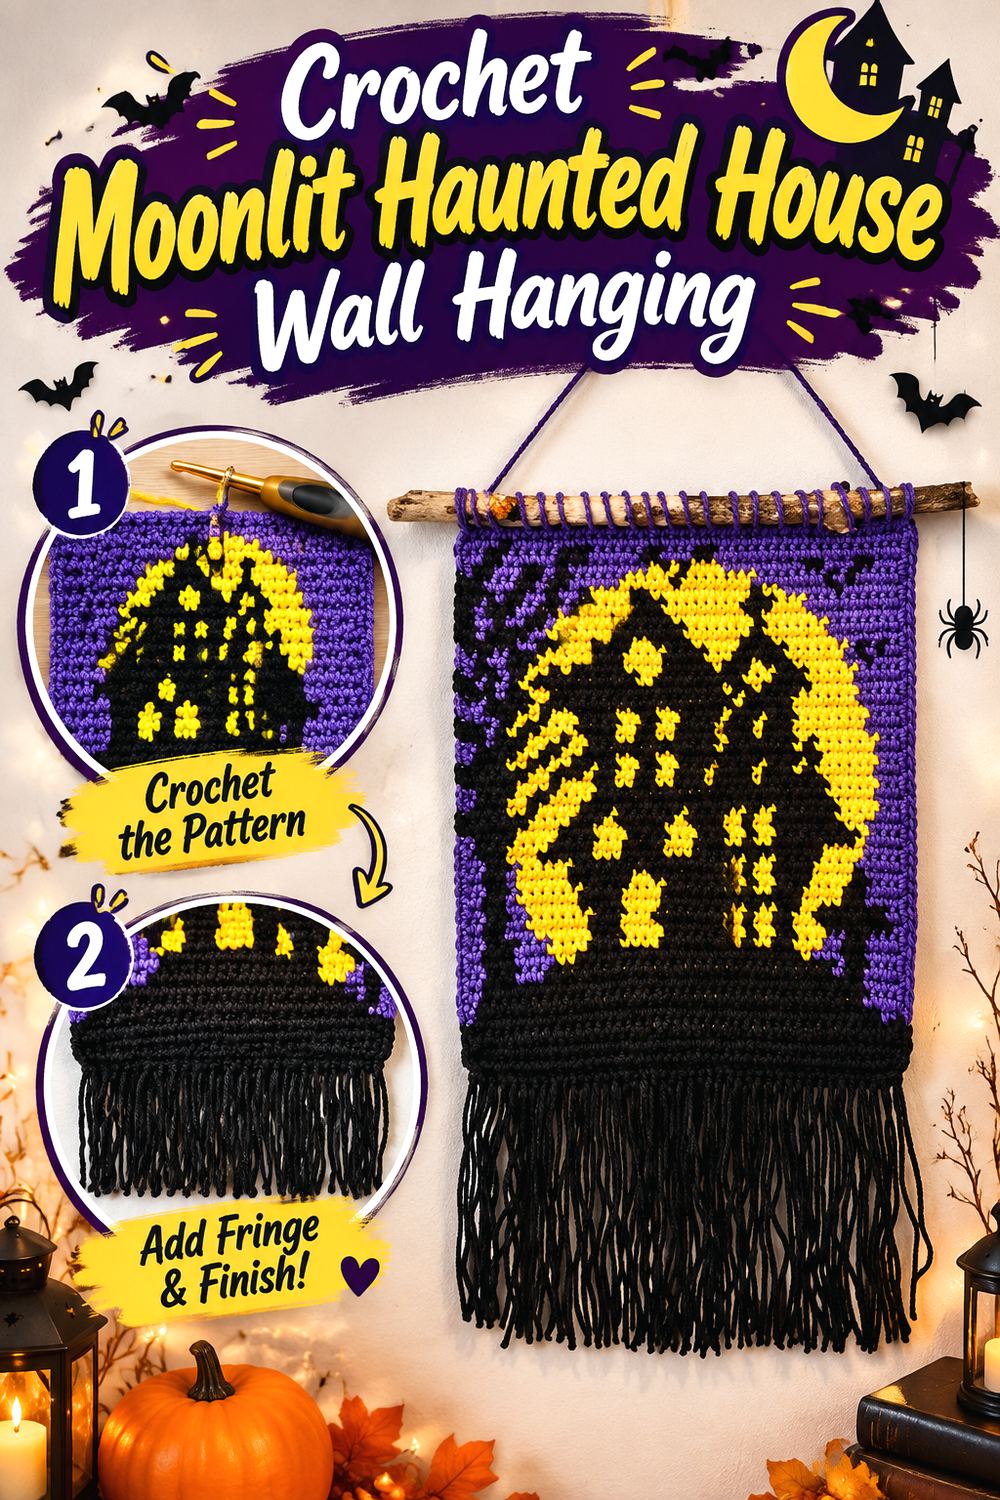
A haunted-house tapestry packs several Halloween cues into one small rectangular piece: an architectural silhouette, a full-moon background, strong color changes, and a simple hanging support. Raffamusa Designs created the project specifically as a tapestry crochet wall hanging, although the underlying square can also serve other purposes.
Choose this when you want a clear story scene rather than an isolated pumpkin or ghost. Because the image is concentrated into one compact panel, it can become the main focal point in a small wall arrangement without needing multiple dangling decorations.
Let the Architecture Stay Crisp
Windows, rooflines, towers, and other small building details depend heavily on clean color boundaries. Check the right side regularly and view the developing image from farther away.
If one area looks muddy, first inspect tension and yarn placement rather than automatically adding more surface detail. Simple, readable shapes are usually more effective on a small wall tapestry than overcrowded corrections.
Match the Mount to the Finished Width
The original design uses a stick or twig as part of the presentation. If you substitute a different support, wait until the crochet is finished before assuming the planned length will look proportional.
A rod extending slightly beyond the panel creates a different visual frame from one that nearly disappears behind it. Center the hanging connection so the scene does not tilt to one side.
Keep Multiple Yarn Strands Organized
Tapestry colorwork can become slower when yarns twist around one another. Arrange the working strands so they can be separated regularly without pulling on completed stitches.
The goal is not merely convenience. Excessive pulling or tangling can change edge tension and affect how square the final panel hangs, so yarn management contributes directly to the finished presentation.
Original Tutorial and Creator Credit
Creator/Site: Raffamusa Designs
6. Crochet Black Cat C2C Wall Panel
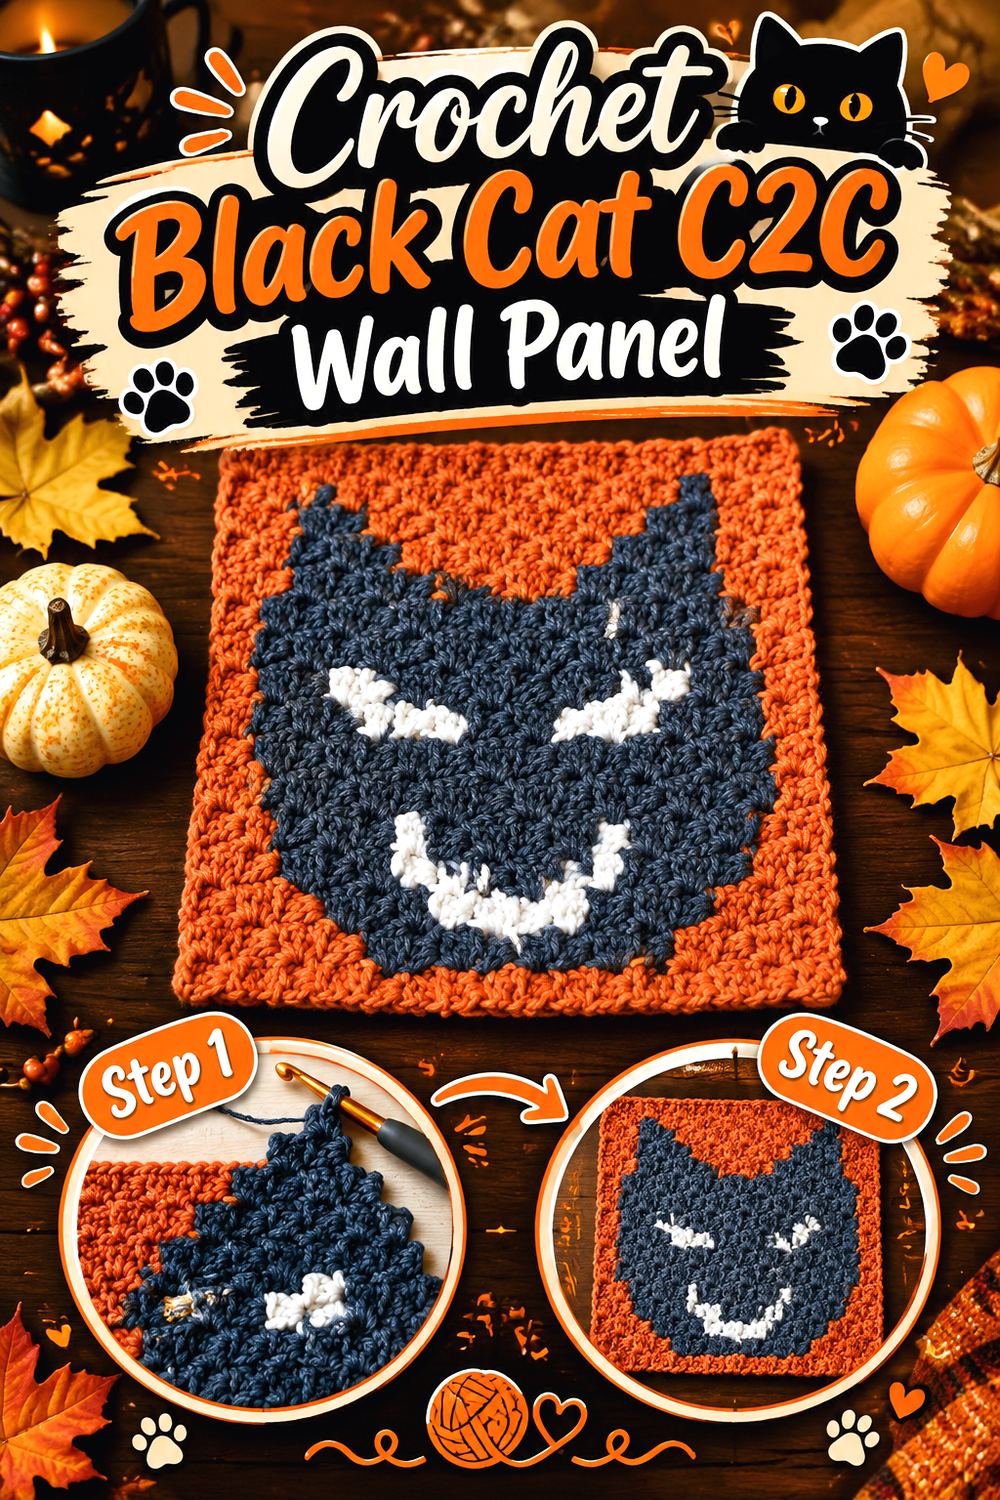
A corner-to-corner cat panel brings a blockier, pixel-like graphic style to Halloween wall decor. Stardust Gold Crochet’s black-cat design is part of a larger Halloween C2C series, and the square is presented for use in a blanket or wall hanging.
This format differs from tapestry crochet because the image grows through C2C blocks rather than ordinary horizontal rows. The resulting texture gives the design a softer mosaic appearance that can suit a craft room, cozy reading corner, or seasonal wall where a strict rectangular tapestry might feel too formal.
Check C2C Scale Before Committing
C2C dimensions change noticeably with yarn weight, hook choice, tension, and the particular C2C method used. If the finished square needs to fit a specific wall or frame, make a realistic size estimate before finishing the entire chart.
The source also provides C2C-specific support, so review that material before altering yarn. A substitution that seems small can make a many-block design considerably larger or smaller.
Decide Whether the Square Needs a Backing
A stand-alone wall square exposes its reverse side differently from a blanket block. Depending on how and where you mount it, a backing may create a tidier presentation or add unwanted bulk.
Make that choice after seeing the completed fabric. If the back will sit directly against a wall and remain unseen, extra construction may be unnecessary.
Keep the Cat’s Features High Contrast
Cat silhouettes can become ambiguous when the ears, face, and background are too similar in value. View your chosen yarns both close up and from several feet away before producing the whole panel.
You do not have to use the original colors, but the major shape boundaries should remain readable enough for the cat to register immediately as the focal motif.
Original Tutorial and Creator Credit
Creator/Site: Stardust Gold Crochet
7. Crochet Poseable Hanging Bat Accent
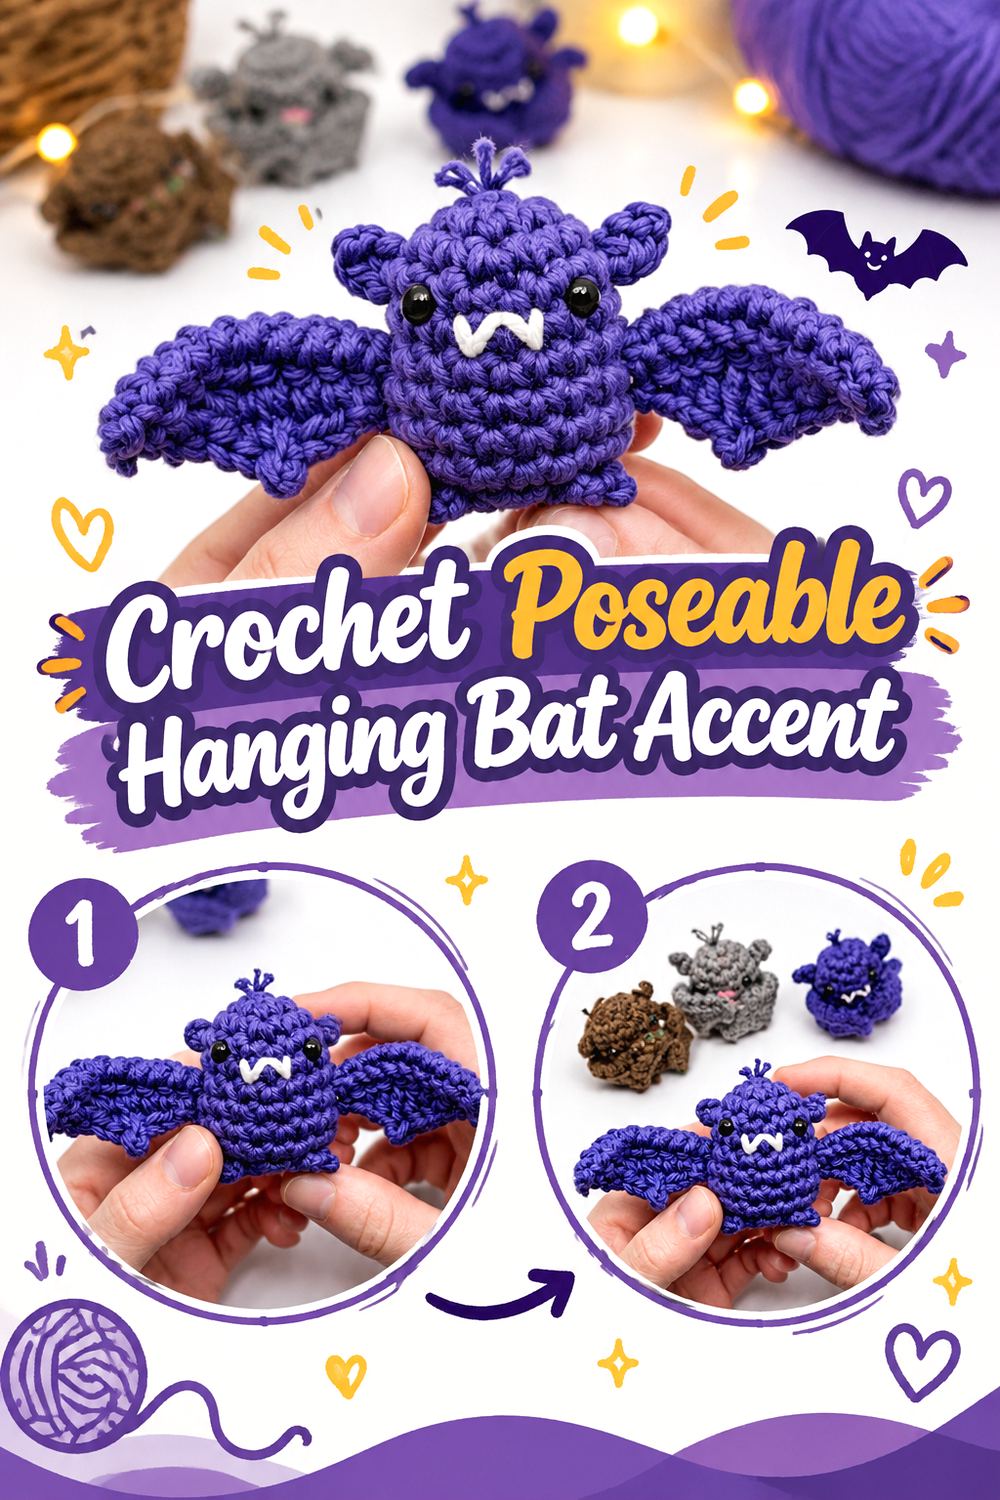
Club Crochet’s hanging bat is a true three-dimensional decoration rather than a flat wall motif. The tutorial combines a stuffed body with wings that can be posed, and it uses a magnet-based concept to let the finished bat hang upside down from a suitable metal surface.
That interaction with the display surface makes this project useful for small gaps where a full tapestry would be excessive. One bat can sit near a metal shelf or compatible fixture, while several can create the impression of a small roost without covering an entire wall.
Choose the Display Surface Before Assembly
Because the source’s hanging concept relies on magnets, confirm where the bat can actually attach before treating it as ordinary wall decor. Standard drywall is not itself a magnetic surface.
If you intend to adapt the display, evaluate the completed weight and structure rather than improvising an insecure loop. The three-dimensional bat deserves a support that will not allow it to fall repeatedly.
Keep Wire and Magnets Away From Small Hands
The tutorial uses structural components for the posing and hanging system. Small strong magnets and wire require sensible placement and secure containment, particularly in homes with young children or pets.
Treat those pieces as functional hardware rather than decorative extras. If the intended display location makes them inappropriate, choose a different wall-hanging idea instead of casually omitting components that affect the source design.
Pose the Wings for the Available Clearance
Wide wings use substantially more visual room than folded wings. Hang the bat temporarily before settling on the final pose.
Near a frame, shelf, or doorway, leaving negative space around the wing tips keeps the silhouette readable. An impressive wing spread can look cramped if it overlaps several neighboring objects.
Original Tutorial and Creator Credit
Creator: Club Crochet
8. Crochet Corner Spiderweb Wall Accent
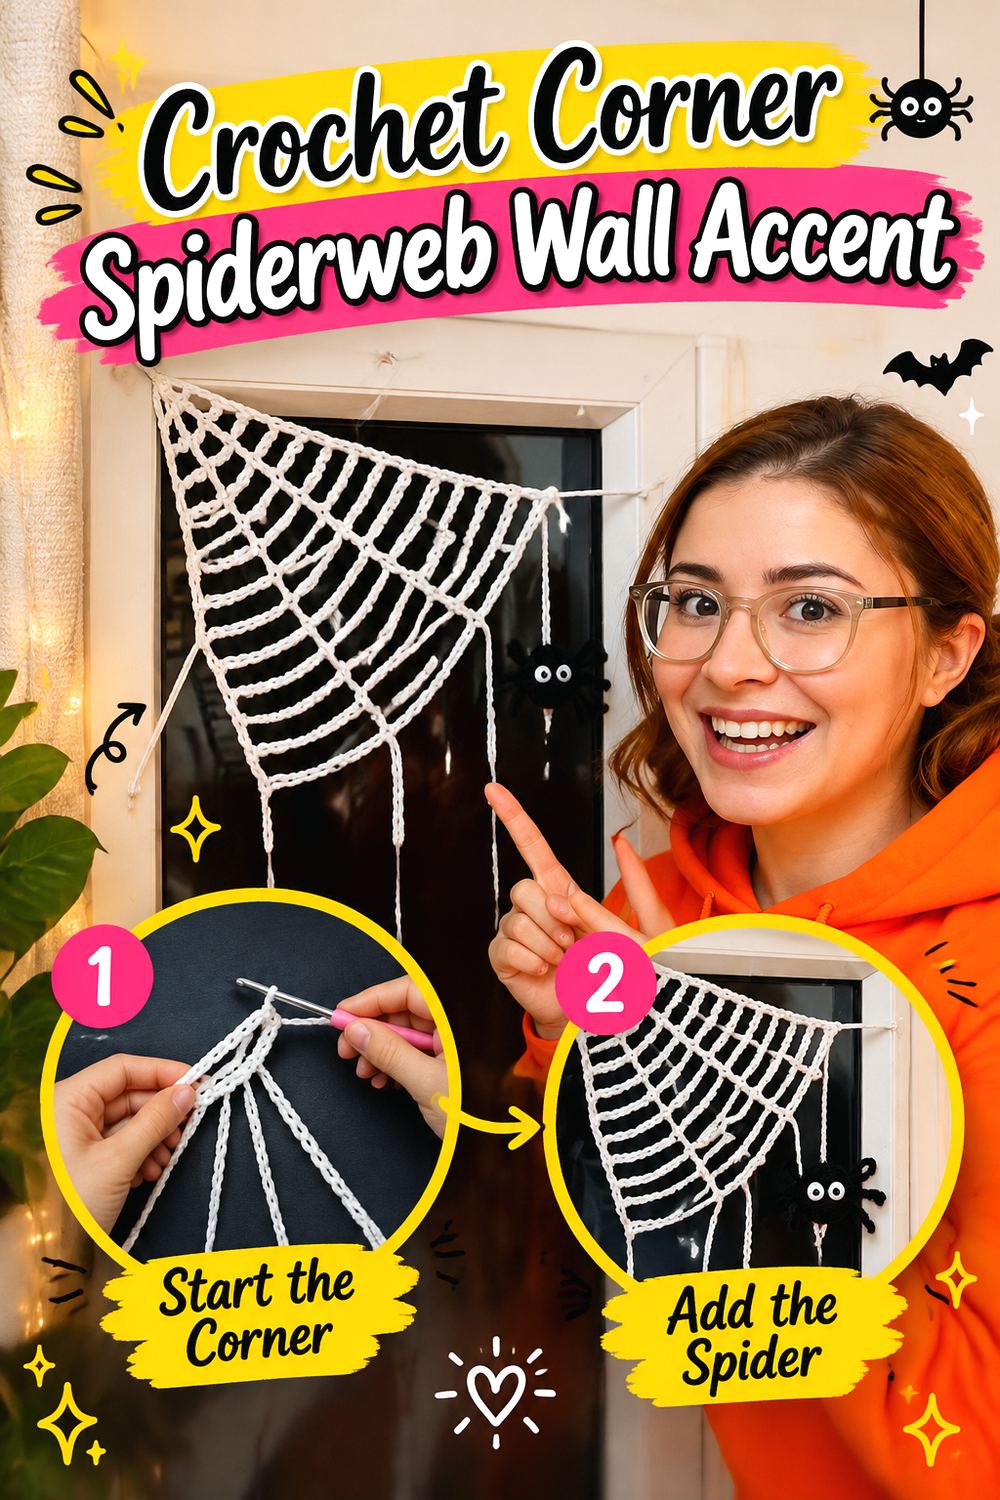
A corner web uses the architecture of the room instead of hanging as a conventional centered picture. Brunaticality’s tutorial covers both a round spiderweb and a corner version, plus a small crochet spider, making the corner style particularly useful for shelf edges, doorways, wall nooks, or empty ceiling-adjacent spaces.
The open construction gives it visual impact without creating another solid rectangle. It can frame existing Halloween decor or stand alone in a neglected corner where a banner or wreath would not fit naturally.
Fit the Web to the Actual Corner
Do not assume every ninety-degree-looking area gives the crochet the same effective space. Molding, shelves, door trim, or nearby artwork may reduce the usable span.
Hold the web in position before deciding its attachment points. The outer lines should have enough room to spread without forcing the center off balance.
Use Even Tension Instead of Overstretching
Open crochet often becomes more web-like when tensioned for display, but pulling aggressively can distort the spacing between the spokes.
Let the finished piece determine its sensible footprint. If the web is too small for a large corner, it is better to adjust the project deliberately than to force one section farther than the rest.
Position the Spider After the Web Is Mounted
A small spider can look differently balanced once the web is under display tension. Mount the web first or reproduce the planned tension on a flat surface before fixing the spider’s final location.
Off-center placement can create movement, while a central spider feels more symmetrical. Neither is automatically better; the wall composition should decide.
Original Tutorial and Creator Credit
Creator: Brunaticality
9. Crochet Continuous Spiderweb Bunting
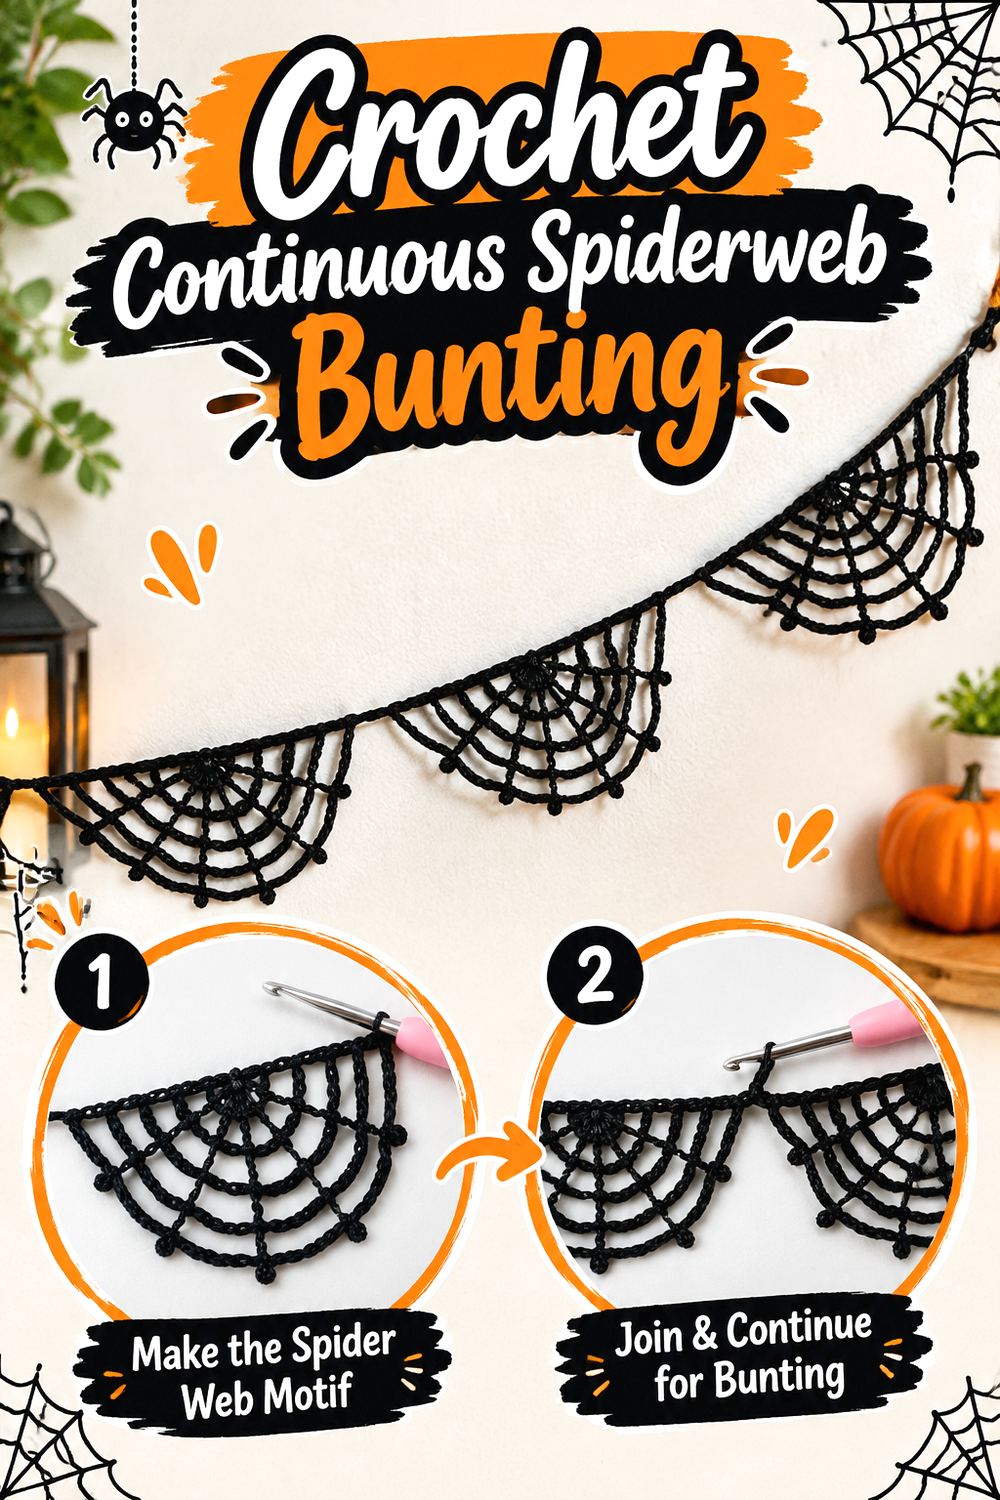
Spiderweb bunting gives you width without the visual heaviness of solid pumpkins or stuffed characters. Crafty Crochet Castle’s design forms repeating web sections in a continuous Halloween strand, with hanging loops incorporated into the overall format.
Use it above a mantel, shelf, doorway, or series of smaller Halloween pictures. Because open spaces remain between the yarn lines, the bunting can frame more detailed wall art without completely competing with it.
Measure the Span Before Repeating Webs
Decide whether you want the strand nearly straight or gently draped before calculating how much wall it should cover. Drape uses more length than a tight horizontal line.
Testing the first few web sections against the intended space can prevent making far more motifs than the wall needs.
Shape Every Web to the Same Standard
Repeated geometric motifs magnify small differences. Lay finished sections side by side and compare the spoke spacing and outer points.
When the yarn permits appropriate blocking or shaping, consistency gives the finished bunting a calmer rhythm and makes the negative space part of the design.
Original Tutorial and Creator Credit
Creator: Crafty Crochet Castle
10. Crochet Skull and Spider Chain Garland
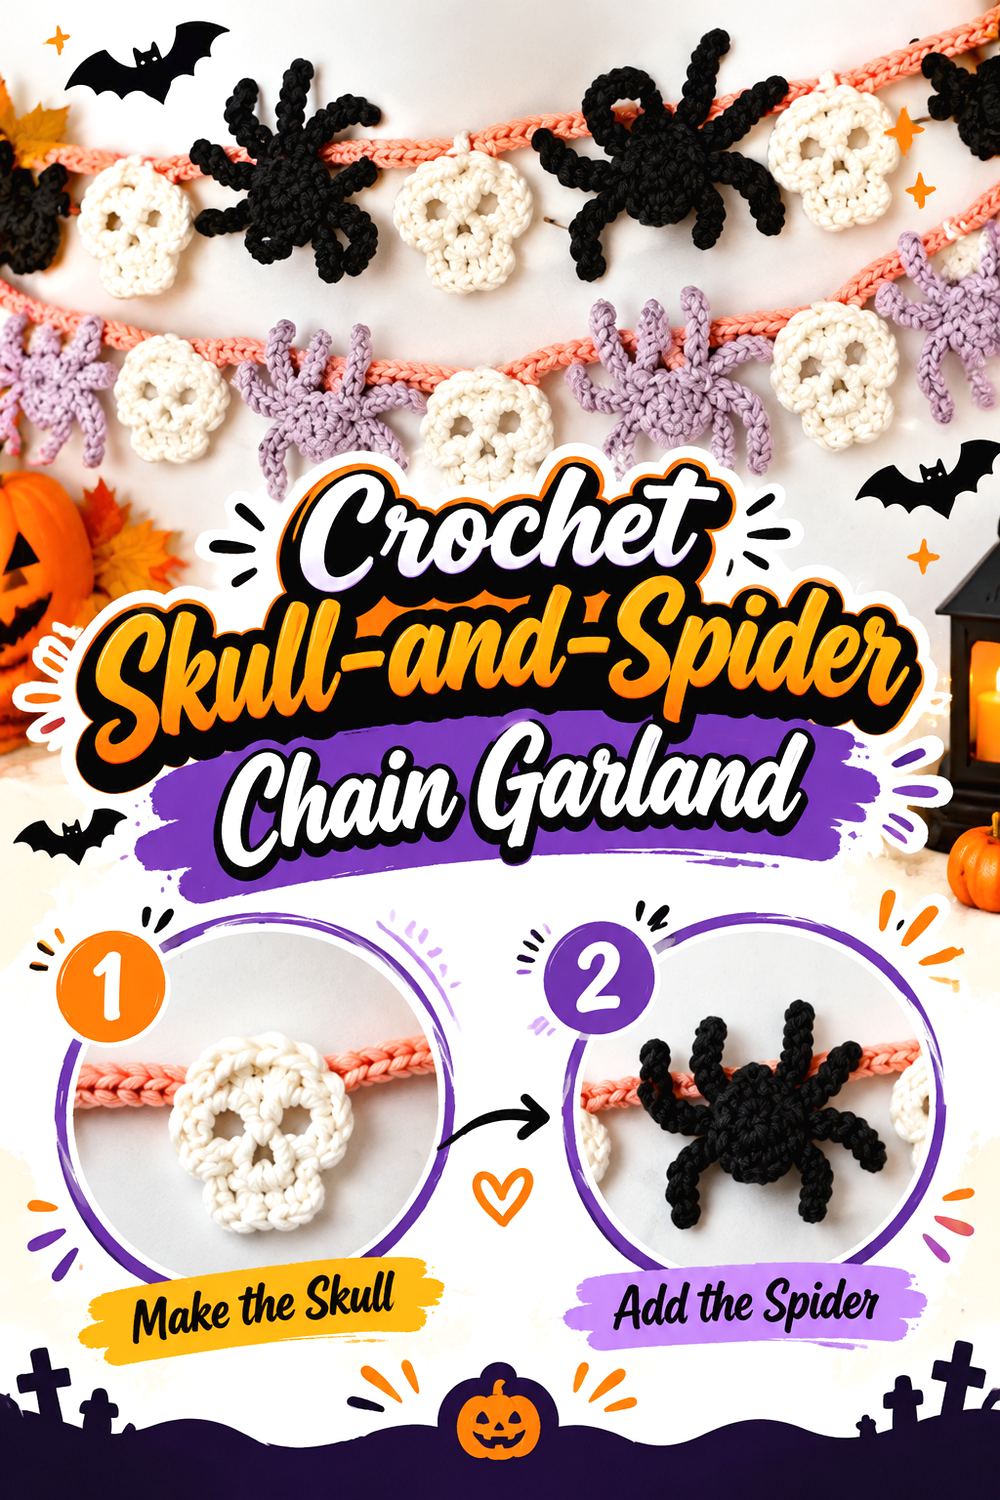
This garland shifts away from the usual pumpkin-and-ghost combination by pairing skull and spider motifs along one chain. Pocket Yarnlings presents the Halloween garland as a no-sew project worked along a foundation strand, giving the finished piece a connected, lightweight appearance rather than a row of separately stuffed ornaments.
The alternating creepy motifs suit a darker Halloween display, especially across a small bookcase, mantel, or wall section where repeating orange pumpkins would feel too soft.
Check Motif Rotation on the Chain
Small flat shapes sometimes turn sideways after a garland is lifted. Before finishing every repeat, hang a short section and confirm that the skulls and spiders naturally face forward.
A joining point that looks fine on the worktable may behave differently once gravity takes over.
Keep the Skull and Spider Contrast Strong
The two motifs should remain distinguishable even when viewed together. If you change colors, make sure the skull features do not disappear into the chain and the spider still reads against the wall.
Testing the combination on the actual wall color is more useful than judging the yarn only against a neutral work surface.
Original Tutorial and Creator Credit
Creator/Site: Pocket Yarnlings
11. Crochet Witch Hat and Pumpkin Garland
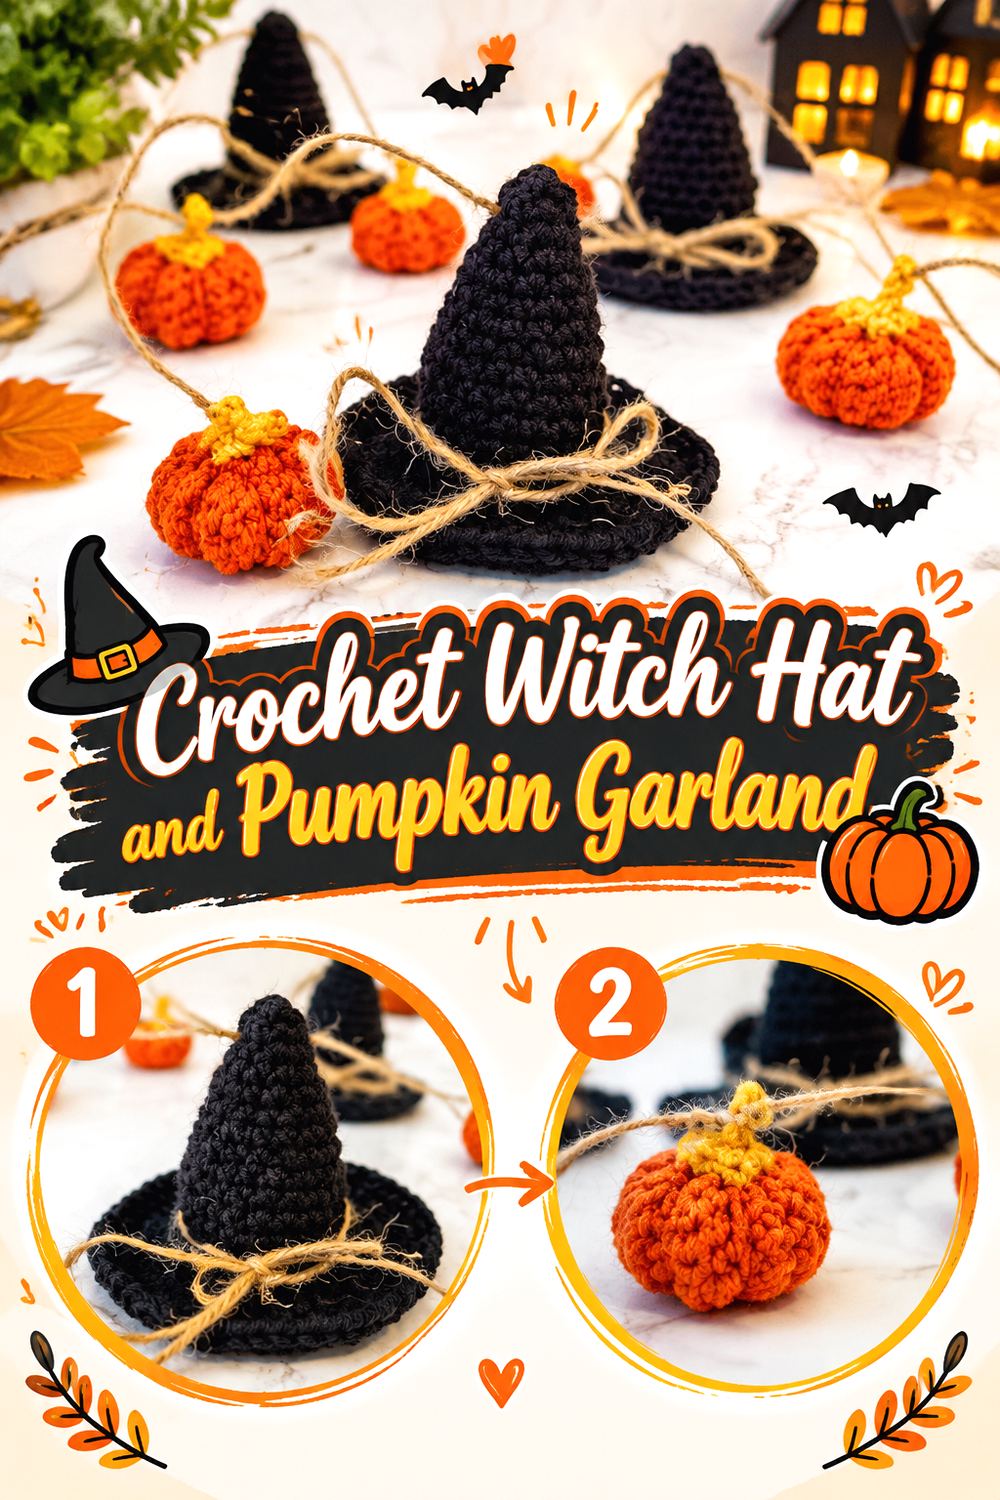
Witch hats and pumpkins make an effective alternating pair because one motif is tall and pointed while the other is rounded and compact. Handy Little Me’s Halloween garland combines the two dimensional seasonal shapes on a hanging strand, creating more visual variety than a row of identical ornaments.
This option works particularly well in an entryway or above a shelf where you want clear Halloween symbolism without adding faces or horror characters. The pumpkin component can also connect the display to broader fall decor.
Alternate Rounded and Pointed Shapes Intentionally
Before attaching every motif, place the hats and pumpkins in the intended order on a flat surface. Check whether one end feels visually heavier.
An alternating sequence usually creates a steady rhythm, while small intentional clusters can make the strand feel more playful. Decide before permanent joining.
Test Weight Before Adding More Motifs
Three-dimensional shapes weigh more than flat appliqués. Hang a partly completed strand to see how much the central section drops.
If the garland is becoming heavier than expected, shortening it or adding a well-placed support can be more effective than simply pulling the end points tighter.
Original Tutorial and Creator Credit
Creator/Site: Handy Little Me
12. Crochet Eight Character Halloween Pennant Bunting
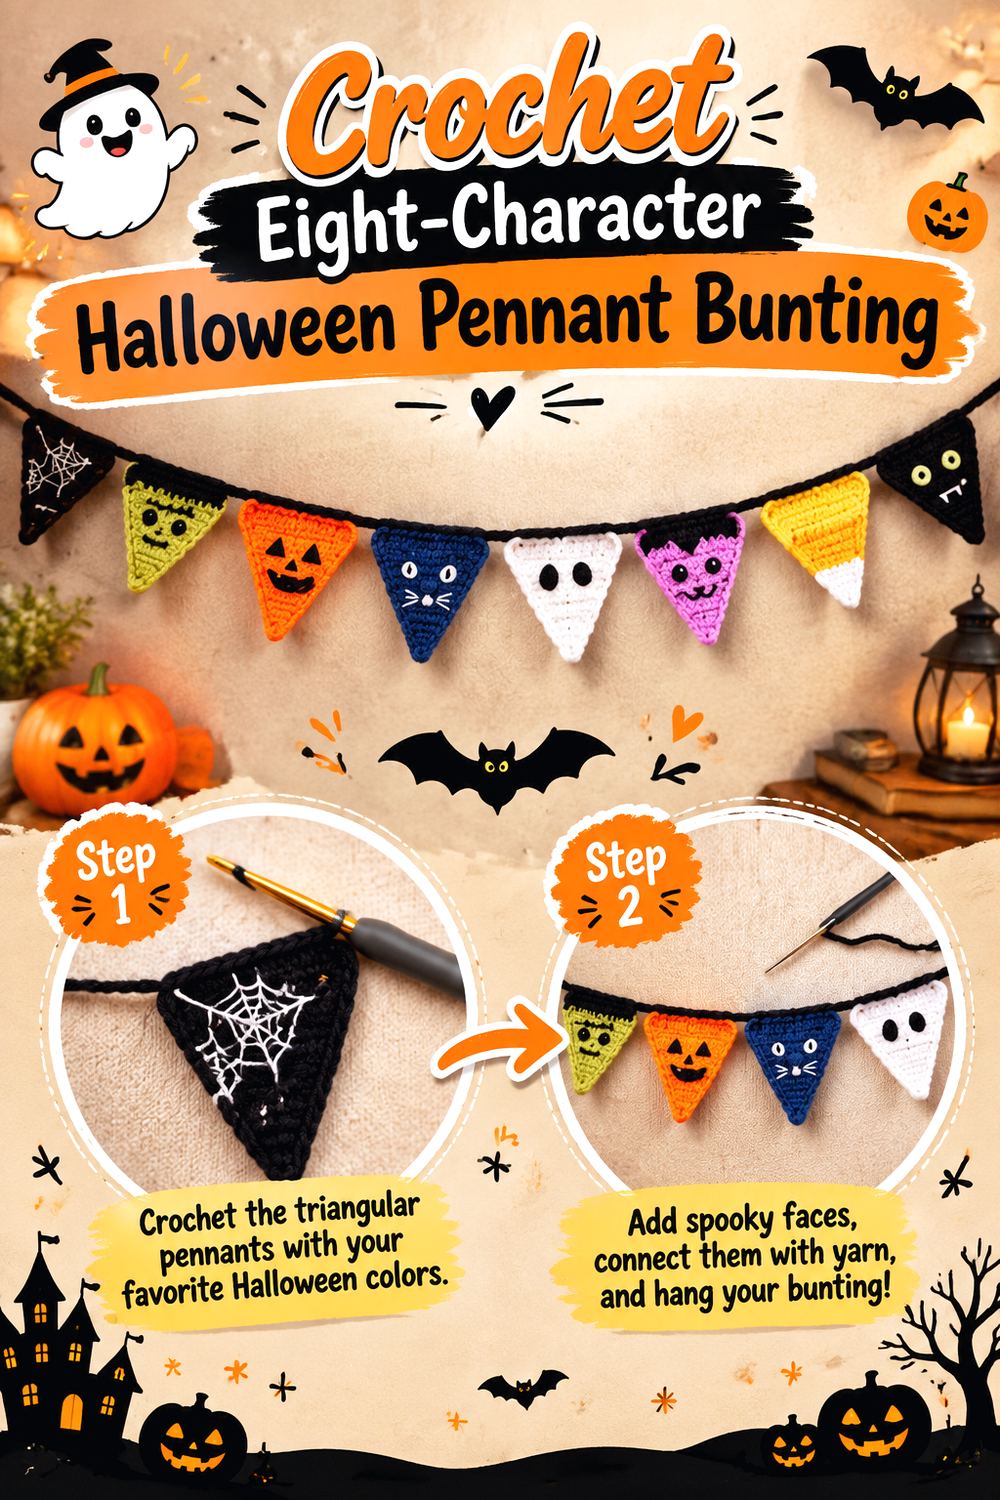
The Lazy Hobbyhopper’s Halloween bunting packs multiple characters into individual triangular pennants, creating a miniature cast of seasonal faces instead of repeating one motif. The original pattern includes eight triangles, allowing the finished strand to move between monsters and familiar Halloween icons while maintaining one consistent pennant shape.
This format works when you want a busy, playful display that still feels organized. The repeated triangular base provides structure even though the character details change across the strand.
Use Character Order to Create Rhythm
Lay every pennant out before joining. Alternate darker, lighter, simpler, and more detailed faces so one side does not become visually crowded.
A central favorite character can act as the focal point, with quieter motifs moving toward the ends.
Secure Added Facial Details for the Display Location
Character bunting may include separate decorative components. Check every attachment after assembly, particularly when the bunting will hang where children or pets can reach it.
If you substitute buttons, beads, or similar small parts, remember that decorative suitability depends on the actual location and audience, not merely the crochet pattern.
Original Tutorial and Creator Credit
Creator/Site: The Lazy Hobbyhopper
13. Crochet Costumed Ghost Garland
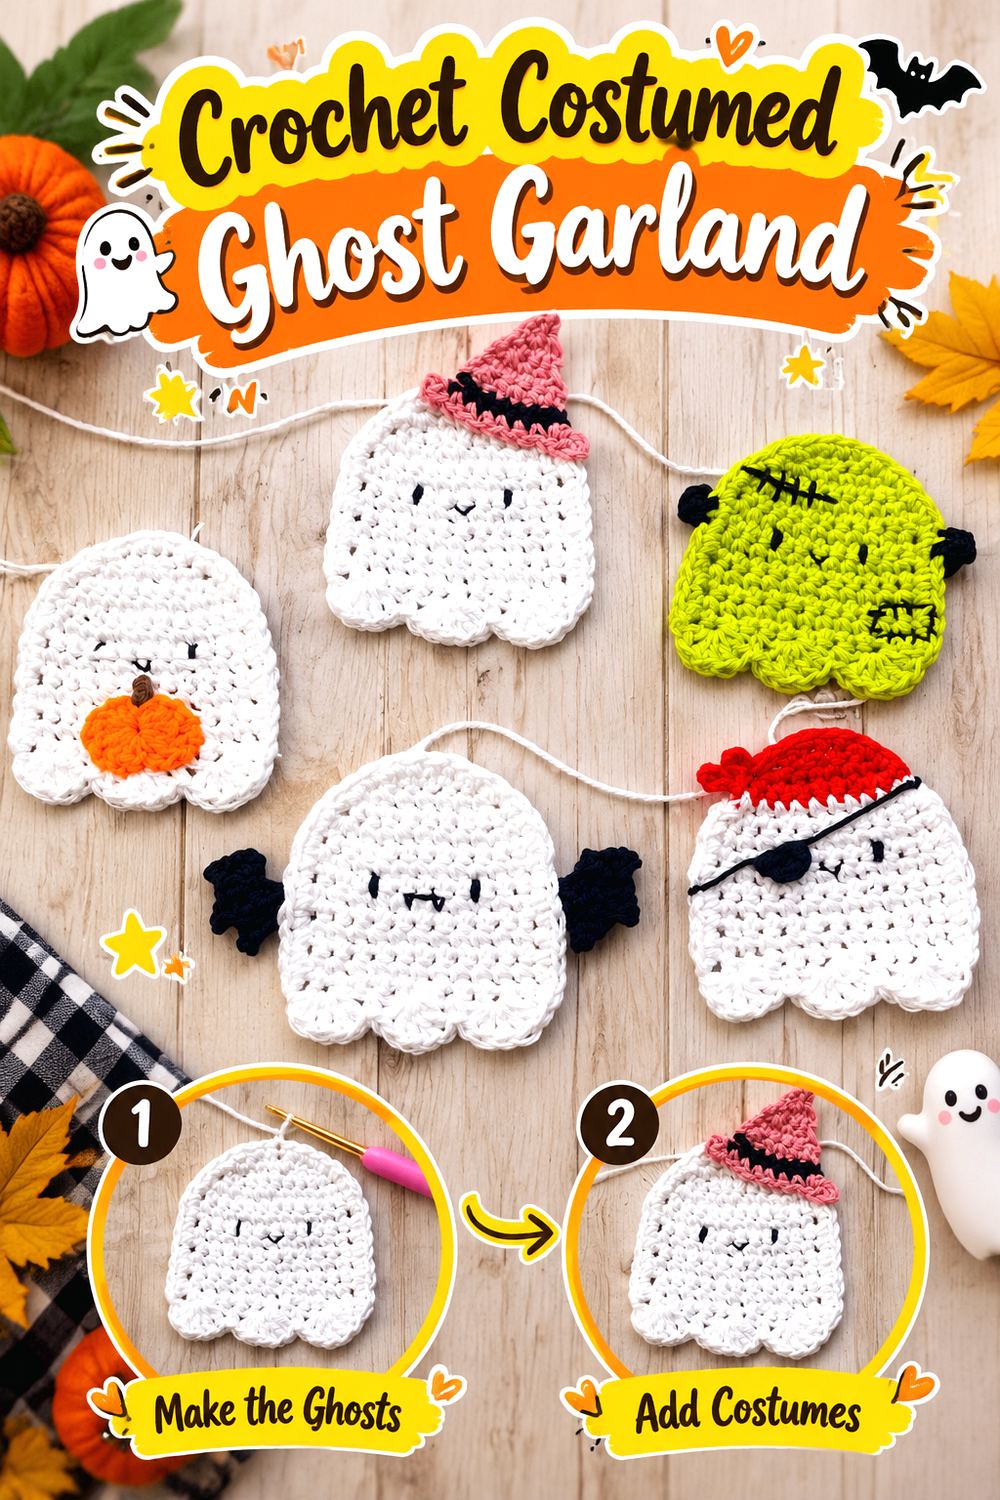
Instead of repeating identical white ghosts, The Caffeinated Snail’s garland gives the characters individual costume personalities. That turns the wall strand into a small scene rather than a single motif repeated at equal intervals.
The format is playful enough for a family room, craft space, party backdrop, or mantel and offers stronger visual storytelling than plain silhouette bunting. Because each ghost contributes something different, it is best displayed where viewers can get close enough to notice the details.
Plan Costume Variety Before Repeating Ghosts
Look at the whole set before deciding whether to repeat a favorite version. Too many highly detailed ghosts in one section can make the strand feel uneven.
Arrange the characters first, then choose spacing that gives individual costume details enough room to read.
Keep Faces Visible After Hanging
A flat ghost may curl or rotate slightly once joined to the garland. Test every character in the hanging orientation before securing the final arrangement.
If a face repeatedly turns inward, inspect the joining position rather than assuming the motif itself needs reshaping.
Original Tutorial and Creator Credit
Creator/Site: The Caffeinated Snail
14. Crochet Colorful Bat Wall Garland
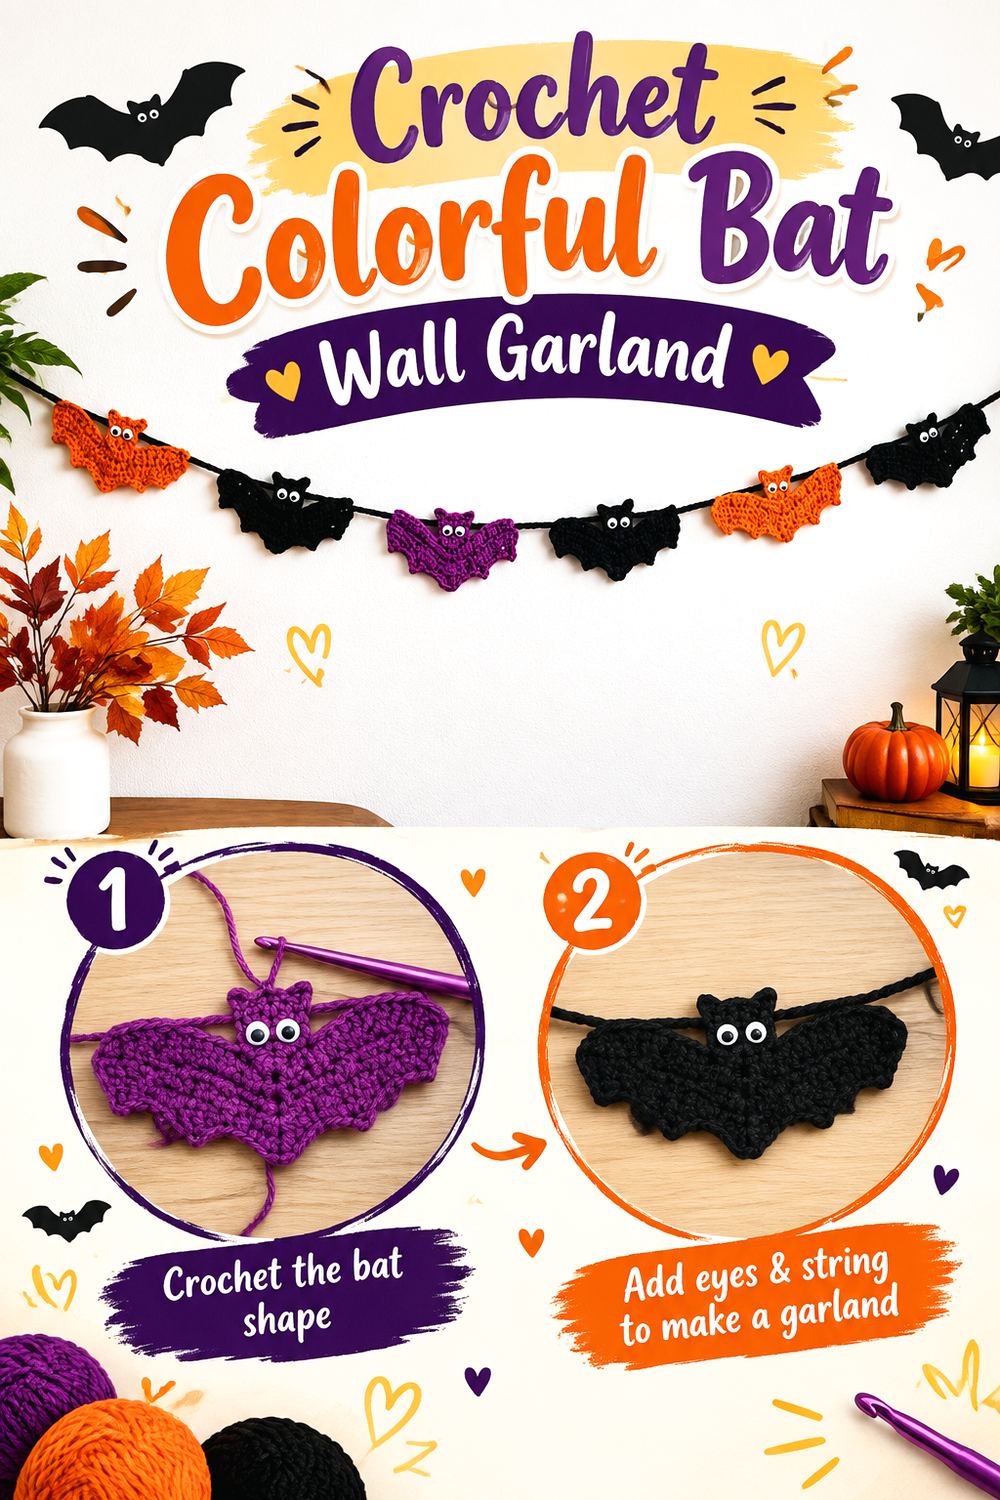
GoldenLucyCrafts builds this garland around repeated crochet bat appliqués rather than stuffed bats. Their wide wings create a strong horizontal line, while changing colors can make the strand more playful without altering the basic motif. The source specifically shows the bats assembled as Halloween wall garland decor.
Compared with a single dimensional bat, this project is better for filling a long section over a doorway, window, or mantel while keeping the strand relatively flat.
Vary Color Without Losing Bat Silhouettes
A multicolor strand works best when every bat still reads immediately against the background. Very dark bats can disappear on a dark wall, while pale bats may lose definition against white paint.
Hold sample colors against the intended surface before making a full set.
Join Through Stable Points
Wide wings invite attachment near their outer edges, but the best joining location should follow the creator’s construction and keep each bat sitting predictably.
Hang a short section first and look for twisting or drooping before assembling the entire garland.
Original Tutorial and Creator Credit
Creator/Site: GoldenLucyCrafts
15. Crochet Cobweb Triangle Bunting
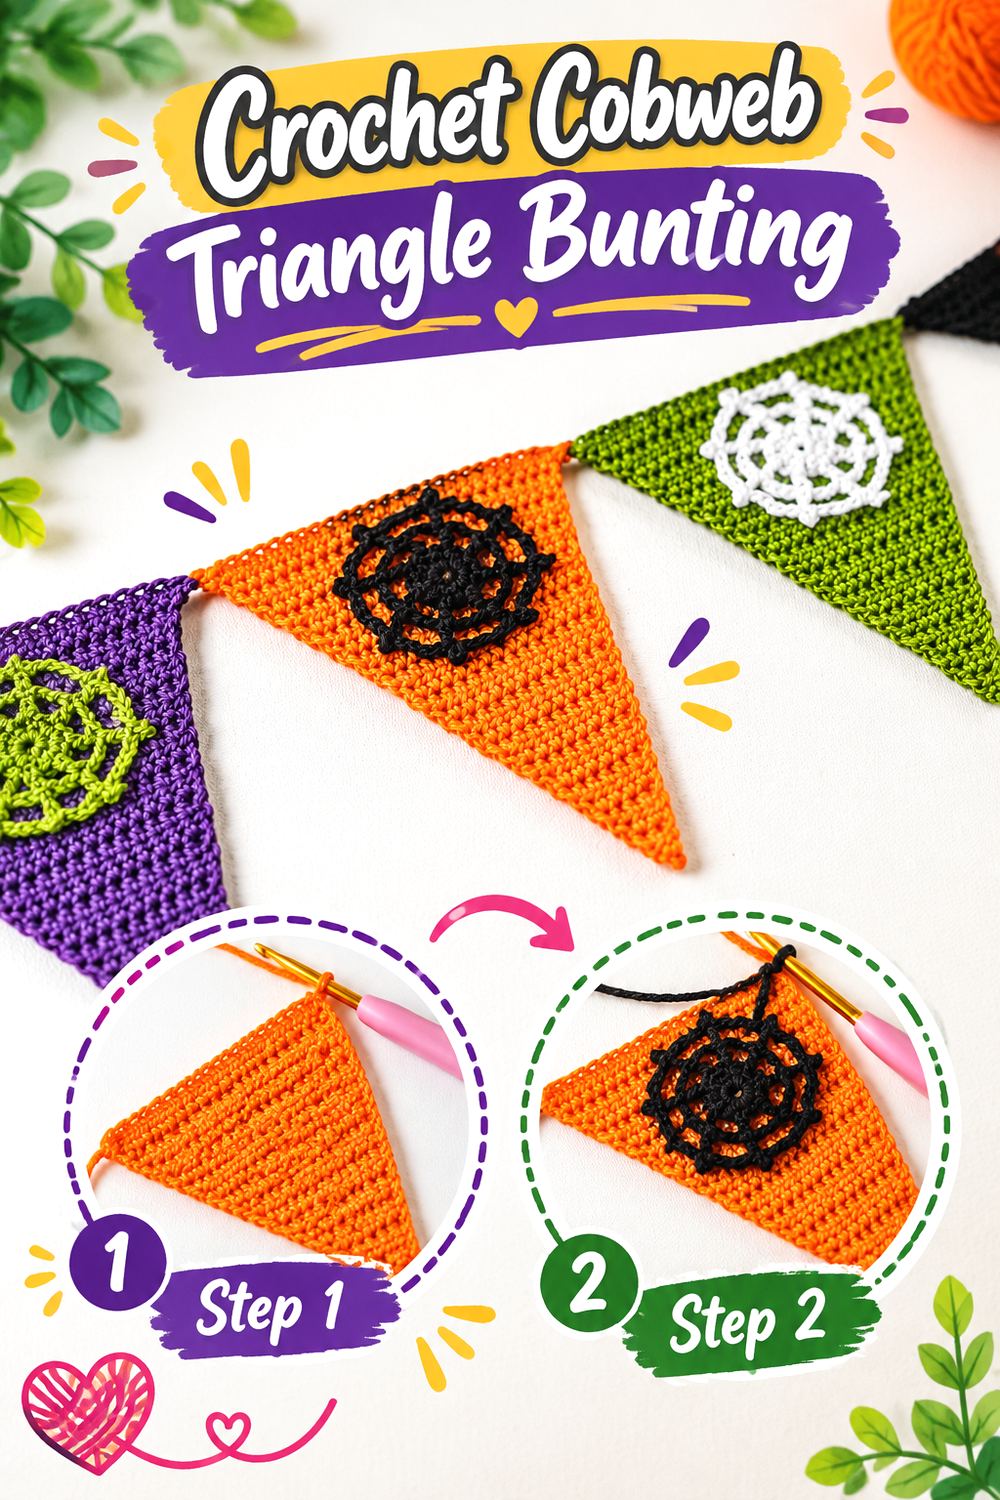
Annie Design Crochet combines solid triangular bunting with attached cobweb details, creating a layered effect that differs from a strand made entirely from open spiderweb motifs. The contrasting constructions let the triangular flags establish a strong lower edge while the thread-like webs supply the Halloween detail.
This is a useful middle ground for rooms where a pure openwork web strand would disappear visually but a row of stuffed decorations would feel too bulky.
Let Open Cobwebs Stay Visible
Position each web so its negative spaces remain readable instead of disappearing against heavily textured fabric or other decorations.
If the wall itself has a strong pattern, consider whether the web needs more contrast than it would against a plain background.
Combine Solid Triangles and Thread Details Carefully
The two components may behave differently when stored or cleaned. Fine cobweb sections can snag more easily than the sturdy pennant fabric.
Follow the material guidance and avoid storing the bunting where hooks, branches, or other Halloween decorations can catch the open stitches.
Original Tutorial and Creator Credit
Creator/Site: Annie Design Crochet
16. Crochet Spooky Chic Bobble Bunting
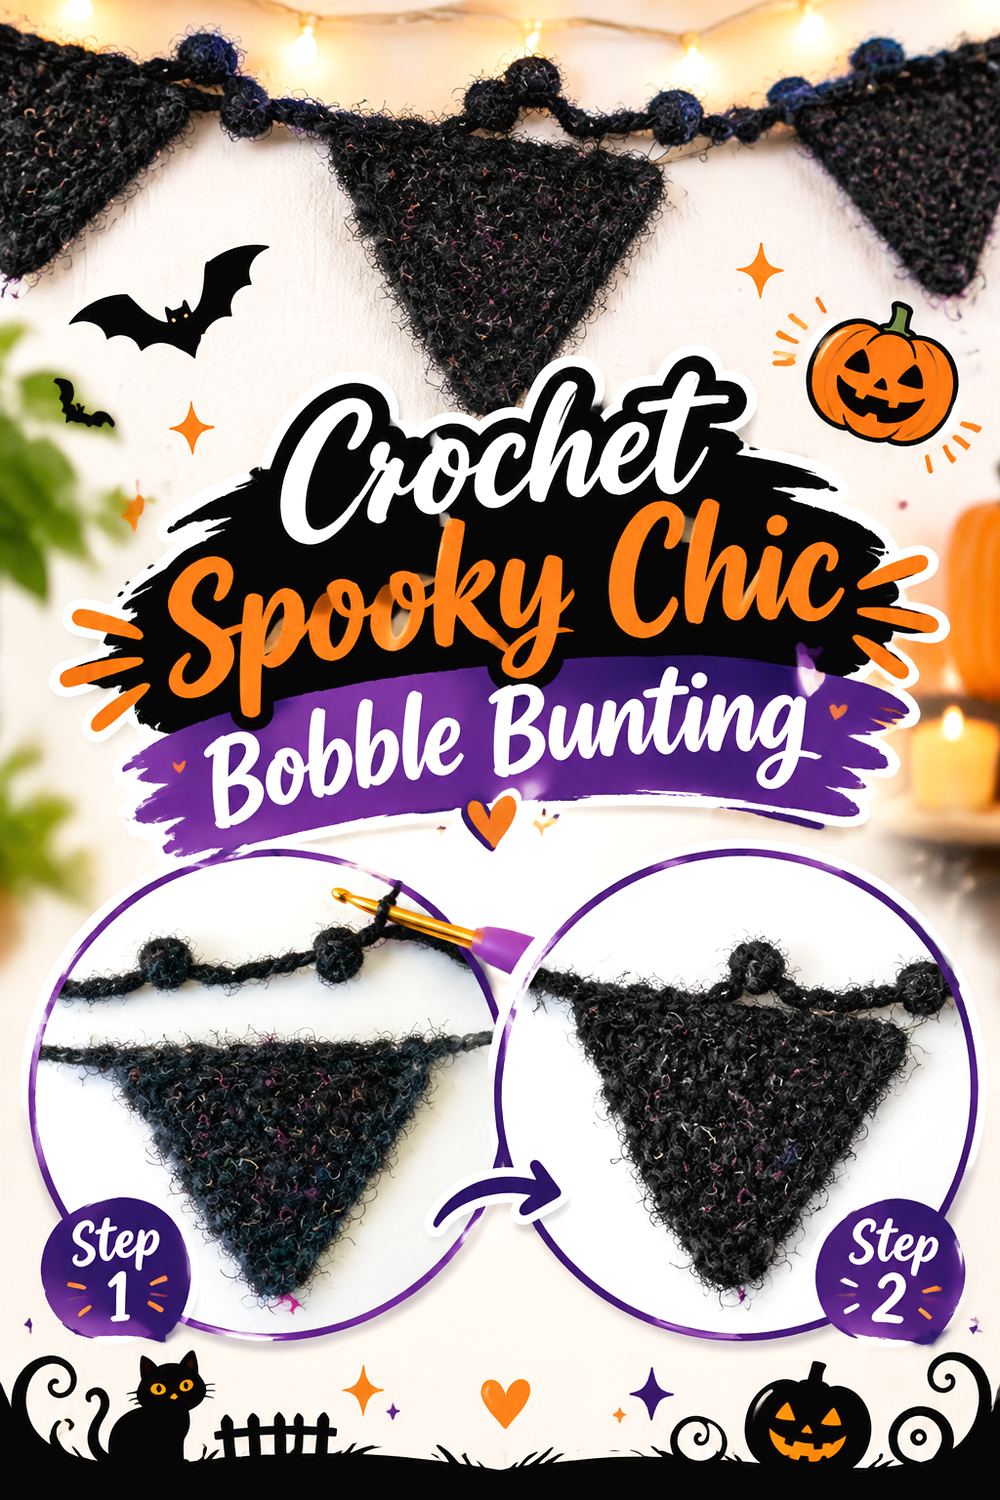
This design combines triangular bunting with a separate bobble-style strand, allowing you to layer two crochet textures instead of relying on character motifs. Darn Good Yarn’s pattern credits the design to Theresa Denham, also identified on the page as TeaganAndLu.
The result is more abstract than pumpkins or ghosts, making it useful when you want a Halloween palette and dramatic texture without literal monster faces. The secondary bobble garland can also extend the composition beyond the main pennant strand.
Use the Bobble Strand as a Separate Layer
Rather than forcing both pieces onto exactly the same line, test the bobble garland slightly above or below the pennants.
A little separation lets both textures remain visible and can fill more vertical wall space without adding another major centerpiece.
Watch Stretch in Heavier Decorative Yarn
Textured yarn and repeated bobbles can add weight to a long strand. Hang a sample section before deciding how tightly the ends should be pulled.
A gentle drape is usually more forgiving than trying to keep a weighty strand perfectly straight across a wide span.
Original Tutorial and Creator Credit
Creator/Site: Darn Good Yarn; design credited to Theresa Denham / TeaganAndLu
17. Crochet Mixed Motif Halloween Wall Garland
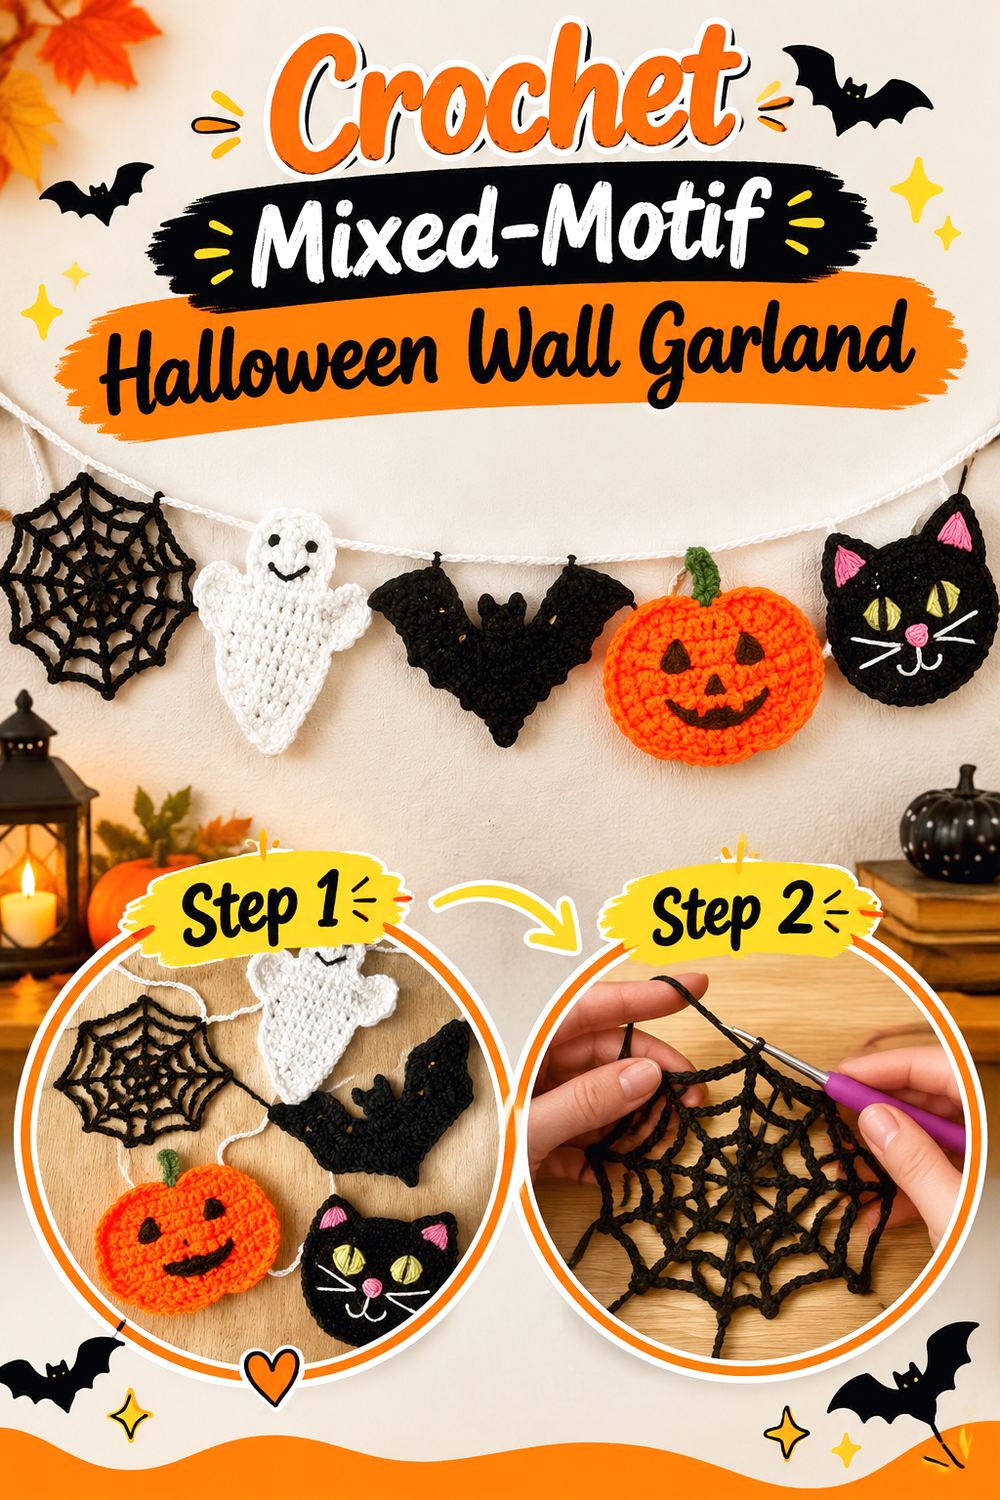
Craft Fix’s Halloween garland gives you a broader motif library rather than committing to one repeated symbol. The source combines seasonal shapes including a spiderweb, ghost, bat, pumpkin, and cat, letting the finished strand shift between openwork, faces, rounded forms, and winged silhouettes.
This is a practical choice when one garland needs to carry most of the Halloween theme in a room. It can also be shortened for a shelf or extended for a wider mantel by adjusting the number and sequence of motifs.
Build a Motif Mix Instead of a Motif Pile
Lay the finished pieces in sequence before attaching them. Alternate visually dense motifs with simpler or more open ones so the strand has breathing room.
Repeating a few motifs can establish rhythm, but avoid placing every dark or wide shape together unless you deliberately want an asymmetrical composition.
Standardize Hanging Loops
When different motifs use different shapes, their joining points can sit at different heights. Test the top alignment before finishing the strand.
Consistent attachment height helps the motifs look related even when their lower edges vary dramatically.
Original Tutorial and Creator Credit
Creator/Site: Craft Fix
18. Crochet Pumpkin Cluster Garland
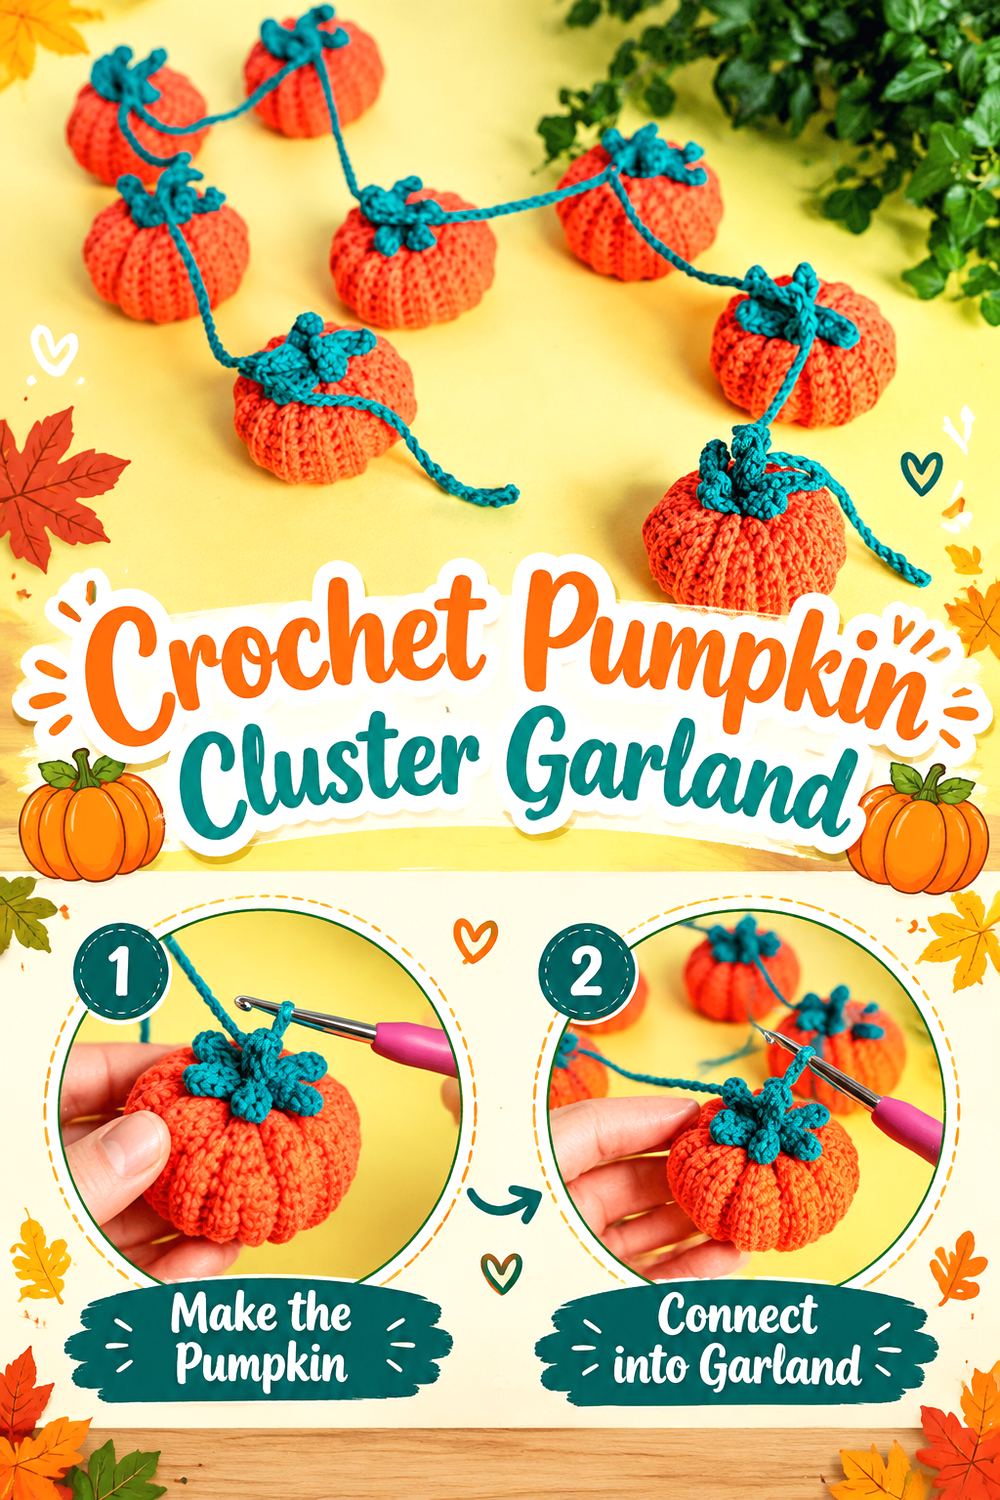
Hoooked’s Halloween tutorial includes a pumpkin pattern plus a garland variation made by scaling the pumpkins for hanging. Unlike flat pumpkin appliqués, these shapes bring more volume to the strand and create a row of small three-dimensional autumn forms.
The design can remain on display beyond Halloween because it reads just as naturally as fall decor. That makes it a useful choice for anyone who wants seasonal crochet with a longer display window.
Sample One Pumpkin Before Making the Set
Three-dimensional motifs can become much larger or heavier than expected when the yarn changes. Make one sample pumpkin with the intended substitution and hold it against the planned wall area.
That check reveals both scale and how much visual weight the finished garland may carry.
Support the Garland for Three-Dimensional Weight
Stuffed or dimensional pumpkins create a different load than flat motifs. Once several are attached, hang the partial strand and inspect the center sag.
Use support appropriate to the completed project rather than relying automatically on the same hooks you would use for lightweight bunting.
Original Tutorial and Creator Credit
Creator/Site: Hoooked
19. Crochet Gothic Coffin Wall Hanging
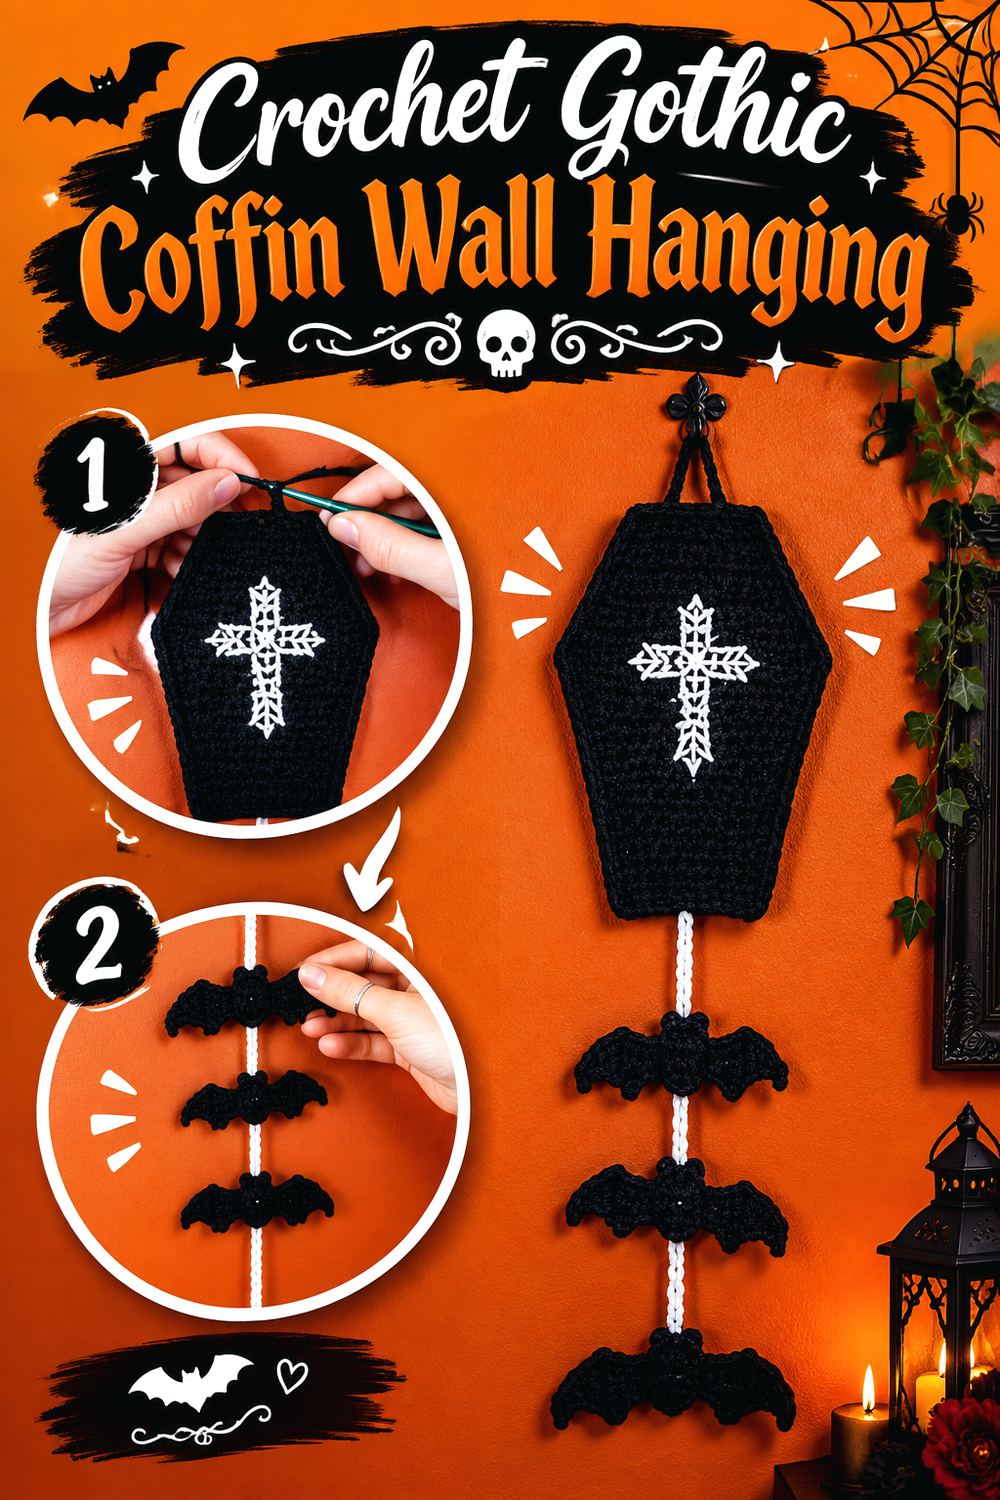
A coffin changes the collection from playful seasonal decor to a more gothic silhouette. Randeere Repaints combines a crocheted coffin with a DIY wall-hanging presentation, giving the project a narrow vertical footprint that works well among dark artwork, curios, mirrors, or bookcases.
Because the outline itself communicates the theme, you do not need a busy palette or many separate motifs. This is an effective choice for a small wall where a long bunting strand would be impractical.
Check All Mixed-Media Supplies Up Front
The project is presented as both crochet and a DIY wall hanging, so review the complete video before buying only yarn and a hook.
Identify which structural or decorative items contribute to the finished display. Substituting those elements can affect how the coffin hangs or how rigid the final silhouette appears.
Keep the Coffin Outline Uncrowded
A narrow coffin works because its angular perimeter remains immediately recognizable. Give it enough empty wall around the sides that neighboring frames and garlands do not break up the shape.
A little negative space often adds more gothic drama than surrounding the piece with every available Halloween ornament.
Check Dark Yarn in the Intended Lighting
Black and charcoal yarn can hide stitch texture in dim rooms. Test the yarn against the actual wall and under evening lighting before deciding the entire palette.
Contrast can come from the wall, trim, frame, or nearby objects rather than changing the coffin into a bright color.
Original Tutorial and Creator Credit
Creator: Randeere Repaints
20. Crochet Chunky Ghost Wall Garland
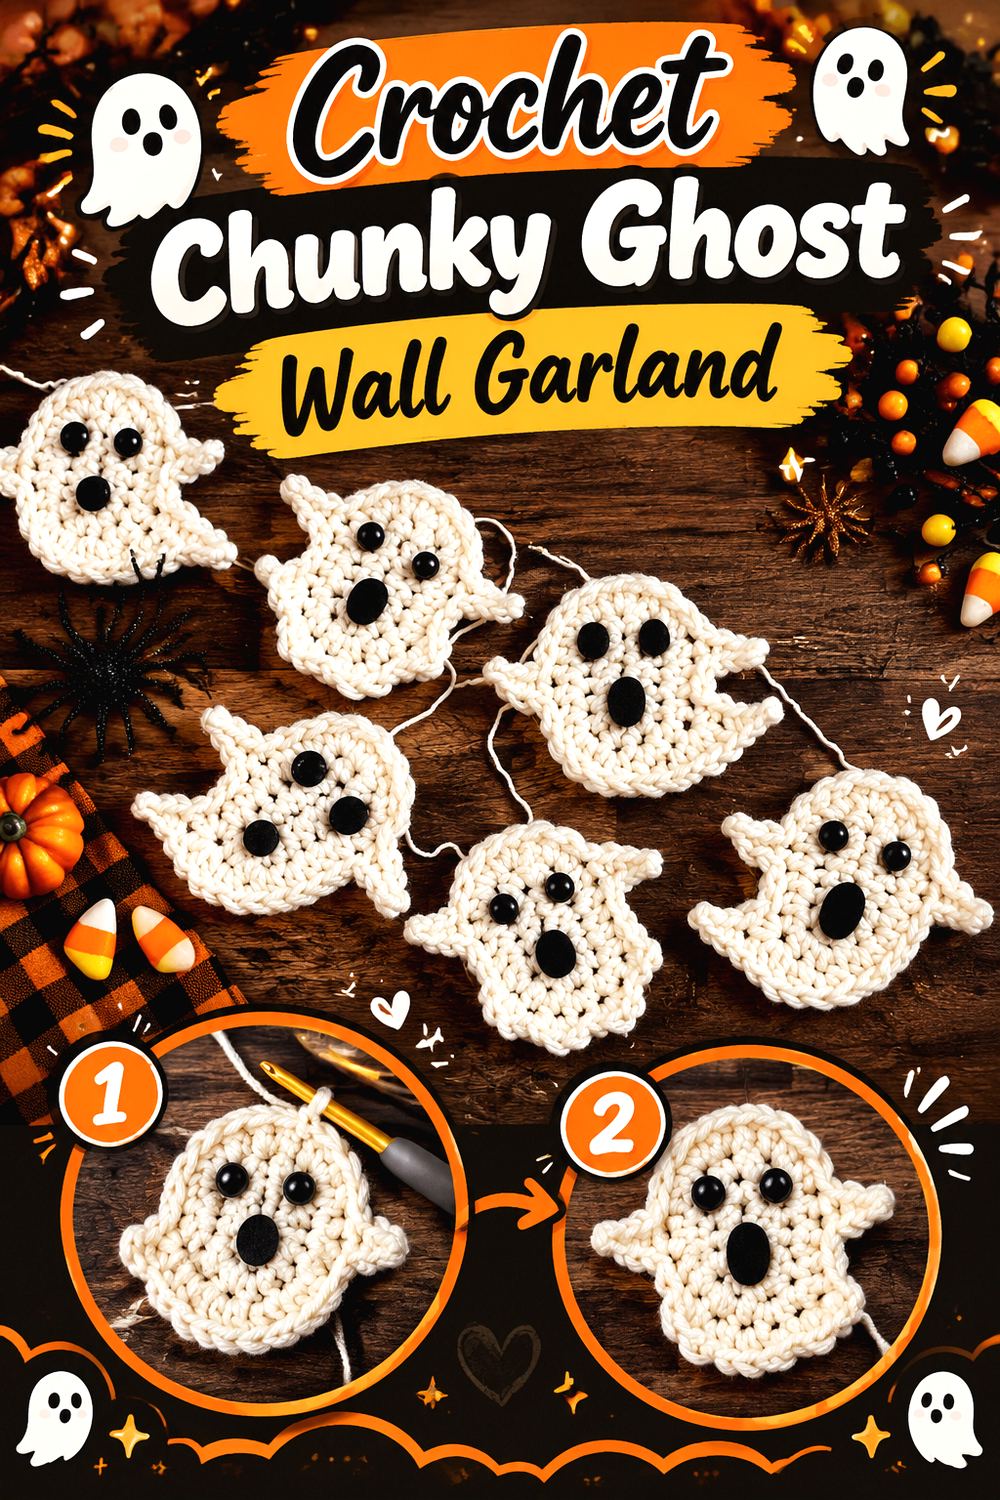
SeeLoveShare’s ghost garland uses multiple ghost variations in a thicker, more dimensional-looking format than small thread or DK appliqués. The original source presents three ghost versions intended to be repeated into a complete hanging strand.
The larger texture makes this option useful where tiny motifs would disappear, such as above a substantial mantel, bookshelf, or wider section of wall. Keeping all the characters ghost-based also gives the finished display a cleaner theme than a mixed-symbol garland.
Space Chunky Ghosts for Negative Space
Thicker motifs need more room between them. Crowding can turn separate ghost silhouettes into one continuous pale band.
Lay the entire set out before joining and adjust gaps until each lower edge and tail remains recognizable.
Recheck the Cord Once the Strand Hangs
A cord that looks correctly proportioned on the table may sag considerably once several bulky ghosts are attached.
Hang the finished strand, let it settle, and make final spacing adjustments before trimming or permanently securing any adaptable joining components.
Original Tutorial and Creator Credit
Creator/Site: SeeLoveShare
21. Crochet Frankenstein and Vampire Halloween Bunting
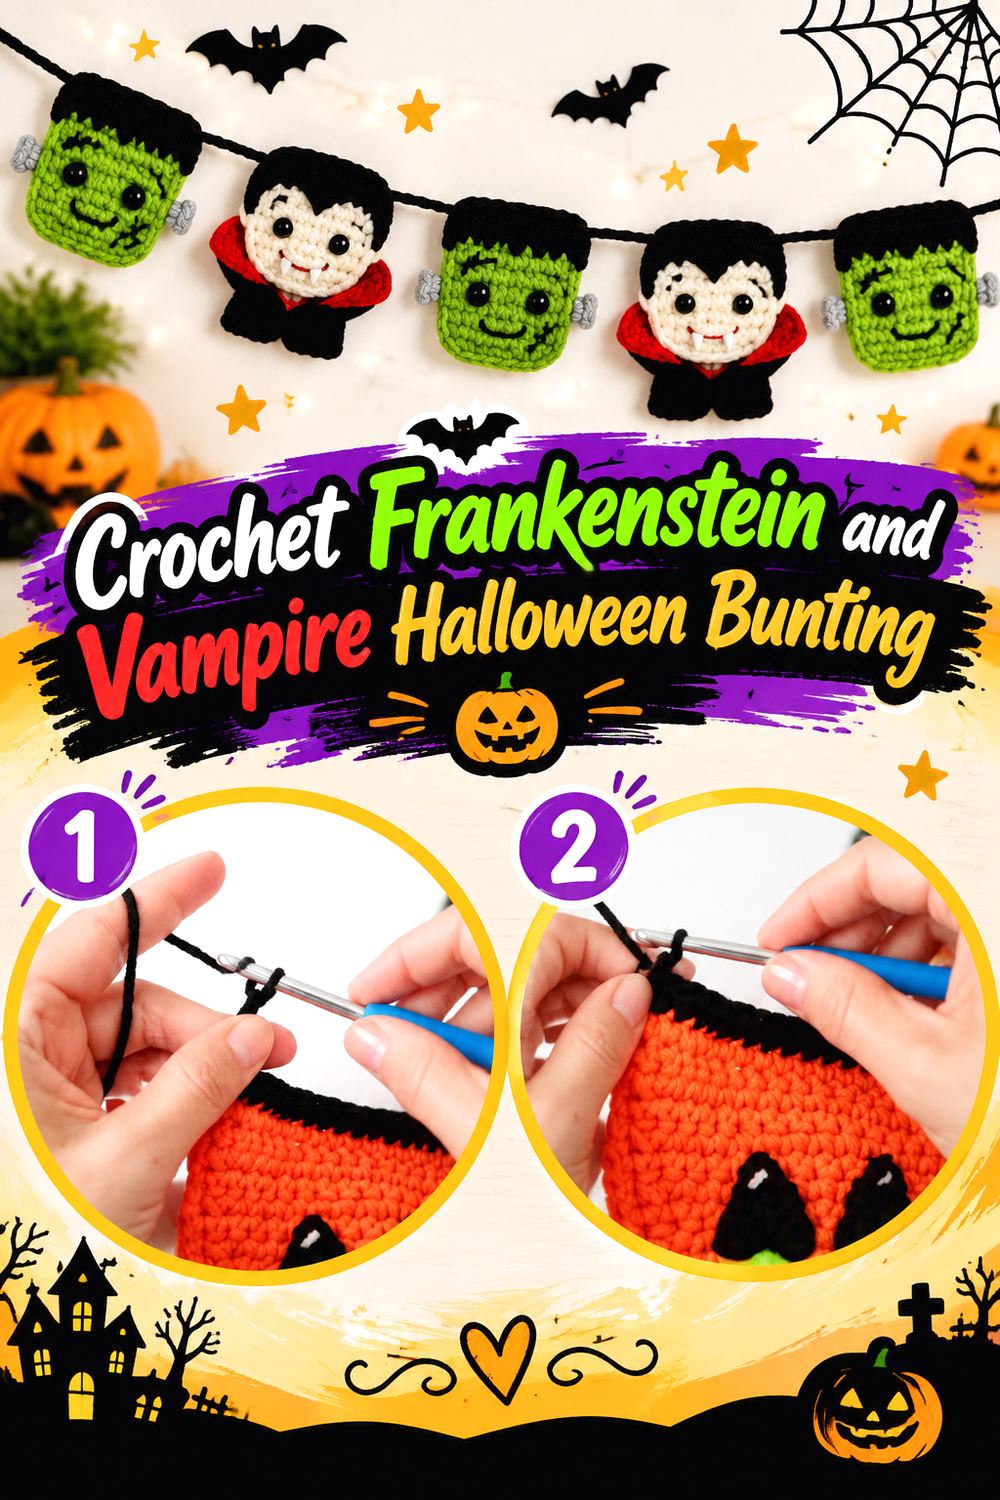
This character-driven bunting brings classic monster imagery into a horizontal hanging without requiring a large portrait panel. Ahuyama Crochet’s Halloween video demonstrates decorative motifs including pumpkin, Frankenstein, and vampire faces for a home, window, or door garland.
The facial motifs give the strand more personality than abstract triangles, while the compact repeated format remains easier to distribute across a wide wall than one oversized character.
Use Monster Faces as the Main Visual Hook
When a motif has a recognizable expression, extra surrounding embellishment can quickly become distracting. Let the faces remain the strongest feature of the strand.
View the completed motifs from several feet away and confirm that the eyes, hairlines, mouths, or other defining areas remain readable.
Keep Color Changes Consistent Across Repeats
If several versions of one monster appear, small tension differences may change the apparent face proportions.
Make the first successful motif your visual reference and compare later pieces to it before assembly rather than noticing inconsistent scale after the strand is hanging.
Original Tutorial and Creator Credit
Creator: Ahuyama Crochet
22. Crochet Pumpkin Wreath Wall Accent
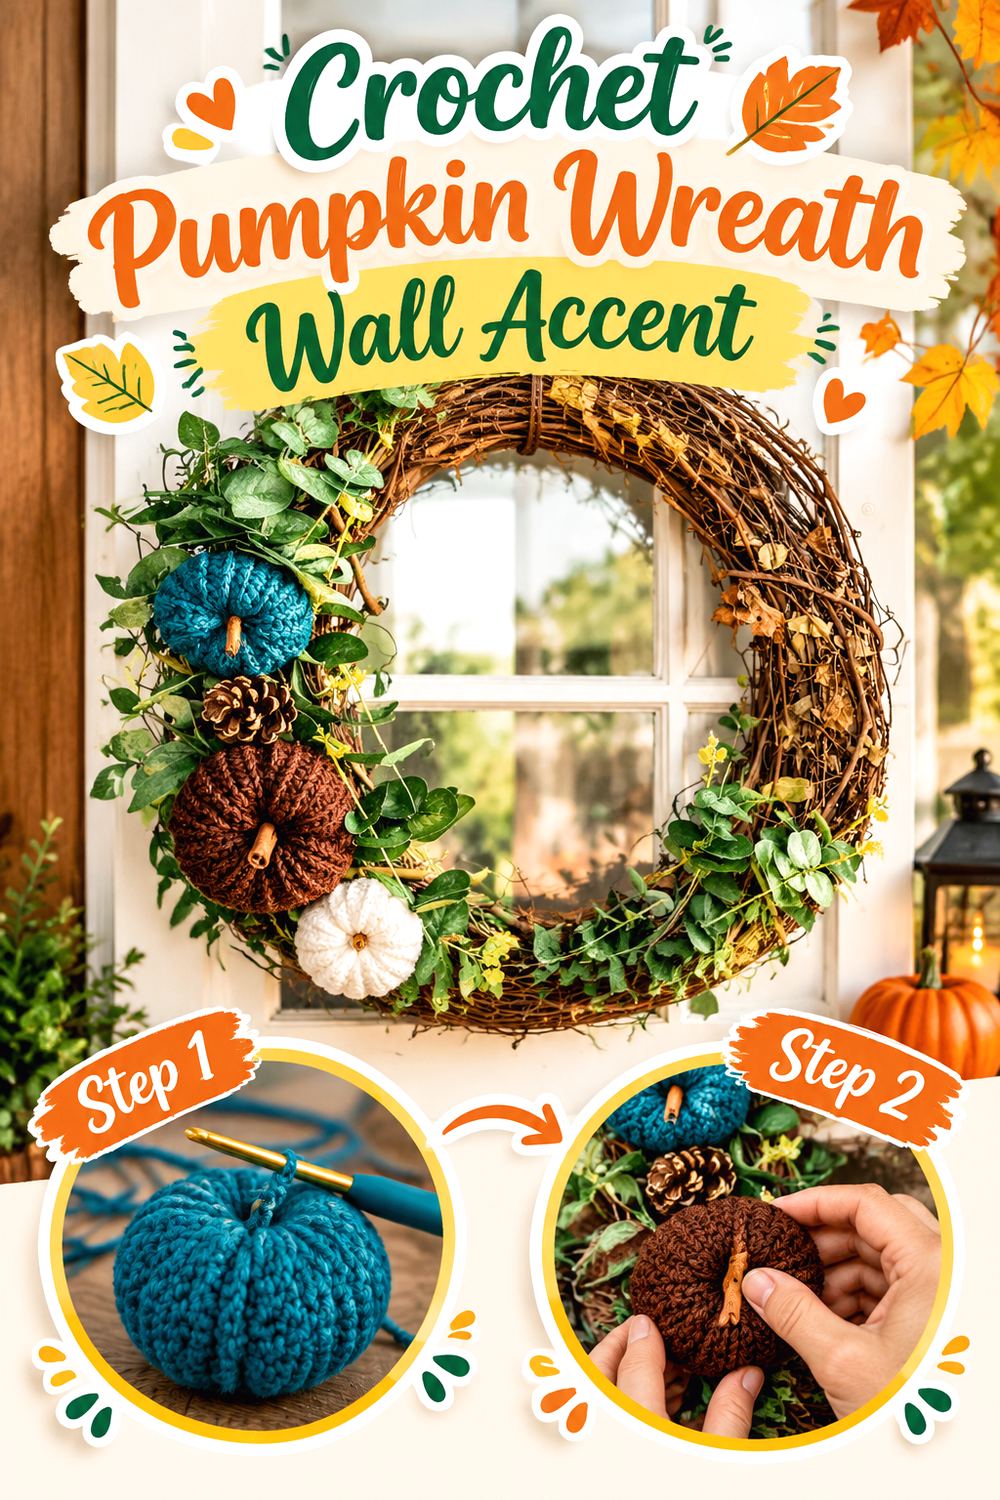
A pumpkin wreath gives the wall or door one strong circular focal point instead of a long line of motifs. MJ’s Off The Hook Designs presents a fall crochet wreath built around pumpkin styling and notes its suitability for Halloween as well as broader autumn decorating.
This makes it a practical seasonal bridge piece. It can go up early in fall, remain through Halloween, and still work after ghost and spider decor comes down.
Make the Wreath Work With the Door or Wall
Measure the intended location before deciding how much surrounding decoration to add. A wreath that looks compact on a worktable can feel much larger when centered on a narrow door.
Also check clearance if the display is on an operating door rather than a fixed wall.
Protect Raised Pumpkins From Compression
Dimensional decorations need more storage depth than flat panels. Avoid stacking heavy seasonal items directly on top of the finished wreath.
If any components are removable according to the design, storing them separately can reduce crushing, but follow the creator’s assembly method before changing how structural pieces are attached.
Original Tutorial and Creator Credit
Creator: MJ’s Off The Hook Designs
23. Crochet Layered Halloween Motif Wall Hanging
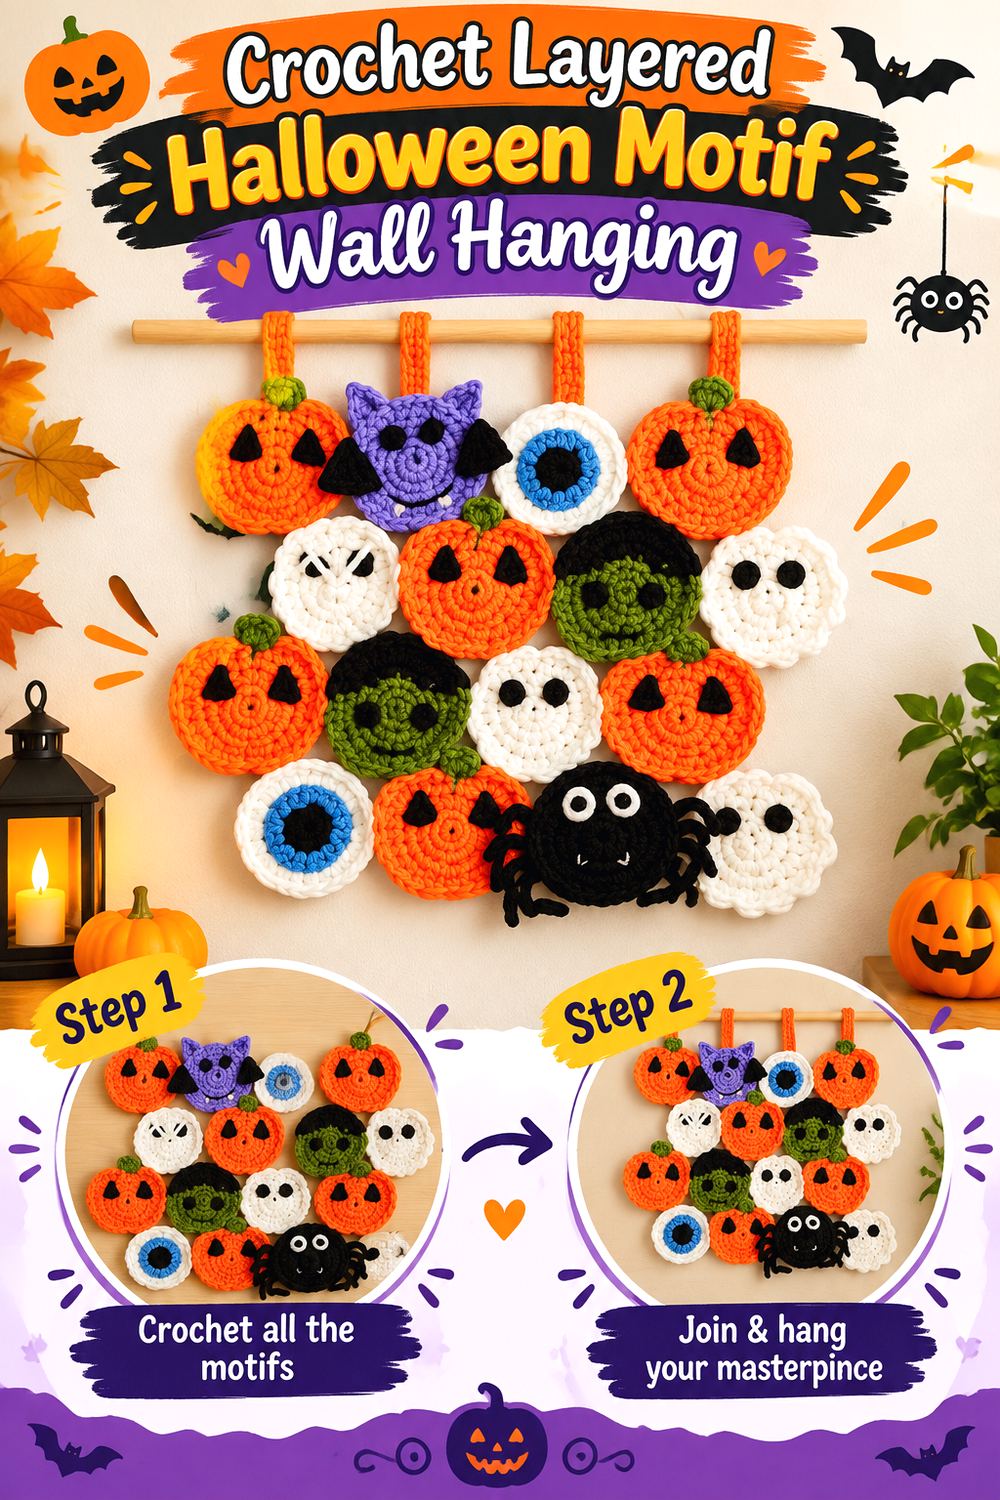
HookStitchSew’s wall hanging is one of the most collage-like projects in the collection. The finished display combines multiple crocheted Halloween elements—including pumpkins, ghosts, eyeballs, Frankenstein’s monster, a spider, bat, and mummy—into one broad decorative composition mounted from a dowel.
This is ideal when you want one wall piece to replace several separate decorations. Unlike a linear garland, the motifs occupy multiple levels and join into a larger visual field, giving the hanging a more substantial presence.
Lay Out the Full Grid Before Joining
With many motifs, assembly order matters as much as the individual pieces. Arrange everything on the floor or a large table at approximately the final dimensions before sewing connections.
Check visual weight from a distance. Several dark or wide motifs clustered together can make one side feel heavier even if the physical weight is similar.
Reinforce the Top Edge and Dowel Connection
A broad hanging distributes more weight than one small tapestry. Follow the source’s loop and dowel arrangement closely and inspect the top attachments after the entire motif field is joined.
If you enlarge the design by adding pieces, reassess the support rather than assuming the original mounting arrangement automatically suits the extra weight.
Plan Storage Before Making the Hanging Larger
The source notes that the layout can be expanded. Bigger is not always more practical for seasonal decor.
Before adding another row of motifs, consider whether the finished piece can be stored without folding dimensional spiders, faces, or other details into awkward positions.
Original Tutorial and Creator Credit
Creator/Site: HookStitchSew
24. Crochet Skull Portrait Wall Hanging
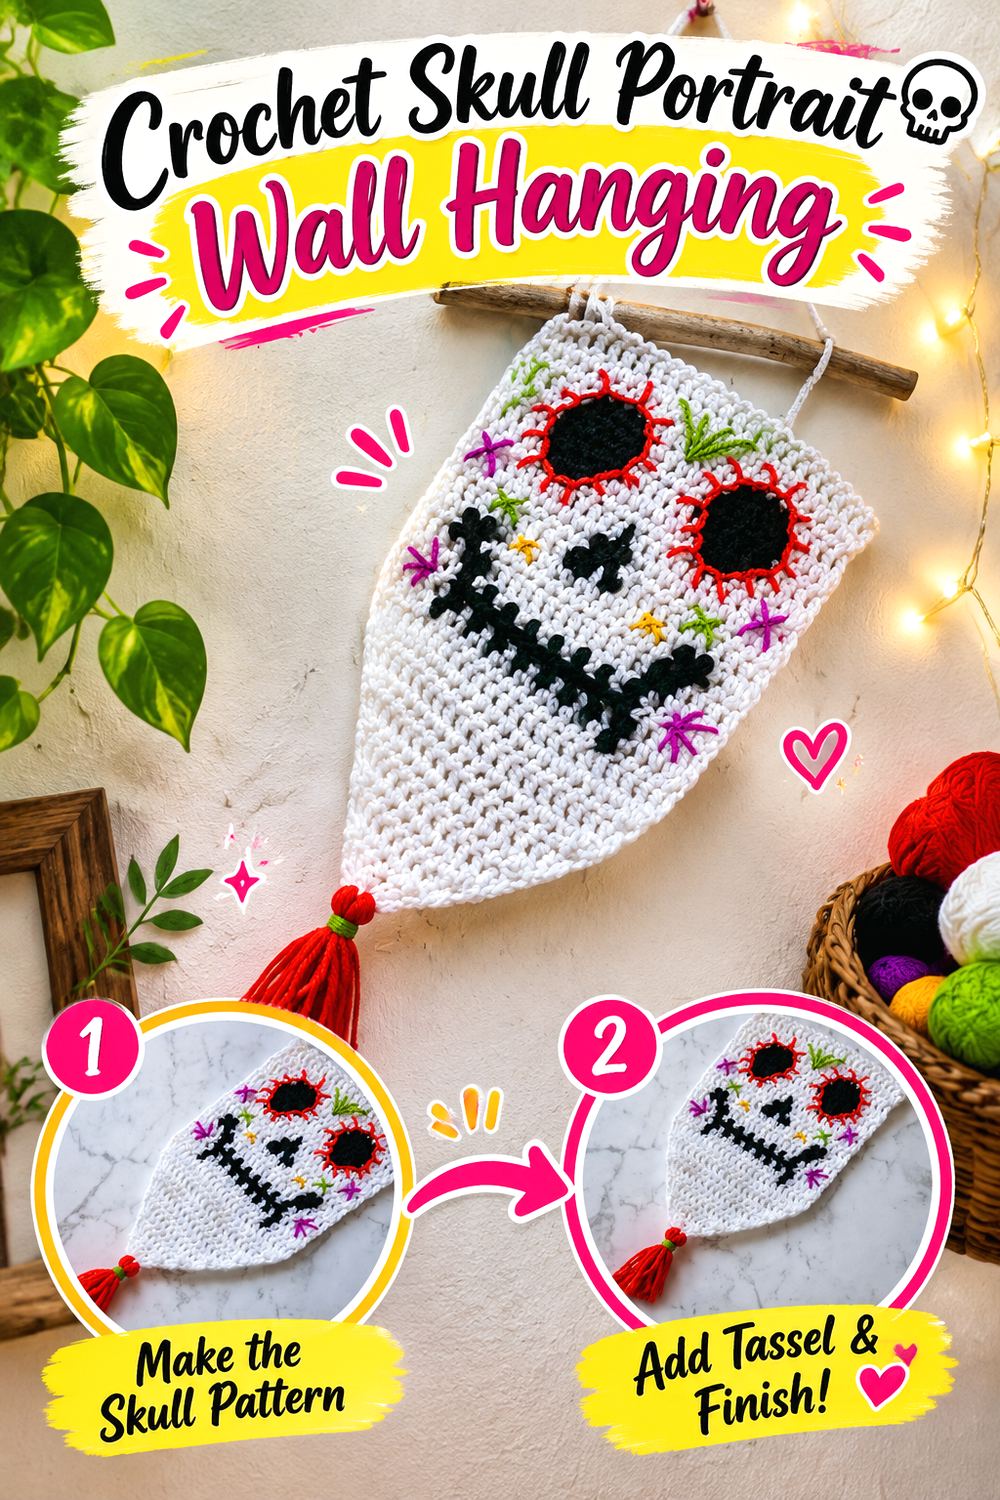
A skull portrait closes the collection with a character-focused panel rather than a repeating garland or abstract web. Molly’s tutorial is part of a Halloween monster wall-hanging series and presents the skull as a pennant-style display mounted from a rod. The linked source is explicitly Part 1, so makers should locate the continuation before beginning the full project.
The portrait approach works particularly well for classic-horror or Día-de-los-Muertos-inspired color palettes, depending on how the creator’s design is interpreted and how you choose your non-structural colors. Give it its own area rather than surrounding the face with several equally detailed portraits.
Save the Full Multi-Part Tutorial Sequence
A video labeled Part 1 should not be treated as the entire construction. Locate the creator’s continuation before committing to finishing, mounting, or embellishment decisions.
Watching the full sequence first also helps identify where major facial details and structural choices enter the project.
Step Back to Judge the Skull Expression
Faces and skulls are sensitive to small placement differences. Periodically hang or hold the work upright and view it from the distance where it will normally be seen.
Features that seem balanced while the crochet is inches from your eyes may read differently once the whole silhouette is visible.
Give the Portrait Its Own Visual Territory
Detailed faces compete strongly with neighboring artwork. Pairing the skull with simpler shapes—a web, bat, or pumpkin—usually gives the portrait a clearer role than placing several face-heavy pieces immediately beside it.
Use surrounding empty wall as part of the composition rather than filling every gap.
Original Tutorial and Creator Credit
Creator: Molly
Which Crochet Halloween Wall Hanging Should You Choose?
For a single focal point, start with the pumpkin ring, haunted house, black cat, coffin, skull portrait, or pumpkin wreath. The pumpkin and wreath transition most naturally into general fall decorating, while the coffin and skull lean more gothic.
Choose the BOO banner, hanging ghost, or bat tapestry when wall width is limited. The corner spiderweb is even more space-specific because it turns an otherwise awkward nook into part of the design.
Garlands and bunting work best when you need horizontal coverage. Open spiderwebs feel visually light; chunky ghosts and three-dimensional pumpkins create more weight and depth. Character garlands offer the most storytelling, while abstract pennants and bobble strands suit rooms where literal Halloween faces would feel too busy.
The large HookStitchSew motif hanging is the strongest choice when you want many Halloween symbols consolidated into one substantial statement piece.
Conclusion
These 24 crochet Halloween wall hanging ideas range from compact bat and haunted-house tapestries to dimensional ghosts, gothic coffins, round pumpkin pieces, open spiderwebs, wreaths, pennants, and wide motif garlands. The most useful starting point is the wall itself: decide whether the space needs height, width, an isolated focal shape, or a lightweight accent before choosing the motif.
Then consider how much structure the project requires. Flat panels are generally easier to keep visually contained, while stuffed shapes, magnets, rings, mixed-media components, and large motif arrangements need more attention to mounting and storage.
Once you have chosen the format that suits your space, use the original tutorials linked with each project for exact materials, construction, finishing, and assembly details.
Frequently Asked Questions
What is the best type of crochet Halloween wall hanging for a small space?
A narrow vertical banner, small tapestry panel, individual ghost, coffin, or single hanging bat usually uses wall space more efficiently than a long garland. Corner spiderwebs can also work well because they occupy an area that often goes unused. Measure the complete display footprint, including fringe, cords, rods, or wings, rather than comparing only the crocheted body. A compact project can still require surprising clearance once its hanging system is included.
How can I stop a crochet wall panel from hanging crooked?
First determine whether the fabric itself is distorted or the problem comes from the mounting system. Check the side edges, top edge, and overall tension before attaching a dowel. If the pattern and fiber are suitable for blocking, follow appropriate creator and yarn-care guidance. Then center the panel on its support and distribute the hanging weight evenly. Pulling harder on one side may temporarily straighten the display but can introduce new distortion.
Can I use a different yarn weight for Halloween wall decor?
Often, but expect changes in finished size, thickness, weight, stitch definition, and drape. Those changes matter most when the tutorial relies on a fixed ring, dowel, frame, magnet system, closely fitted motif layout, or detailed colorwork. Make a sample whenever practical and compare it with the intended display area before committing. For repeated garlands, test more than one motif because different shapes may respond differently to the same yarn substitution.
Do crochet spiderwebs need to be blocked?
Not automatically. Openwork webs often benefit from careful shaping because their geometry depends on distinct spokes and spaces, but the correct method depends on the yarn fiber and the creator’s finishing guidance. Some webs may display well with ordinary hanging tension. Avoid aggressive stretching simply to fill a larger area; excessive pull can change the intended proportions. If blocking is appropriate, shape the web consistently and let it settle completely before judging final placement.
How should I hang crochet garlands without making the center sag too much?
First remember that some drape is part of a garland’s appearance. Three-dimensional pumpkins, chunky ghosts, or densely embellished motifs will naturally create more central drop than lightweight appliqués. Test the strand after several motifs are attached rather than waiting until the end. For a long or heavy garland, an additional support point may distribute the load better than pulling the two ends extremely tight. Always choose hooks or hardware appropriate to the actual finished weight.
Can crochet Halloween wall hangings be used outdoors?
Do not assume ordinary crochet decor is weather-resistant. Yarn fiber, stuffing, metal rings, dowels, magnets, wire, adhesives, buttons, and other embellishments can all respond differently to moisture, sunlight, wind, and temperature changes. Unless the creator and material manufacturers specifically address outdoor exposure, an indoor or well-protected location is the safer assumption. Even a covered porch can expose a project to dampness and wind, so check both the materials and attachment method first.
How should I store Halloween crochet wall decor after the season?
Storage depends on structure. Flat panels can often be stored with less bulk, provided their rods or supports do not force awkward folds. Garlands should be loosely coiled so motifs and strands do not tangle. Dimensional ghosts, pumpkins, wreaths, wired bats, and structured coffins need enough room to avoid crushing. Open spiderwebs should not be packed beneath heavy objects. Clean only according to the yarn label and creator guidance, especially when a project includes mixed materials or attached embellishments.