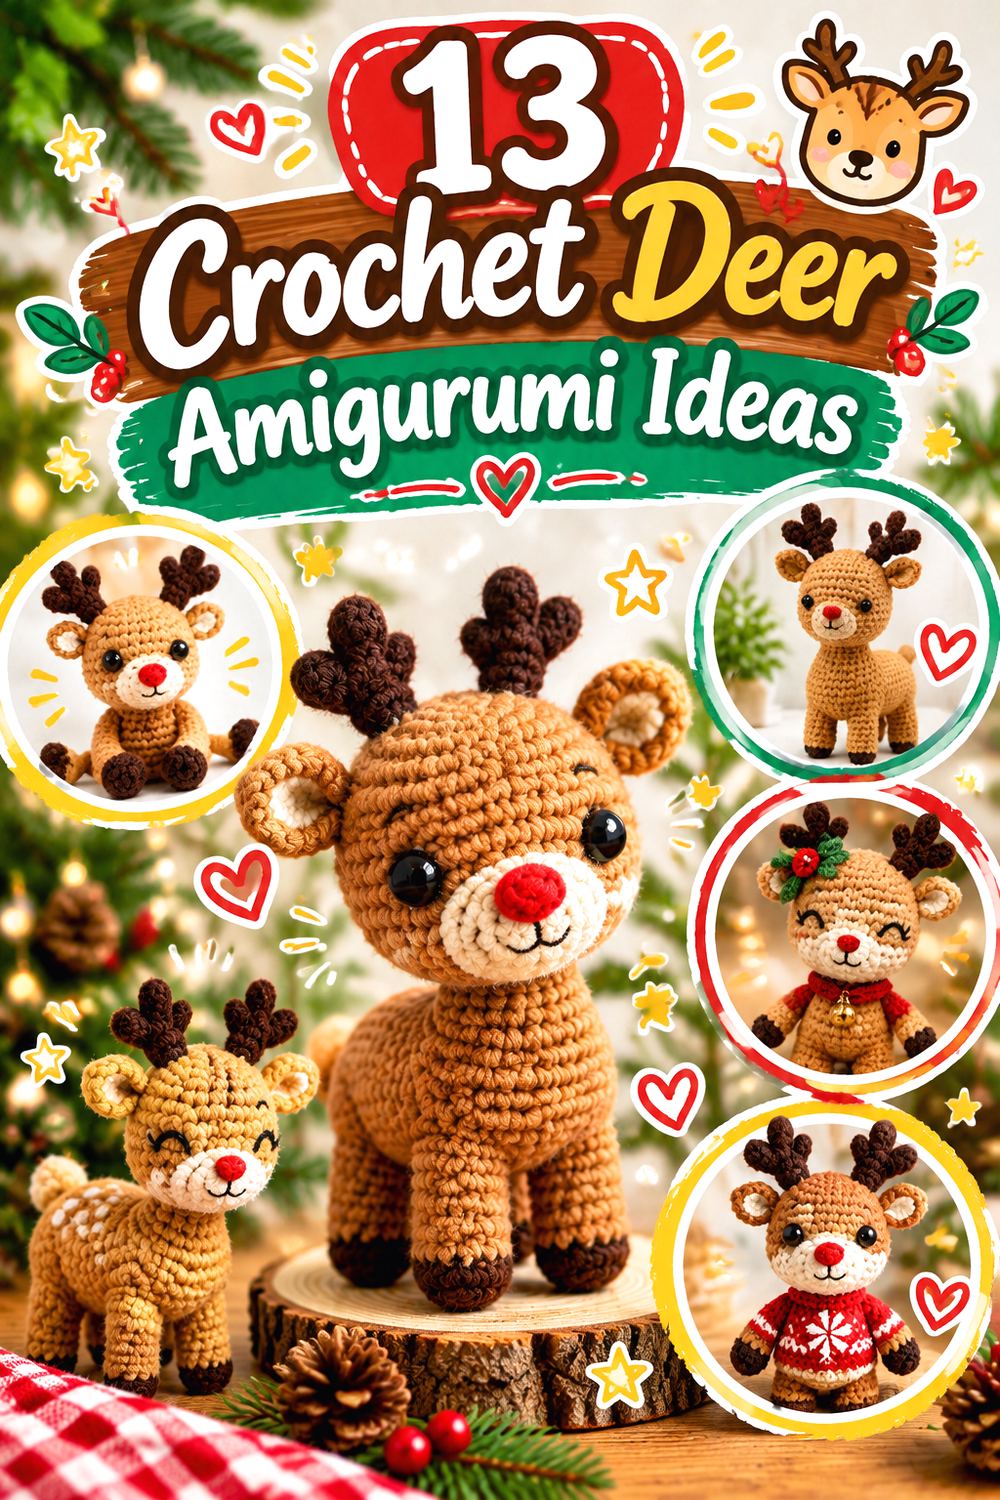
13 Crochet Deer Amigurumi Ideas
Crochet deer amigurumi can take surprisingly different forms. Some designs are tall upright dolls with long limbs, while others use a four-legged fawn silhouette that feels closer to a woodland animal. Holiday versions add antlers, red noses, scarves, hats, or textured trim, and compact designs can work well when you want an ornament-scale or palm-size project.
This collection focuses on those structural differences rather than treating every brown reindeer as a separate idea. You’ll find large display pieces, tiny minis, a floral-crown fawn, low-sew construction, chunky plush yarn, a buck-and-doe pair, and more naturalistic deer proportions. Each project also links back to its original creator so you can check materials, assembly, sizing, and exact construction before making substitutions.
Quick List
- Crochet Floral-Crown Fawn Amigurumi
- Crochet Tall Woodland Deer Amigurumi
- Crochet Tiny Spotted Fawn Amigurumi
- Crochet Bow-Accent Reindeer Amigurumi
- Crochet Pom-Pom Scarf Reindeer Amigurumi
- Crochet Beanie-and-Scarf Rudolf Amigurumi
- Crochet Mini Tree-Ornament Reindeer Amigurumi
- Crochet Large Textured Reindeer Amigurumi
- Crochet Chunky Low-Sew Reindeer Plush Amigurumi
- Crochet Buck-and-Doe Deer Doll Pair
- Crochet Pocket-Size Sitting Reindeer Amigurumi
- Crochet Naturalistic Four-Legged Deer Amigurumi
- Crochet Low-Sew Palm-Pet Reindeer Amigurumi
Choose the Deer Silhouette Before Choosing Your Yarn
The first decision is whether you want an upright character or an animal-shaped deer. Upright dolls usually give you more space for scarves, hats, clothing, facial details, and long limbs. Four-legged fawns put more emphasis on body proportion, leg placement, neck angle, spots, and the ability to sit or stand convincingly.
Scale matters too. A mini deer made with fine yarn can keep small antlers and ears looking proportionate, while the same details may need reconsideration after a major yarn-weight change. Plush yarn creates a softer, rounder silhouette but can obscure tiny shaping and make very narrow antlers harder to define.
When substituting yarn, don’t assume only the finished height will change. Fabric density, stuffing visibility, limb stiffness, facial definition, and the weight of the head relative to the neck can all change as well.
Plan Antlers, Facial Features, and Assembly Early
Deer expressions depend heavily on a small group of details: muzzle position, eye spacing, ears, antler symmetry, and the angle at which the head meets the body. Before permanently sewing separate pieces, pinning them temporarily can help you check the face from the front and side. Small errors that seem minor on an individual ear or antler can become obvious when the two sides are compared.
Recipient safety also affects finishing choices. Several featured tutorials use safety eyes, but plastic eyes and other small detachable components are not appropriate for every recipient. If the finished deer is intended for a baby or very young child, consider an embroidered alternative and evaluate every attached embellishment. Follow the individual creator’s guidance as well as the care information for the yarn and stuffing you actually use.
1. Crochet Floral Crown Fawn Amigurumi
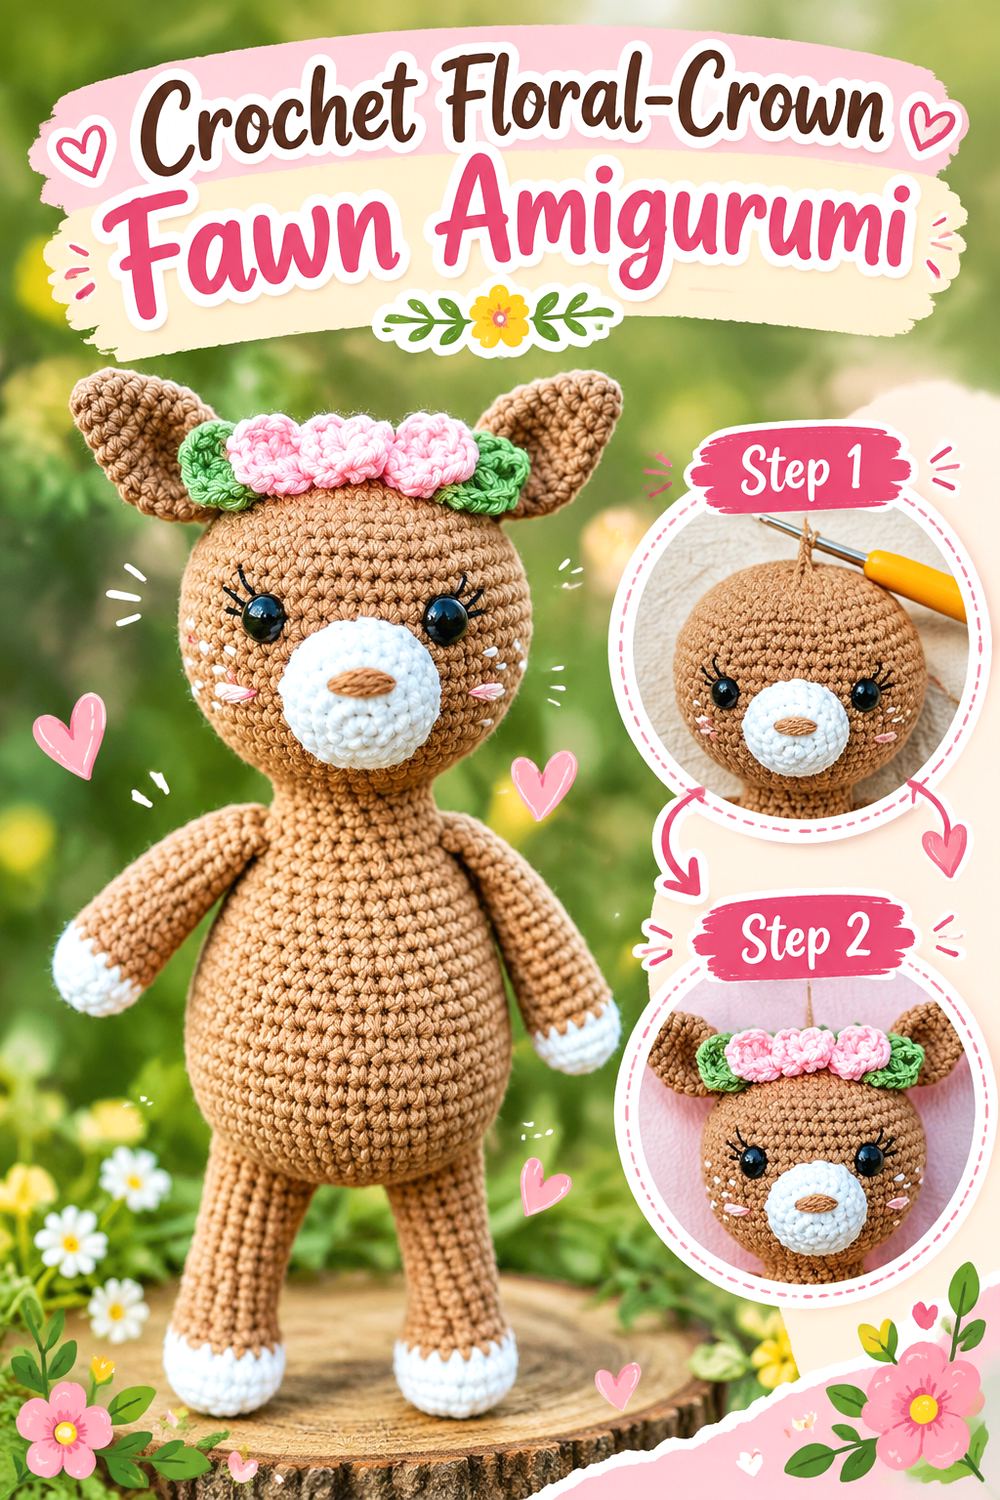
This tall fawn trades the usual Christmas-reindeer treatment for a softer woodland look. Grace and Yarn’s original deer has an upright body, long limbs, contrasting muzzle and feet, facial embroidery, and a small crocheted floral crown. The designer’s sample is about 14 inches tall, and the head and body are made as one continuous piece, with the limbs attached separately.
The flower detail gives this version a very different purpose from a Rudolph-style project. It can fit woodland nursery styling, spring displays, or nature-inspired gifting without depending on Christmas colors or accessories.
Let the Crown Stay in Proportion
The crown is an accent rather than the main silhouette. If you resize the deer with substantially thicker yarn, simply scaling every flower upward can make the head look crowded. Compare the finished flowers against the space between the ears before attaching them, and consider using a finer coordinating yarn for the embellishment if you want to preserve a delicate look.
Watch the Long-Limb Stuffing
Long crocheted legs can change shape when heavily packed. For a doll that is primarily displayed, aim for consistent shaping rather than trying to force as much stuffing as possible into every section. If you change yarn or fiber, check whether the fabric is stretching enough for stuffing to become visible before continuing with the remaining limbs.
Decide Whether the Fawn Is a Toy or Display Piece
The original uses safety eyes and decorative elements, so recipient and intended use matter. A shelf piece gives you more freedom with small decorative details. For a young child’s toy, review the eyes, crown components, embroidery, and all attachment points and choose safer alternatives where appropriate rather than assuming decorative construction is suitable for every age.
Original Tutorial and Creator Credit
Creator/Site: Grace and Yarn
2. Crochet Tall Woodland Deer Amigurumi
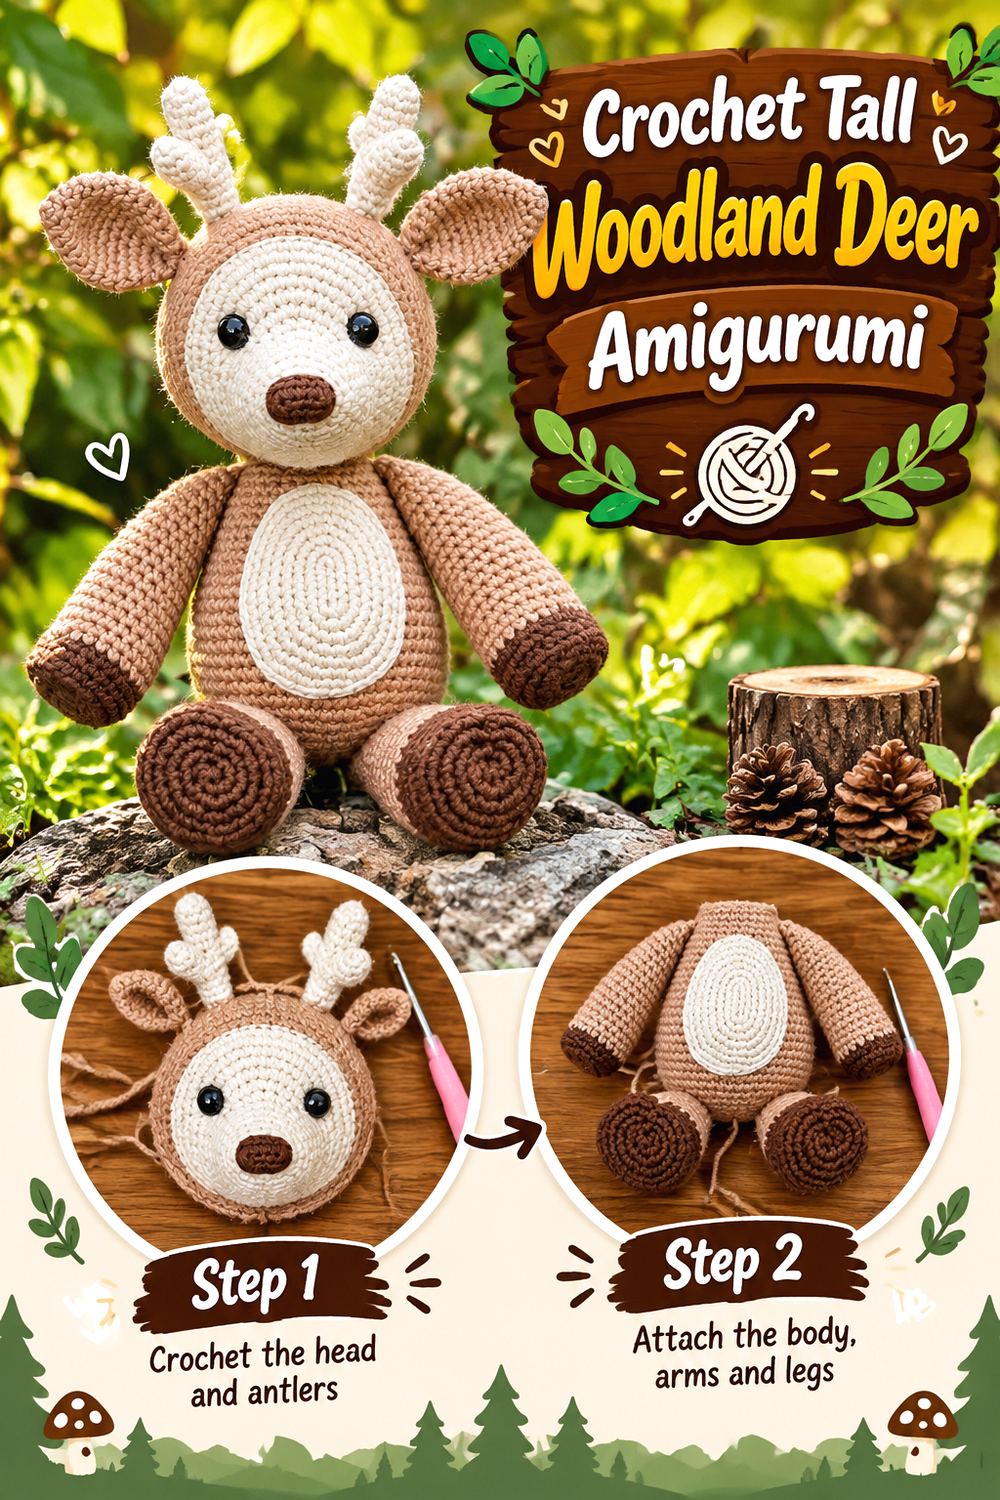
Jess Huff’s deer is a substantial woodland animal doll with much more anatomical detailing than a simple round-bodied reindeer. The original Dash design stands about 15 inches tall and includes a contrasting face area, belly, branched antlers, tail, long limbs, and details designed to suggest cloven hooves. The source classifies the project as intermediate-to-advanced and provides additional technique tutorials for several specialized finishing points.
Choose this style when the appeal is craftsmanship and deer-specific shaping rather than a compact holiday character. It can also be converted visually toward a red-nosed reindeer, but its underlying woodland proportions remain the main feature.
Treat the Antlers as a Focal Construction
Branched antlers attract the eye immediately, so uneven branches are more noticeable here than on a very small reindeer. Work the pair under similar tension, compare them before attachment, and check their angle after pinning. If one appears significantly denser or longer, correcting it before sewing will be less frustrating than trying to disguise the mismatch later.
Preserve the Face Border Cleanly
This design uses contrasting areas to define the deer face. Color boundaries therefore contribute to the finished expression, not just decoration. If you substitute a fuzzy yarn, consider whether its halo will soften those transitions too much. Smooth yarn generally displays small colorwork and surface definition more clearly than highly textured yarn.
Check Balance Before the Final Limb Placement
With a tall stuffed figure, small changes in leg angle can affect how naturally the body sits or stands. Position both legs together before completing the attachment of either one. View the deer from the side as well as the front; symmetrical placement from one viewpoint does not always guarantee balanced posture from another.
Original Tutorial and Creator Credit
Creator/Site: Jess Huff
3. Crochet Tiny Spotted Fawn Amigurumi
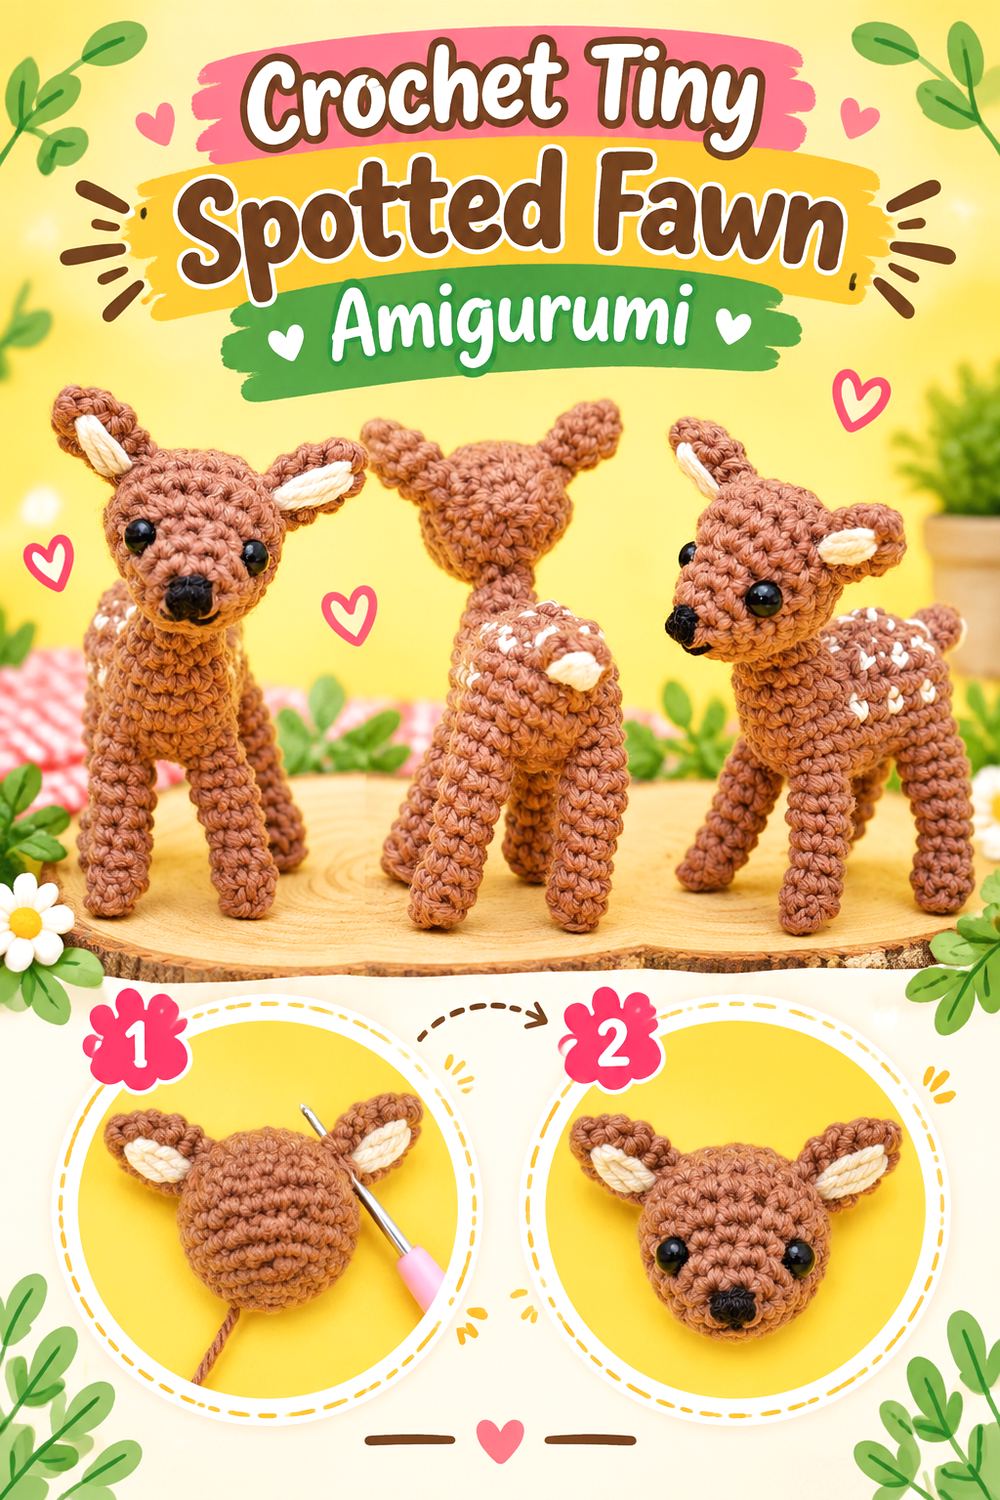
Stella’s Yarn Universe takes the deer shape in the opposite direction: this is a genuinely tiny four-legged fawn rather than an upright doll. Using the creator’s recommended materials, the finished animal is approximately 4 cm high at the back and 7 cm at the front. Its recognizable fawn look comes from the little legs, raised neck, large ears, tail, and contrasting back spots.
The designer also offers two approaches to the spots: they can be incorporated through color changes or added afterward with embroidery. That makes this a useful project for comparing how much fine-scale colorwork you actually want to manage.
Tiny Scale Magnifies Tension Changes
On a small fawn, a single loose area can affect proportion more visibly than it would on a large plush. Keep an eye on the diameter of matching legs and the density of the neck. If your tension changes when working tiny pieces, compare paired components as you go instead of discovering the difference during final assembly.
Choose Your Spot Technique Intentionally
Worked-in spots integrate the markings directly into the fabric, while embroidered spots let you finish the main body in one color first. Neither approach is universally better. Choose based on which technique gives you more control at this scale, and use the creator’s tutorial rather than improvising stitch placement from a finished photograph.
Position the Neck Before Committing
A four-legged fawn depends strongly on the relationship between torso, neck, and head. Pin the head in place and set the unfinished animal on a flat surface before making the attachment permanent. This lets you assess whether the head looks alert, level, or unintentionally tilted.
Original Tutorial and Creator Credit
Creator/Site: Stella’s Yarn Universe
4. Crochet Bow Accent Reindeer Amigurumi
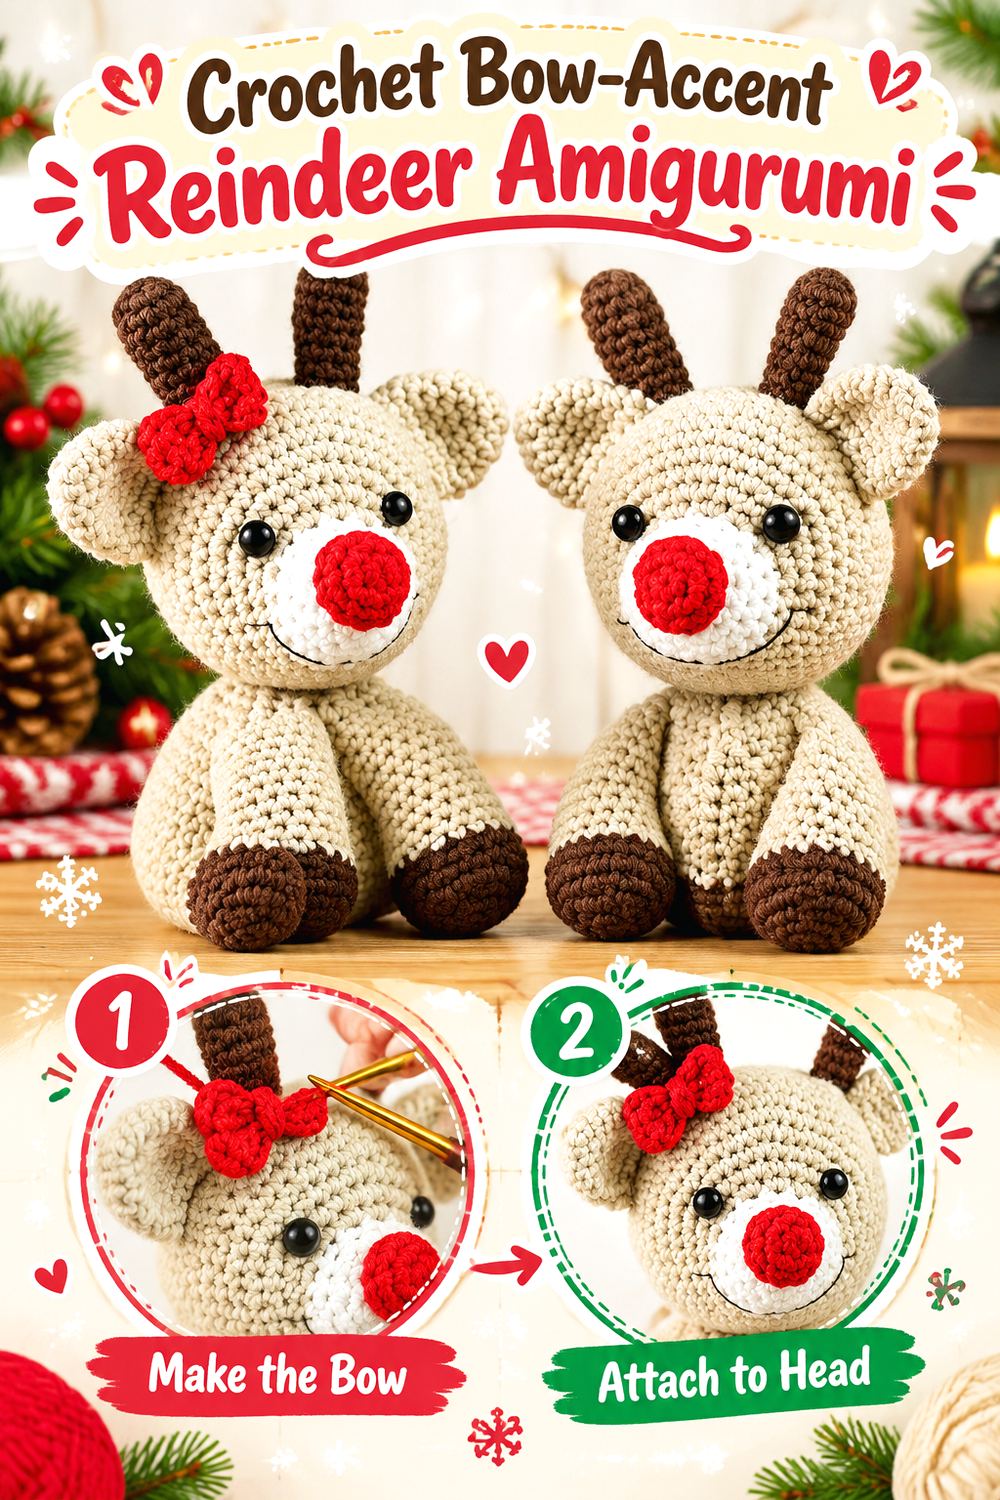
StringyDingDing’s reindeer has the proportions of a classic stuffed animal: a large rounded head, separate torso, elongated arms and legs, contrasting hooves, muzzle, antlers, and a prominent red nose. The designer also includes an optional crocheted bow, giving you an embellishment choice without changing the basic animal structure.
This is a good direction when you want an unmistakably festive reindeer but do not want clothing to dominate the design. Tan, white, dark brown, and red create the identity primarily through the face and extremities, while the optional bow can make a pair or group of reindeer look deliberately different.
Use the Hoof Contrast to Define the Limbs
The dark ends of the arms and legs help visually separate hoof from leg. When substituting colors, maintain enough value contrast for that boundary to remain visible. Two colors that look different in the skein can blend once crocheted into small sections, especially under low indoor light.
Pin the Muzzle Before the Nose
The red nose sits on a contrasting muzzle, so the muzzle establishes the face first. Center it in relation to both eyes before adding the nose. If the muzzle is noticeably off-center, an accurately attached nose will emphasize the problem rather than hide it.
Keep the Bow Removable When Versatility Matters
If you want the deer to work outside the holidays, consider how permanently you want to attach decorative accessories. A removable or loosely tied accessory can change the styling without altering the crocheted animal itself, provided it is intended for display or an appropriate recipient and does not create a safety issue.
Original Tutorial and Creator Credit
Creator/Site: StringyDingDing
5. Crochet Pom Pom Scarf Reindeer Amigurumi
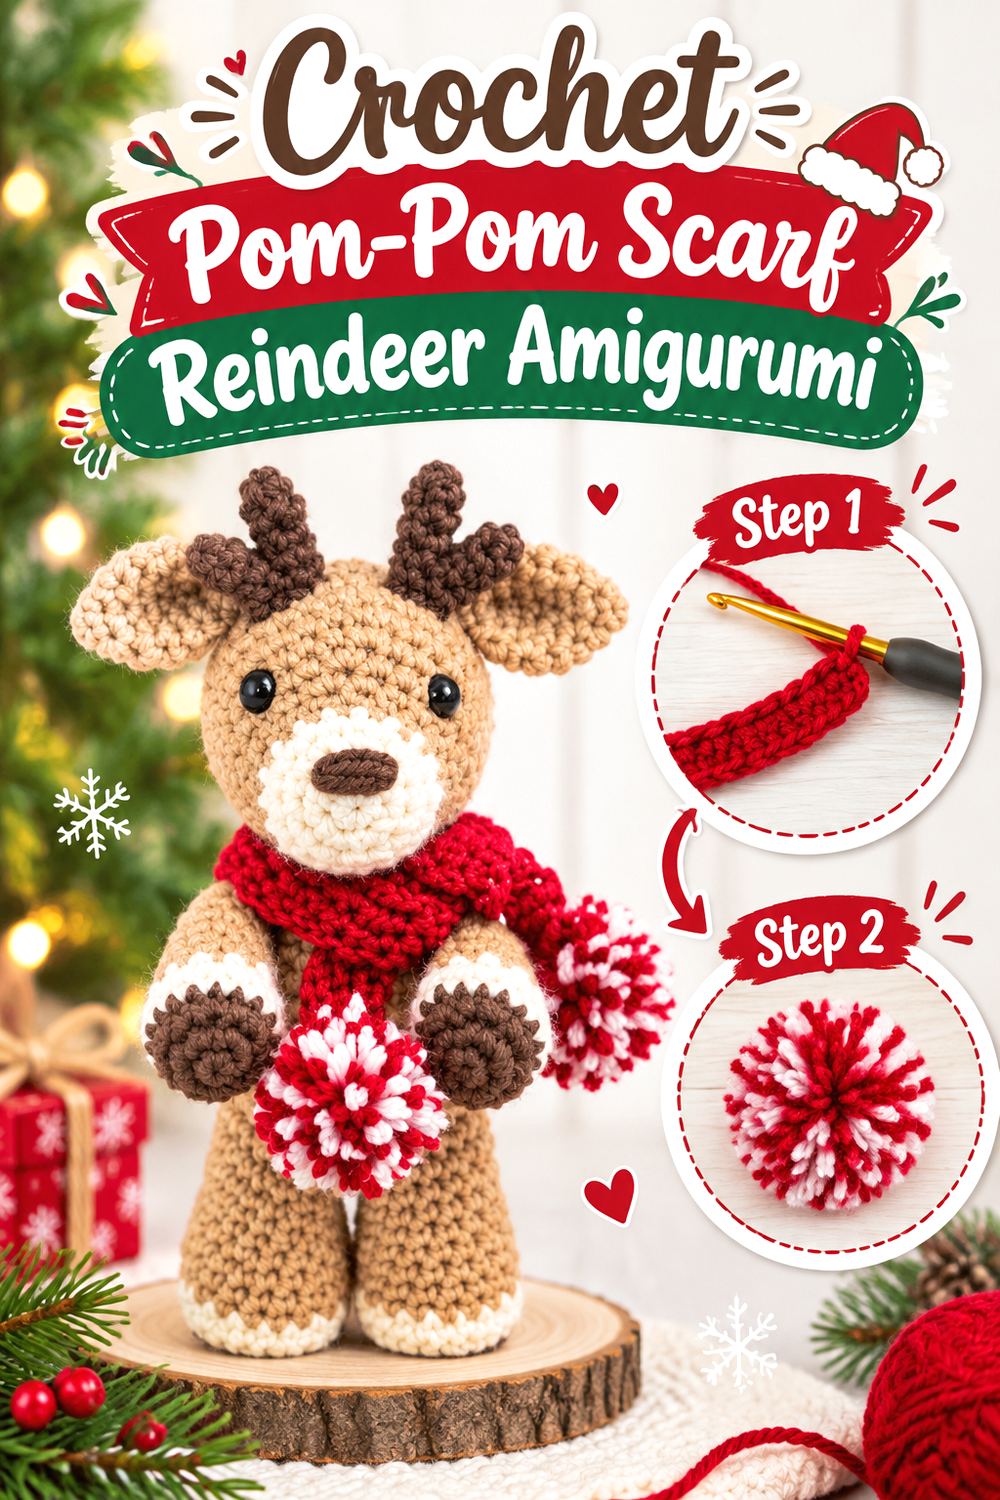
Randall the Reindeer by The Nicole Chase is compact enough for a manageable stuffed figure while still giving the limbs, muzzle, ears, and antlers enough space to read clearly. The source lists the finished deer at approximately 5.5 inches tall when sitting or 7.5 inches when standing. An optional scarf is finished with contrasting pom-poms, creating a stronger winter accessory than a plain neck wrap.
This design suits readers who like a traditional reindeer shape but want the accessory to contribute significant personality. The scarf can also become the primary color-customization area while the animal stays neutral.
Decide on the Display Position First
A figure that may be shown sitting or standing should be assembled with that final pose in mind. Before securing the legs, hold or pin them where the deer will normally rest. If your yarn substitution changes the firmness of the limbs, the pose may behave differently from the designer’s sample.
Treat Pom-Poms as Optional Hardware
Pom-poms add texture and movement, but they are another attached component. They make sense on a decorative winter reindeer or an age-appropriate gift; they may be unnecessary when you want fewer pieces to maintain. If you omit them, compare the scarf length and ends visually before finishing so it still looks deliberate.
Avoid an Oversized Scarf After Yarn Substitution
If you change the deer’s yarn but make the accessory from a different weight, the scarf can become disproportionately bulky. Place a short test section around the neck before committing to the whole accessory. The goal is to retain a visible neck and face rather than burying the lower head in fabric.
Original Tutorial and Creator Credit
Creator/Site: The Nicole Chase
6. Crochet Beanie and Scarf Rudolf Amigurumi
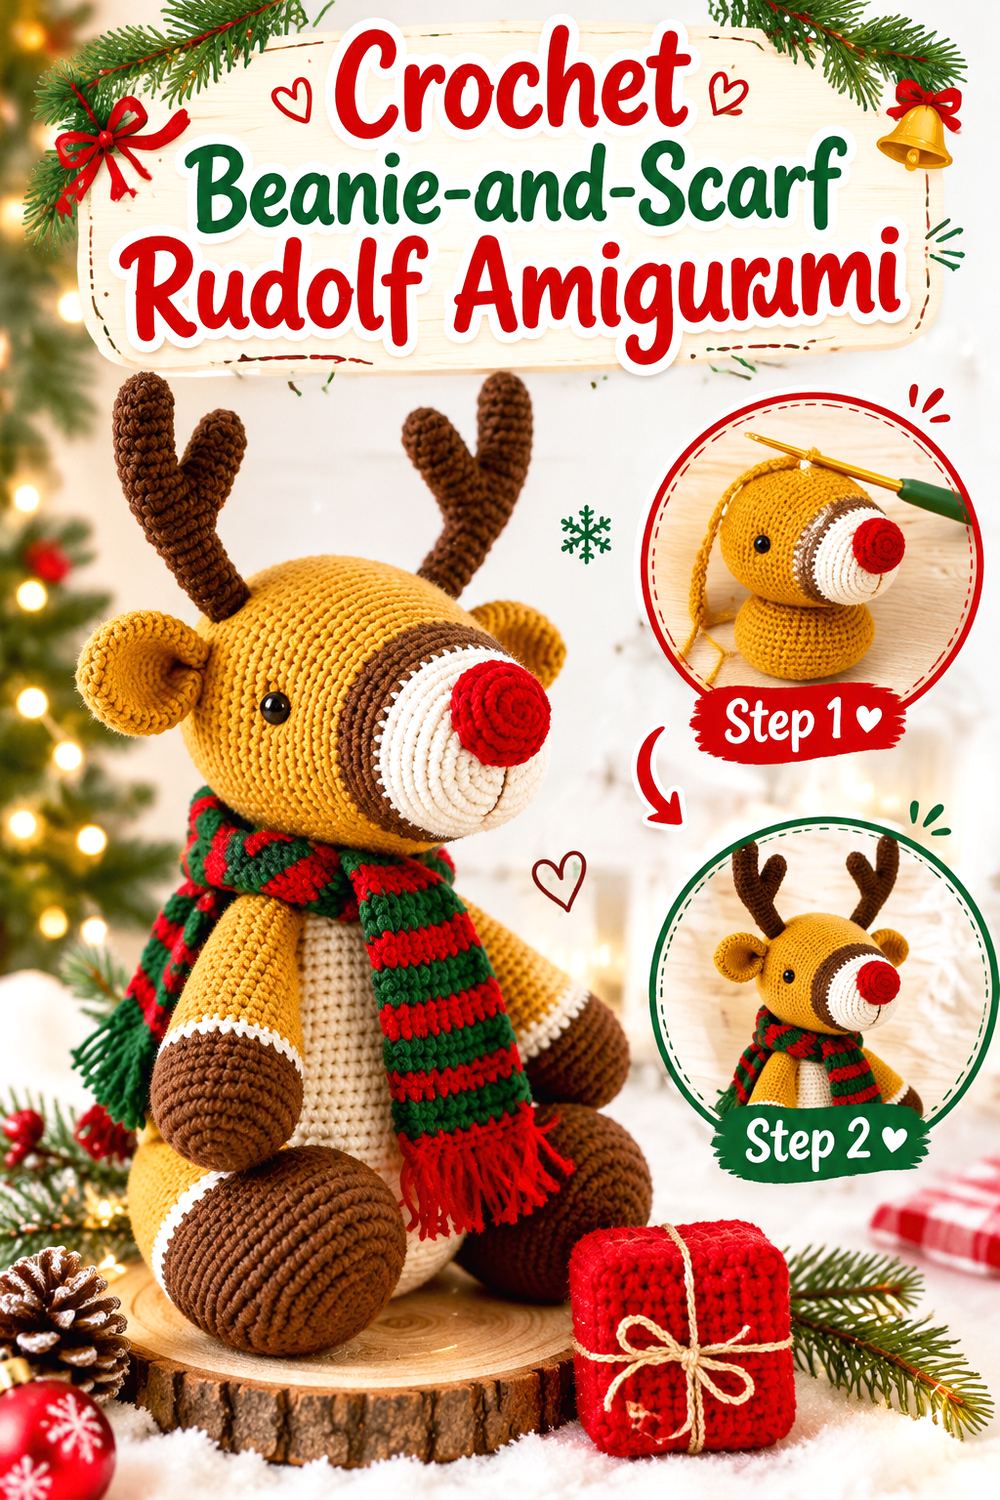
Craft Passion’s Rudolf pushes the Christmas styling further by combining the red-nosed reindeer with crocheted winter accessories. The project is constructed from separate body, head, antlers, ears, nose, arms, legs, and tail, and the creator also includes a striped scarf and beanie. Decorative markings are added to the back of the body during finishing.
Because the animal and accessories are distinct components, this option offers more styling decisions than a one-piece mini. You can think about how the hat interacts with the antlers, whether the scarf should contrast strongly with the body, and how much holiday color you want.
Test the Beanie Against the Antlers
Antlers already occupy valuable space on the top of a reindeer head. A hat that shifts their apparent angle can change the silhouette. Complete or mock up the main head pieces before deciding how you want the beanie to sit, particularly if you are using a yarn that produces a thicker fabric than the original.
Keep Back Markings Visually Consistent
Small embroidered or stitched markings look most intentional when their spacing and size relate to one another. Rather than judging each mark in isolation, step back after adding a few and evaluate the whole back. Stop before the surface becomes so busy that the markings compete with the face and accessories.
Separate Seasonal Styling From Core Construction
The underlying amigurumi is still a reindeer even without every accessory. If you want a design that remains useful beyond Christmas, use more neutral accessory colors or treat the scarf and hat as removable display pieces. Any removable small accessory, however, should be considered carefully when the deer is intended as a child’s toy.
Original Tutorial and Creator Credit
Creator/Site: Craft Passion — Joanne Loh
7. Crochet Mini Tree Ornament Reindeer Amigurumi
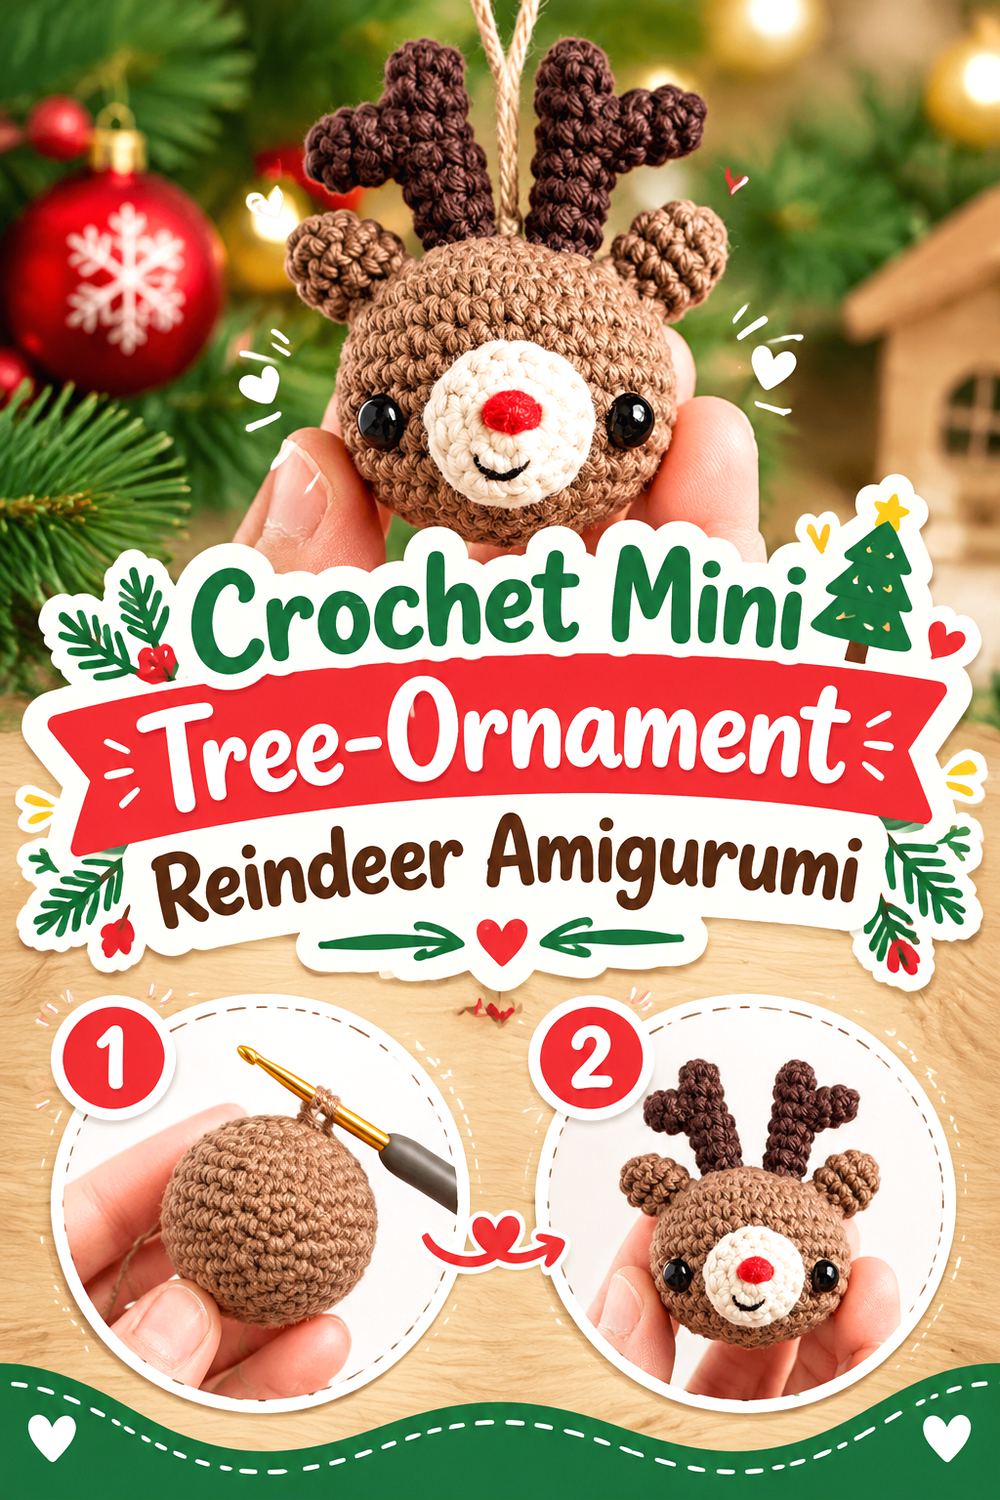
A Menagerie of Stitches offers a miniature reindeer developed as part of a Christmas amigurumi collection. The creator specifically suggests it as either an ornament or an advent-calendar addition and uses super-fine yarn with a small hook for the sample. A step-by-step video accompanies the project.
The scale is the main reason this deserves its own place in the list. Rather than shrinking a larger doll and hoping the details remain practical, you are starting with a project already conceived as a mini. That makes it suited to a tree, small seasonal display, gift topper, or a coordinated group of tiny Christmas characters.
Keep a Hanging Loop Secondary
If you turn the deer into an ornament, the hanging loop should support the finished piece without visually taking over the antlers. Check the balance point before fastening it permanently. A loop positioned too far forward or backward can make a stuffed ornament hang at an awkward angle.
Reconsider Tiny Parts for Young Recipients
Ornament-scale amigurumi naturally uses small components. That is fine for decorative use, but a miniature intended for a young child’s play area needs a different safety assessment. Eyes, embellishments, hanging loops, and other attached details should all be evaluated for the actual recipient rather than assumed safe because they are crocheted.
Original Tutorial and Creator Credit
Creator/Site: A Menagerie of Stitches — Lauren Espy
8. Crochet Large Textured Reindeer Amigurumi
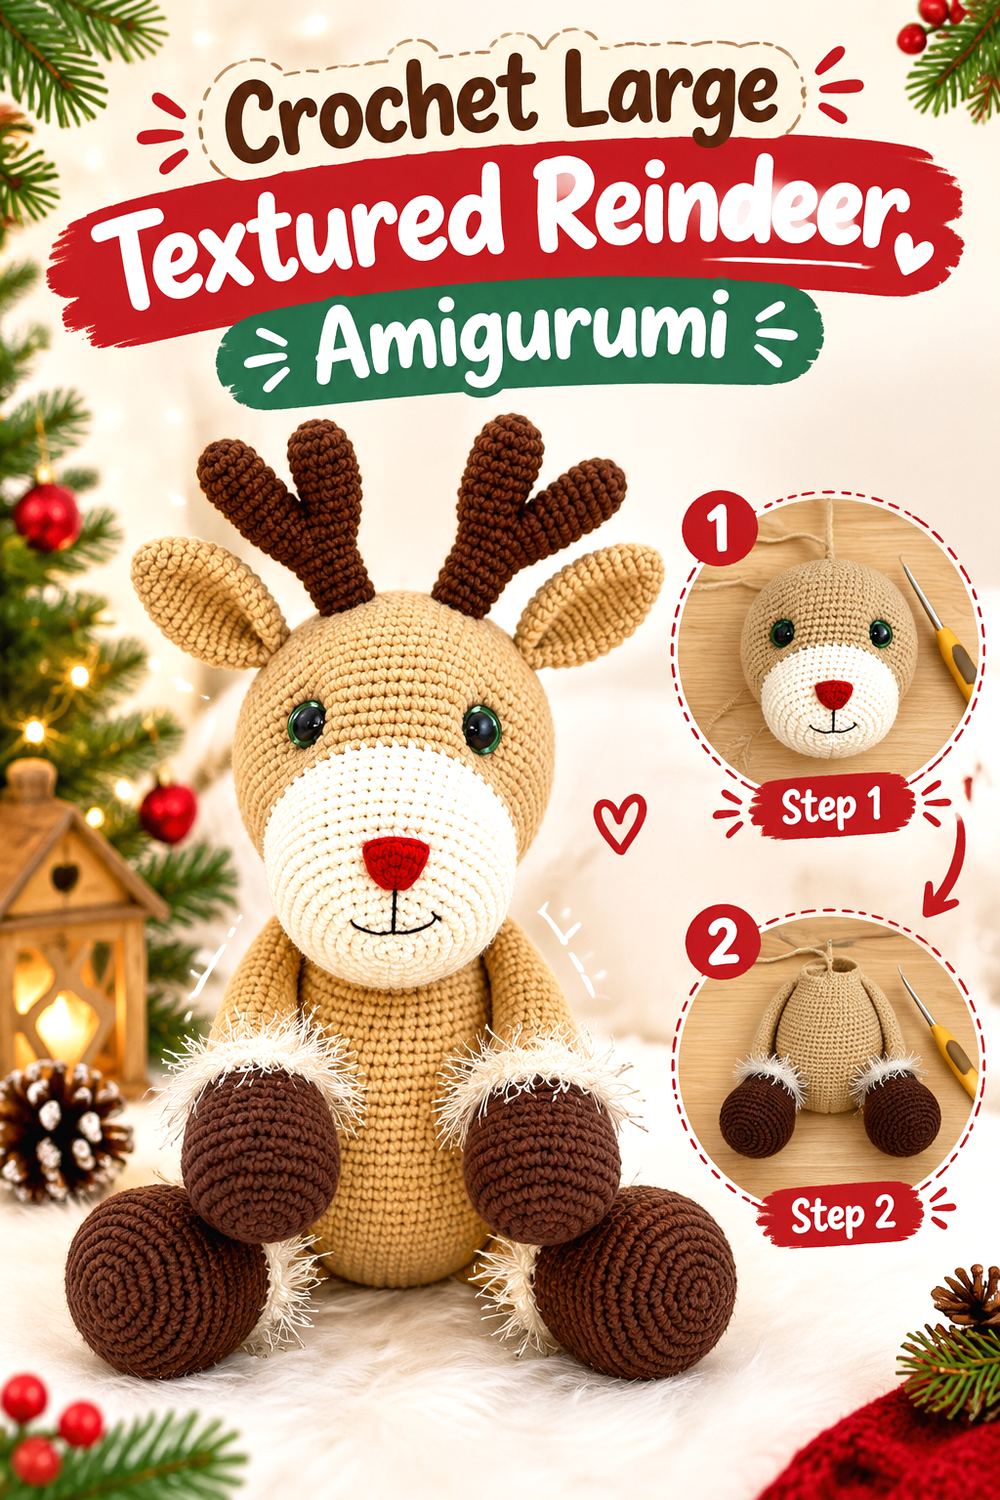
Cuddly Stitches Craft’s Rudolf is one of the larger projects here. The creator gives a finished measurement of about 25.5 cm when seated and 34.5 cm from the antler tips to the toes. The design also introduces a distinctive texture change: cream eyelash-style yarn creates hairy bands around the limbs.
That textural contrast makes the reindeer feel more elaborate than a smooth single-yarn doll. It is well suited to a larger seasonal display where details can be seen from across a room, but the increased scale also makes consistent stuffing, secure head attachment, and symmetrical antlers more important.
Sample the Fuzzy Yarn Before Committing
Eyelash and novelty yarn can hide stitch tops and make corrections harder. If you have not worked with the chosen fuzzy fiber before, make a small sample so you know whether you can identify stitches reliably. A texture that looks appealing may still be frustrating if it obscures the structure you need to work into.
Support the Neck With Even Stuffing
A larger head and antlers create more visual and physical weight above the body. Uneven stuffing around the neck can encourage a tilt or visible dent. Add stuffing gradually while checking the head angle from multiple sides instead of trying to correct the posture only after closing and sewing.
Use the Seated Pose as an Assembly Check
Before finalizing the legs and tail, place the partially assembled reindeer on a flat surface. The designer provides a seated finished measurement, making that pose an important part of the intended form. Testing it during assembly can reveal a low tail, uneven leg position, or body lean while corrections are still accessible.
Original Tutorial and Creator Credit
Creator/Site: Cuddly Stitches Craft — Petra Salisbury
9. Crochet Chunky Low Sew Reindeer Plush Amigurumi
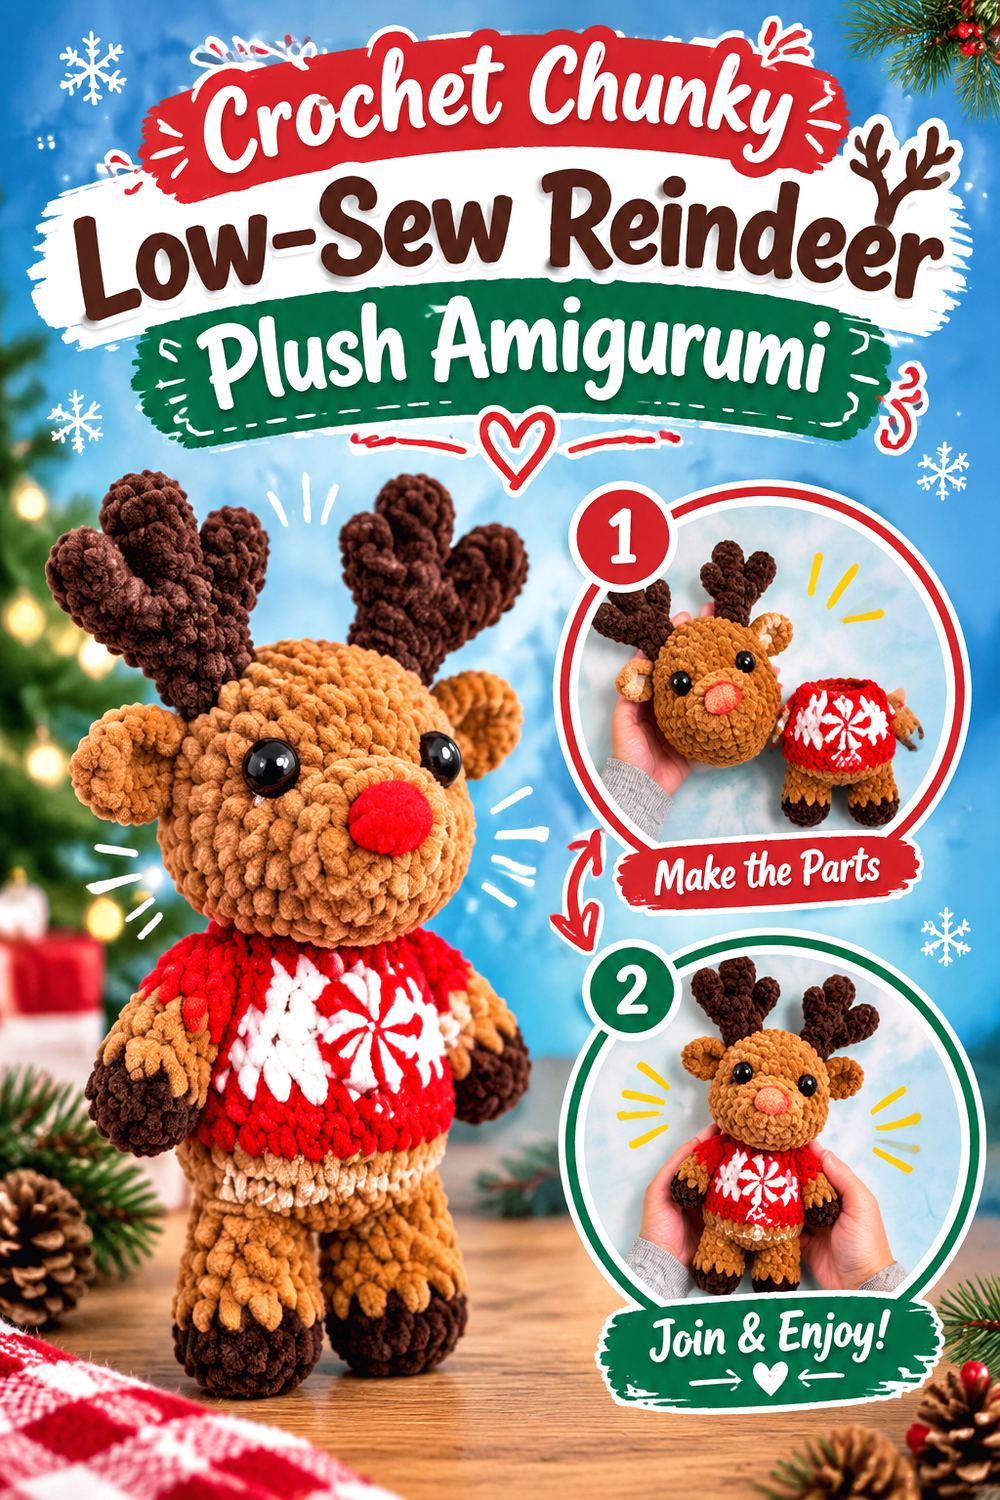
Wonder Crochet shifts the texture dramatically with a reindeer made in super-bulky chenille-style yarn. The designer’s version uses Premier Parfait Chunky for a soft plush appearance and incorporates a no-sew method for attaching most body parts, although some finishing and assembly are still required. A full video tutorial is also available on the page.
Compared with the finer cotton-style deer in this list, this design emphasizes squishiness and bold shapes rather than tiny stitch definition. The larger yarn also makes the red, green, white, and brown color areas visually substantial enough for a strong Christmas-plush look.
Expect Chenille to Soften Small Details
Chunky plush yarn tends to round off narrow shapes and hide individual stitches. That can be attractive on a body and muzzle but less forgiving on tiny antler branches. Follow the source’s proportions first before deciding to simplify or enlarge individual details, because changing only one component can throw off the head silhouette.
Low-Sew Does Not Mean No Alignment Checks
Crocheting limbs directly into a body reduces later stitching, but placement still matters. Once an integrated part is several rounds behind you, repositioning it may require substantial unraveling. Check front/back orientation and compare both sides immediately before joining each piece.
Consider the Finished Plush Weight
Super-bulky yarn plus stuffing can create a noticeably heavier object than a fine-yarn mini. If you scale it further, make sure the neck, attachment areas, and intended display surface suit that extra weight. A soft plush body should still hold the head without being overpacked to the point that stitches spread apart.
Original Tutorial and Creator Credit
Creator/Site: Wonder Crochet
10. Crochet Buck and Doe Deer Doll Pair
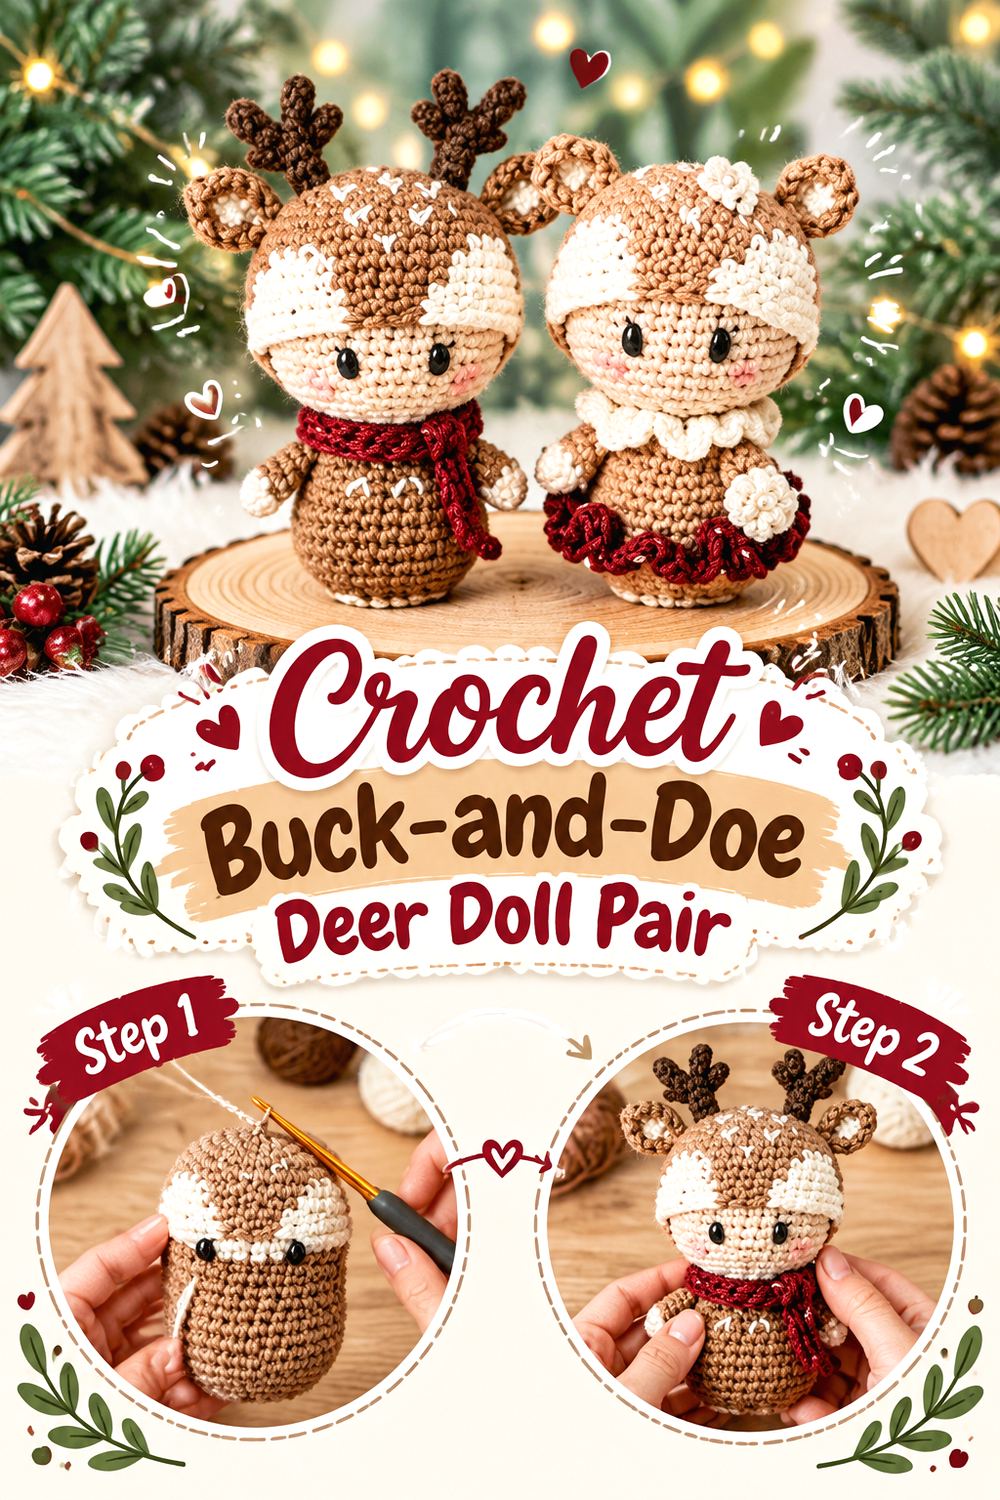
Briana K Designs provides two related deer versions—a buck and a doe—rather than treating one finished character as the only outcome. The design uses cross-stitch-style single crochet for a tighter X-shaped surface, includes colorwork, and adds a separately crocheted hat. The source also provides a video tutorial.
A coordinated pair opens different design possibilities from making two identical reindeer. You can use the same yarn family and body proportions while changing features that distinguish the characters, making this appealing for a mantel display, matched gifts, or a woodland pair.
Keep Pair Proportions Consistent
When two related dolls will be displayed together, tension differences become easy to spot. If possible, use the same hook and yarn family for both and compare the bodies at natural checkpoints. Matching does not require absolute mathematical precision, but noticeable shifts in head width or limb length can make an intentional pair look accidental.
Watch Colorwork Tension
Carried color can tighten the fabric if the unused strand is pulled too firmly. That matters on a stuffed form because a tight band may create a visible indentation. Periodically stretch the work gently to its normal width and make sure the carried yarn has enough slack to follow the curve without forming long, loose floats.
Think Carefully About Added Weight
The original pattern includes weighted material in the lower part of the doll. If you are adapting the project for a child rather than display, review that construction choice carefully and choose materials appropriate for the recipient. Do not substitute random small or sharp objects simply to reproduce weight.
Original Tutorial and Creator Credit
Creator/Site: Briana K Designs — Briana Kepner
11. Crochet Pocket Size Sitting Reindeer Amigurumi
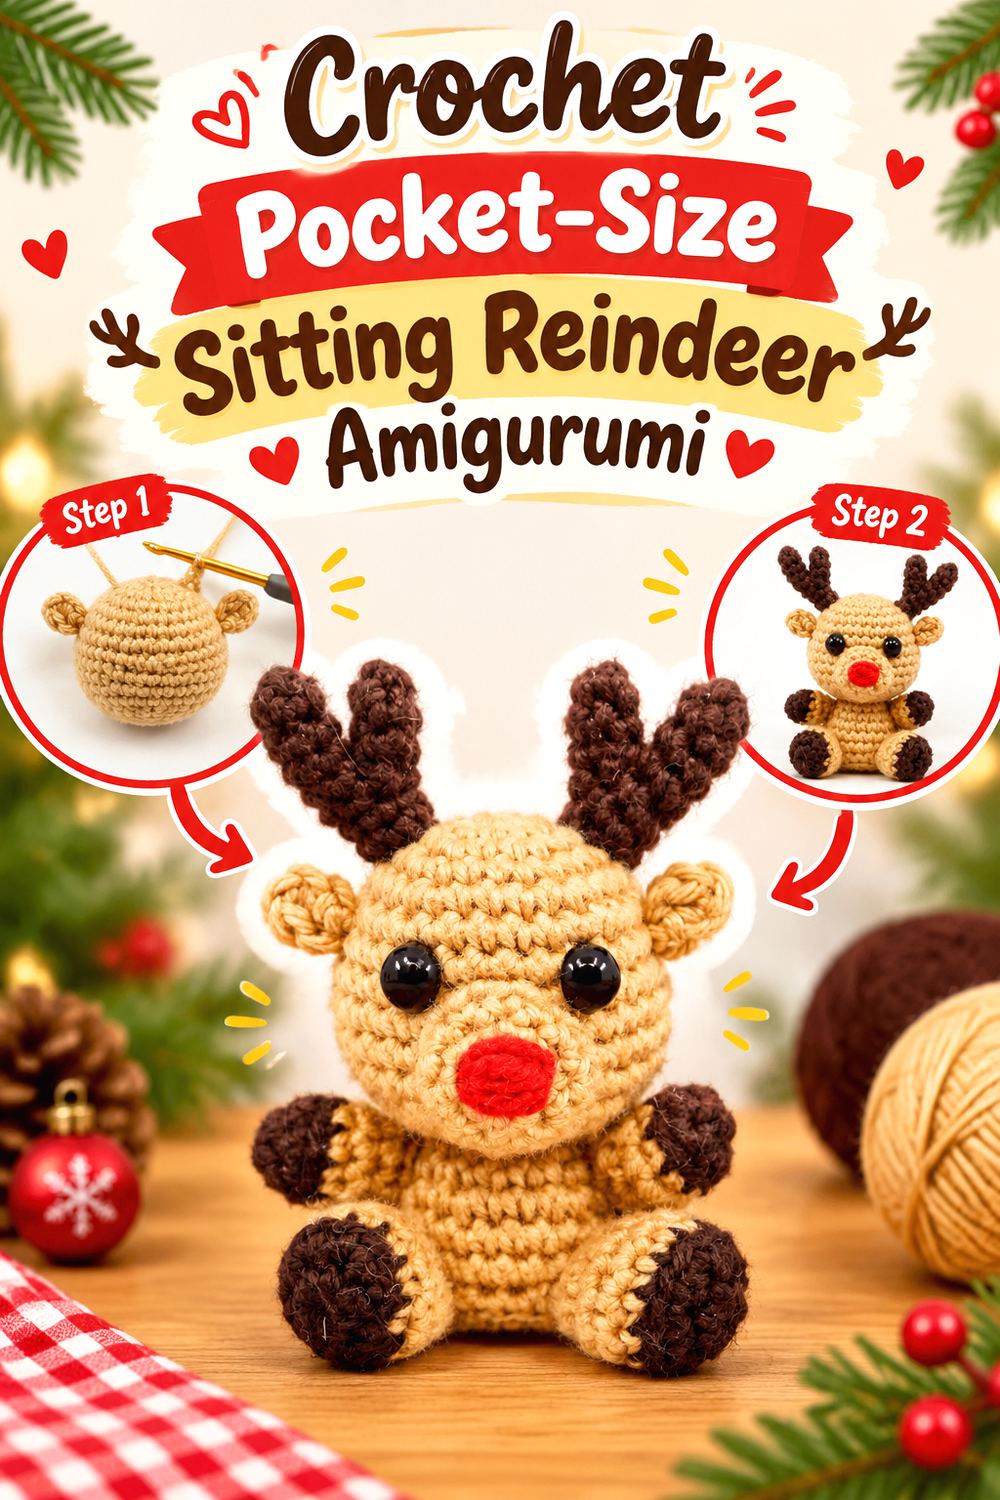
Supergurumi’s compact reindeer is designed at a sitting height of about 6 cm with the creator’s listed sport-weight cotton and hook. The head and body are crocheted as one piece, while the limbs, antlers, ears, tail, and muzzle provide the recognizable reindeer details.
Its proportions make it a different kind of mini from a long-limbed doll. The body is compressed into a small seated figure, so it works well when you want a desk companion, small holiday display, or miniature gift without the vertical space of a taller amigurumi.
Protect the Seated Silhouette
Small legs do not need to dominate this design. When attaching them, check the figure from the front and place it on a flat surface before fastening every stitch. If the legs point too far forward or sit at different heights, the compact body can look tilted.
Keep the Antlers Crisp at Small Scale
Fine antlers are where a smooth, tightly worked yarn is especially helpful. A very fuzzy substitution can merge the branches visually. If antler definition is important to you, make one test component in your proposed yarn before converting the entire deer to that fiber.
Original Tutorial and Creator Credit
Creator/Site: Supergurumi — Jonas Matthies
12. Crochet Naturalistic Four Legged Deer Amigurumi
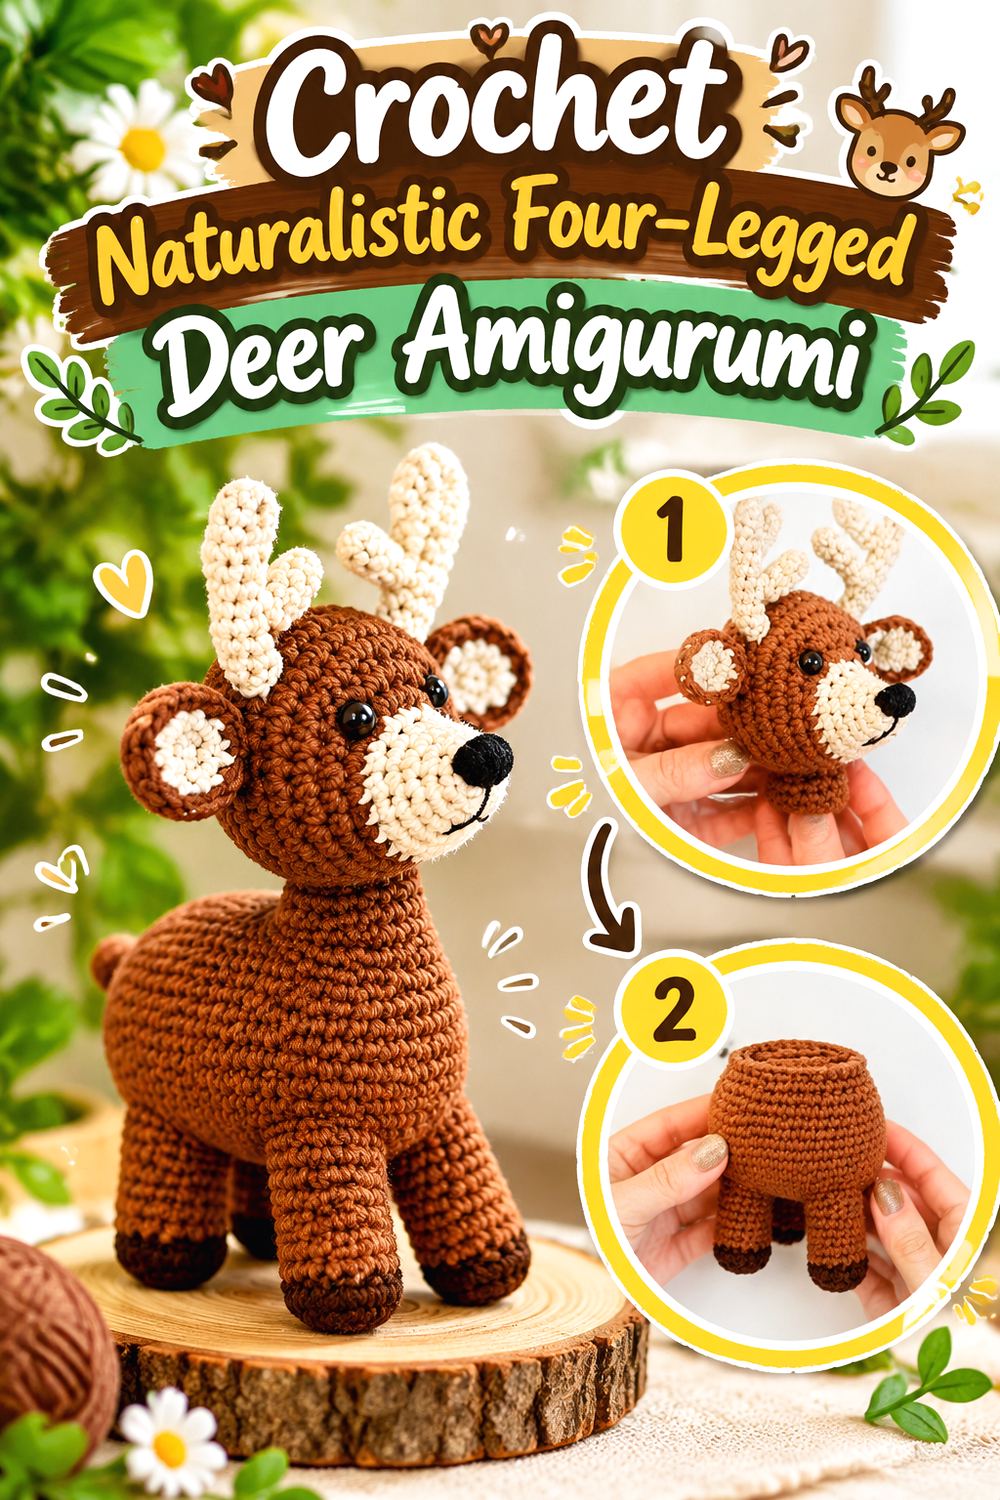
For readers who prefer a deer that reads more like an animal than a doll, Amigurumi_Joys’ video tutorial is a strong change of direction. The tutorial separately covers legs, body, neck, head, ears, antlers, and tail before moving through final assembly and facial embroidery. That division supports an elongated, four-legged deer structure rather than the upright humanlike torso used by many holiday reindeer.
This version is especially appealing when the neck and body profile matter as much as the face. It also gives you antlers without requiring scarves, sweaters, or other seasonal accessories to communicate the subject.
Judge the Body Line From the Side
For a quadruped, side-profile balance is critical. Before permanently joining the neck and head, look at how the back, chest, neck, and muzzle flow together. An attachment can look centered from the front yet still produce a head that projects too far forward or sits too upright.
Match the Four Legs as Sets
Make corresponding legs under similar tension and compare them before assembly. Small differences can affect whether all four feet meet a flat surface. If one leg is slightly different, determine whether placement can compensate naturally before sewing rather than forcing the stuffed body into position afterward.
Attach Antlers Only After Confirming the Head Angle
Antlers visually extend the head upward and backward, so they can exaggerate a tilt you did not notice earlier. Complete the major body and neck alignment first, then pin the antlers symmetrically and view the deer from the front, side, and slightly above before securing them.
Original Tutorial and Creator Credit
Creator: Amigurumi_Joys
13. Crochet Low Sew Palm Pet Reindeer Amigurumi
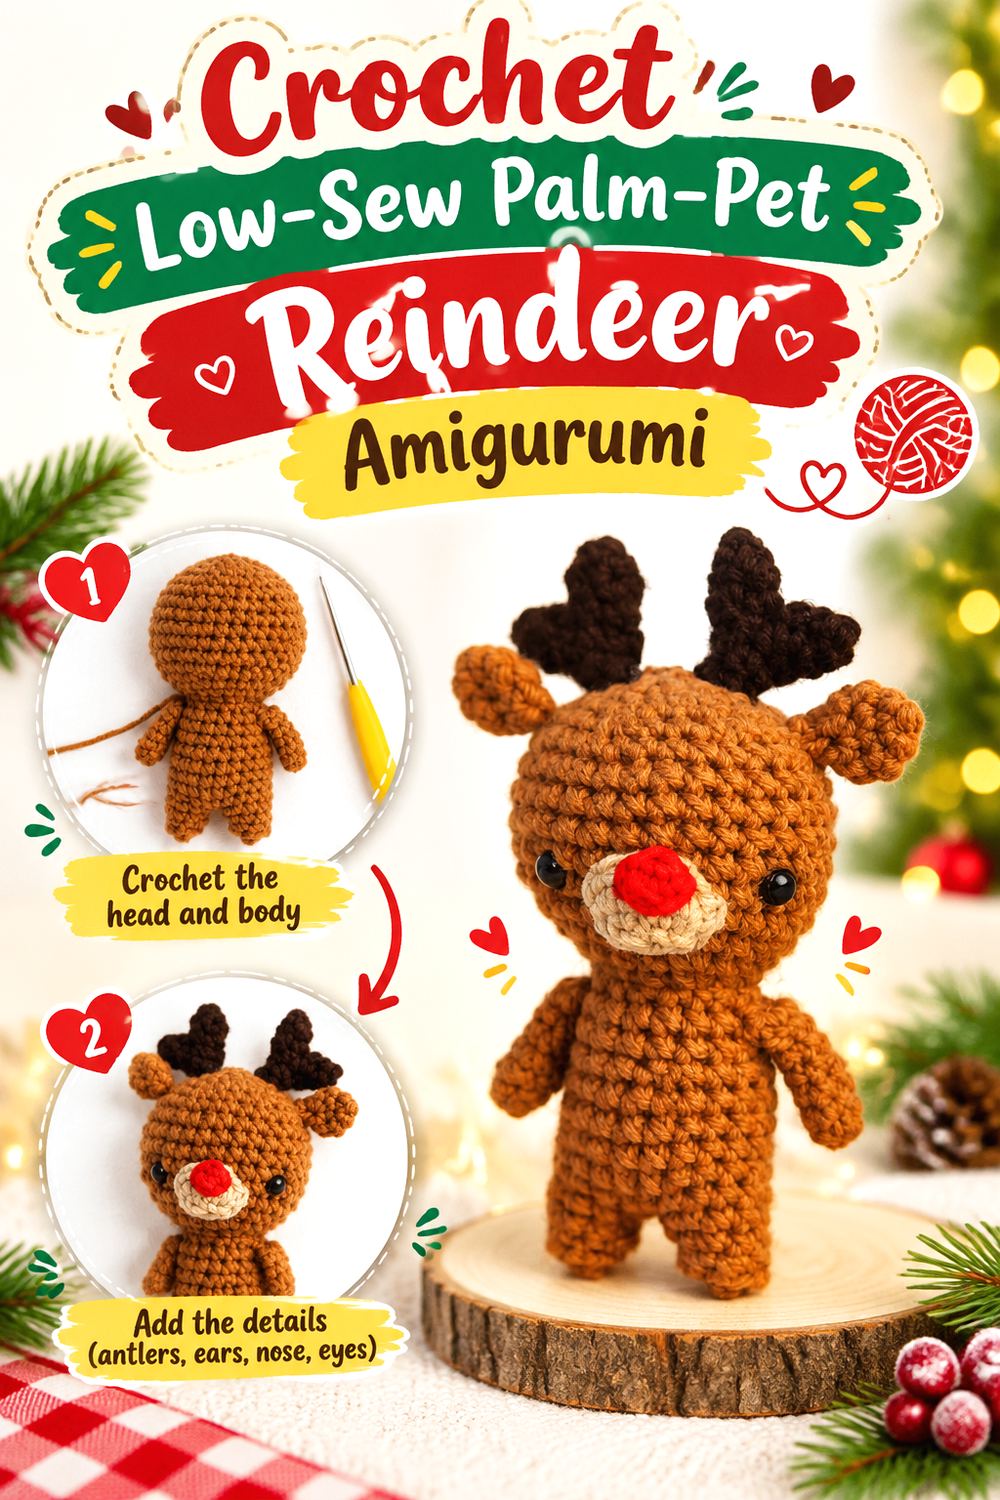
Chai Coffee Crochet’s small reindeer is built around low-sew construction. In the original design, the legs, body, arms, tail, and head are integrated into one continuing structure, leaving pieces such as the ears, muzzle, nose, and antlers for later attachment. With the creator’s DK-yarn setup, the finished reindeer is about four inches tall; the designer also shows a chenille version measuring about six inches.
That makes this project a useful choice when minimizing assembly is more important than creating a highly segmented doll. Its compact proportions also allow the same underlying idea to shift between a small stuffed figure and a softer plush look through yarn choice.
Use the Integrated Construction as a Checkpoint
Low-sew designs reward careful orientation. Before crocheting an arm, leg, or tail into the body, verify that the front, back, and beginning of the round are where you think they are. A removable stitch marker placed at the visual center front can make these checks much easier.
Resize With Yarn, but Reassess the Details
The creator demonstrates that changing yarn changes the overall scale, but that does not mean every fiber behaves identically. Chenille produces a softer visual edge than smooth DK yarn. If you go substantially bulkier, check that the ears and antlers still hold enough definition and that the stuffing cannot work through enlarged gaps.
Original Tutorial and Creator Credit
Creator/Site: Chai Coffee Crochet — Shama
Which Crochet Deer Style Should You Choose?
The biggest difference among these ideas is not color; it is construction and intended visual effect.
| Style | Ideas to Consider | Main Advantage | Main Trade-Off |
|---|---|---|---|
| Tall woodland dolls | 1, 2, 8 | Strong display presence and room for detail | More stuffing and assembly to keep aligned |
| Four-legged deer | 3, 12 | More animal-like silhouette | Leg and neck placement affect balance strongly |
| Accessorized holiday reindeer | 4, 5, 6, 10 | Lots of room for scarves, hats, bows, and color | More components and finishing decisions |
| Compact minis | 7, 11, 13 | Small display footprint and less overall bulk | Tiny facial and antler details demand precision |
| Chunky plush | 9 | Soft, bold shapes and fewer tiny stitches | Plush yarn can obscure fine shaping |
If you dislike sewing, ideas 9 and 13 deserve an early look. For deer anatomy and woodland character, ideas 2, 3, and 12 are more relevant. For an unmistakably Christmas-focused make, the scarfed, red-nosed, or ornament-scale options give you stronger seasonal cues.
Conclusion
These 13 crochet deer amigurumi ideas range from a tiny spotted fawn and naturalistic four-legged deer to tall woodland dolls, palm-size reindeer, a buck-and-doe pair, and a chunky low-sew plush. That variety gives you more useful ways to choose than simply deciding between brown yarn shades.
Start with the finished silhouette and intended use, then consider how much assembly, colorwork, accessory making, and fine antler shaping you actually want. Yarn substitutions can change scale and texture dramatically, so compare the resulting fabric rather than relying on hook size alone. Once you’ve chosen a design, use the linked original tutorial for the creator’s exact construction, materials, and finishing details.
Frequently Asked Questions
What yarn is best for crochet deer amigurumi?
There is no single best yarn because the desired deer style matters. Smooth cotton, acrylic, and blends reveal small facial features, color changes, and antlers clearly, while chenille or other plush yarns create a softer and rounder stuffed-animal look. When substituting, aim for a dense fabric that contains stuffing well. Also remember that moving to a thicker yarn changes the scale and may alter how narrow parts such as antlers behave.
Can I make a deer amigurumi larger just by using thicker yarn?
Often, thicker yarn and an appropriately matched hook will produce a larger result, but the change is not purely mathematical. The fabric can become heavier, softer, or less detailed, and the head may put more pressure on the neck. Antlers and ears may also lose definition. Chai Coffee Crochet, for example, shows its small reindeer in more than one yarn style, but you should still evaluate your specific substitution rather than assuming every yarn will scale identically.
How can I keep crochet deer antlers from looking uneven?
Make both antlers under similar conditions and compare them before attachment. Check branch length, stuffing amount where applicable, and the direction each piece naturally curves. Pin both antlers onto the head before sewing either one completely. Looking at the head straight on is especially helpful because small differences in attachment height or angle can make otherwise matching antlers look asymmetric.
Are safety eyes suitable for every deer amigurumi?
No. Many amigurumi tutorials use plastic safety eyes, but that does not make them suitable for every recipient. Small or detachable components can present a hazard to babies and young children. For a young recipient, consider embroidered facial features and evaluate every accessory or embellishment as well. The intended recipient matters more than simply matching the materials shown in a tutorial.
How do I stop stuffing from showing through my deer?
The fabric needs to be dense enough to contain the filling without being stretched excessively. If gaps appear, changing to a smaller hook that still allows comfortable stitching may help, but follow the selected tutorial’s recommendations first. Add stuffing gradually rather than forcing large amounts into one area. A different fiber or yarn weight can also change how easily the stitches spread.
Should a crochet deer be made in one piece or from separate parts?
Both approaches have advantages. Integrated construction can reduce final sewing and is useful when you dislike attaching many limbs. Separate components give you more freedom to adjust head angle, limb placement, and accessories during assembly. Four-legged deer in particular may benefit from careful positioning, while compact character-style reindeer can work well with low-sew construction. Choose based on which finishing process you find easier to control.