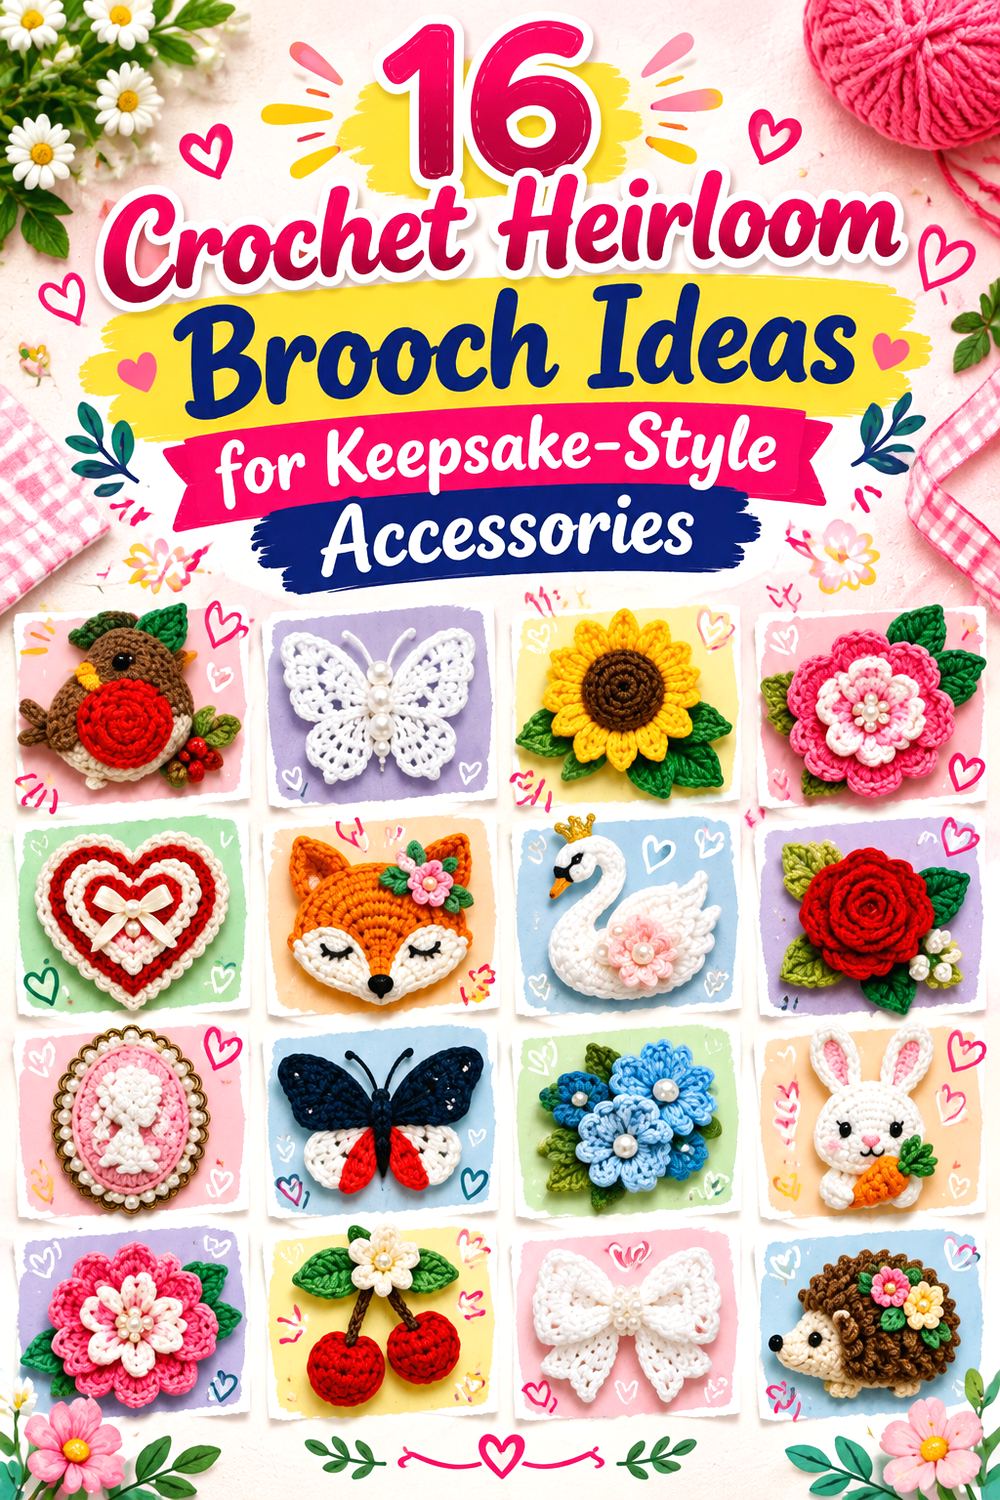
16 Crochet Heirloom Brooch Ideas for Keepsake-Style Accessories
A crochet brooch can feel heirloom-worthy for very different reasons. Fine thread can give a flower the delicacy of textile jewelry, while felting, embroidery, vintage-style buttons, beads, dimensional petals, or carefully assembled botanical pieces can create the character of an accessory meant to be kept rather than treated as a disposable embellishment.
These 16 ideas range from hydrangeas, roses, poppies, chrysanthemums, and daisies to an embroidered oval medallion, oak leaves and acorns, a matryoshka, angel, robin, sheep, butterfly, and heart. Some sit almost flat against a lapel; others depend on stuffing, layered motifs, wire, fabric, or surface decoration. The notes below help you compare those differences, plan sensible adaptations, and think through backing, scale, weight, care, and finishing before using the credited original tutorial for exact construction.
Quick List
- Crochet Thread Hydrangea Cluster Brooch
- Crochet Embroidered Oval Medallion Brooch
- Crochet Acorn and Oak Leaf Brooch
- Crochet Layered Ruffle Corsage Brooch
- Crochet Mixed-Media Peony Brooch
- Crochet Delicate Daisy Pin Brooch
- Crochet Sculpted Rose Brooch
- Crochet Botanical Poppy Brooch
- Crochet Felted Chrysanthemum Brooch
- Crochet Fine-Thread Sunflower Brooch
- Crochet Matryoshka Keepsake Brooch
- Crochet Lace-Style Angel Brooch
- Crochet Robin Lapel Brooch
- Crochet Textured Sheep Brooch
- Crochet Dimensional Butterfly Brooch
- Crochet Keepsake Heart Brooch
What Gives a Crochet Brooch an Heirloom Character?
An heirloom look comes from the relationship between material, scale, construction, and finishing rather than from using beige or faded colors. Fine thread can make stitches read almost like lace. Embroidery creates a textile-medallion effect. A restrained button, bead, fabric leaf, or repurposed jewelry component can become a focal detail, while felting can transform visible stitches into a denser surface reminiscent of an old textile corsage.
Scale matters just as much. A tiny thread flower can sit comfortably near a blouse collar, whereas a padded figure or heavily layered bloom usually needs a sturdier garment or bag. When adapting any tutorial, preserve the proportions that make the original form recognizable. Changing yarn thickness can affect weight, stiffness, petal spacing, and the amount of leverage placed on the pin, not simply make the brooch larger.
Plan the Back Before Adding the Final Decoration
The front receives most of the attention, but the reverse determines whether a brooch hangs neatly. Before permanently attaching hardware, hold the finished crochet against the type of fabric where you expect to wear it. A fitting mounted too high can let the bottom swing outward; a fitting that is too small for a broad motif may allow the piece to rotate.
Backing does not always mean adding a large felt circle. Flat threadwork may need very little extra bulk, while clustered flowers or padded figures can benefit from a stable hidden foundation. Openwork requires another consideration: hardware can sometimes show through from the front.
Whatever method the original tutorial uses, make sure the clasp opens freely and that yarn tails, loops, beads, wire, stuffing, or fabric edges cannot interfere with its moving parts.
Treat Mixed Materials as Part of the Care Plan
Some heirloom-style brooches combine crochet with beads, fabric, stuffing, metal findings, embroidery, glue, wire, buttons, or reclaimed jewelry. Those additions can make a small accessory much more distinctive, but they also mean the care requirements are no longer determined by the yarn alone.
Do not assume a mixed-media brooch can be washed, steamed, pressed, or soaked simply because its yarn could tolerate that treatment. Follow the yarn label and creator guidance, while considering the most delicate added component. Older buttons or jewelry pieces should also be inspected for sharp edges, loose settings, corrosion, or weak attachment points before they are incorporated.
For pieces containing exposed structural wire or sharp pin hardware, periodically inspect the back if the brooch is worn frequently.
1. Crochet Thread Hydrangea Cluster Brooch
1. Crochet Thread Hydrangea Cluster Brooch
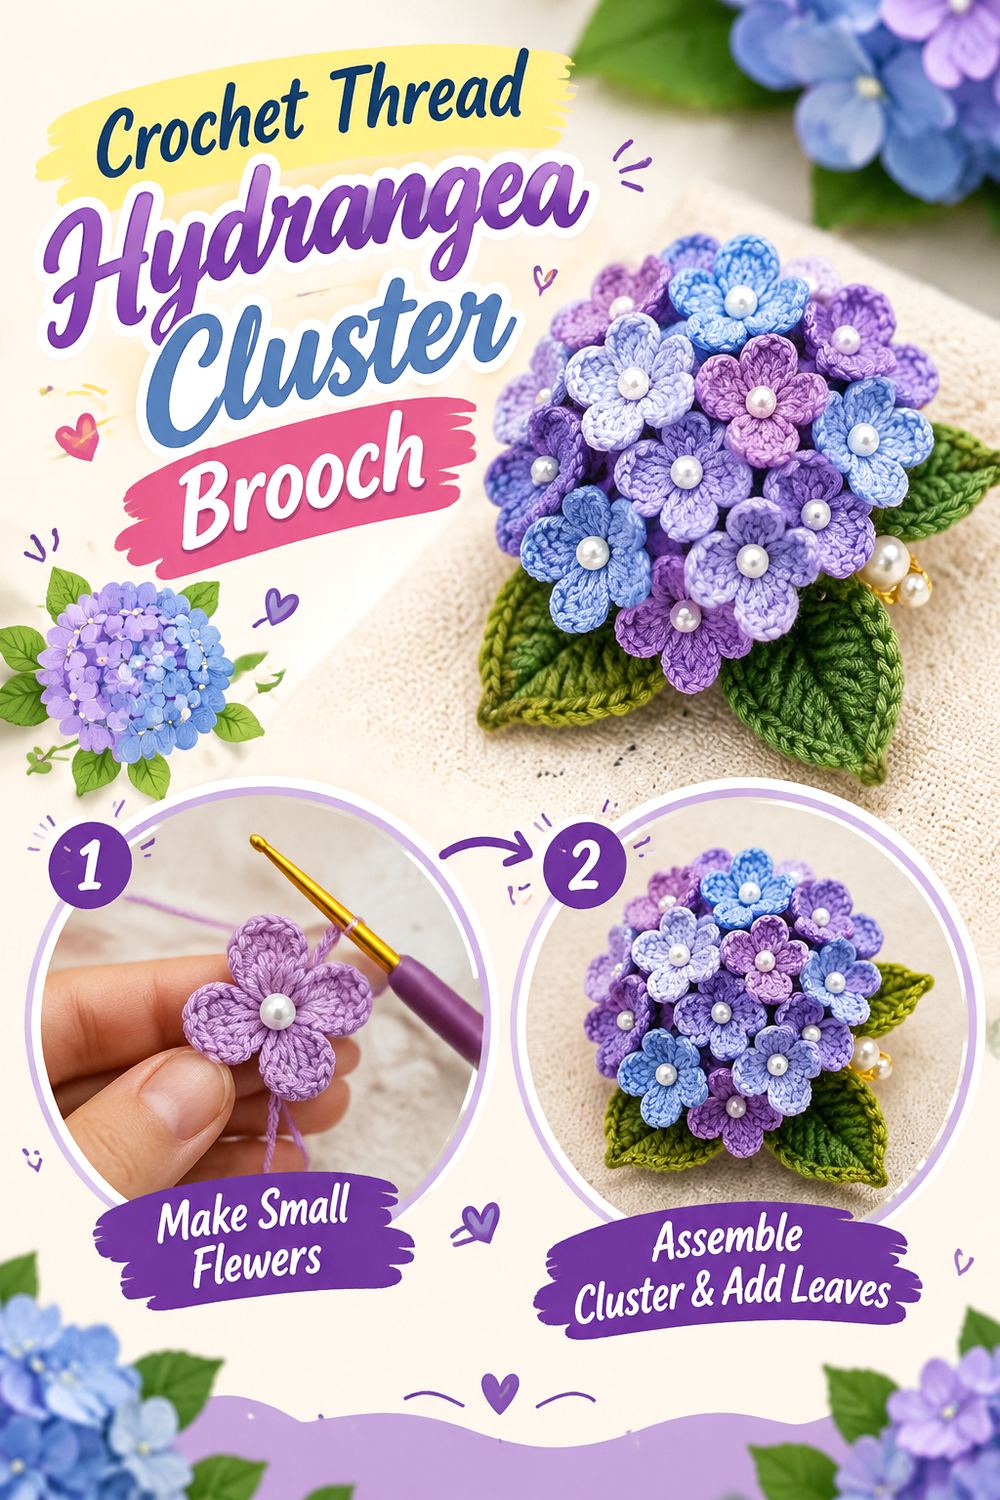
Instead of one large flower, this design builds its visual impact from a cluster of tiny hydrangea-inspired blossoms arranged over a crocheted leaf. Trainee Hero Creative Life’s original project uses fine crochet thread, beads, wire, and hand-applied coloring, giving the finished accessory more of a botanical-jewelry character than a conventional yarn flower. The creator also explains that the design was developed around meaningful family associations with hydrangeas, which suits the keepsake theme particularly well.
This is a strong choice when you want intricate detail and an asymmetrical floral composition. Because its effect depends on several small components working together, changing scale or structural materials deserves more thought than simply substituting another color.
Keep the Flower Cluster Visually Organized
Many tiny blossoms can become an indistinct mass if every flower occupies the same height and angle. Before the final assembly is secured, view the cluster from normal wearing distance and check whether individual florets remain readable. A little variation in orientation can create dimension, but a large gap may expose too much of the supporting leaf. Aim for a coherent cluster rather than mathematical uniformity.
Wire Needs a Finishing Inspection
The original project incorporates jewelry wire as part of its assembly. If you follow that construction, inspect every trimmed and bent end before considering the brooch complete. Nothing sharp should work through the crochet or sit against clothing. If you substitute another wire thickness or material, follow the creator’s structural approach carefully rather than assuming the replacement will bend, support, and secure the flowers identically.
Color Treatment Changes the Care Equation
The source colors its fine-thread flowers rather than relying only on different yarn colors. That produces an unusual, nuanced surface, but it also makes material compatibility important. If you explore a similar treatment, use the creator’s guidance rather than improvising with an unrelated pigment. Once colorants, beads, metal, and crochet thread are combined, treat the finished piece as mixed-media jewelry instead of ordinary washable crochet.
Original Tutorial and Creator Credit
Creator/Site: Trainee Hero Creative Life
2. Crochet Embroidered Oval Medallion Brooch
2. Crochet Embroidered Oval Medallion Brooch
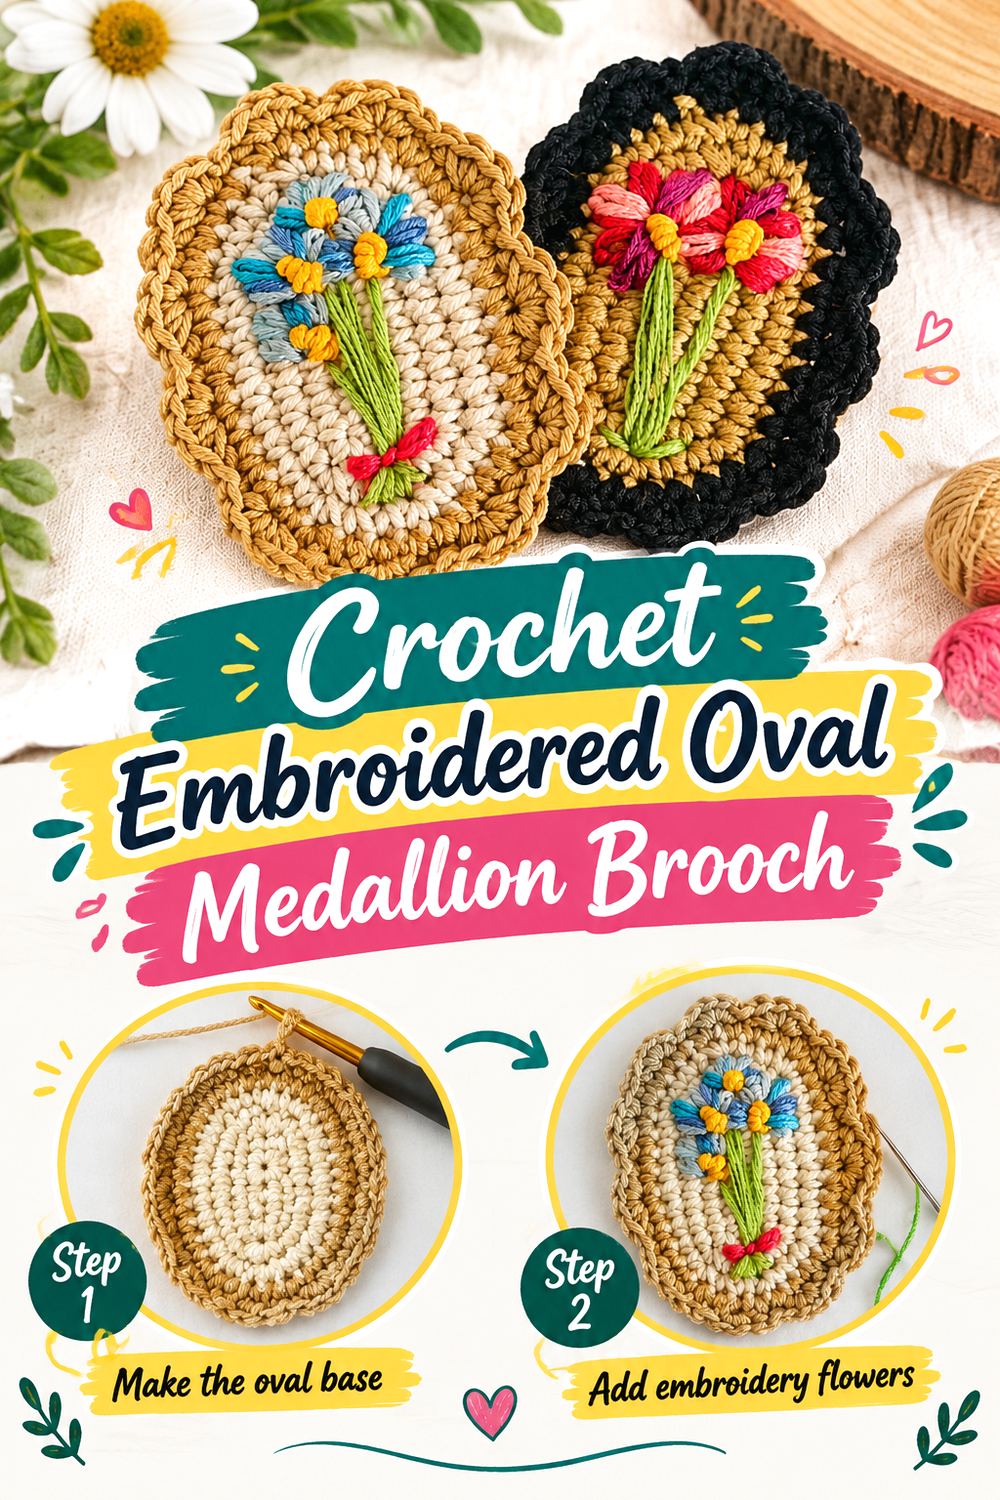
An oval foundation immediately changes the language of a crochet brooch. Rather than resembling a corsage, Lanas y ovillos’ project has the proportions of an old cameo or textile medallion, with crochet establishing the frame and embroidery providing surface decoration. Their video is explicitly presented as a vintage crochet brooch tutorial.
This format is particularly effective for an heirloom collection because the center can carry restrained personalization without requiring a completely different crochet structure. It also has a comparatively controlled profile: there are no long petals or stuffed limbs projecting from the edge. That makes the idea suitable for lapels, collars, scarves, cloth handbags, or a display card where the oval outline can remain fully visible.
Preserve the Oval Before Decorating It
The border is effectively the frame, so check its proportions before embroidery begins. Uneven tension around the curved ends can make one side wider or flatter than the other, and surface decoration will not disguise a noticeably distorted foundation. Lay the piece flat and view it from several directions. Any shaping method should remain appropriate for the actual fiber rather than being applied automatically.
Let Embroidery Create the Personal Story
Surface stitching offers an easy way to give two brooches very different moods without reconstructing the underlying crochet. Small florals, initials, restrained geometric accents, or colors associated with a recipient can make the medallion feel personal. Keep enough negative space for the oval frame to remain visible; filling every part of the center can make a small brooch feel crowded rather than richly decorated.
Watch the Hardware Through the Front
A relatively flat medallion is ideal for tidy pin placement, but a poorly positioned clasp can still affect the silhouette or show around the edges. Temporarily place the hardware against the reverse and inspect the front before stitching it permanently. The fitting should sit within the visual boundary of the oval while remaining easy to open and close.
Original Tutorial and Creator Credit
Creator: Lanas y ovillos
3. Crochet Acorn and Oak Leaf Brooch
3. Crochet Acorn And Oak Leaf Brooch
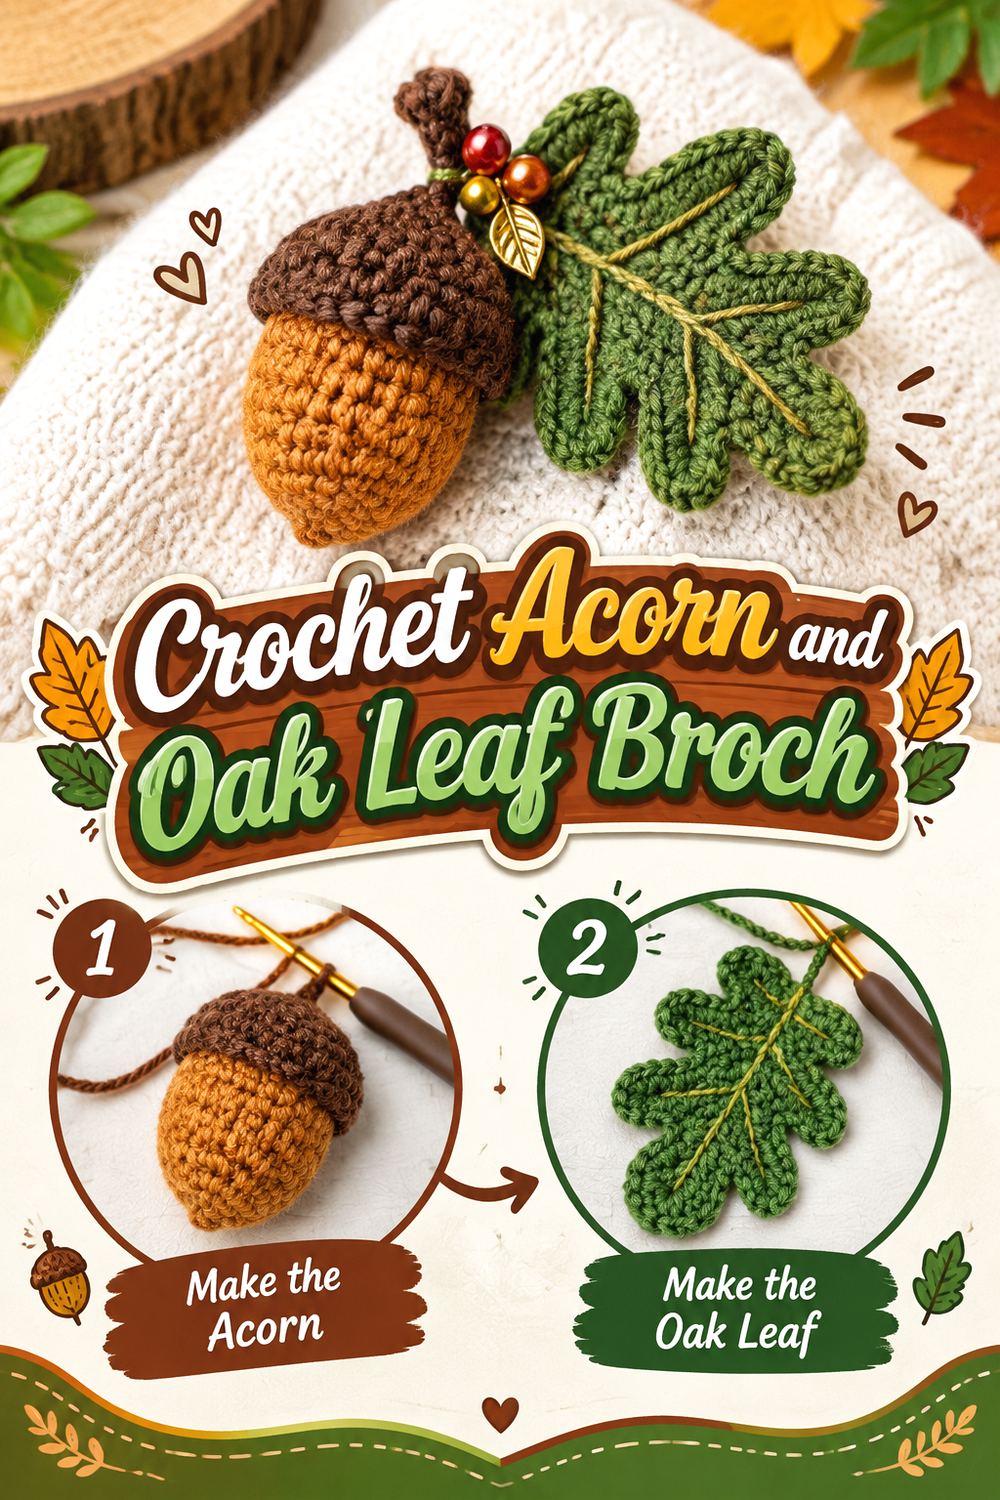
The Crochet Circle’s woodland brooch combines dimensional acorns with a flatter oak leaf and supporting wirework, producing a directional composition rather than a centered badge. The original tutorial specifically explains how the acorns, leaf, pin, wrapped wire, and finishing are assembled into one wearable piece.
That structural contrast gives the design a convincing heirloom-botanical quality. It could suit autumn clothing, tweed-like outerwear, a craft bag, or a nature-themed keepsake, yet the form does not depend entirely on traditional brown and green. Muted plum, rust, faded blue, or neutral combinations could alter the mood while keeping the recognizable oak imagery. The important planning issue is balance: the hanging elements and leaf need to behave as one accessory rather than several unrelated pieces.
Assembly Deserves as Much Attention as Crochet
This is a good example of a small project whose complexity lies largely in finishing. The source incorporates multiple construction materials, so read the complete assembly guidance before making substitutions. A different wire or fastening arrangement can change how the acorns hang and how the leaf supports them. Finish the structural problem first; extra decorative details should come afterward.
Check the Brooch in Its Wearing Position
Lay-flat appearance does not reveal how dangling or directional components will behave vertically. Hold the brooch against fabric and check whether the acorns drag the leaf sideways, cause the piece to rotate, or conceal part of the foliage. Minor orientation adjustments can change the balance considerably, so decide how you want the arrangement to hang before permanently fixing the clasp.
Keep Structural Ends Wearer-Safe
Whenever wire appears in wearable textile work, inspect its concealed areas closely. Cut ends should be securely finished so they cannot migrate through the crochet, scratch the wearer, or snag a garment. If the brooch is stored with other textiles, make sure projecting components cannot hook into neighboring lace or knitwear either.
Original Tutorial and Creator Credit
Creator/Site: TheCrochetCircle.com
4. Crochet Layered Ruffle Corsage Brooch
4. Crochet Layered Ruffle Corsage Brooch
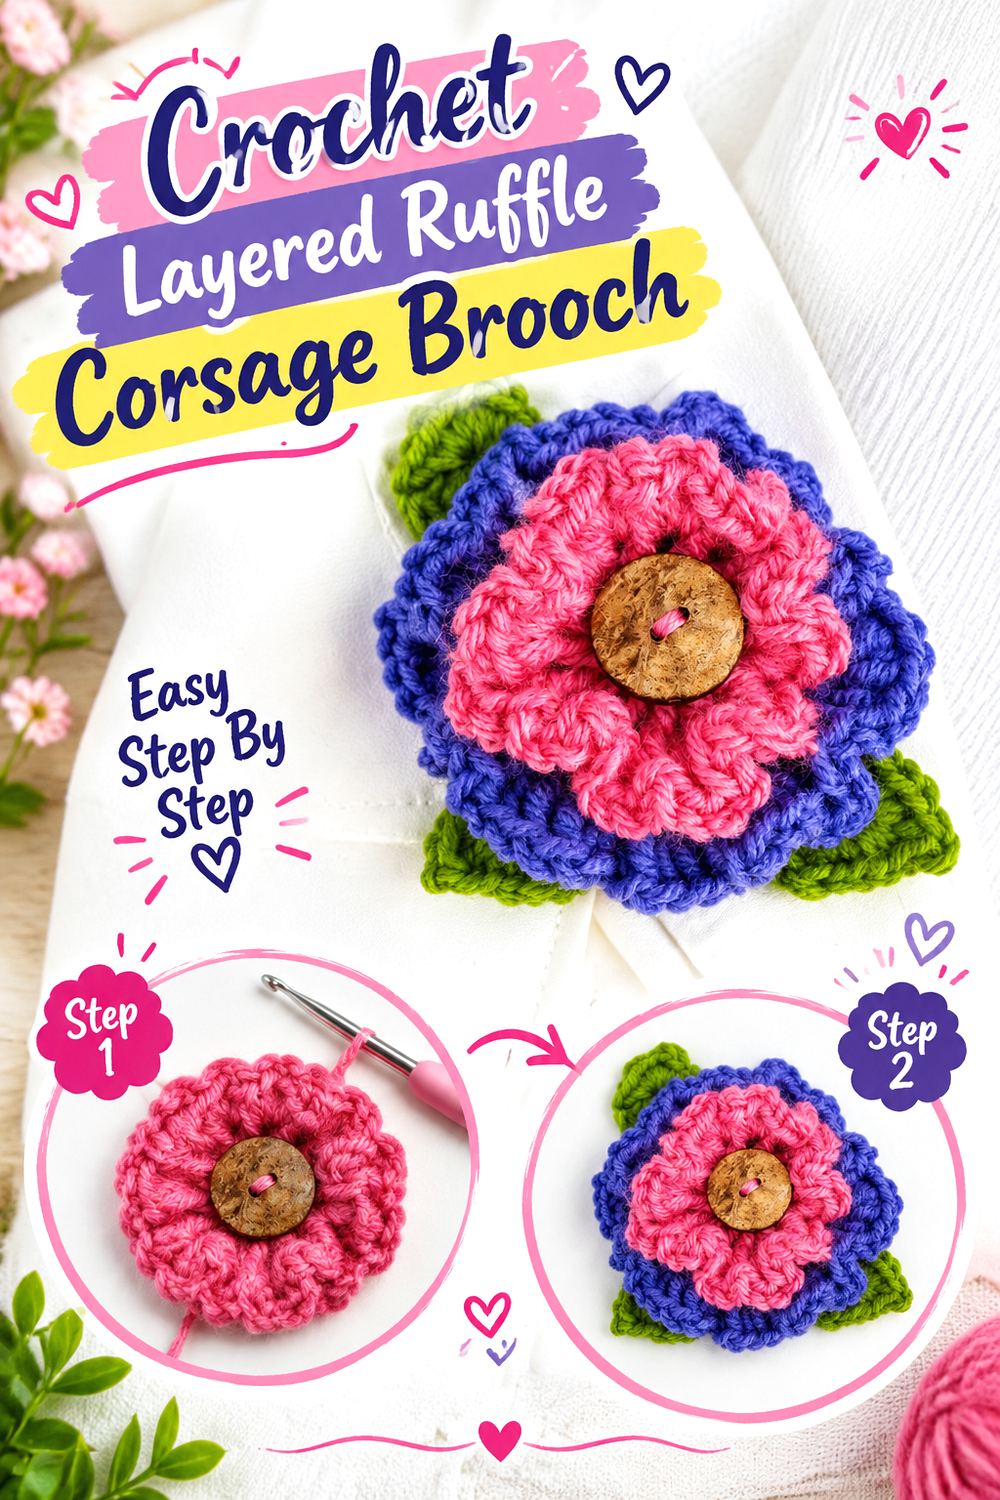
Jennifer Dickerson’s Layered Ruffle Flower for Fiber Flux stacks two crocheted flower layers, adds a button center, and offers leaves as an optional addition. The original page explicitly suggests putting a pin on the back to wear the flower as a brooch.
The resulting depth is reminiscent of a small textile corsage, making it a practical heirloom-style option when you want noticeable volume without constructing a stuffed figure. Because the two crochet layers already supply substantial movement, color and center treatment can stay restrained. A quietly textured button can push the design toward vintage cardigan styling, while a brighter novelty button will make it read as a more contemporary craft accessory.
Keep Both Ruffle Levels Visible
Changing yarn can affect whether the two layers look deliberately stacked or collapse into one thick mass. A very lofty yarn can obscure the separation, while a smoother yarn may make the individual edges easier to read. Before adding leaves or extra embellishment, check the flower from the side as well as the front and decide whether its existing depth is already sufficient.
Choose the Center for Proportion, Not Just Color
The button sits where every ruffle directs the eye, so its scale matters. A heavy or oversized center can pull the flower inward or visually dominate it. Temporarily position several options before sewing one down. For an heirloom treatment, a restrained button often has more impact than multiple layers of beads, ribbons, charms, and other competing additions.
Original Tutorial and Creator Credit
Creator/Site: Jennifer Dickerson / Fiber Flux
5. Crochet Mixed Media Peony Brooch
5. Crochet Mixed Media Peony Brooch
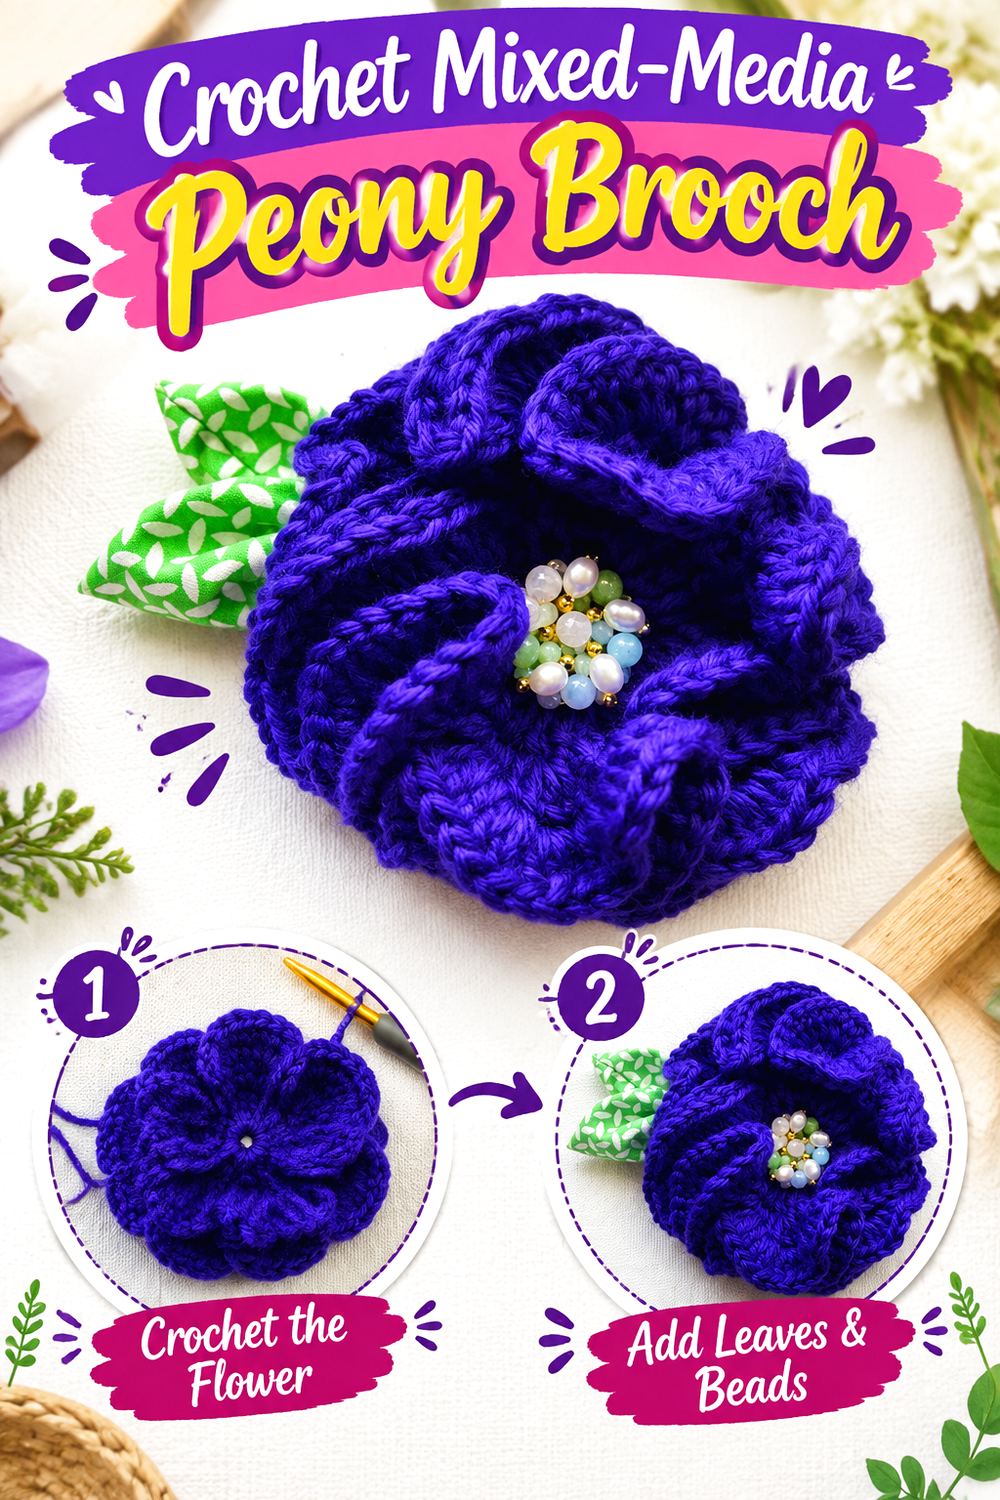
Dawn’s peony tutorial at sew ritzy~titzy combines a highly ruffled crocheted bloom with fabric leaves and demonstrates a vintage earring component at the flower center; the page also suggests buttons or beads as alternatives. A felt piece covers the back before the pinback is added.
That mix of crochet, fabric, jewelry, and backing material makes this one of the most naturally heirloom-oriented projects in the collection. It feels assembled from treasured textile and jewelry elements rather than made from yarn alone. The trade-off is care and weight. Every added material has its own behavior, so this design deserves more inspection before it is pinned to a delicate blouse or stored beside easily snagged lace.
Keep the Centerpiece in Scale With the Flower
A vintage earring or ornate button can be the reason someone remembers the brooch, but it should not erase the soft peony shape around it. Place the proposed centerpiece on the completed bloom before sewing. If the crochet disappears visually beneath the center, choose something smaller or allow more of the petal texture to remain exposed.
Inspect Reclaimed Components Before Reuse
Older jewelry can bring history to a keepsake, but age does not guarantee suitability. Look for loose stones, sharp edges, weakened metal, deteriorating coatings, or attachment points that may not tolerate repeated handling. Secure the decorative component according to the project’s needs rather than assuming its original jewelry fitting can serve as the brooch’s structural connection.
Store the Ruffles Without Crushing Them
A full flower gains much of its character from depth. Storing it underneath heavier jewelry or other brooches can compress the crochet and fabric leaves. Give it enough room to retain its shape. If reshaping ever becomes necessary, base the method on the actual yarn, fabric, and decorative center rather than applying heat or moisture indiscriminately.
Original Tutorial and Creator Credit
Creator/Site: Dawn / sew ritzy~titzy
6. Crochet Delicate Daisy Pin Brooch
6. Crochet Delicate Daisy Pin Brooch
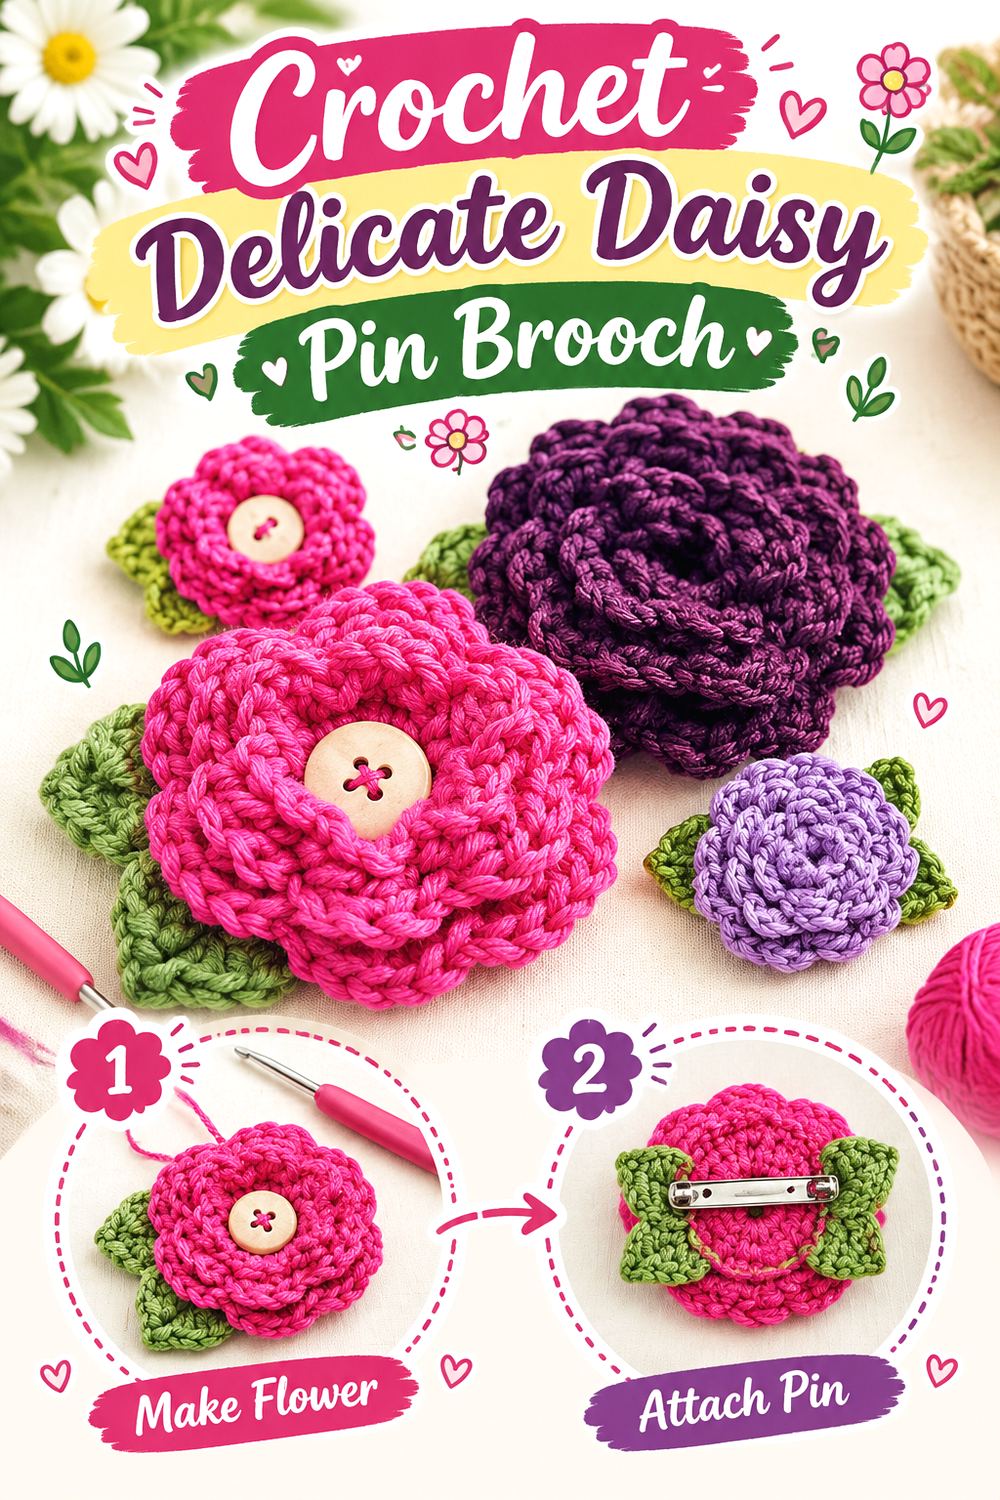
Lorene’s Daisy Delight design for Cre8tion Crochet is intended as a flower pin, brooch, or hair accessory. The original source works the design in embroidery thread, includes optional leaves and a button, and also discusses how using ordinary yarn creates a substantially larger flower.
That visible scale difference is particularly useful when planning an heirloom accessory. In fine thread, the daisy has a more jewelry-like presence suitable for a collar, light cardigan, or small fabric purse. Enlarged in yarn, it becomes a much more obvious textile flower. Either direction can work, but the backing should be selected for the size actually produced rather than copied automatically from a different-scale version.
Keep the Daisy’s Graphic Shape Clear
The identity of a daisy depends on a readable center surrounded by distinct radiating petals. Optional leaves and buttons can enrich the motif, but they should not obscure that simple structure. Before installing the pin, rotate the flower and check whether the petal distribution remains balanced from several angles.
Match the Hardware to Finished Scale
A tiny thread flower can be visually overwhelmed by a large metal fitting, while a very small clasp on an enlarged yarn version may allow the brooch to twist. Finish the crochet first whenever possible, then choose or confirm the backing against the actual dimensions and density of your piece.
Original Tutorial and Creator Credit
Creator/Site: Lorene / Cre8tion Crochet
7. Crochet Sculpted Rose Brooch
7. Crochet Sculpted Rose Brooch
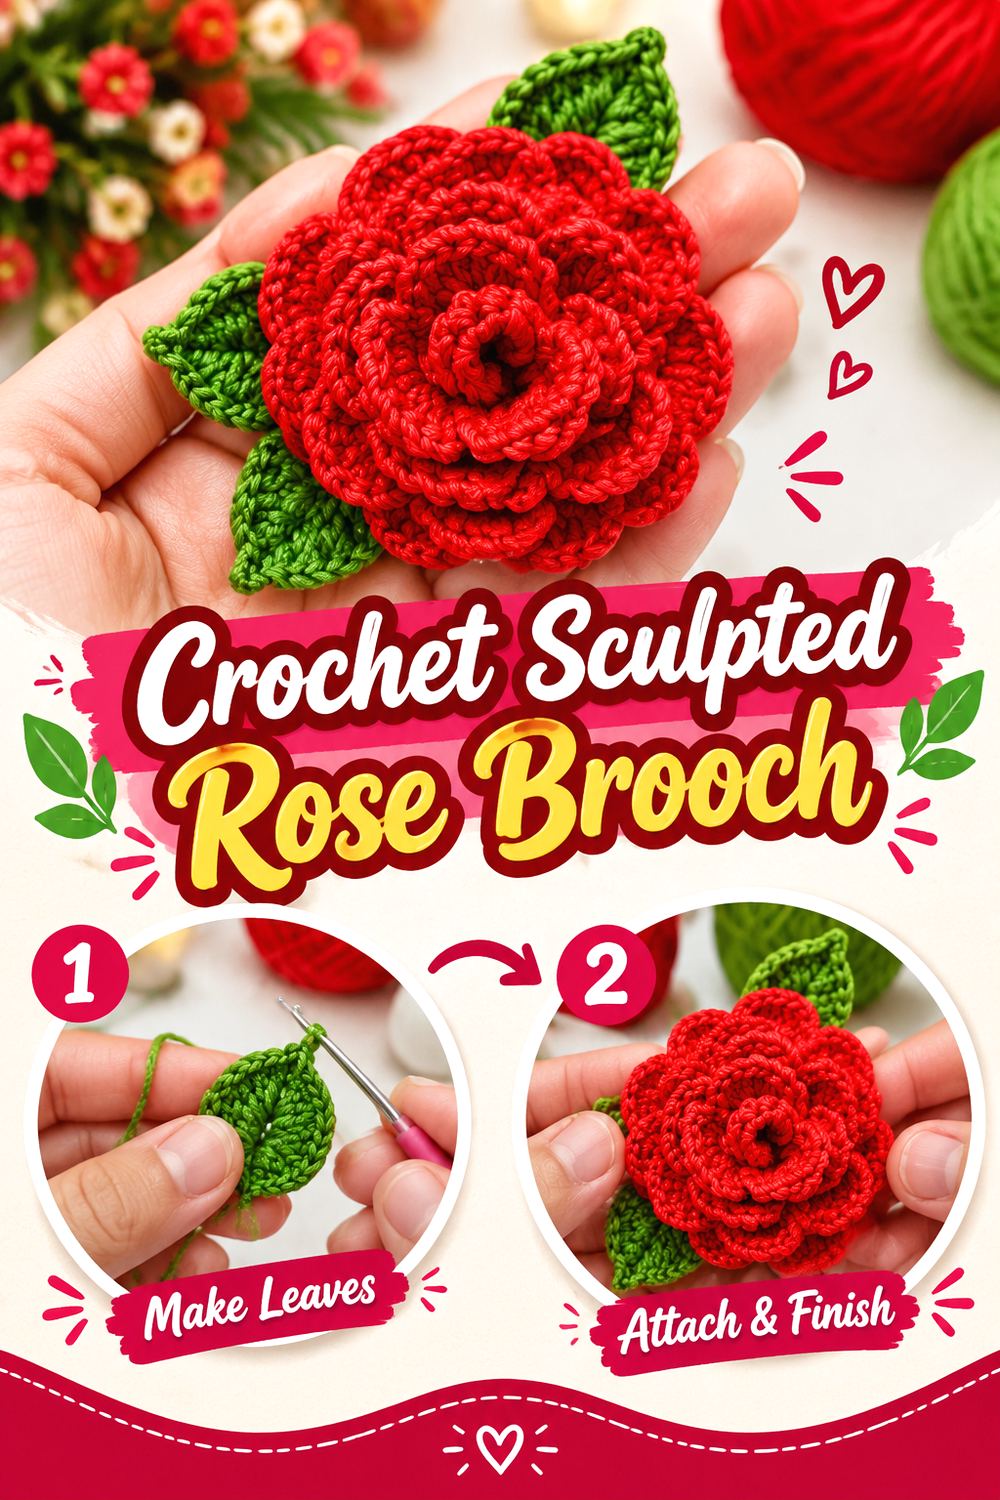
MAMA HUMAM’s video demonstrates a crocheted rose specifically presented as a brooch, while also noting that the rose can be applied to other accessories. The rolled or sculpted appearance separates this flower from radial daisies, ruffled discs, and clustered hydrangeas.
A rose makes sense when you want the heirloom feeling to come from a recognizable traditional flower rather than added beads or embroidery. Its depth can create natural shadow between the petals, so complicated embellishment is unnecessary. The main consideration is maintaining a convincing floral silhouette after the rose is attached to its backing: a beautifully shaped front can lose some of its character if the rear is pulled too tightly against the pin.
Assess the Rose From the Side
A rose is a three-dimensional object, so the profile matters almost as much as the front view. Check whether the bloom projects evenly or seems to lean heavily in one direction. If the backing compresses one side, adjust the attachment rather than compensating with more decorative material.
Use Leaves or Extras Sparingly
A rose can support leaves, ribbon, or another accent, but each addition broadens the brooch and alters its visual center of gravity. Add supporting motifs only after the flower itself looks complete. An heirloom-style rose often benefits from restraint: a clear bloom with one thoughtful supporting element can look more intentional than a heavily decorated cluster.
Let Garment Weight Guide Placement
A sculpted rose may create more leverage than a flat applique. Test the completed brooch on fabric similar to its intended garment. A coat, structured cardigan, hat, or sturdy bag may support the depth more comfortably than a very lightweight blouse.
Original Tutorial and Creator Credit
Creator: MAMA HUMAM
8. Crochet Botanical Poppy Brooch
8. Crochet Botanical Poppy Brooch
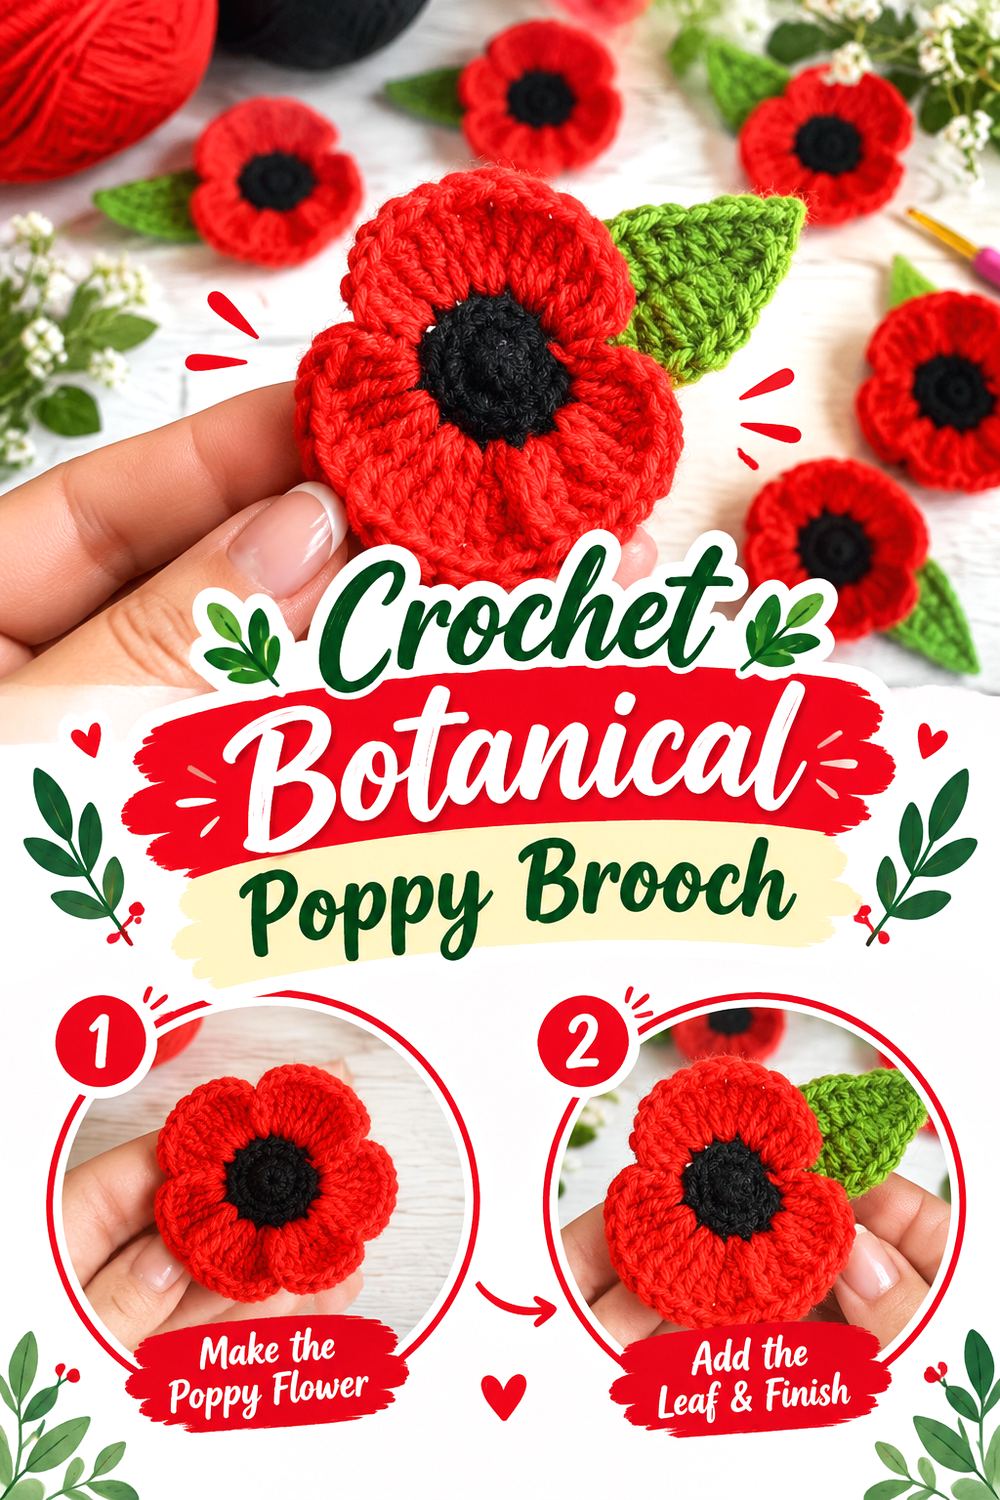
Crafting Happiness’ remembrance poppy is designed specifically as a brooch and combines a defined flower center with shaped petals and a separate leaf. The original page includes both written guidance and video support.
Compared with a round daisy or ruffled corsage, the poppy has a stronger directional relationship between bloom and foliage. That makes it useful when you prefer a small botanical composition that can sit diagonally along a lapel or scarf. Its recognizable shape also means embellishment can remain minimal. For an heirloom interpretation, focus on clean finishing and considered color rather than adding decorative objects that distract from the flower’s center and broad petals.
Protect the Petal Outline
Poppies depend on broad, readable petal shapes. Before attaching the backing, view the brooch from several feet away rather than concentrating only on stitch detail. If the outline reads as a crowded circle, check whether the petals have become folded or compressed during assembly and reshape them in a way appropriate to the yarn.
Choose the Leaf Angle Before Mounting
The leaf establishes direction. A small change in its angle can make the finished pin look upright, diagonal, or almost horizontal. Arrange the flower and leaf first, then decide where the pin should sit on the reverse so the brooch naturally hangs in the orientation you prefer.
Keep Symbolic Use in Mind
Red poppies can carry remembrance associations in several countries and communities. If that symbolism is part of why you are making the brooch, follow any relevant local customs for wearing or presentation rather than assuming decorative placement conventions are universal. If you are using the flower purely as botanical inspiration, other colors can move the design away from that specific context.
Original Tutorial and Creator Credit
Creator/Site: Crafting Happiness
9. Crochet Felted Chrysanthemum Brooch
9. Crochet Felted Chrysanthemum Brooch
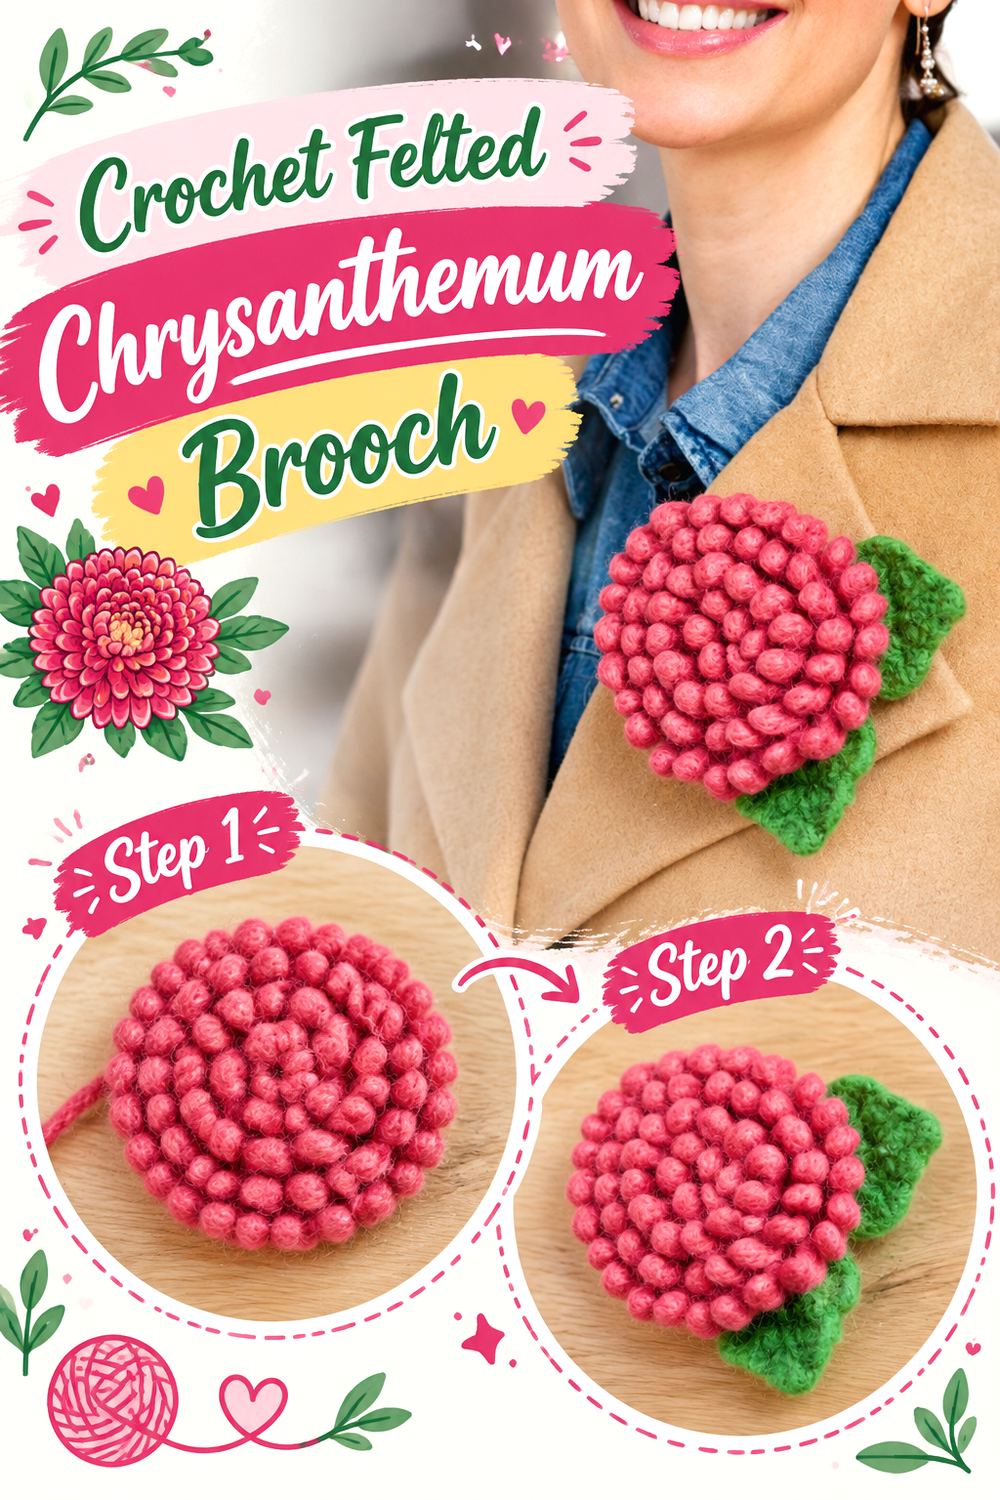
Yarnspirations’ Red Heart Felted Chrysanthemum Pin is intentionally crocheted and then felted, making the post-crochet finishing process fundamental to the project rather than optional decoration. The pattern page identifies it as a pin and provides the original downloadable instructions.
Felting gives this brooch a materially different heirloom character from fine cotton or embroidery-thread pieces. Stitch definition becomes less prominent while the flower gains a denser textile surface, closer to a soft old-fashioned corsage. That density also affects weight and scale, so this is a particularly good project for a substantial lapel, felt hat, or sturdy bag rather than a fabric that already struggles to support accessories.
Fiber Substitution Is Not Neutral Here
Felting behavior varies substantially by fiber and yarn construction. A yarn with similar thickness is not necessarily an equivalent substitute if it will not felt in the same way. Follow the original pattern’s material guidance closely. If you deliberately experiment with another yarn, sample it before committing to the full flower so the amount of shrinkage and surface change is not a surprise.
Judge Structure After Felting
Do not decide how much reinforcement the flower needs while looking only at the pre-felted crochet. Felting changes density and may provide enough body on its own. Once the finishing process is complete, assess the flower’s actual stiffness, thickness, and weight before adding any extra backing that could make the accessory unnecessarily bulky.
Test It on Comparable Fabric
Density can make even a soft flower pull on delicate fabric. Fasten the finished pin to a scrap or garment with similar weight to its intended surface and watch whether the lapel curls or the brooch tips forward. If the fabric cannot support it cleanly, use the brooch on a heavier textile rather than trying to solve everything by making the backing stiffer.
Original Tutorial and Creator Credit
Creator/Site: Yarnspirations / Red Heart
10. Crochet Fine Thread Sunflower Brooch
10. Crochet Fine Thread Sunflower Brooch
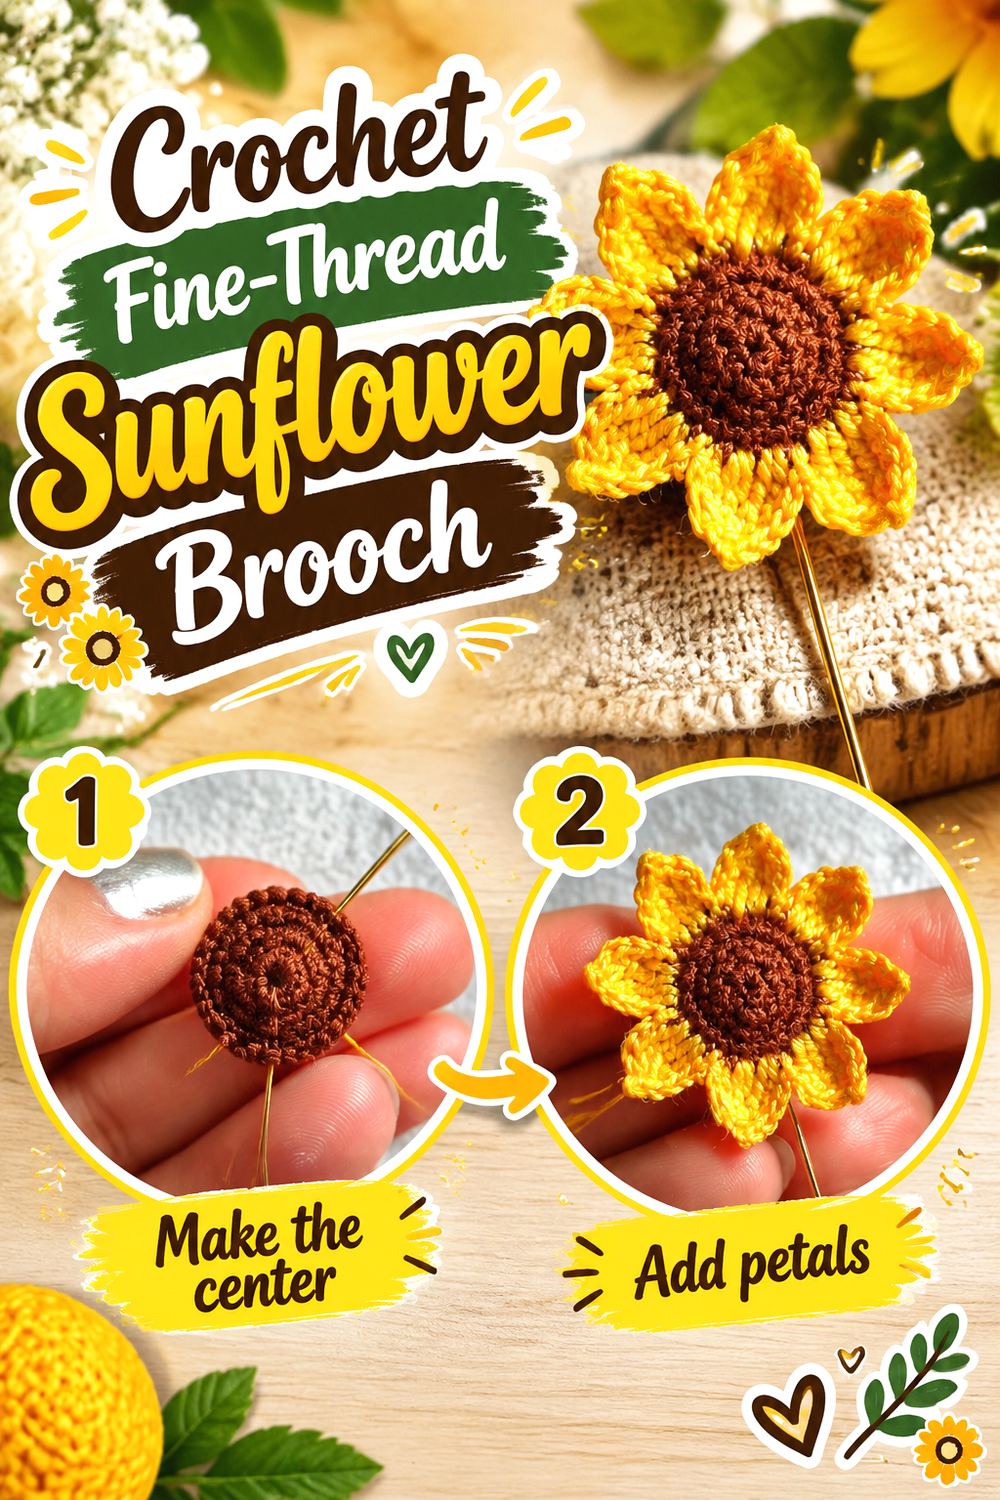
Sure It’s tutorial is specifically presented as a crochet brooch or hijab pin and uses fine crochet thread to create a compact sunflower with a strongly defined center and radiating petals. The source also discusses finishing materials intended to help the piece retain its presentation.
The small scale gives this sunflower more of a textile-jewelry feeling than a large decorative flower. It works especially well when you want strong graphic contrast without a bulky profile. Traditional sunflower colors are immediately recognizable, but the radial construction could also be interpreted in quieter heritage colors if the goal is a less literal floral accessory.
Check the Petal Ring Before Stiffening
A radial flower exposes uneven spacing quickly because every petal points away from the same center. Rotate the unfinished brooch and correct the visual distribution before any final shaping treatment is applied. Stiffening can preserve a good outline, but it should not be relied on to disguise an unbalanced one.
Consider the Garment Before Making It Very Rigid
A crisp thread flower can sit neatly on structured fabric, but overly rigid edges may be less forgiving on fine knitwear or delicate scarves. Follow the source for its actual finishing approach and avoid automatically increasing stiffness. The appropriate amount of structure depends partly on where the brooch will be worn.
Original Tutorial and Creator Credit
Creator: Sure It
11. Crochet Matryoshka Keepsake Brooch
11. Crochet Matryoshka Keepsake Brooch
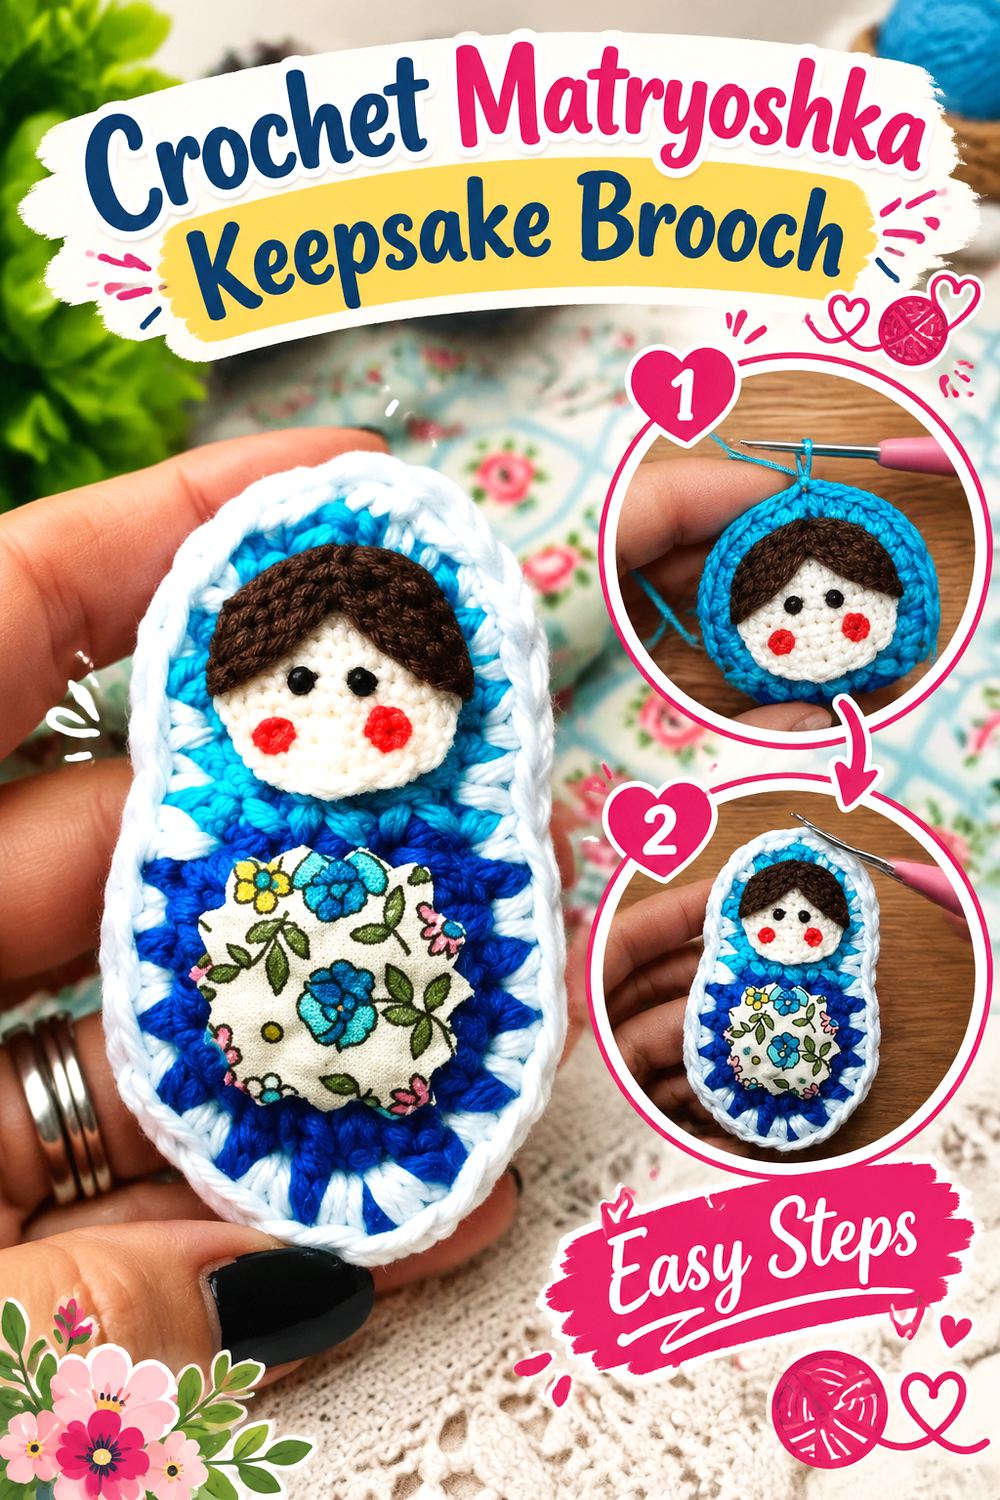
Annaboo’s House approaches the brooch as a tiny padded textile figure rather than a flat applique. The original Matryoshka project combines crochet with light stuffing, felt, fabric, facial decoration, and a brooch pin.
That mix makes it especially suitable for an heirloom or memory-box theme. Fabric scraps from another meaningful sewing project could influence the doll’s look without changing its basic silhouette, while restrained facial details can keep the result closer to folk art than toy styling. Because the design is lightly dimensional, the back still needs to remain reasonably flat so the pin can sit securely against clothing.
Keep the Stuffing Modest
The goal is enough volume to distinguish the brooch from a flat applique, not enough to create a miniature soft toy. Too much stuffing can bow the reverse outward and make the clasp harder to mount or cause the figure to tip away from the garment. Assess the side profile before closing the piece completely.
Coordinate the Textile Scraps
Felt and patterned fabric give the doll personality, but a very small surface can become visually chaotic when every component uses an unrelated print or color. Choose one or two repeated tones to connect the crochet and fabric. This is also a natural place to incorporate a meaningful scrap without needing the entire brooch to match it exactly.
Secure Applied Details for Handling
Unlike framed decoration, a brooch is repeatedly picked up, turned over, fastened, removed, and brushed against clothing. Periodically inspect glued or sewn fabric and felt pieces if the accessory is worn often. The sharp pin also means the finished brooch should be treated as an accessory rather than an unsupervised toy for a young child.
Original Tutorial and Creator Credit
Creator/Site: Annaboo’s House
12. Crochet Lace Style Angel Brooch
12. Crochet Lace Style Angel Brooch
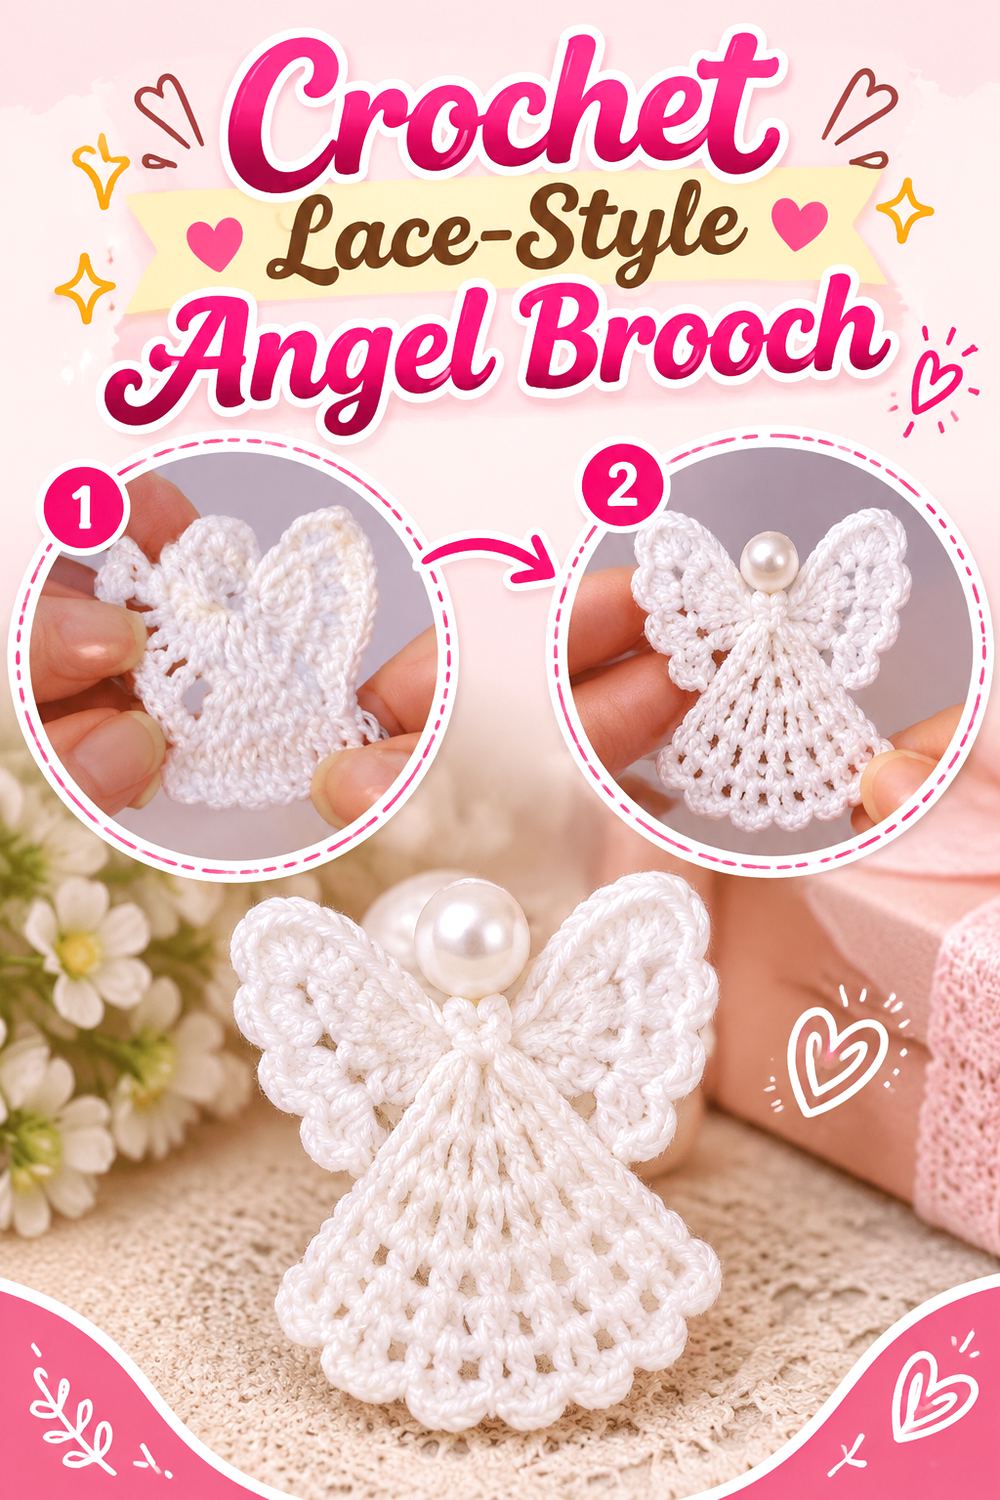
Kim Guzman’s Angel Lapel Pin at CrochetKim uses a symmetrical angel silhouette and is presented with several yarn-and-hook options, ranging from fine cotton choices to a heavier yarn interpretation. The pattern is explicitly designed as a lapel pin.
That scale flexibility is valuable for heirloom planning. Worked finely, the angel can have a lace-like delicacy; interpreted more substantially, it becomes closer to a textile ornament. The long vertical outline also distinguishes it from circular flowers and padded animal figures. It can serve as a religious keepsake, memorial accessory, holiday brooch, or family gift depending on the context in which it is made and worn.
Keep the Wings Visually Balanced
Symmetry carries much of the design. Lay the finished angel on a flat surface before adding hardware and compare the two wings as well as the lower section. A clasp mounted slightly crooked can make an otherwise balanced angel appear tilted when worn, so decide the final orientation before sewing the pin.
Reconsider Placement When Enlarging It
A thicker yarn does more than widen the motif—it also increases its vertical drop. An enlarged version that looks good on a table may extend too far below a small lapel. Compare the finished dimensions with the intended garment before deciding that a larger interpretation still functions comfortably as a brooch.
Original Tutorial and Creator Credit
Creator/Site: Kim Guzman / CrochetKim
13. Crochet Robin Lapel Brooch
13. Crochet Robin Lapel Brooch
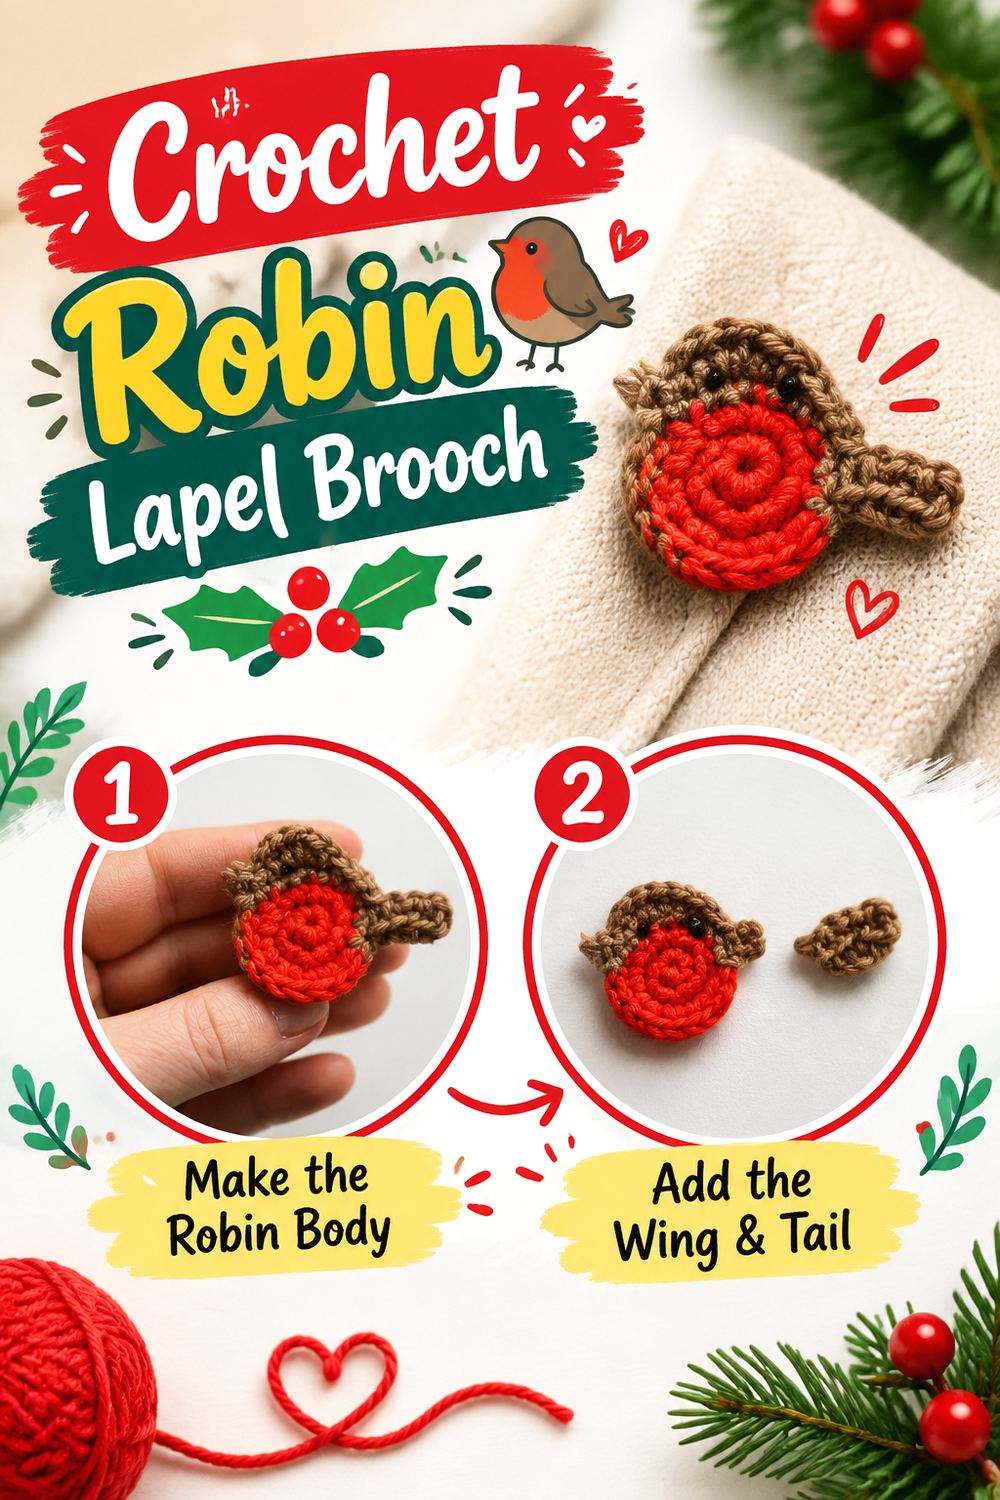
Hobbi CROCHET’s tutorial demonstrates a robin applique that can be turned into a brooch by adding a pin. The finished bird uses its distinctive body coloring and compact side-profile silhouette to read clearly without becoming a heavily stuffed character.
That makes the robin a useful heirloom idea for winter collections, family Christmas boxes, nature-inspired accessories, or a small remembrance piece. It also adds figurative character without the projection of an amigurumi-style brooch. Because the motif has a clear head-to-tail direction, the clasp position should support the intended angle rather than simply running through the geometric center of the crochet.
Decide Whether the Bird Should Sit Level or Perch
A robin can look quite different when held horizontally versus tipped slightly upward. Test the motif on the garment before marking the pin position. A minor adjustment to the backing angle can make the bird look alert and intentionally placed instead of appearing to slide downward.
Keep Added Seasonal Decoration Secondary
The bird already has a recognizable silhouette and color contrast, so it does not need miniature bells, bows, beads, snowflakes, and holly all competing around it. If you want a stronger heirloom-holiday mood, one restrained addition or a thoughtfully chosen color palette is generally enough to preserve the clarity of the robin.
Original Tutorial and Creator Credit
Creator: Hobbi CROCHET
14. Crochet Textured Sheep Brooch
14. Crochet Textured Sheep Brooch
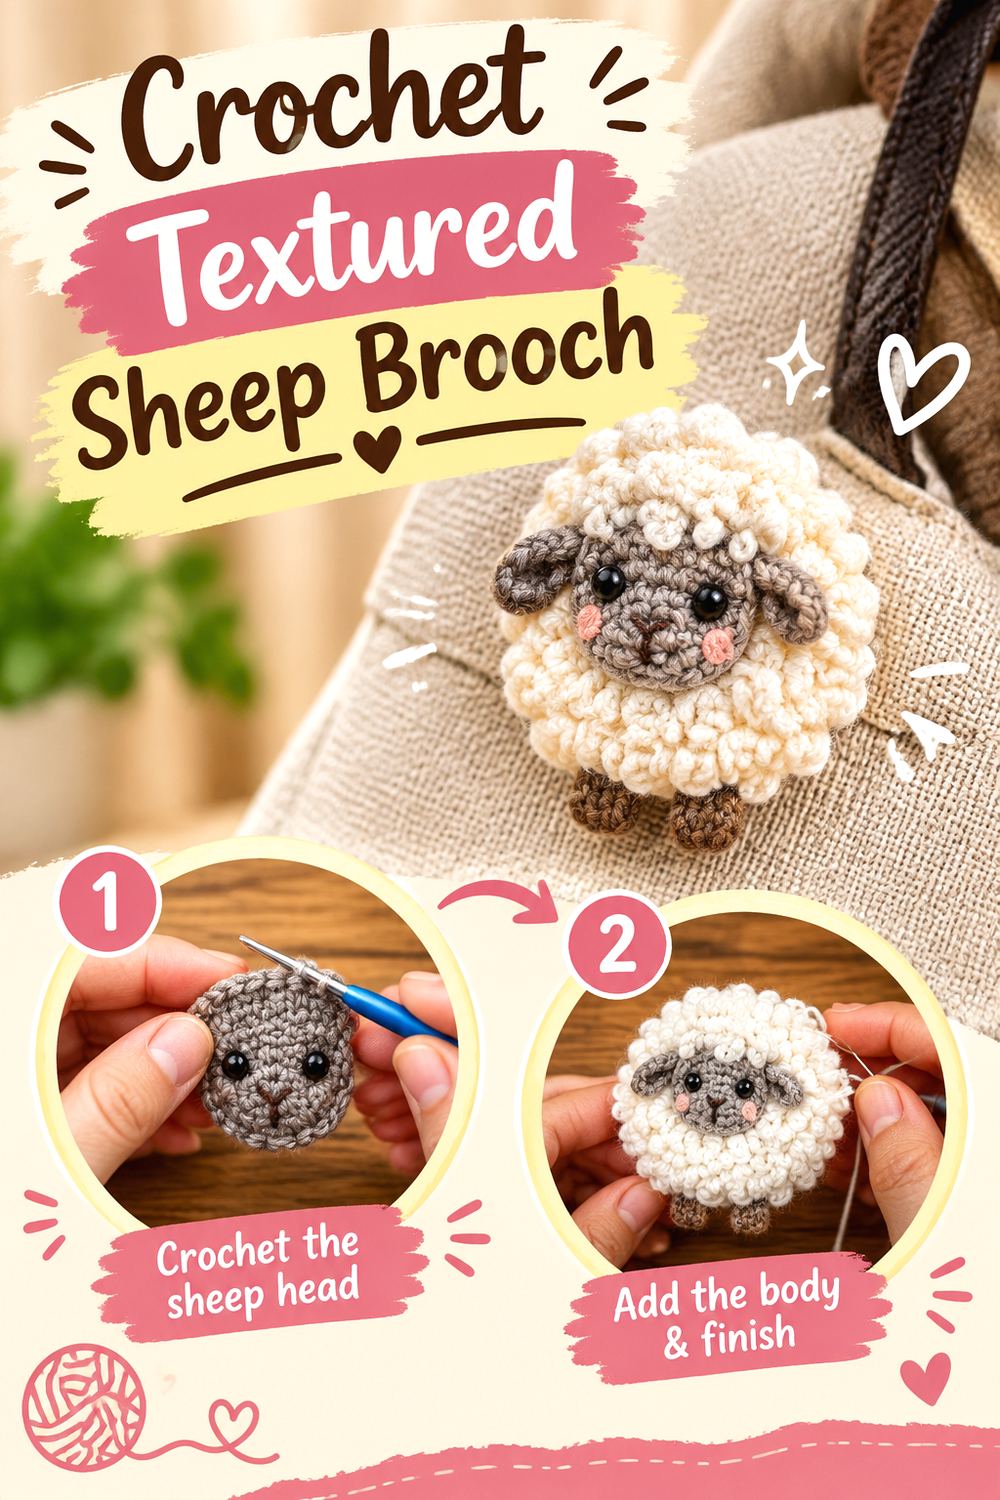
Hello stitches’ detailed sheep brooch tutorial uses a fur-style crochet texture to create the animal’s characteristic woolly body. The surface treatment is therefore part of the actual identity of the motif rather than an optional decorative border.
This gives the brooch a tactile folk-art quality that contrasts strongly with the fine hydrangea, flat medallion, and crisp sunflower. A sheep can work beautifully on denim, a project bag, sturdy knitwear, or tweed-like outerwear where the texture has room to show. The same texture that makes the front appealing, however, means the reverse needs to stay controlled enough that loose loops do not interfere with the fastening mechanism.
Do Not Let Texture Erase the Animal
If you substitute a thicker, fuzzier, or more irregular yarn, check whether the head and body still read immediately as a sheep. At small scale, excessive texture can swallow the silhouette. The goal is a woolly impression with recognizable boundaries rather than maximum fluff.
Keep Loops Away From the Clasp
Textured crochet can create projecting loops or fibers that are easy to catch in a brooch mechanism. Before attaching the hardware, identify a stable part of the reverse and clear the moving parts of decorative texture. Open and close the clasp several times after installation to confirm that nothing is being pulled into it.
Treat Small Added Parts Carefully
If you adapt the brooch with beads, buttons, eyes, or similar small components, make sure each is securely attached and appropriate for the intended wearer. Because the piece contains a sharp brooch pin, it should not be treated as a child’s play object. For gifts, consider whether a bag or display textile is a better destination than clothing.
Original Tutorial and Creator Credit
Creator: hello stitches
15. Crochet Dimensional Butterfly Brooch
15. Crochet Dimensional Butterfly Brooch
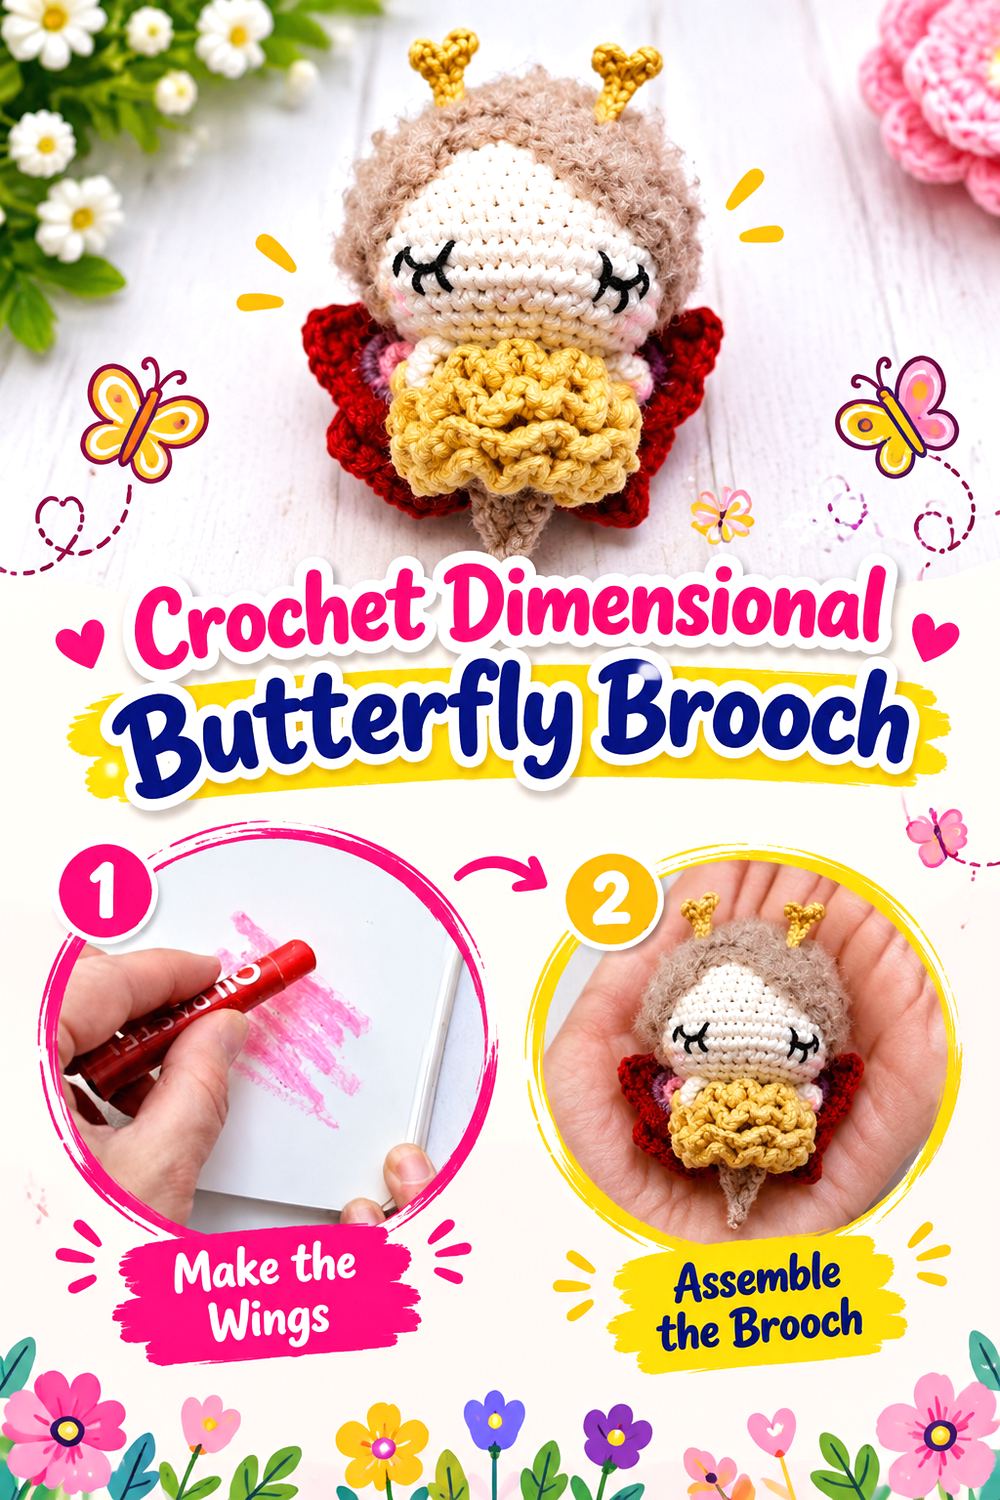
CrochetConfetti’s butterfly is a character-style brooch rather than a simple butterfly applique. The video shows a small dimensional figure with a crocheted body, wings, limbs, antennae, facial details, stuffing, and a brooch-pin attachment.
That combination makes it one of the most whimsical keepsakes in the collection. It has more projection and more potentially snag-prone details than almost every flat flower here, so it suits a stable cardigan, coat, fabric tote, or display piece better than an extremely delicate textile. For an heirloom interpretation, subtle embroidery and restrained coloring can soften the character styling without changing the distinctive body-and-wing construction.
Protect the Wings During Assembly
The wings provide most of the recognizable butterfly silhouette. Before finishing the pin attachment, lay the figure down and check that neither wing is being pulled inward by stitches connecting the body or backing. Correcting tension at this stage is more effective than trying to disguise an uneven wing later with extra decoration.
Plan for Projecting Details
Antennae, limbs, hair, and wings can catch on open knits, loosely woven scarves, or neighboring jewelry during storage. Think about intended use before choosing the brooch’s destination. A dense coat, bag, or display board may preserve those small details better than a surface where they are repeatedly rubbed.
Keep the Expression Subordinate to the Silhouette
Tiny facial details add personality, but they should not become so elaborate that the wings and body are visually secondary. If adapting the decoration, inspect the brooch at normal viewing distance. A few clear stitches often communicate more effectively on a miniature character than many competing accents.
Original Tutorial and Creator Credit
Creator: CrochetConfetti
16. Crochet Keepsake Heart Brooch
16. Crochet Keepsake Heart Brooch
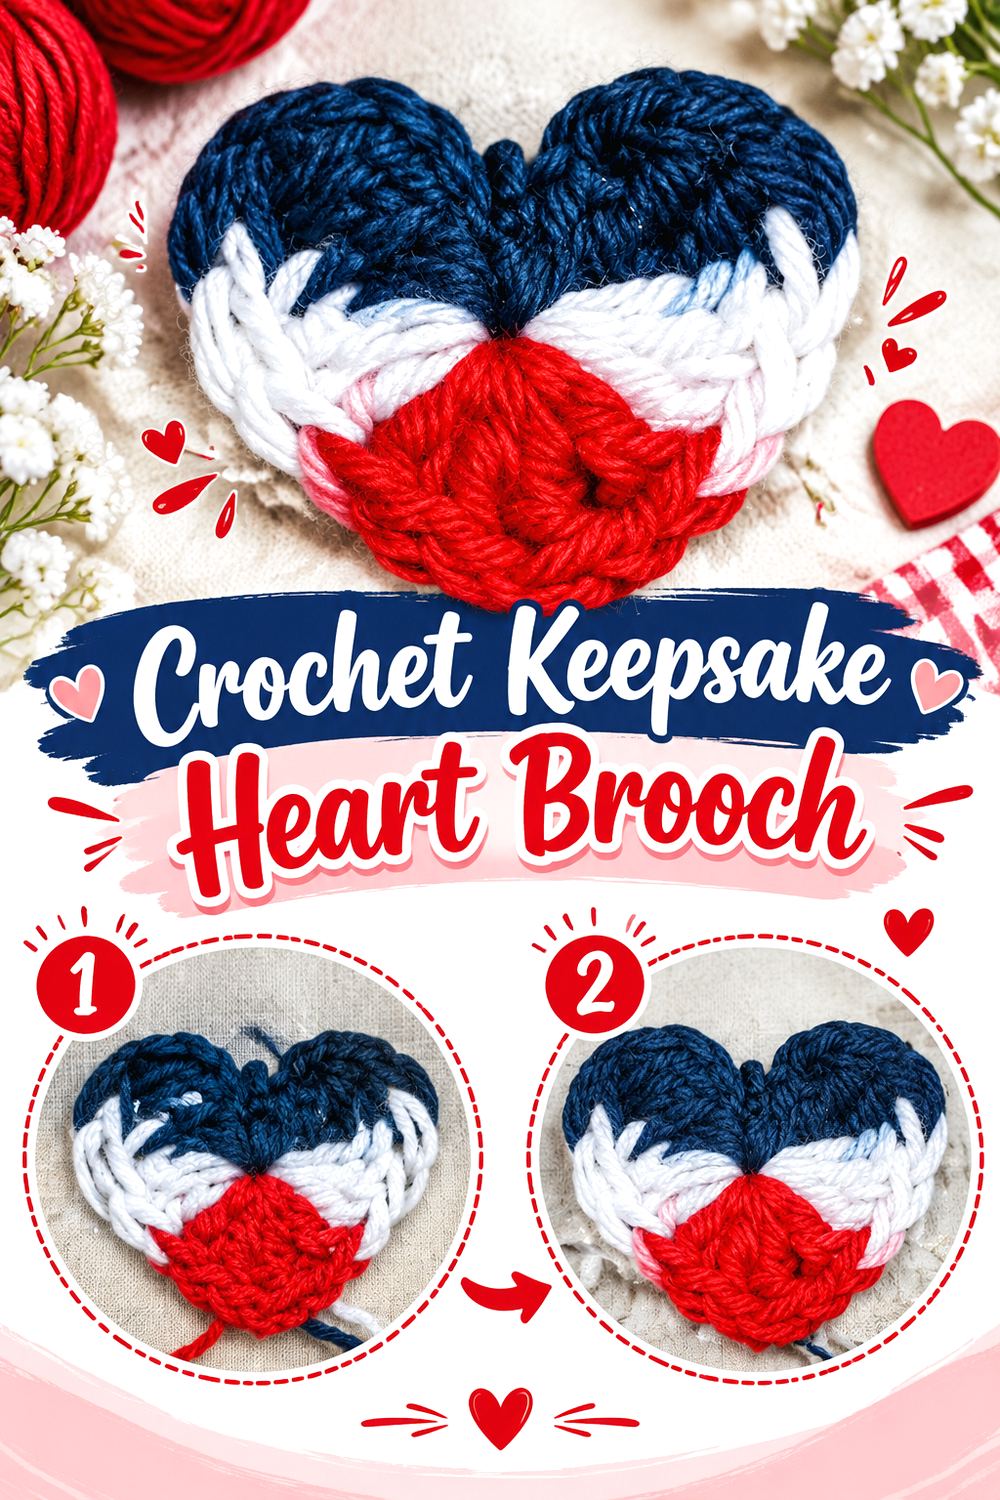
Suzetta’s Heart Pin is a deliberately straightforward brooch design built around one of the clearest symbolic silhouettes. The original pattern at Suzies Stuff includes small and large heart versions and suggests ribbon or yarn bows as possible embellishment.
A heart works well when sentiment is more important than botanical realism. It could mark an anniversary, remembrance, friendship, Valentine’s tradition, wedding keepsake, or family color story without relying on complicated three-dimensional construction. Its comparative simplicity also makes the quality of finishing conspicuous: a clearly shaped point, balanced upper lobes, neat backing, and proportionate bow will contribute more than adding several unrelated decorative elements.
Preserve the Heart Before Adding a Bow
Check the point and upper indentation while the motif is still unobstructed. If those defining features are curling or distorted, correct the shape before embellishing. A wide ribbon placed across a small heart can hide the very contours that make it recognizable, so test the bow temporarily before sewing or attaching it permanently.
Use Sentimental Materials Selectively
A tiny piece of meaningful ribbon or a color associated with a person can make this simple brooch feel more personal than a complicated collection of charms. If using an older ribbon or textile scrap, check its condition first. Fragile materials that are already fraying may be better preserved elsewhere rather than placed on an accessory designed for repeated handling.
Original Tutorial and Creator Credit
Creator/Site: Suzies Stuff
Comparing the Crochet Heirloom Brooch Styles
The right project depends as much on where the brooch will be worn as on the motif you prefer.
| Style | Examples | Overall Character | Main Planning Issue |
|---|---|---|---|
| Fine textile jewelry | Hydrangea, Daisy, Sunflower | Delicate and detailed | Keep hardware proportionate |
| Dimensional floral | Ruffle Corsage, Rose, Peony | Soft statement accessory | Control depth and weight |
| Structural botanical | Poppy, Acorn and Oak Leaf | Directional and naturalistic | Plan orientation and assembly |
| Altered-surface textile | Felted Chrysanthemum, Embroidered Oval | Strong material character | Respect finishing and care limits |
| Folk keepsake | Matryoshka, Angel, Robin, Sheep | Nostalgic and figurative | Preserve silhouette and backing stability |
| Dimensional character | Butterfly | Whimsical and projecting | Protect snag-prone details |
| Symbolic keepsake | Heart | Simple and personal | Let finishing carry the design |
A light blouse generally favors finer, flatter work, while coats, bags, hats, and sturdy cardigans give heavier or dimensional pieces more support. Mixed-media projects deserve additional attention to storage and care.
Conclusion
These 16 crochet heirloom brooch ideas show how much character can fit into a small wearable object. The hydrangea and daisy emphasize thread-scale detail; the rose, peony, and ruffled corsage rely on depth; the chrysanthemum changes its surface through felting; and the embroidered oval creates a completely different cameo-like effect. Botanical acorns, a robin, sheep, matryoshka, angel, butterfly, and heart extend the collection beyond conventional flower pins.
Choose according to the textile you plan to wear it on and the kind of detail you want to preserve. Fine pieces benefit from proportionate hardware, dimensional pieces need supportive surfaces, and mixed materials require thoughtful care. Once you select a favorite, use the credited original tutorials for exact construction details and treat your color, embellishment, and presentation choices as the personal layer that turns the finished brooch into a keepsake.
Frequently Asked Questions
What yarn is best for a crochet heirloom brooch?
There is no single best yarn because the projects use very different approaches. Fine cotton or embroidery thread can produce crisp jewelry-scale detail, while ordinary yarn gives flowers more obvious textile presence. A felted brooch requires a fiber compatible with the creator’s felting process, and textured animal projects may depend heavily on the yarn’s surface. Check the original tutorial before changing both fiber and thickness.
Should every crochet brooch have a felt backing?
No. Felt can conceal yarn ends, provide a broader surface for hardware, or stabilize a layered composition, but it can also make a tiny thread brooch unnecessarily thick. Decide after assessing the actual reverse of the project. If a backing is added, trim it within the front silhouette and confirm that it does not prevent the clasp from opening fully.
How can I make a crochet brooch look more like an heirloom?
Focus on coherence rather than adding every vintage-looking decoration you can find. Fine thread, softly contrasting colors, restrained embroidery, fabric leaves, a thoughtful button, an old jewelry component in safe condition, or a small symbolic fabric scrap can establish a keepsake quality. One meaningful detail generally has more impact than covering a small brooch with unrelated pearls, lace, charms, bows, and beads.
How do I keep a dimensional brooch from tipping forward?
First make sure the garment can support the brooch’s weight and depth. Then experiment with the pin location before permanently sewing it down. Hardware positioned too high on a flexible backing can allow the lower portion to swing outward. Test the brooch on fabric similar to its intended surface. Sometimes the correct solution is simply moving a substantial brooch to a coat, hat, or bag.
Can I make these brooches larger by using thicker yarn?
Sometimes, but a larger yarn does more than change dimensions. It can soften fine details, increase weight, alter petal spacing, make a figure bulkier, or require a different-size backing. For projects involving wire, felting, stuffing, or mixed materials, scaling can also affect structural behavior. Check what the original creator says about substitutions and reassess the backing after the new size is known.
How should crochet heirloom brooches be stored?
Store them where dimensional petals, wings, stuffing, embroidery, and decorative components are not crushed by heavier objects. Keep sharp pin points closed, and prevent wire or protruding details from catching neighboring textiles. Care should follow the actual yarn plus the most delicate additional material. Brooches incorporating beads, vintage jewelry, glue, fabric, color treatments, or felt should not automatically be washed like plain crochet.