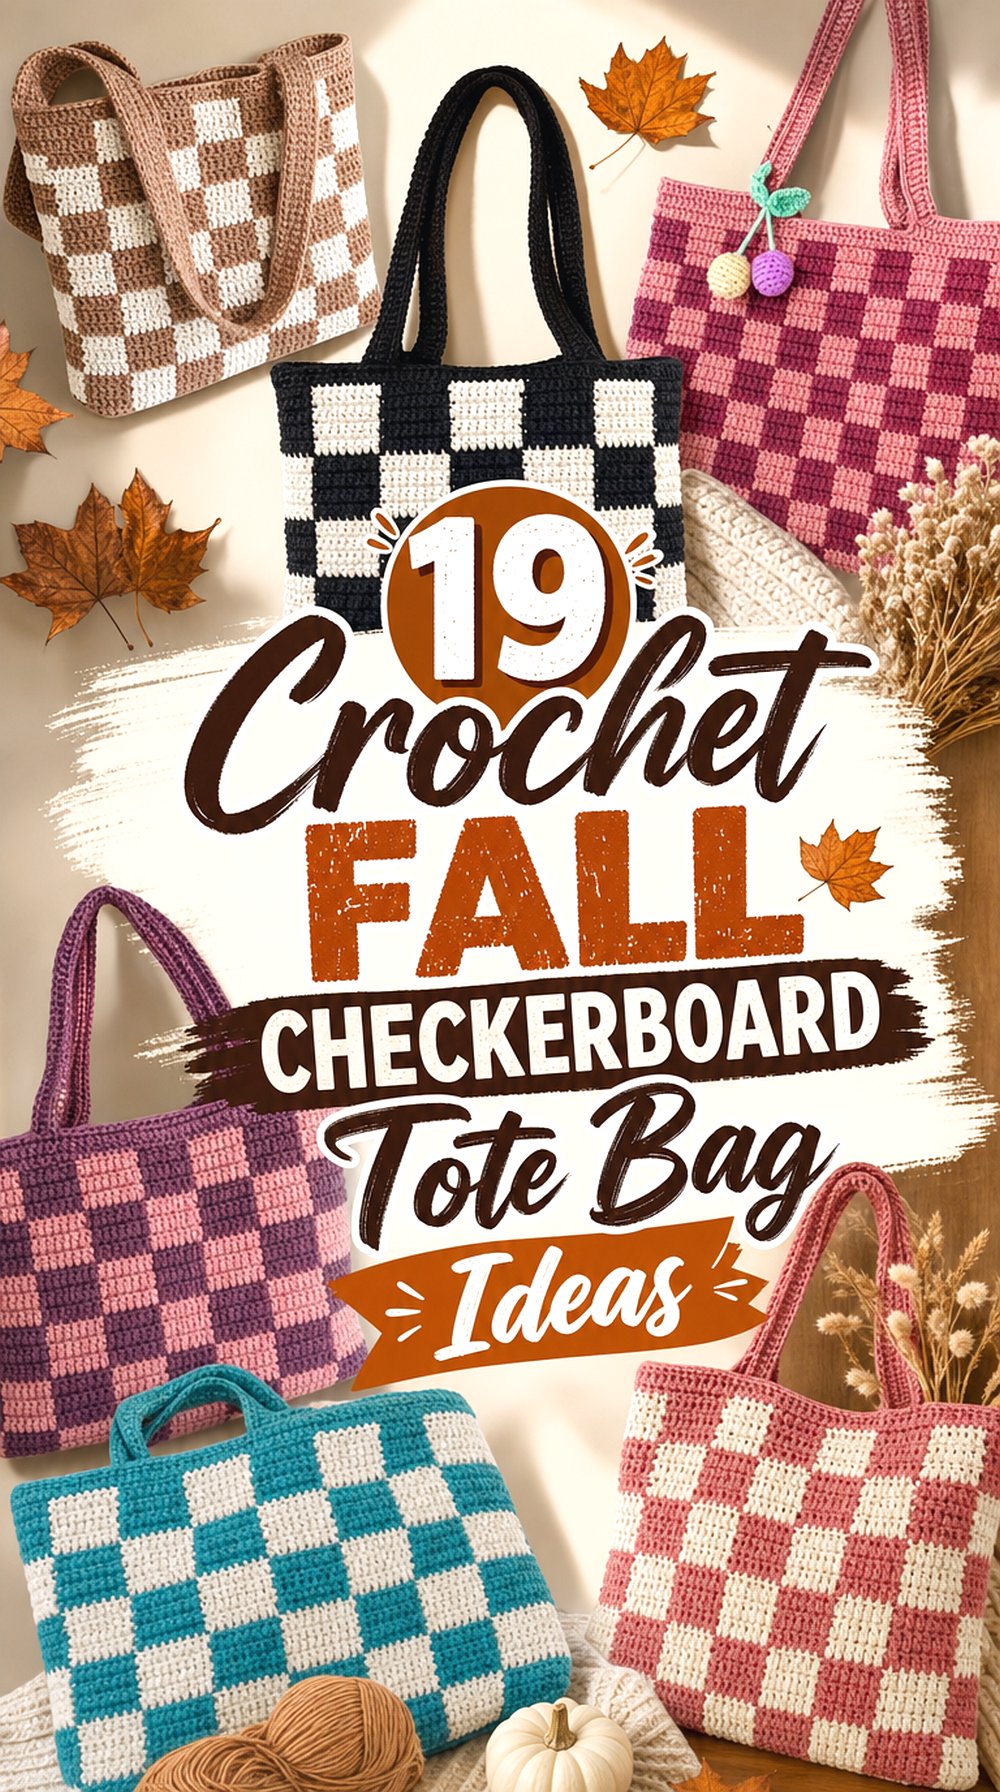
19 Crochet Fall Checkerboard Tote Bag Ideas
Checkerboard crochet works especially well for fall totes because the same grid can look completely different when you change the bag structure, scale of the checks, handle treatment, fabric density, or color relationship. Rust and cream can feel traditional, while olive, oatmeal, burgundy, plum, mustard, and chocolate create quieter autumn combinations.
This collection goes beyond swapping colors. You’ll find gingham constructions, broad graphic checks, chunky bags, panel-built totes, lined options, tapered straps, softer shoulder shapes, and more structured everyday carriers. A few source tutorials are described by their creators as shoulder or checker bags rather than full market totes; they are included only where the finished construction provides a useful tote-style variation. Compare structure, stretch, opening, straps, and finishing before settling on a color palette.
Quick List
- Crochet Rust-and-Cream Classic Checkerboard Tote
- Crochet Warm-Tone Continuous-Body Checkered Tote
- Crochet Compact Cocoa Grid Tote
- Crochet Three-Tone Fall Gingham Picnic Tote
- Crochet Tapered-Strap Checkerboard Carryall
- Crochet Corded Checkerboard Market Tote
- Crochet Wide Everyday Checkered Tote
- Crochet Lined Checkerboard Pocket Tote
- Crochet Two-Panel Berry Check Tote
- Crochet Slouchy Forest-Green Checkerboard Tote
- Crochet Bold Block Shoulder Tote
- Crochet Chunky Harvest Checkerboard Tote
- Crochet Lightweight Checkerboard Tote
- Crochet Classic Autumn Gingham Square Tote
- Crochet Clean-Edge Checkered Tote
- Crochet Sewn-Side Gingham Tote
- Crochet Minimalist Checkerboard Shoulder Tote
- Crochet Connected-Handle Checkerboard Tote
- Crochet Compact Checkerboard Tote-Style Bag
Choose the Tote Structure Before the Fall Color Palette
The checkerboard pattern may grab attention first, but construction determines whether a bag feels structured, relaxed, compact, or roomy. A tote built around a defined base generally behaves differently from two flat panels sewn together. A shoulder-oriented checker bag may sit closer to the body, while a wider tote opening is easier to use for yarn, books, or everyday items.
Before choosing your autumn colors, look at the tutorial’s finished silhouette. Notice where the base begins, whether the sides are seamless or joined, how the top opening is finished, and whether the straps are added separately or shaped as part of the upper bag. If you plan to resize, those details matter more than simply adding another row of checks. Changing width can also change where the pattern meets at seams and handles.
Yarn Stretch, Strap Support, and Lining Can Change the Result
A checkerboard tote asks the fabric to do two jobs: keep the color blocks readable and support whatever the bag carries. A firmer fabric can hold a rectangular shape more clearly, while a softer fabric may create the relaxed drape some shoulder bags need. Fiber, yarn construction, stitch density, and hook choice all contribute, so do not judge stability from fiber name alone.
Straps deserve separate attention. Longer, narrower, or more elastic handles can stretch under use, especially when the bag is loaded. A lining can reduce how much small objects press through the crochet fabric and may help control distortion, but it also changes finishing and care. If lining matters to you, check whether the selected tutorial actually covers it instead of assuming every tote can be finished the same way.
Build a Fall Palette That Still Shows the Checks
Autumn colors do not have to mean orange and brown. What matters for checkerboard crochet is whether neighboring blocks remain distinct enough to read as a grid. Burnt orange against oatmeal creates strong separation; moss with cream is softer; burgundy with tan gives a richer contrast; chocolate and mustard create a more graphic retro effect.
Three-color gingham needs a different approach. Instead of choosing three unrelated shades, look for a light color, a deeper anchor, and a middle shade that visually connects them. The exact combination is personal, but viewing the yarns together in daylight before starting can prevent two colors from blending unexpectedly. For a more understated bag, reduce color contrast while keeping enough value difference that the checker pattern does not disappear from several feet away.
1. Crochet Rust and Cream Classic Checkerboard Tote
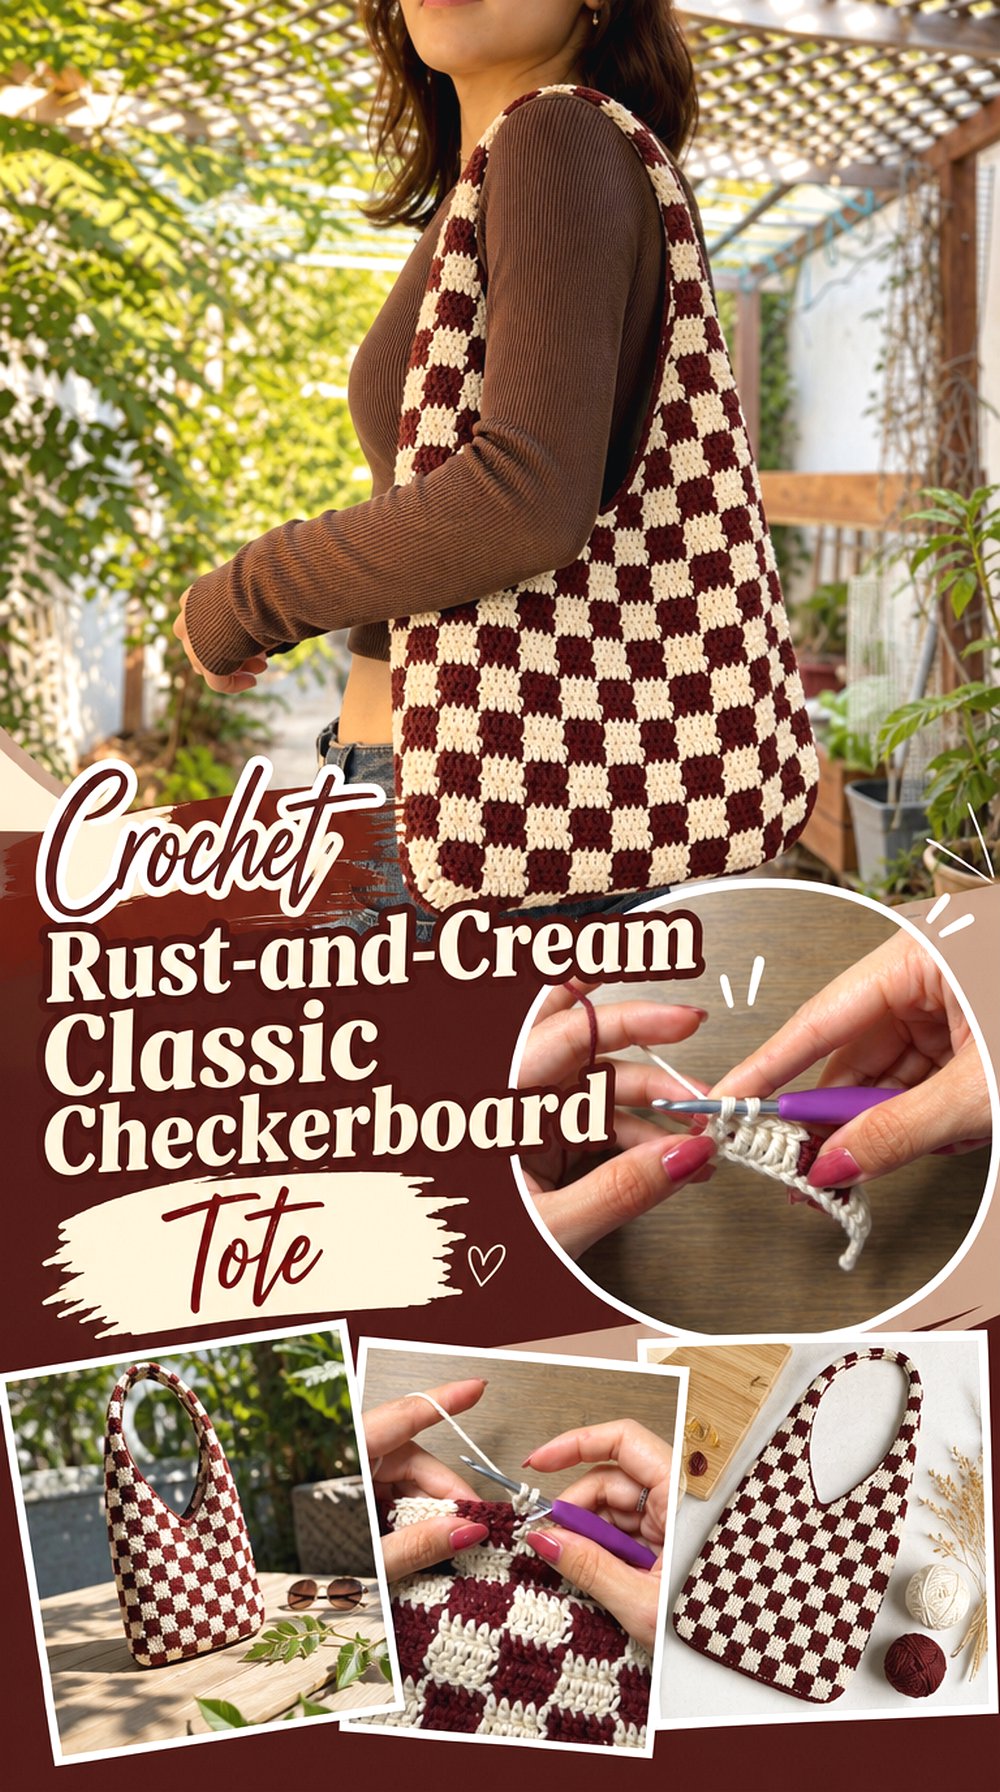
This is the strongest place to start if you want a recognizable checkerboard tote rather than a smaller purse adapted into one. The finished concept has a defined base, a full checkered body, and straps that visually continue the clean modern shape. Rust paired with cream would push the design toward fall without changing what makes the original bag work.
This version suits someone who wants bold, medium-scale checks rather than gingham. It is also worth considering if resizing matters, because the source tutorial specifically addresses making the tote smaller or larger rather than presenting only one immutable finished form.
Strap Shaping Keeps the Upper Edge Cohesive
The straps are part of the bag’s overall silhouette, so treat their proportions as more than a decorative choice. A wider body paired with disproportionately narrow handles can make the top look visually pinched, while very long handles may alter where the tote rests when carried.
If you change the tote size, judge strap width and drop against the new body rather than copying the original proportions automatically. The tutorial separates base, body, and strap instruction, making those checkpoints easier to see.
Check the Base Before Resizing the Whole Grid
When checkerboard bags are resized, it is tempting to focus only on adding more squares across the visible body. The base is just as important because it establishes the usable width and affects how the tote fills out when loaded.
Make a size decision early, then compare the planned base with the intended use. A wider carryall and a compact everyday tote need different proportions even if both use the same rust-and-cream grid. The creator notes that the design can be adjusted in size, so use the original tutorial for the construction-specific changes.
Creator: VivCrochets
2. Crochet Warm Tone Continuous Body Checkered Tote2.
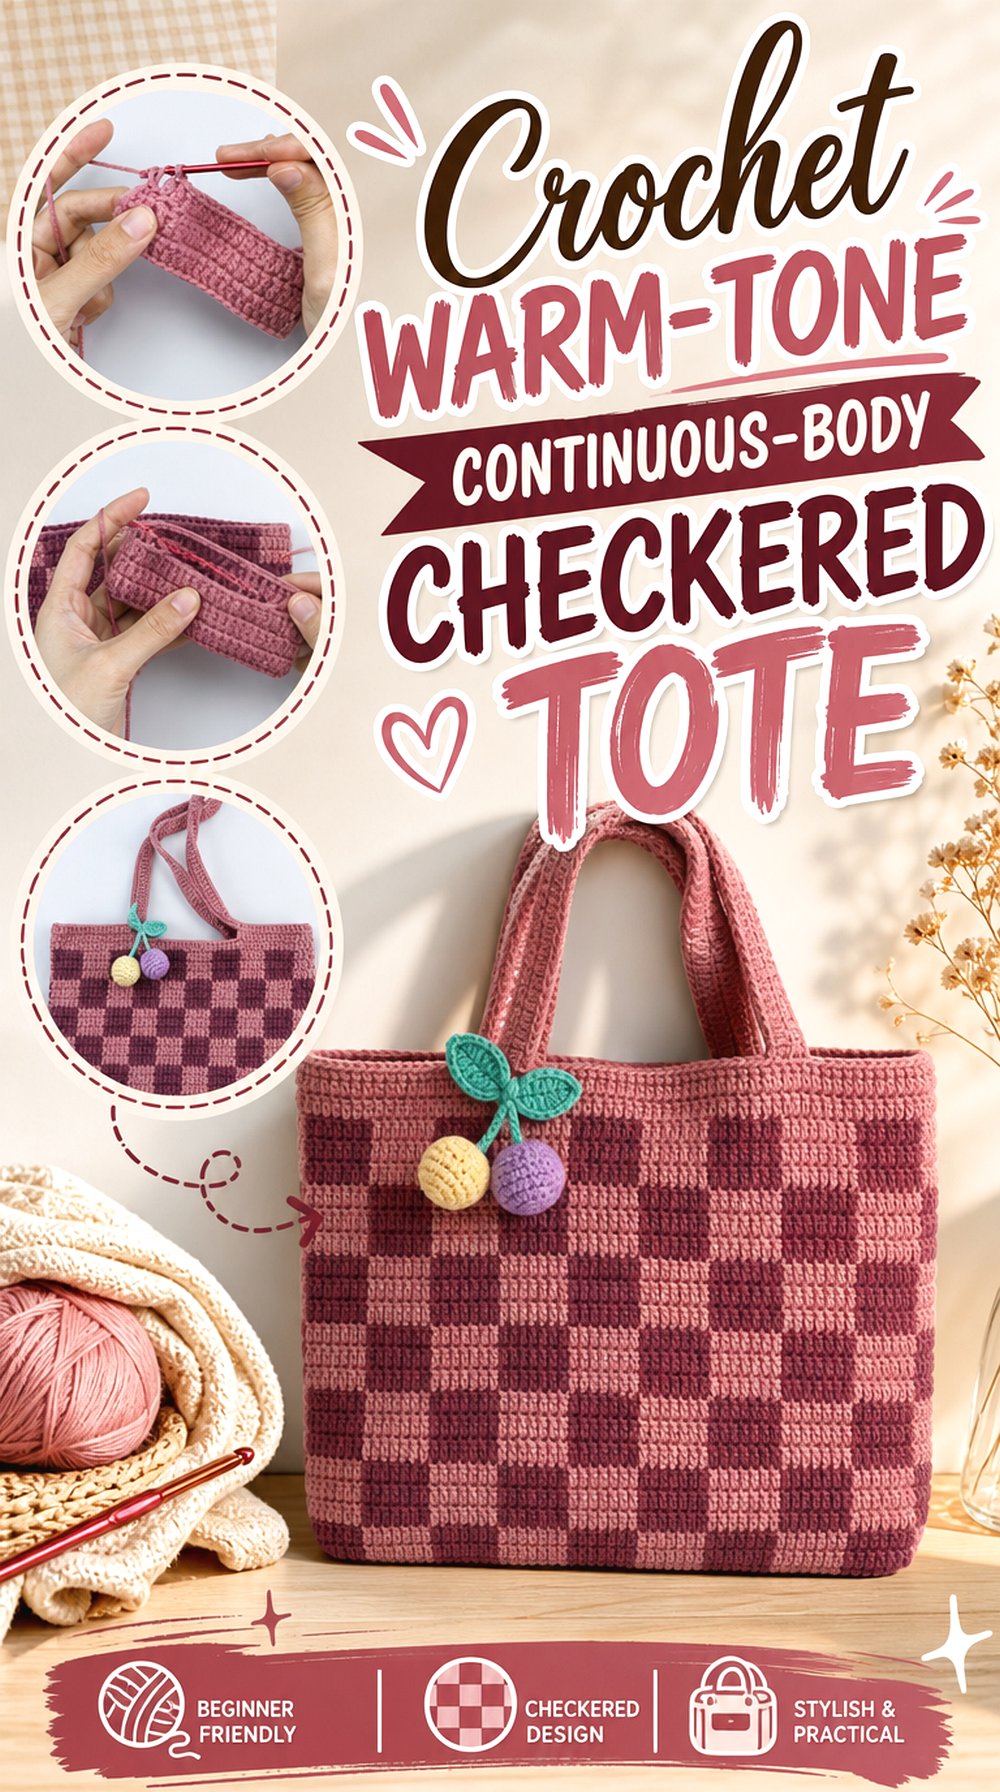
For a smoother, less segmented look, use a checkered tote construction in which the body develops continuously rather than looking like two obvious front-and-back rectangles. A pumpkin-and-plum, terracotta-and-cream, or mustard-and-cocoa pairing can make the graphic checks feel seasonal without adding motifs or embellishments.
This option is especially appealing when you prefer the checkerboard itself to dominate the design. There is less need for decorative hardware, elaborate edging, or an accent panel. Before adapting the colors, pay attention to where the beginning of the round sits because checker alignment at that point is more noticeable in high-contrast combinations.
The Round Transition Deserves a Visual Check
Working a check pattern around a bag introduces a meeting point that a flat panel does not have. Even when the front looks perfectly regular, the transition area can become the first place where an offset or tension change is visible.
Periodically turn the bag and inspect all sides instead of judging progress only from the most photogenic face. If you want very high contrast—such as pumpkin against cream—small irregularities will be easier to notice than with two neighboring earth tones.
Mercerized Cotton Creates a Crisper Kind of Tote
The source tutorial identifies mercerized cotton among its materials. That makes it a useful reference if you are curious about a smoother, more defined surface rather than a fuzzy autumn texture.
Do not assume the same finished behavior from every cotton or every substitute yarn. Make a small colorwork sample first and compare stitch definition, flexibility, and how readily the fabric stretches. A beautiful fall shade is not useful if the finished fabric behaves differently from what you want in a tote.
Creator: Chenda DIY
3. Crochet Compact Cocoa Grid Tote
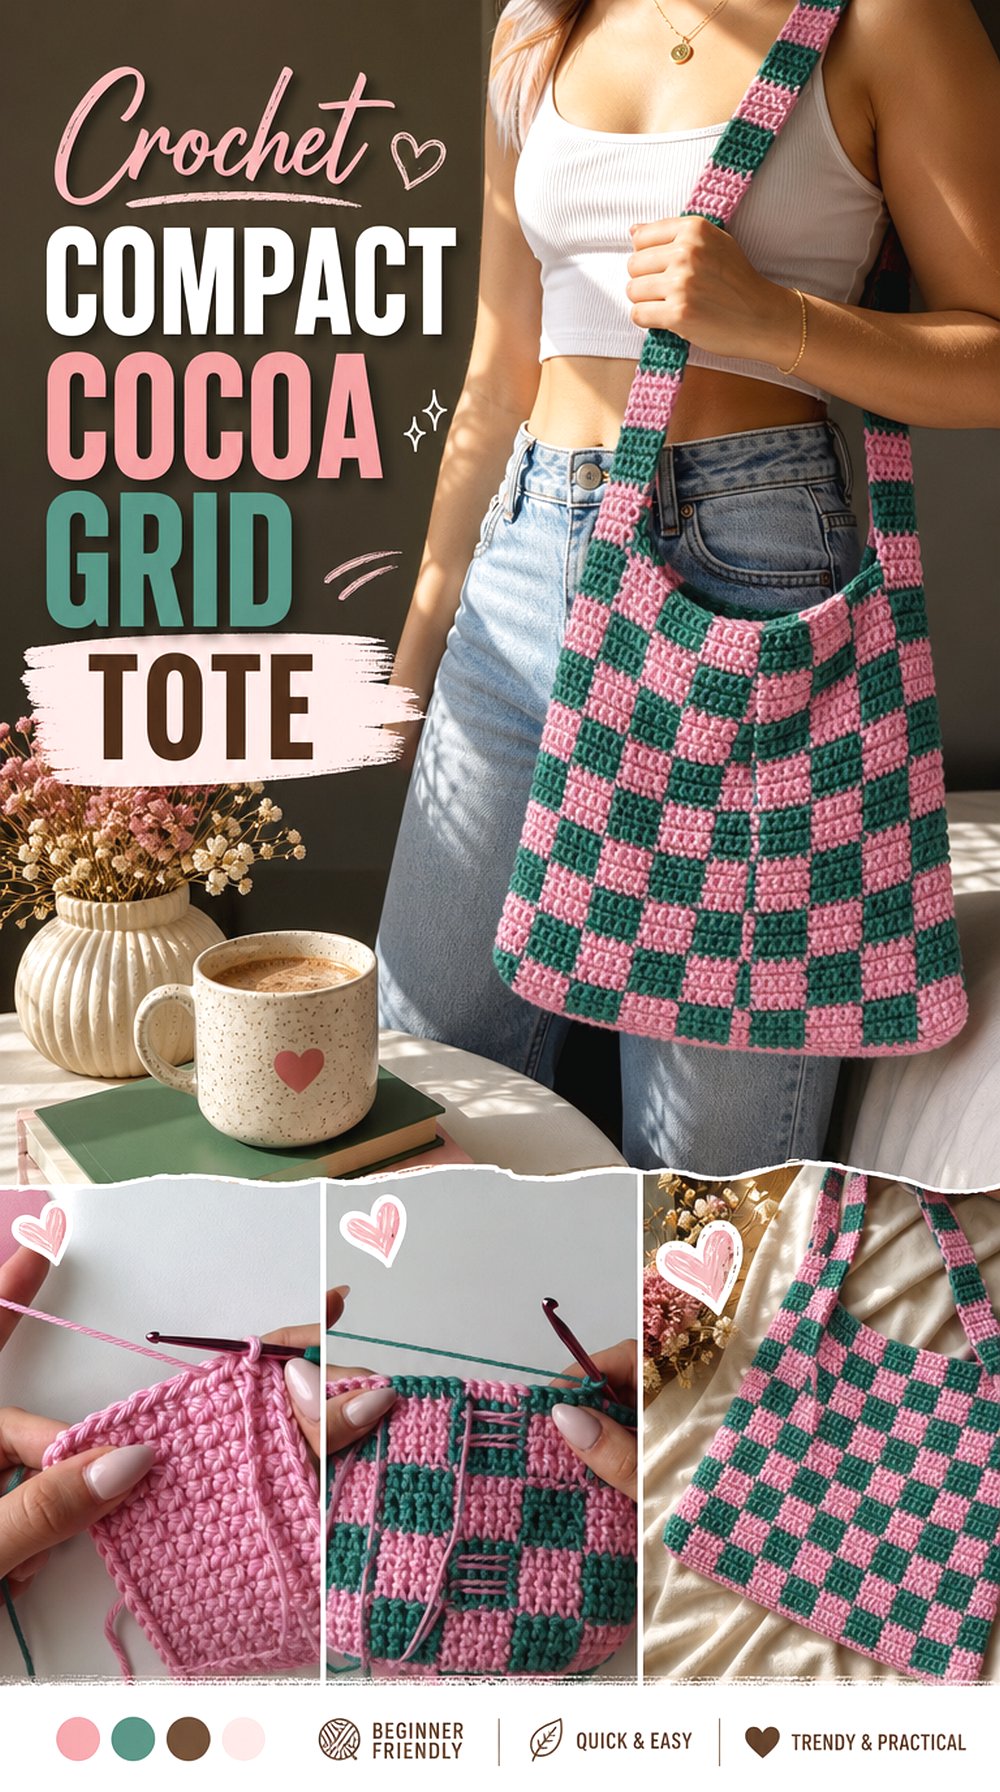
This design direction keeps the checkerboard visually neat and relatively compact rather than turning every block into an oversized statement. Cocoa with rosewood, petrol green with warm cream, or espresso with muted blush can give that tighter grid an autumn feel while preserving plenty of contrast.
Kenikse Crochet’s tutorial separates a base panel, main panel, and handle section, which makes this a helpful choice for readers who like to understand the major structural zones of a tote before committing to color changes. The creator also demonstrates the color-change portion rather than leaving the viewer to infer how the checkerboard develops.
Smaller Checks Make Tension Differences More Frequent
A tighter grid means more frequent transitions between colors. That puts extra attention on tension: if one color is consistently pulled tighter than the other, the squares can look compressed even when the stitch count is correct.
Compare the fabric width every few color sections and let the work relax before deciding it is drifting. This is particularly helpful with dark cocoa beside a lighter shade, where changes in block width are easy to see.
Give the Handle Section Its Own Fit Check
The tutorial devotes a distinct portion to the handles, so do not treat them as an automatic extension of the checker pattern.
Before finishing them, hold the tote where you expect it to sit and consider whether you want hand-carry, close shoulder carry, or a deeper drop. If adapting the size, the original handle proportions may no longer produce the same relationship between the top edge and your shoulder.
Creator: Kenikse Crochet
4. Crochet Three Tone Fall Gingham Picnic Tote4.
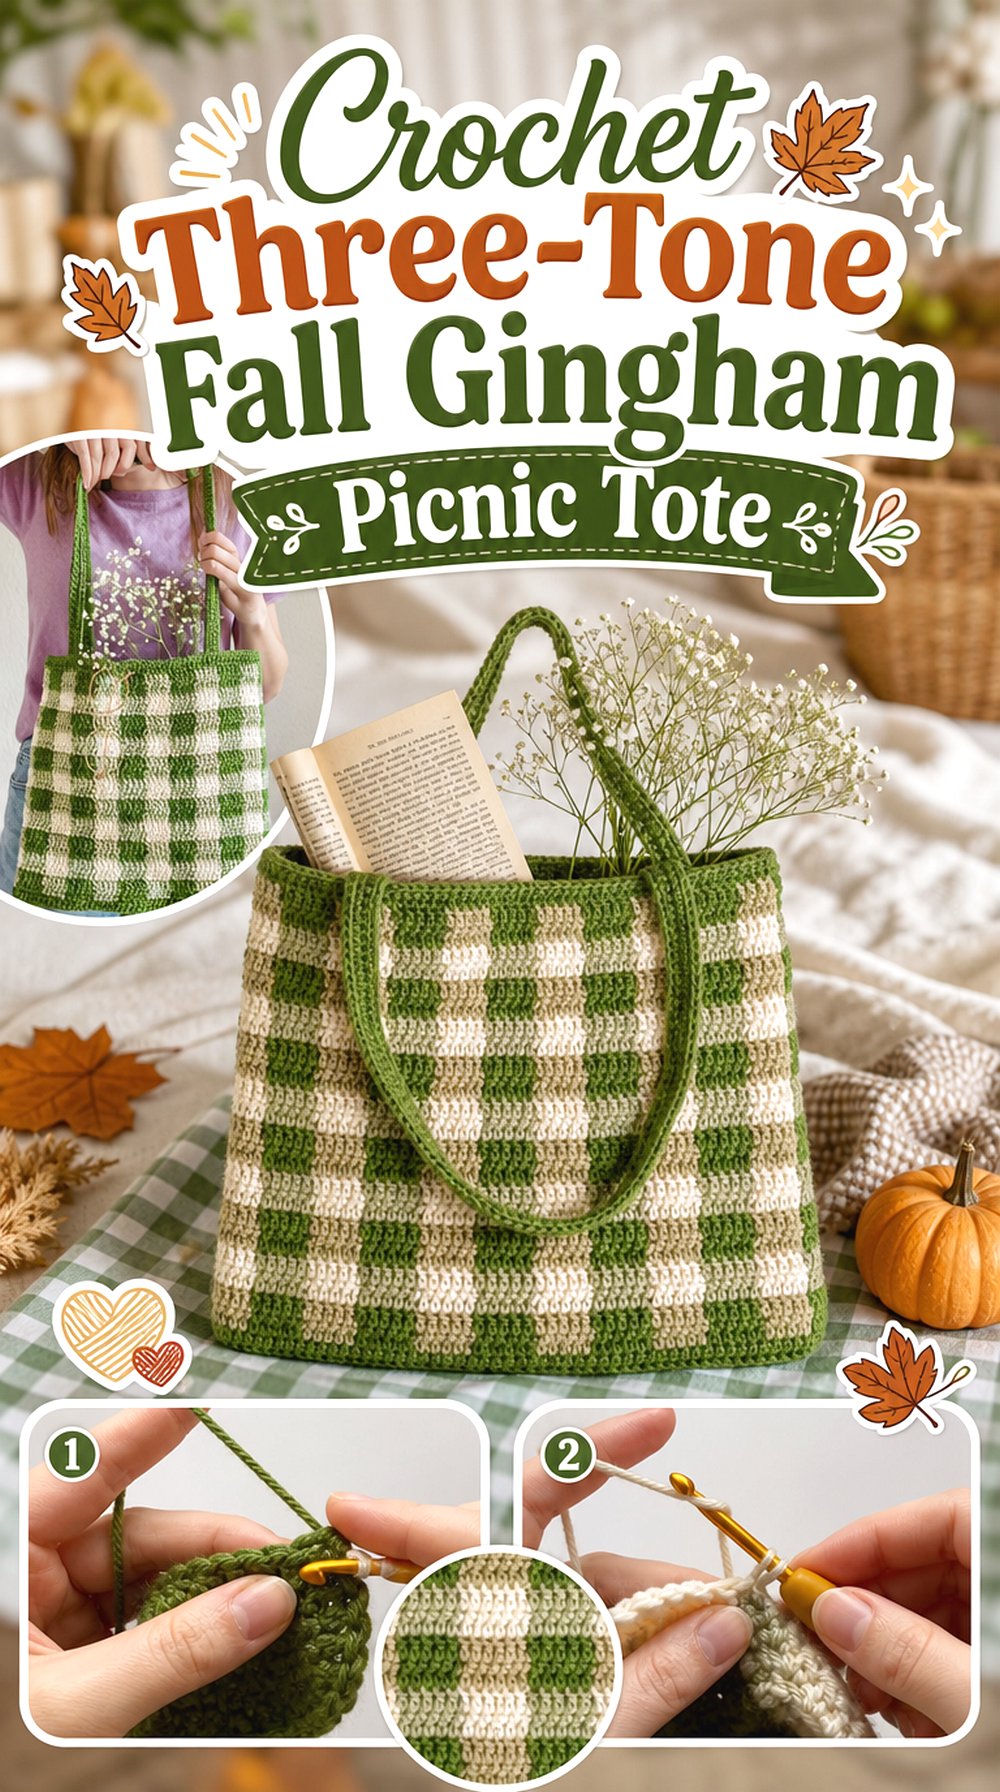
Gingham creates a softer alternative to a hard two-color checkerboard because three related shades interact across the grid. HayHay Crochet’s Fall Picnic Tote uses three colors and a square tote form, making it particularly well suited to an autumn interpretation.
For a fall version, think moss, sage, and ivory; rust, clay, and cream; or burgundy, dusty rose, and oatmeal. This bag feels less like a graphic black-and-white statement and more like woven picnic cloth translated into crochet. It is a strong option when you want seasonal color to matter as much as the checker pattern itself.
Three Colors Need a Clear Light-to-Dark Relationship
Gingham is most readable when the colors feel connected without collapsing into one value. Lay all three skeins side by side, then photograph them in grayscale if you have trouble judging contrast. If two become nearly identical, the woven-looking effect may be much subtler than expected.
That can be intentional. A low-contrast tote looks softer and easier to pair with clothing, while a stronger light-to-dark range emphasizes the individual gingham blocks.
Separate Straps Make Placement Part of the Finish
The source construction uses separately made straps attached to the finished body. That gives you a clear finishing checkpoint: position both straps before permanently securing them and check that they appear balanced against the gingham grid.
On a highly regular pattern, even a small visual mismatch between strap placement on the two sides can be noticeable. Pinning or temporarily positioning them first is more useful than judging each attachment in isolation.
Creator: HayHay Crochet
5. Crochet Three Tone Fall Gingham Picnic Tote
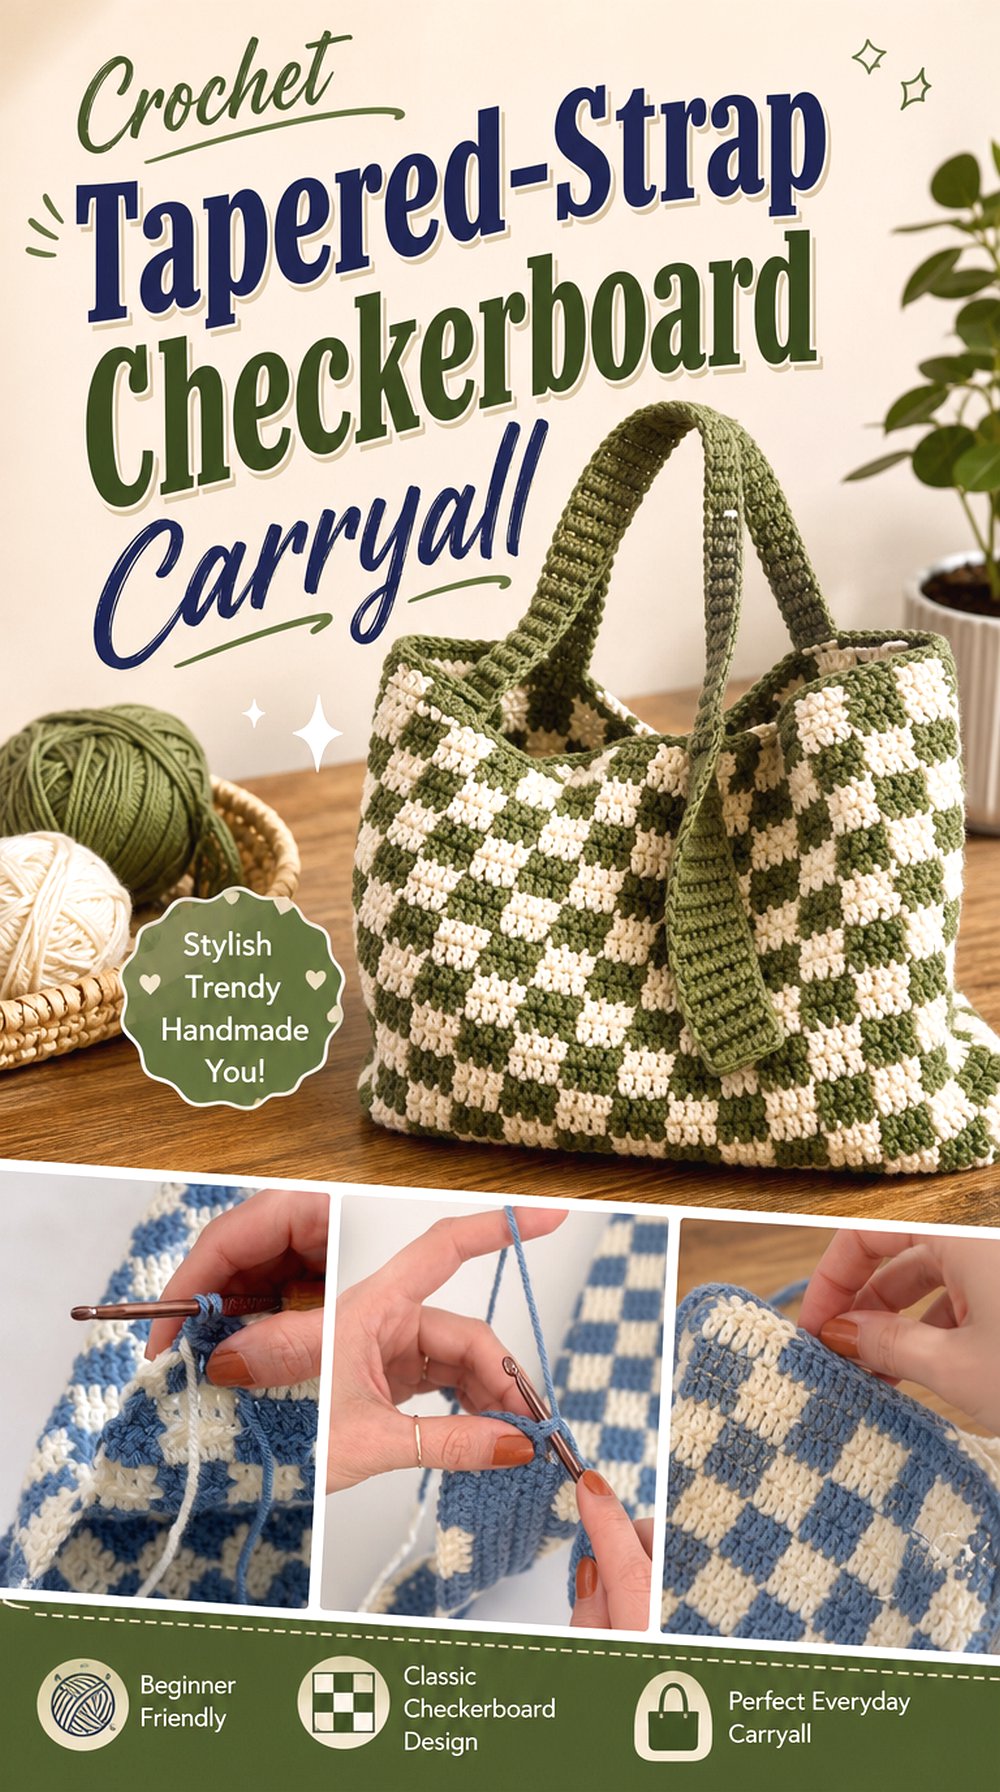
A tote with a flat base, seamless body, and tapered straps offers a more sculpted silhouette than a basic rectangle with two narrow handles sewn on afterward. That construction is the useful distinction in the MitchesGetStitches version. The supporting pattern description identifies a flat base, body worked continuously, and straps shaped directly from the bag.
For fall, try dark chocolate and camel or charcoal and muted pumpkin. The stronger upper shaping keeps the bag from looking like a plain shopping sack, making this direction attractive when you want checkerboard colorwork but a cleaner fashion-bag outline.
A Defined Base Makes Capacity Look More Intentional
A flat base creates a visible lower plane rather than letting the tote collapse entirely into two layers. That can make the checkerboard body look more dimensional once the bag contains something.
If you adapt the width, evaluate the base first. Increasing only the wall circumference without reconsidering the floor can create proportions that feel unusually tall or shallow. Use the creator’s construction for any exact resizing rather than extrapolating a new stitch formula.
Tapered Straps Change the Upper Silhouette
Because the straps narrow as they rise from the bag, they visually connect the body to the shoulder rather than looking like separate cords.
This shape is especially effective with large checks because it gives the eye a gradual transition away from the blocky body. If you switch to a heavier yarn, check how much bulk collects where the strap shaping begins; the same geometry can look much thicker in another material.
Creator: MitchesGetStitches
6. Crochet Corded Checkerboard Market Tote
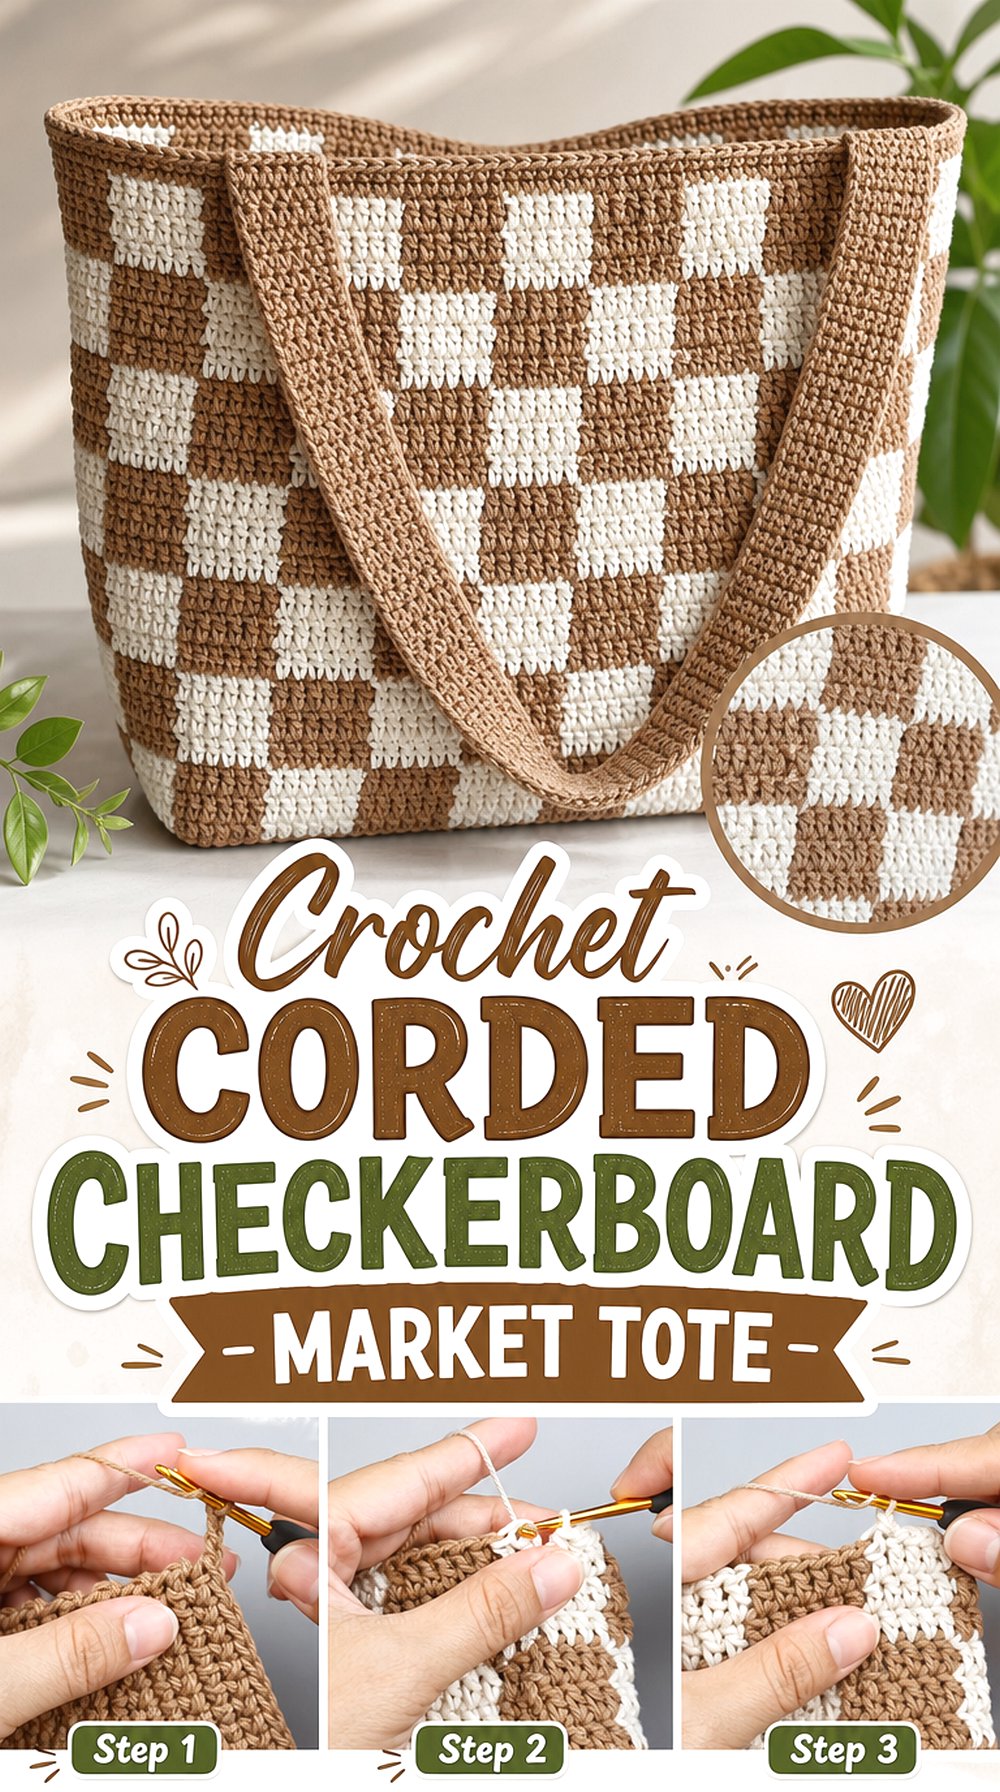
A cord-like yarn can push checkerboard crochet toward a firmer, more bag-like texture. ViVi Berry Crochet presents a checkered bag described for tote, shoulder, and market-bag use and uses cotton rope in the demonstrated project.
That makes this a useful autumn idea if you want stronger physical presence rather than a soft fabric that folds down easily. Think dark olive and sand, cinnamon and cream, or espresso and burnt orange. The grid can stay simple because the thicker, more substantial surface already gives the bag character. Before substituting materials, consider whether your chosen yarn will make the finished handles too rigid or bulky.
Cord-Like Yarn Can Build More Wall Structure
A firmer yarn may help the tote walls stand more distinctly, but extra structure usually comes with a different hand and more bulk. That matters around corners, top edges, and handles.
Work enough of a sample to bend it, not just look at it flat. A fabric that makes perfect checker squares on the table may feel too stiff once folded around an opening or carried against the body.
Market-Bag Use Puts More Attention on the Handles
A market-style tote is likely to be used with objects of changing shape and weight, so the handles are a practical checkpoint rather than an afterthought. Avoid assuming that a visually thick strap automatically guarantees a particular carrying capacity.
Instead, inspect how the handle connects to the body and how your chosen yarn stretches under ordinary use. If you expect frequent loading, lining or reinforcement may be worth considering independently of the source design.
Creator: ViVi Berry Crochet
7. Crochet Wide Everyday Checkered Tote
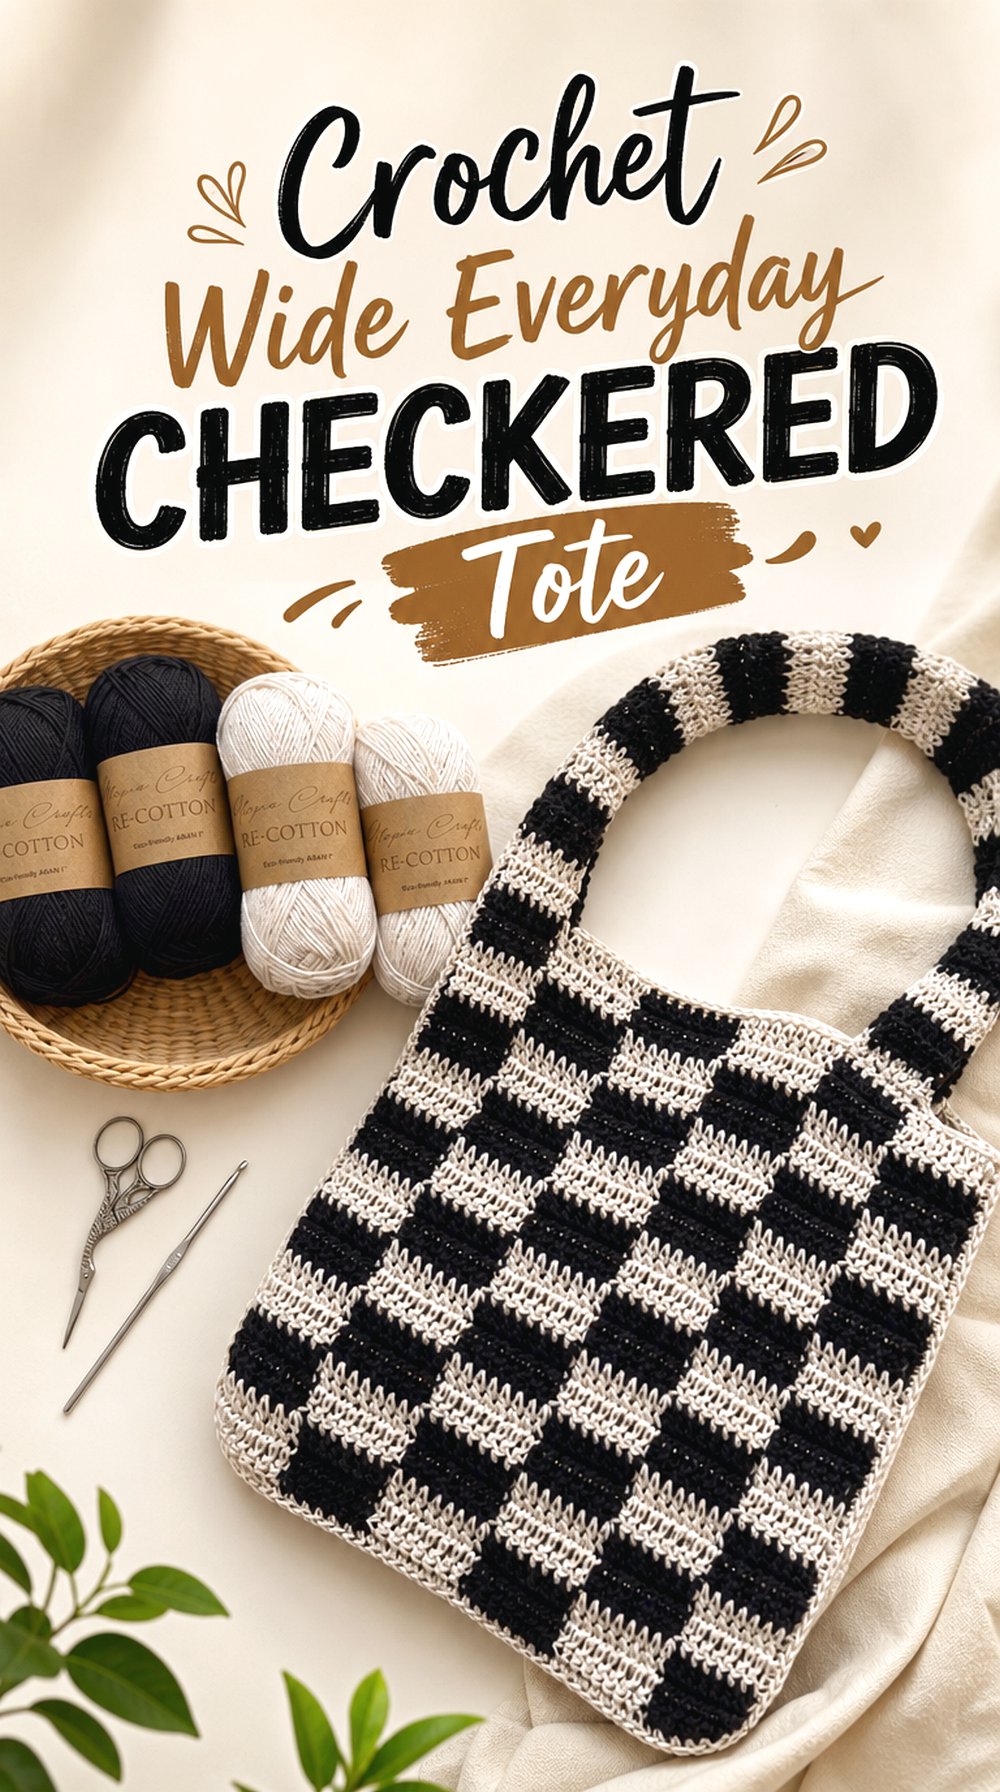
A wider rectangular checkerboard tote is useful when you want the pattern to read like a broad graphic panel. Cat Kemble’s tutorial presents the finished piece specifically as a checkered tote and describes it as suitable for everyday carrying.
For a fall interpretation, try walnut with cream, deep green with camel, or burgundy with a muted beige. The broad front gives those combinations enough room to repeat without becoming visually busy. This version makes sense for readers who prefer a recognizable tote silhouette over a narrow shoulder purse, especially when the checkerboard is intended to be the main design feature.
A Broad Rectangle Handles Flat Items Differently
The wider the tote, the more noticeable its proportions become when carrying notebooks, folders, or similarly flat objects. Before resizing, compare the opening width with the kinds of items you realistically want to place inside.
A wider shape can also sag differently from a narrow bag if the yarn is very flexible. If retaining a crisp rectangle is important, fabric density and optional lining deserve more attention than simply choosing a thicker yarn.
Keep Side Edges From Interrupting the Grid
On a broad checkerboard, the front panel creates a strong rhythm. That makes the side transition easy to notice. When you reach finishing stages, inspect whether the checker blocks appear visually balanced near both edges.
If the construction includes seaming, align the pieces before securing the full seam. A small mismatch that seems harmless at the bottom can become more obvious near the opening where the eye expects the checks to stay level.
Creator: Cat Kemble
8. Crochet Lined Checkerboard Pocket Tote
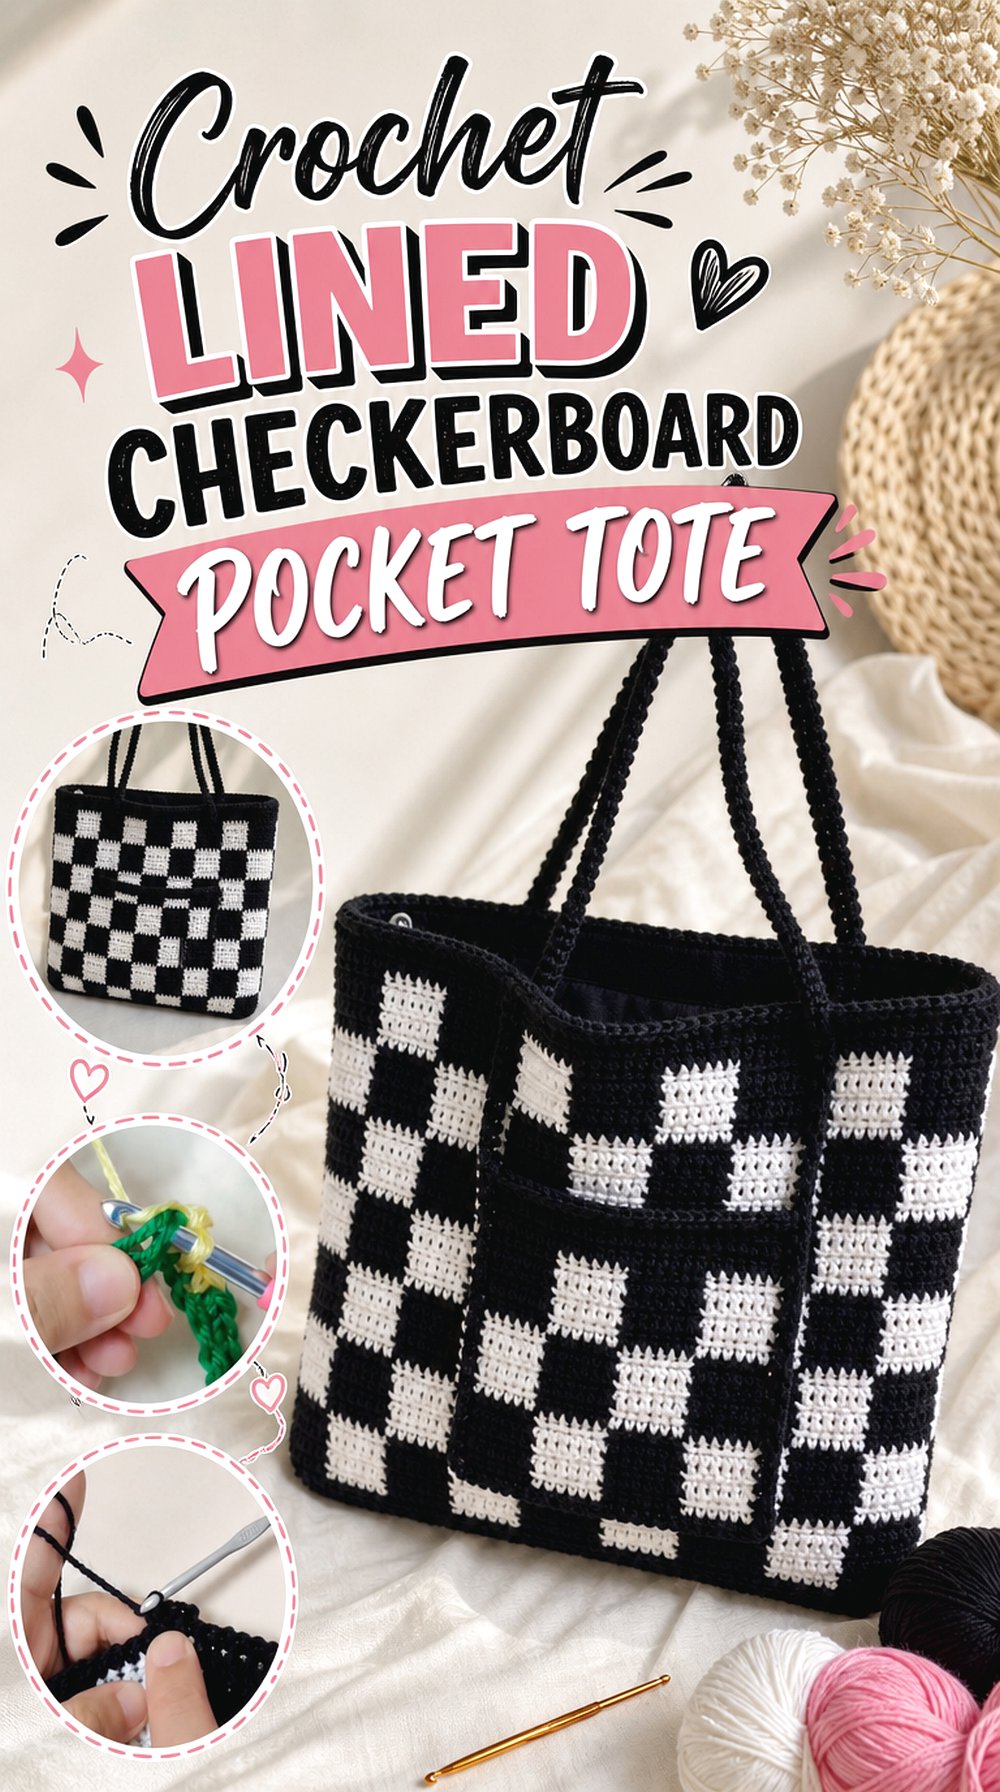
A lining and interior pocket turn the checkerboard tote into a more finished storage piece rather than leaving all organization to the crocheted shell. Let’s All Crochet explicitly covers a checkerboard tote or purse with both a pocket and lining, making this the most practical reference in the collection for readers who want interior finishing demonstrated rather than improvised.
For fall, keep the outside graphic—perhaps chocolate and oatmeal—then choose a lining that coordinates without competing. A lining is especially worth thinking about when the crocheted fabric has enough openness or stretch that small items could distort the bag.
Lining Changes the Interior More Than the Exterior
The biggest benefit of lining may not be visible in photographs. It can keep small objects from catching in the crochet fabric and creates a separate inner surface that can be easier to organize.
However, lining also affects flexibility and laundering. Choose the lining only after you understand how much the crocheted shell stretches and whether you want the finished bag to remain soft or feel more controlled.
A Pocket Adds Organization Without Disturbing the Checks
An interior pocket preserves the uninterrupted checkerboard exterior while giving small items a designated place. That is useful if you like the clean visual grid and do not want an exterior patch pocket breaking it up.
Before sewing, decide what the pocket needs to hold and position it relative to the finished opening. An oversized pocket can pull awkwardly on a lightweight lining, while one placed too low may be inconvenient to reach.
Creator: Let’s All Crochet
9. Crochet Two Panel Berry Check Tote
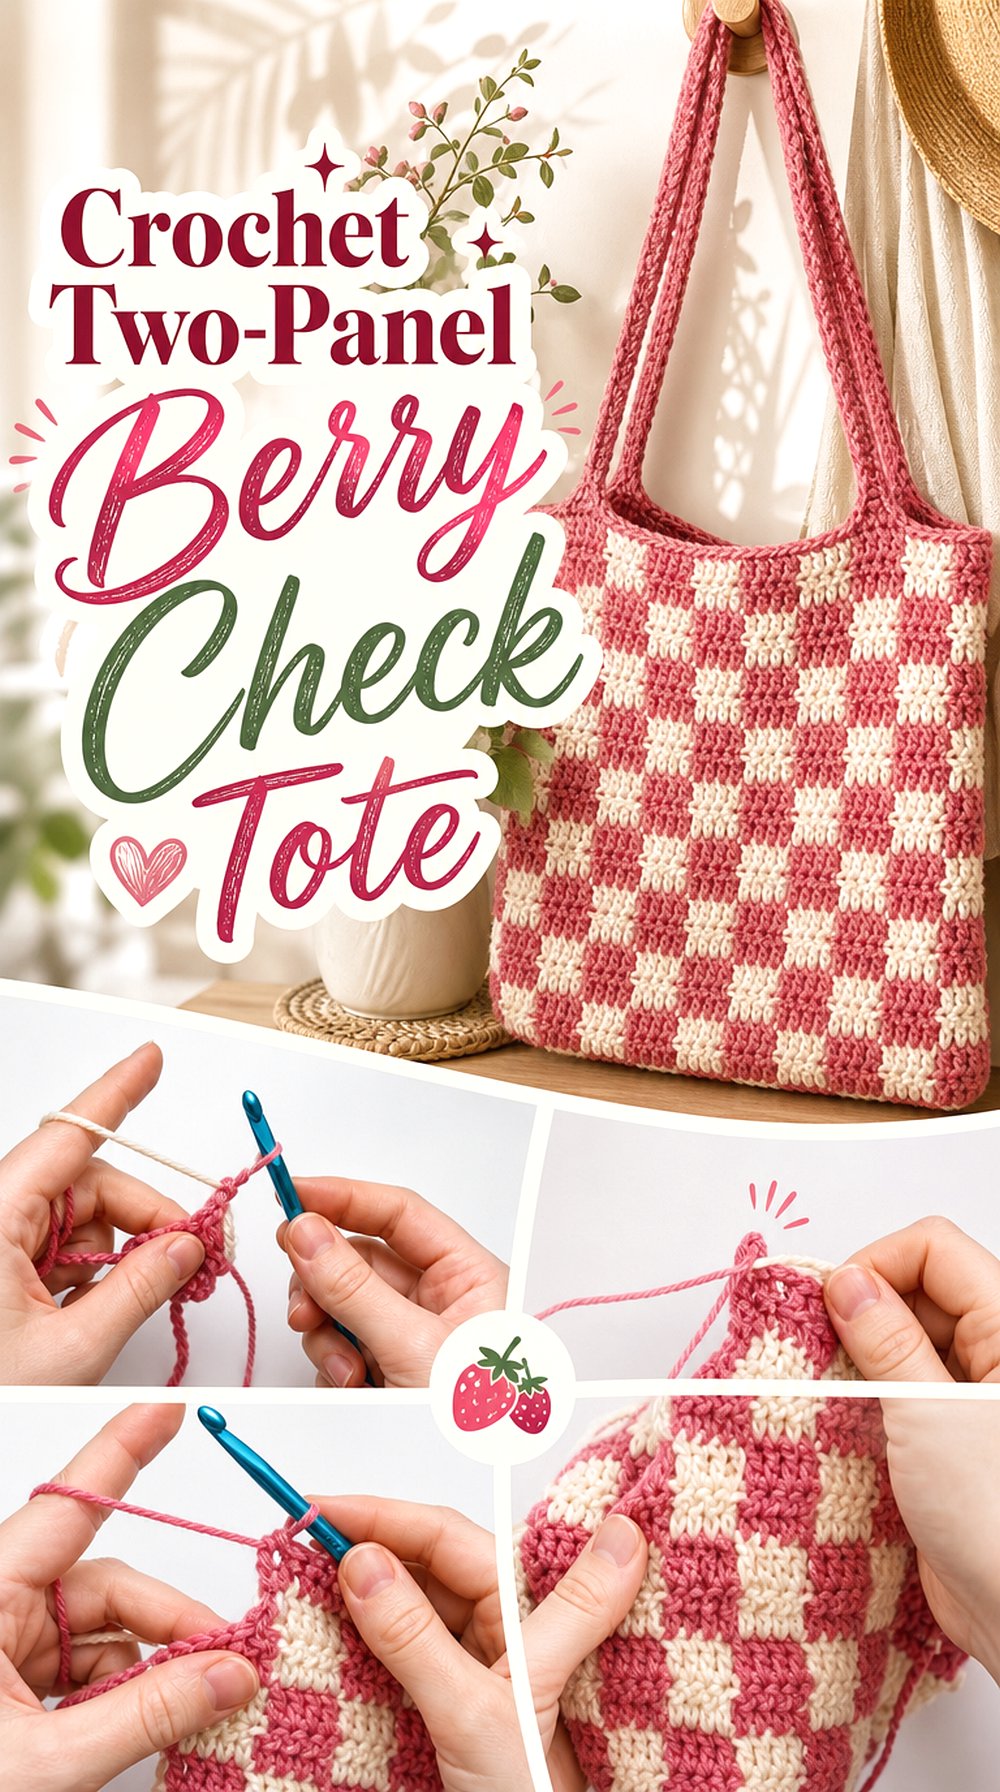
Panel construction gives you something a seamless tote does not: the opportunity to lay the front and back flat beside each other before assembly. Anna Greene’s tutorial visibly separates the front panel, handle portions, back panel, and sewing stages.
That lends itself well to a berry-toned fall bag—burgundy and cream, plum and oatmeal, or cranberry and camel—because you can inspect the entire checker layout before joining. The result can remain shoulder-friendly while still reading as a tote. This option is especially useful for crocheters who find it easier to control straight, flat colorwork than to monitor a checkerboard continuously around a bag.
Flat Panels Make Symmetry Easier to Inspect
Before sewing, place the two panels together with the intended outer faces visible. Compare height, width, and checker alignment rather than assuming matching stitch counts automatically produced matching dimensions.
Small tension differences between colors can accumulate over a whole panel. Catching them before assembly gives you more options, such as blocking and rechecking, instead of discovering the difference only after the seams are finished.
Handle Alignment Matters Before the Final Seam
Because the tutorial divides the handle work into identifiable sections, handle placement becomes an easy checkpoint.
Lay the unfinished pieces in their final orientation and confirm that both handles rise from comparable positions in the grid. This is particularly important with alternating berry and cream blocks, where the checkerboard creates strong vertical reference lines that can make uneven placement easy to spot.
Creator: Anna Greene
10. Crochet Slouchy Forest Green Checkerboard Tote
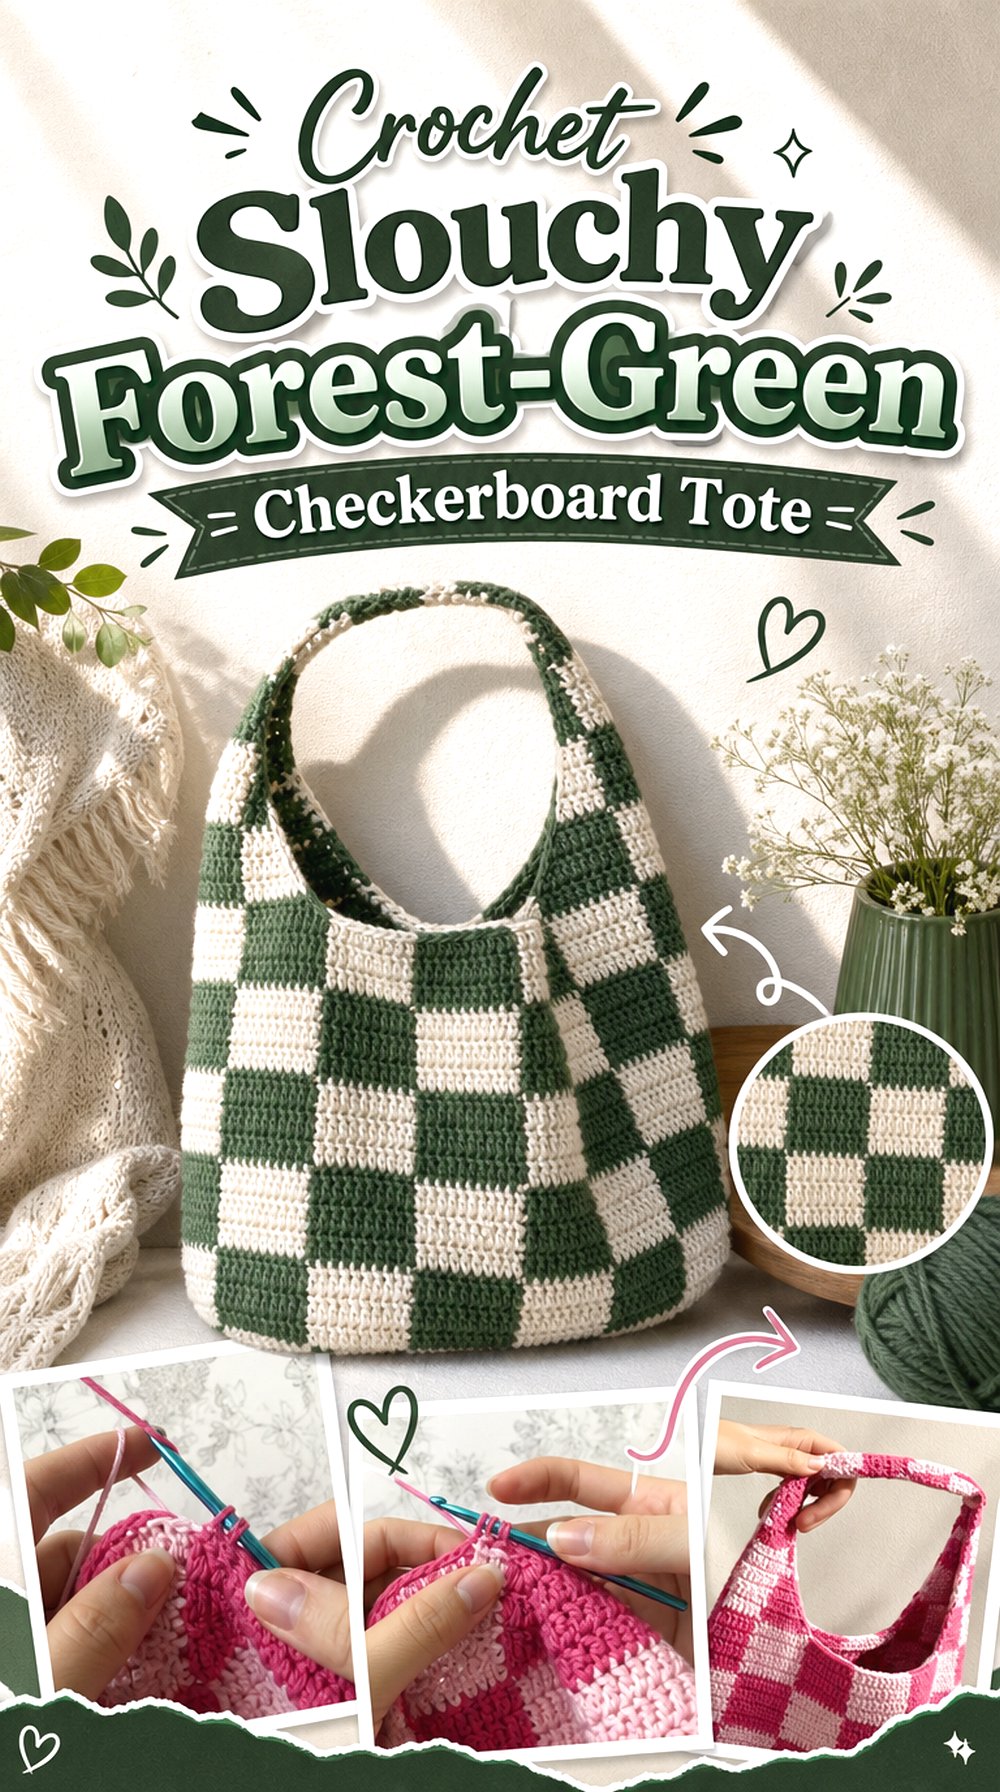
Not every fall checkerboard tote needs crisp, architectural sides. A softer shoulder bag can let the checks bend and drape, producing a more casual accessory that works well with layered autumn clothing. IsabelPost’s tutorial demonstrates a checkered bag with a relaxed shoulder-bag character, making it a useful reference for this direction.
Forest green and oatmeal would keep the design earthy, while espresso and dusty rose would feel warmer. The main decision here is whether you actually want a slouch. If you line or stiffen the bag heavily, you may remove the relaxed character that distinguishes this idea from the more structured totes above.
Softer Fabric Gives the Grid Movement
Checkerboard does not have to stay perfectly flat to be recognizable. On a softer bag, the blocks move as the fabric folds, which can make the finished piece feel more wearable and less like a rigid market tote.
If that is the effect you want, avoid choosing yarn solely because it feels “sturdy.” Swatch enough fabric to fold it over your hand and see whether the drape matches the relaxed silhouette.
Lower Contrast Makes a Slouchy Tote Easier to Style
A soft shoulder shape already adds visual movement, so the colors do not need maximum contrast. Forest and oatmeal, taupe and cream, or plum and muted beige can produce a calmer fall accessory.
Test your colors from a distance before committing. If the checks disappear entirely, choose a slightly lighter or darker partner rather than automatically switching to stark white or black.
Creator: IsabelPost
11. Crochet Bold Block Shoulder Tote
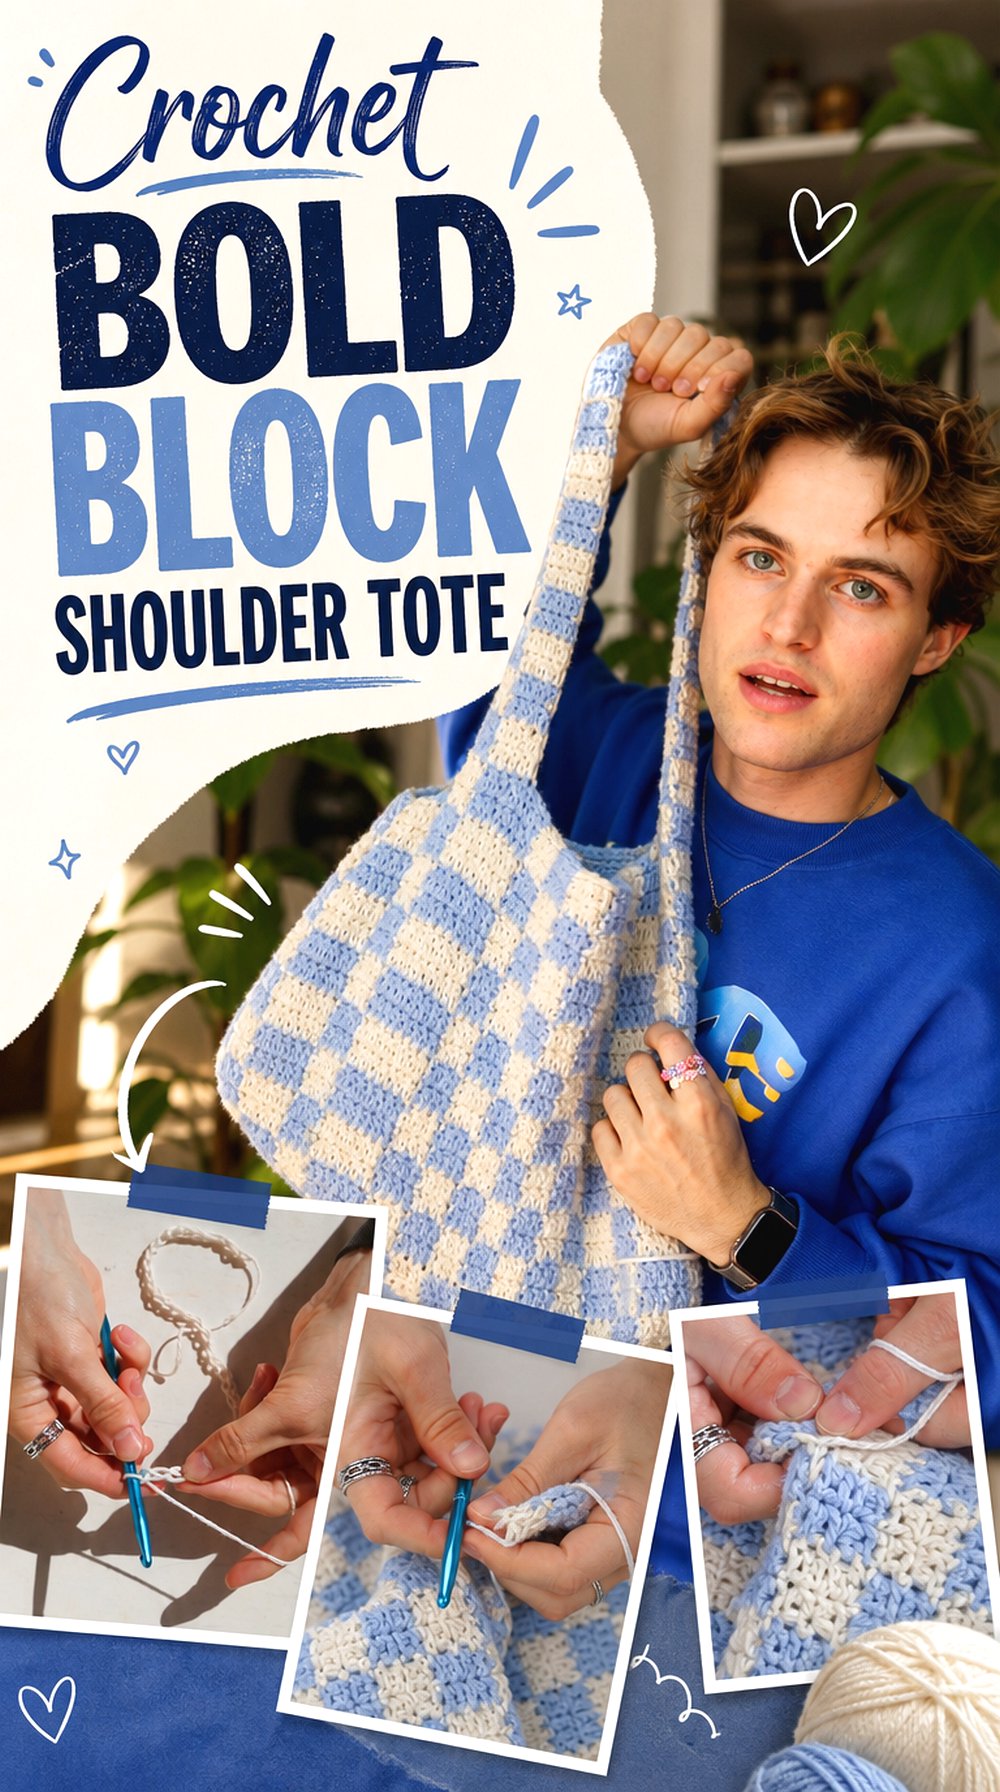
Large, graphic checks create a completely different effect from gingham. Henri Purnell’s checker bag tutorial is useful for this bold-block direction, where the pattern can remain simple and the color pairing does most of the visual work.
Try deep brown with pumpkin, blackened olive with cream, or mustard with espresso. Rather than adding extra motifs, let the size of the blocks become the statement. This shoulder-oriented form is better suited to readers who want an accessory scale rather than an oversized market tote. If you plan to enlarge it, evaluate the strap and overall proportions instead of assuming the same shape will simply scale up.
Large Blocks Need Clean Color Boundaries
When each square occupies more visual space, an inconsistent changeover can become more noticeable. Watch the edges where one color meets the next and avoid pulling the inactive yarn so tightly that the block narrows.
A high-contrast pair makes those boundaries particularly visible. If you are still refining colorwork tension, two related fall shades may be more forgiving while still producing a clear checker pattern.
Compact Shoulder Proportions Suit a Different Use
A shoulder bag is not automatically interchangeable with a roomy tote. Consider what you actually need to carry before enlarging the body or handles.
If you want a light personal bag, keeping the more compact proportions preserves the original visual balance. For books, groceries, or a large crochet project, choose one of the dedicated tote tutorials elsewhere in this list rather than relying on an unverified enlargement.
Creator: Henri Purnell
12. Crochet Chunky Harvest Checkerboard Tote12.
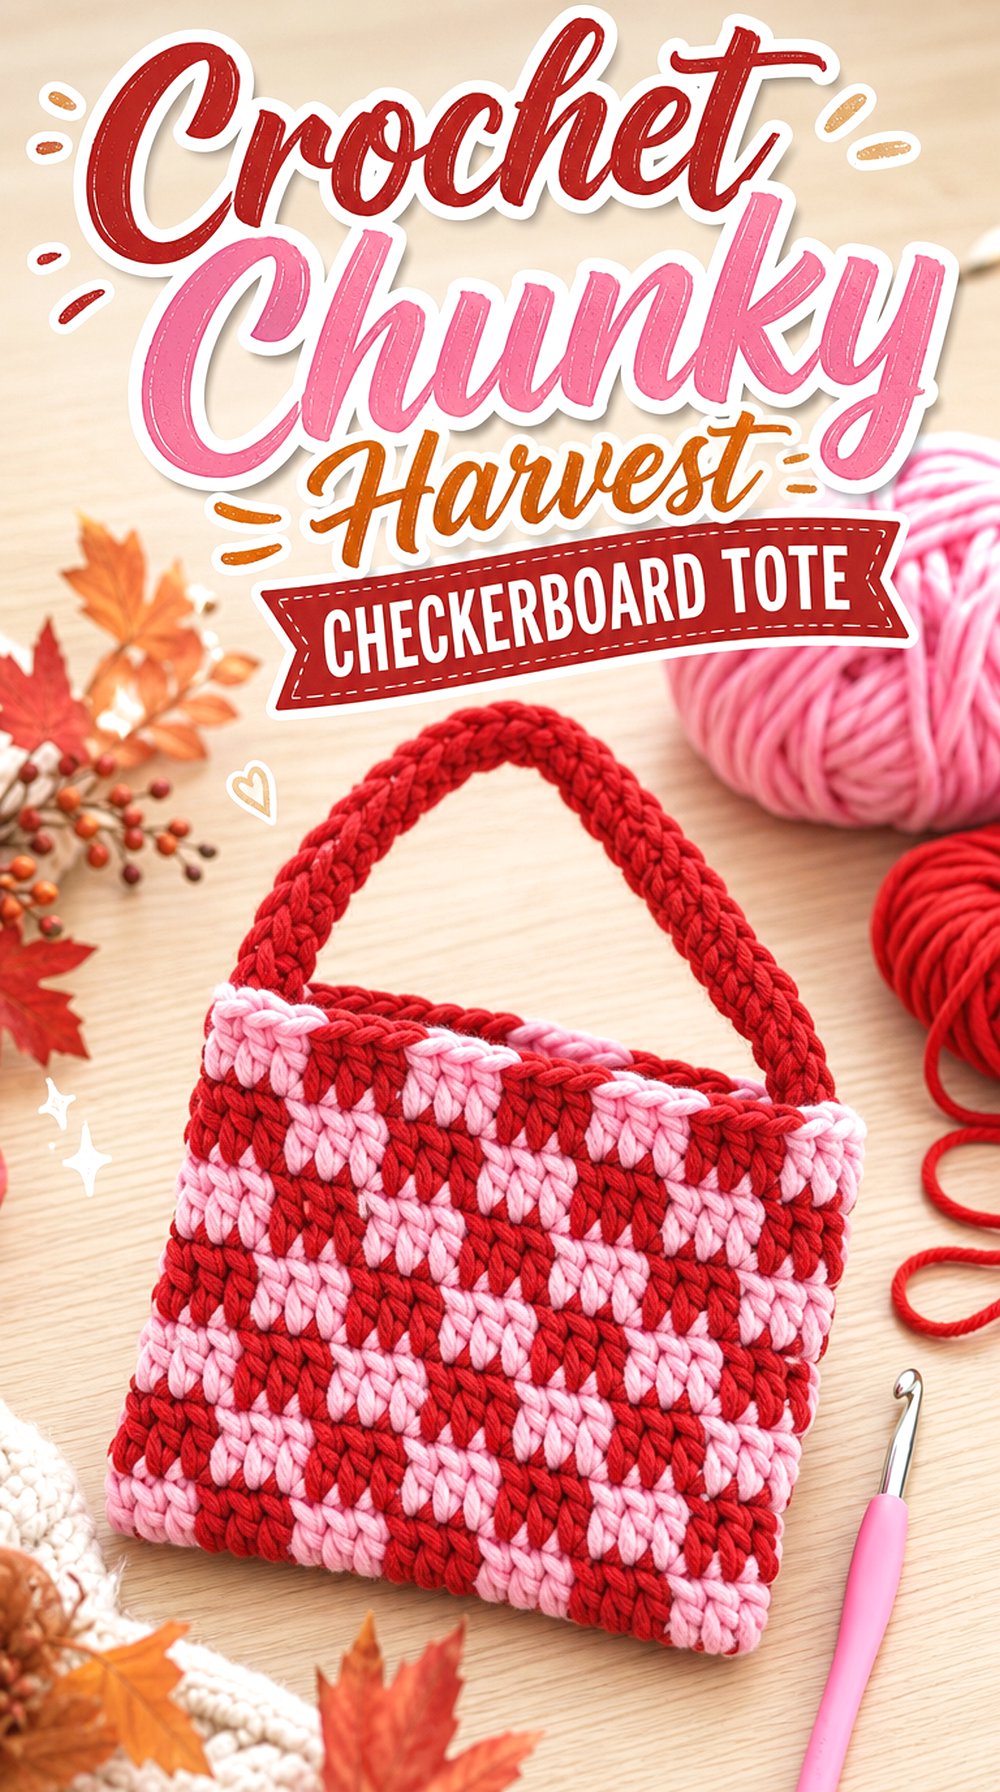
Chunky yarn makes checkerboard crochet feel almost pixelated because the stitches and blocks gain visual weight. Craft Folk’s tutorial demonstrates a chunky checkered crochet bag, giving this collection a deliberately bulkier option rather than another medium-weight tote.
For fall, mustard and chocolate, burnt orange and cream, or olive and camel would complement the substantial texture. The main trade-off is bulk: thicker fabric can give the bag presence, but it can also make seams, corners, and handles feel heavier. Choose this route because you want that oversized handmade texture, not because you assume thicker automatically means stronger.
Chunky Yarn Magnifies Shape and Tension
With large stitches, every change in tension occupies more physical space. A slightly tighter checker block may become visibly narrower, and bulky join areas can stand out rather than disappearing into the fabric.
Pause after several blocks and view the work from a distance. The grid should look intentional as a whole, not merely correct one stitch at a time. A little sampling before committing can save substantial yarn and finishing work.
Keep the Opening Flexible Enough to Use
A thick tote can develop a very firm top edge, especially if extra edging is added later. Before finishing, open the bag naturally with both hands and make sure the mouth behaves the way you want.
If it feels excessively rigid, adding more dense edging may not improve it. The goal is enough stability to define the tote without creating an opening that fights against everyday use.
Creator: Craft Folk
13. Crochet Lightweight Checkerboard Tote
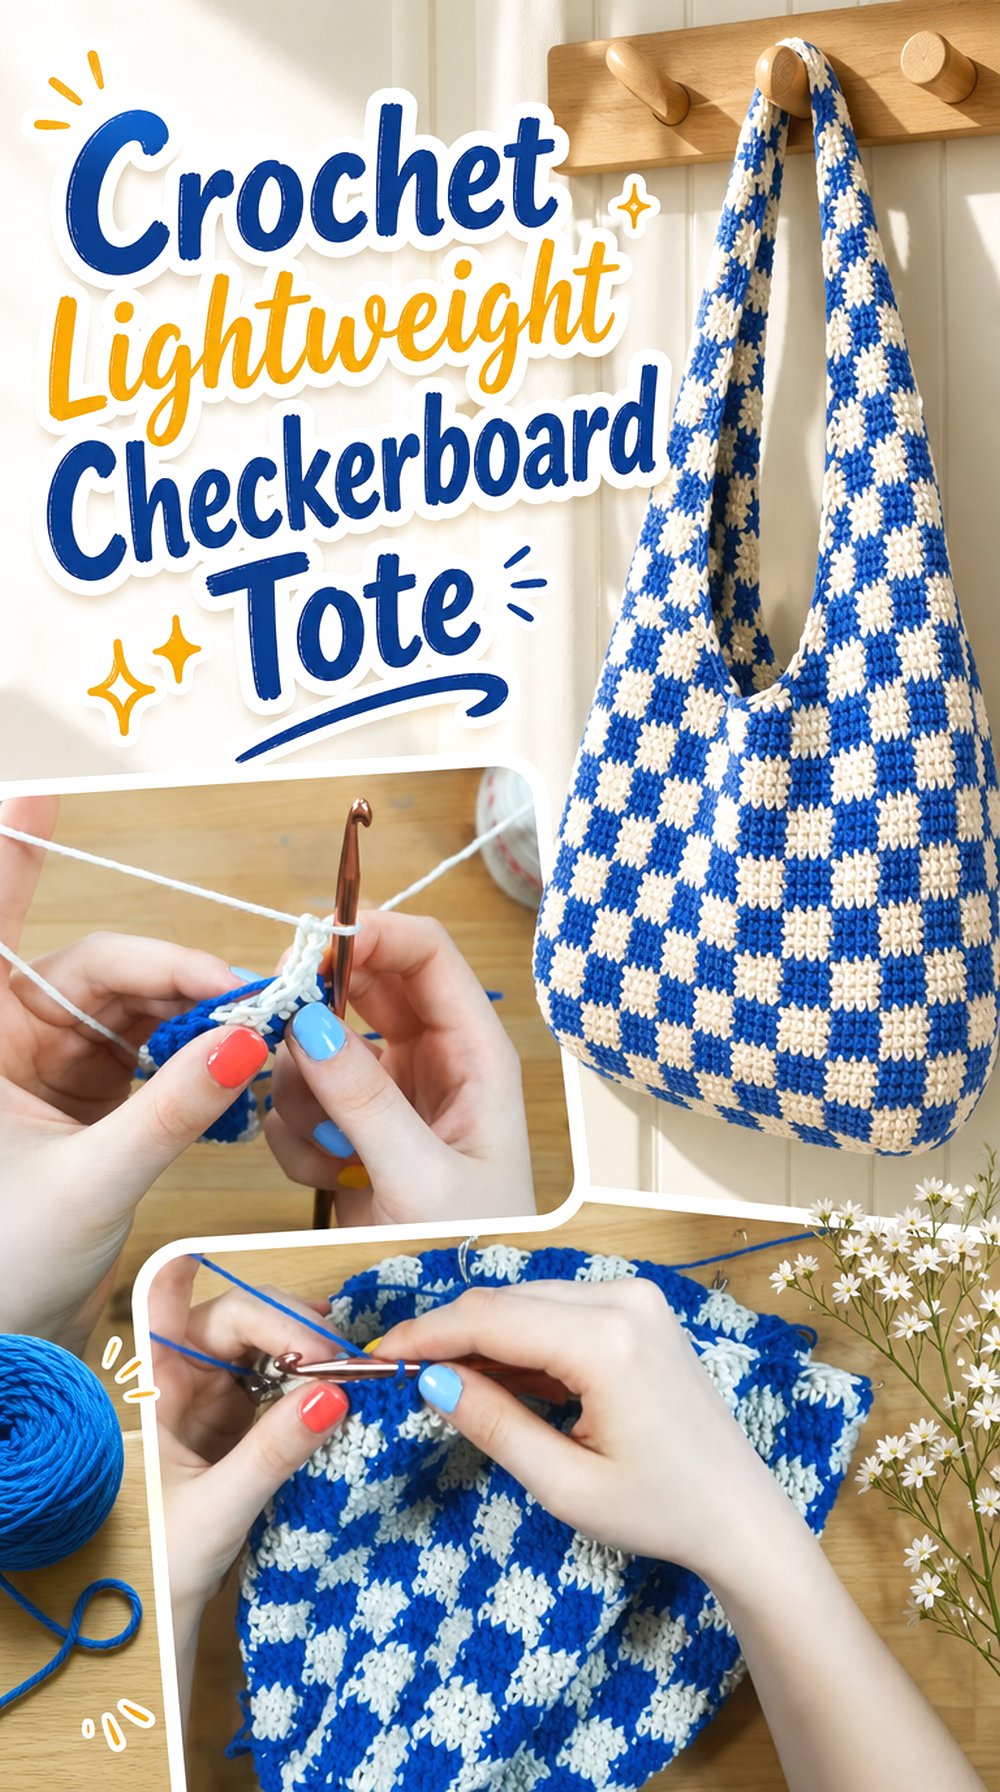
A lighter checkerboard tote gives the pattern a more flexible, foldable quality than the chunky version above. The Ju’studio design is categorized as a crochet tote and is associated with DK-weight yarn, making it a useful contrast when you want the checks without a thick, heavy-looking fabric.
For fall, consider charcoal with camel, wine with cream, or olive with a warm beige. This direction works especially well if you want a tote that can collapse more readily for storage. The trade-off is that lighter fabric may need more consideration around the straps and contents if you want the bag to retain a very crisp shape.
A Lighter Yarn Weight Changes Drape
Finer fabric usually creates a different visual scale and flexibility from a chunky checker bag, even when the overall tote dimensions are similar. The squares can look cleaner and less oversized, while the empty bag may fold more easily.
Before substituting a much heavier yarn, decide which of those qualities attracted you to the design. Changing yarn weight can alter the entire character, not just make the project larger.
Judge the Grid After the Fabric Relaxes
A lighter checkerboard fabric may look slightly different once it is no longer stretched across your hands or hook. Lay it flat periodically and allow it to relax before deciding whether the blocks need correction.
If you plan to block the finished pieces, compare dimensions only after treating comparable sections the same way. That prevents one panel or edge from being judged while stretched and another while relaxed.
Creator: Ju’studio
14. Crochet Classic Autumn Gingham Square Tote
This gingham tote idea is for readers who want the checks to resemble woven fabric more than a two-color chessboard. meowci’s tutorial is explicitly a gingham/checkered tote bag, giving you another full bag reference without repeating HayHay Crochet’s exact construction source.
A square silhouette emphasizes the regularity of the pattern, so color selection becomes especially important. Try chestnut, caramel, and cream for a warm traditional palette, or olive, moss, and oatmeal for something quieter. This design is useful when you want a fall tote that reads as gingham first and graphic checkerboard second.
Gingham Needs Color Relationships, Not Just Contrast
Choosing three individually attractive colors does not guarantee convincing gingham. The middle tone should help visually bridge the light and dark shades rather than looking like an unrelated accent.
Arrange small lengths of all three yarns in the intended relationship before starting. If the medium shade fights with both neighbors, replace it before investing in a full tote. This planning step is faster than trying to fix the palette through edging later.
A Square Silhouette Makes Drift Easy to See
Straight top, bottom, and side lines create a frame around the gingham grid. If the blocks begin leaning or narrowing, the discrepancy becomes easier to notice against those boundaries.
Check width at several heights during construction rather than waiting until the final row. When the fabric is flat, compare opposite edges and let the piece relax before measuring so normal handling does not create a false difference.
Creator: meowci
15. Crochet Clean Edge Checkered Tote
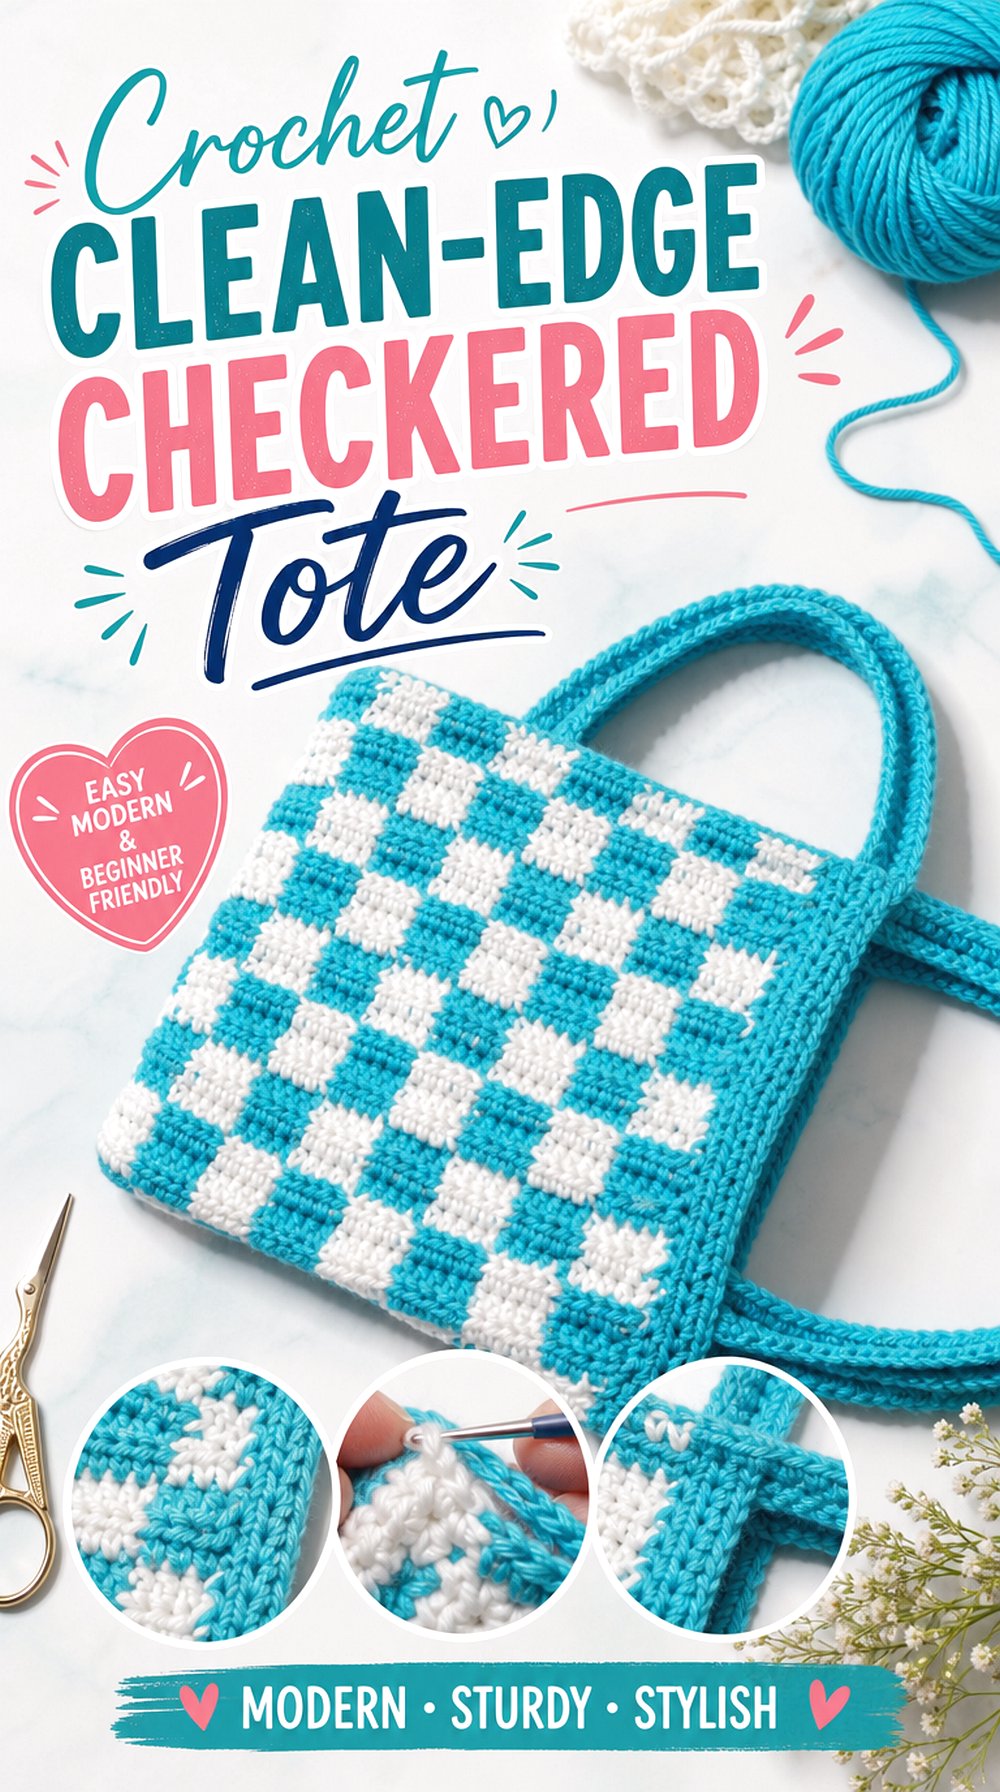
Sometimes the best fall adaptation is a straightforward checkerboard tote with no competing structural gimmick. Crochet Jewel’s tutorial focuses directly on a checkered tote, making it a useful base for a clean seasonal version in espresso and cream, plum and camel, or rust and oatmeal.
This idea suits readers who want the colorwork to carry the design. Instead of adding fringe, appliqués, or multiple textures, concentrate on consistent block size, tidy upper finishing, and balanced handles. The simplicity also makes it easier to compare how different autumn palettes change the same basic visual concept.
A Simple Silhouette Puts Colorwork Front and Center
With few extra design elements, any uneven checker block becomes more noticeable. That is not a reason to avoid the style; it simply means your most valuable checkpoints are color tension and overall width.
Place the work flat every so often and look at the grid rather than individual stitches. If the blocks stay visually square and the side edges remain consistent, the finished bag will look deliberate without needing extra decoration.
Decide on Lining Before Finishing the Top Edge
Even when a source tote is shown without a lining, you may want one for your intended use. Make that decision before adding elaborate finishing around the opening.
A lining may be easier to attach when the inner edge is still accessible. It can also change how much the bag stretches, so do not use lining merely as a cosmetic addition; decide whether you want a softer shell or a more controlled interior.
Creator: Crochet Jewel
16. Crochet Sewn Side Gingham Tote
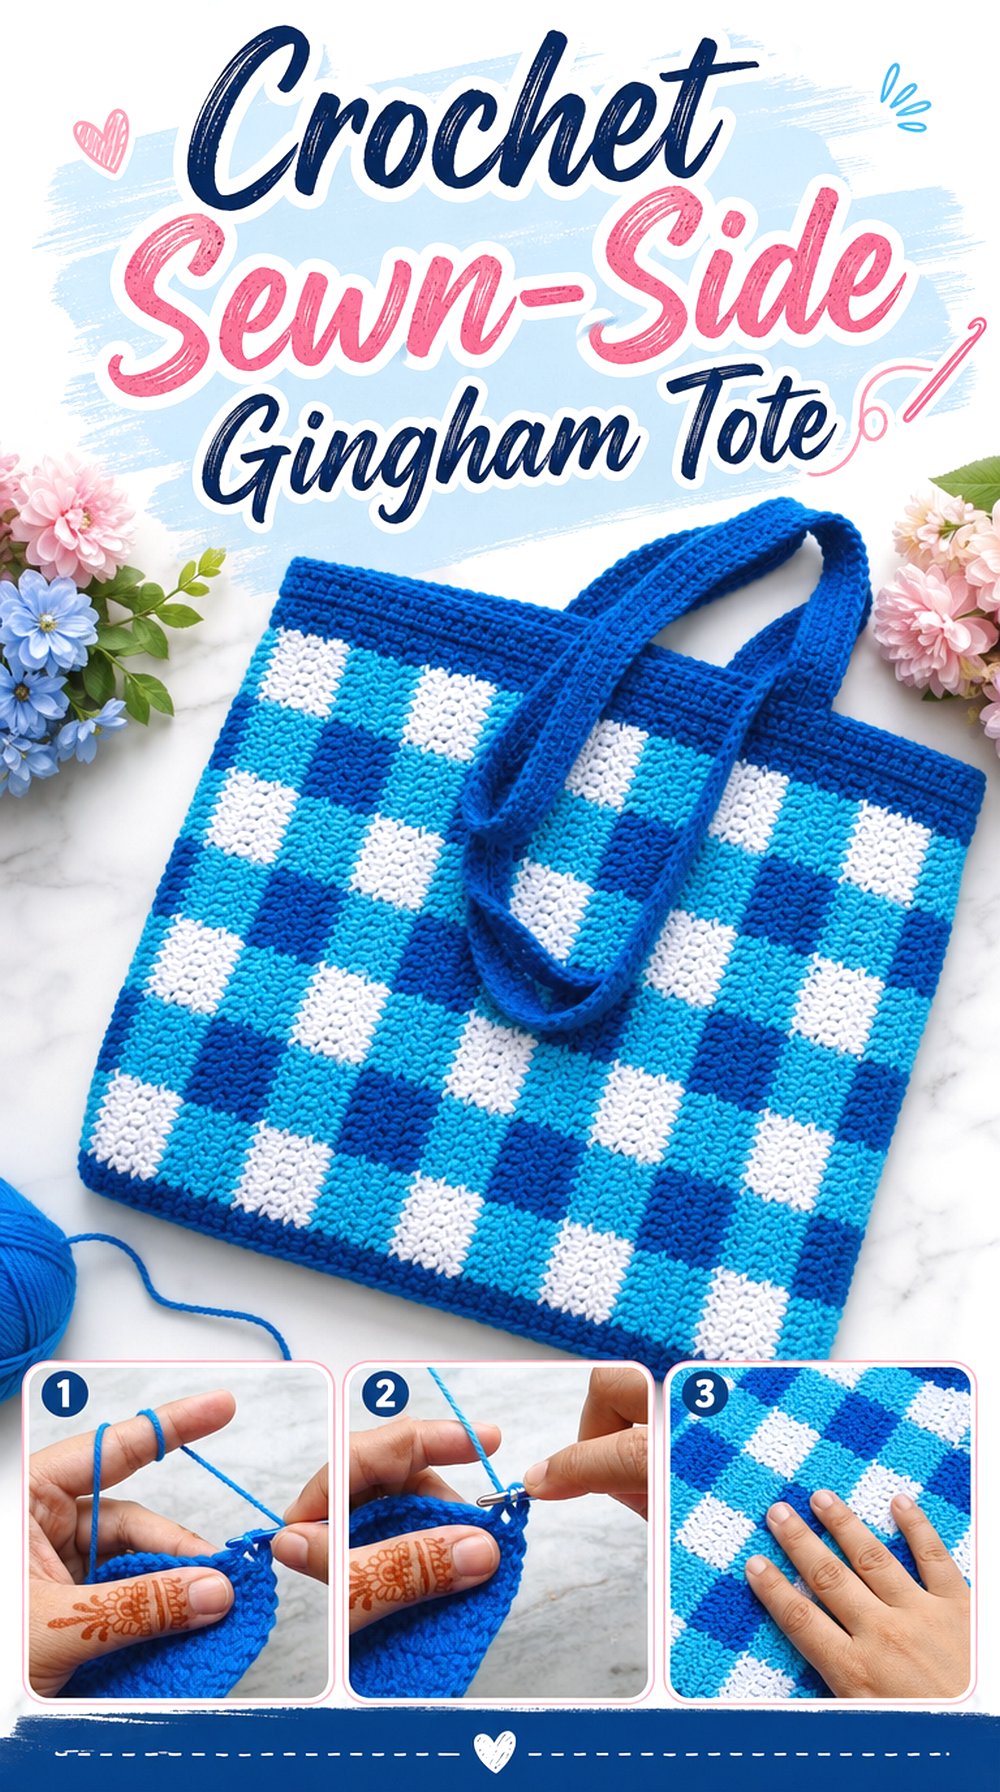
Cute Crochet’s gingham tote tutorial includes separate work on a second side, followed by sewing and strap construction. That makes it a useful project for anyone who likes building bag components flat and checking them before committing to assembly.
For fall, a muted pumpkin, tan, and cream combination would emphasize the gingham without looking overly bright. Because the two sides are created separately, this version also offers a practical opportunity to compare color tension between pieces. It is distinct from a seamless checkerboard tote where inconsistencies can be harder to isolate after the body has grown.
Two Sides Create a Built-In Quality Check
Once the second side is complete, place it directly over the first before sewing. Compare the corners, overall height, and grid placement rather than checking just one measurement.
If one side is visibly larger, joining them immediately can force the seam to absorb the difference. Blocking or correcting the discrepancy first usually produces a cleaner final outline and prevents one panel from bubbling beside the other.
Sewing Becomes Part of the Visible Grid
On a plain tote, a slightly uneven seam may disappear into the fabric. Gingham provides repeated horizontal and vertical references, so the join can draw attention if the blocks stop lining up.
Match several points along the edge before completing the full seam. This distributes any small difference instead of allowing it to accumulate at one corner, where the distortion would be more noticeable.
Creator: Cute Crochet
17. Crochet Minimalist Checkerboard Shoulder Tote
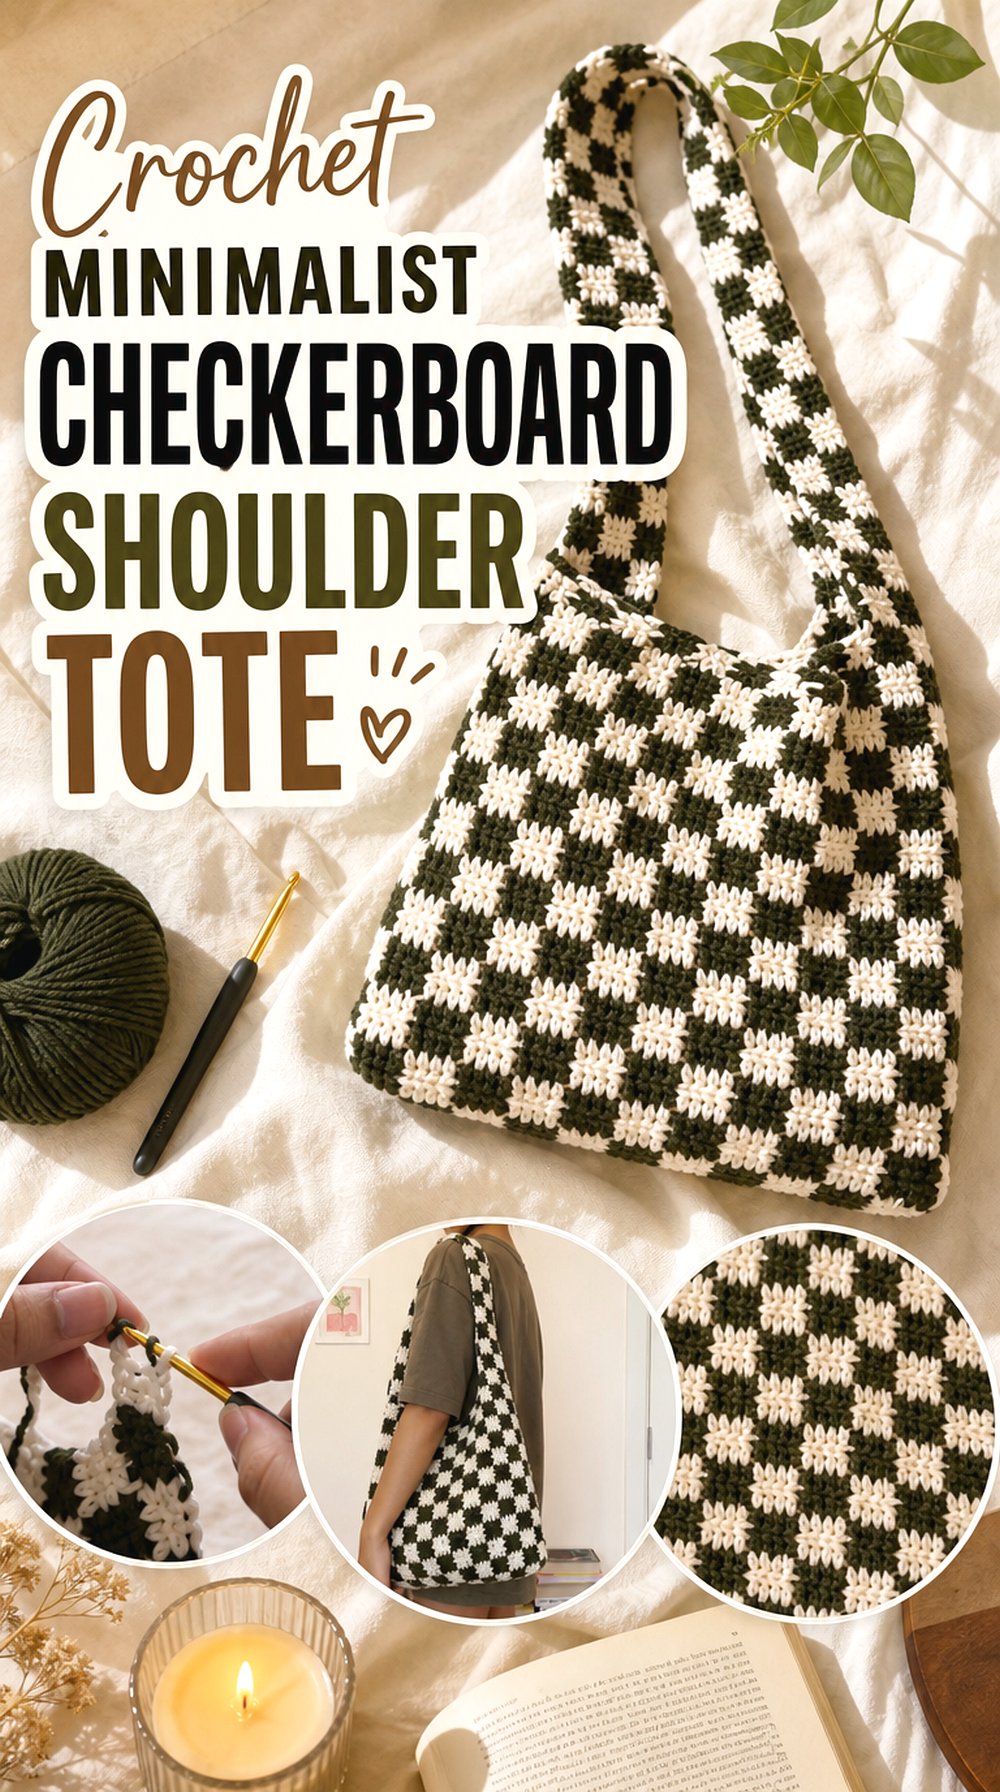
Pim’s tutorial describes a Pinterest-inspired checkered tote bag, making it a good source for a simpler fashion-oriented direction rather than a heavily structured utility tote.
For fall, soften the graphic effect with taupe and cream, dark olive and sand, or muted plum and oatmeal. The appeal here is restraint: a relaxed silhouette, a clear two-color checker, and no need for extra motifs. This can work well with casual jackets and sweaters because the bag contributes pattern without looking overly elaborate. If you need substantial carrying structure, however, compare it with the broader or lined tote options before choosing.
Relaxed Shapes Benefit From Thoughtful Contrast
When a bag folds against the body, checker blocks overlap visually. Very stark colors can create a busier effect than they do on a flat photograph.
For a quieter fall accessory, choose colors with enough value difference to preserve the grid but not so much contrast that every fold becomes a sharp visual break. Viewing the yarn pairing at arm’s length is more useful than inspecting the skeins inches from your face.
Let the Straps Match the Body’s Visual Weight
A minimalist tote depends on proportion. Very bulky handles can overpower a soft body, while an overly delicate strap may look disconnected from broad checker blocks.
Before final finishing, hold the bag at carrying height and assess the whole silhouette. If adapting the yarn or bag dimensions, use the tutorial for construction but make your aesthetic decision from the finished proportions rather than the original colorway.
Creator: Pim
18. Crochet Connected Handle Checkerboard Tote
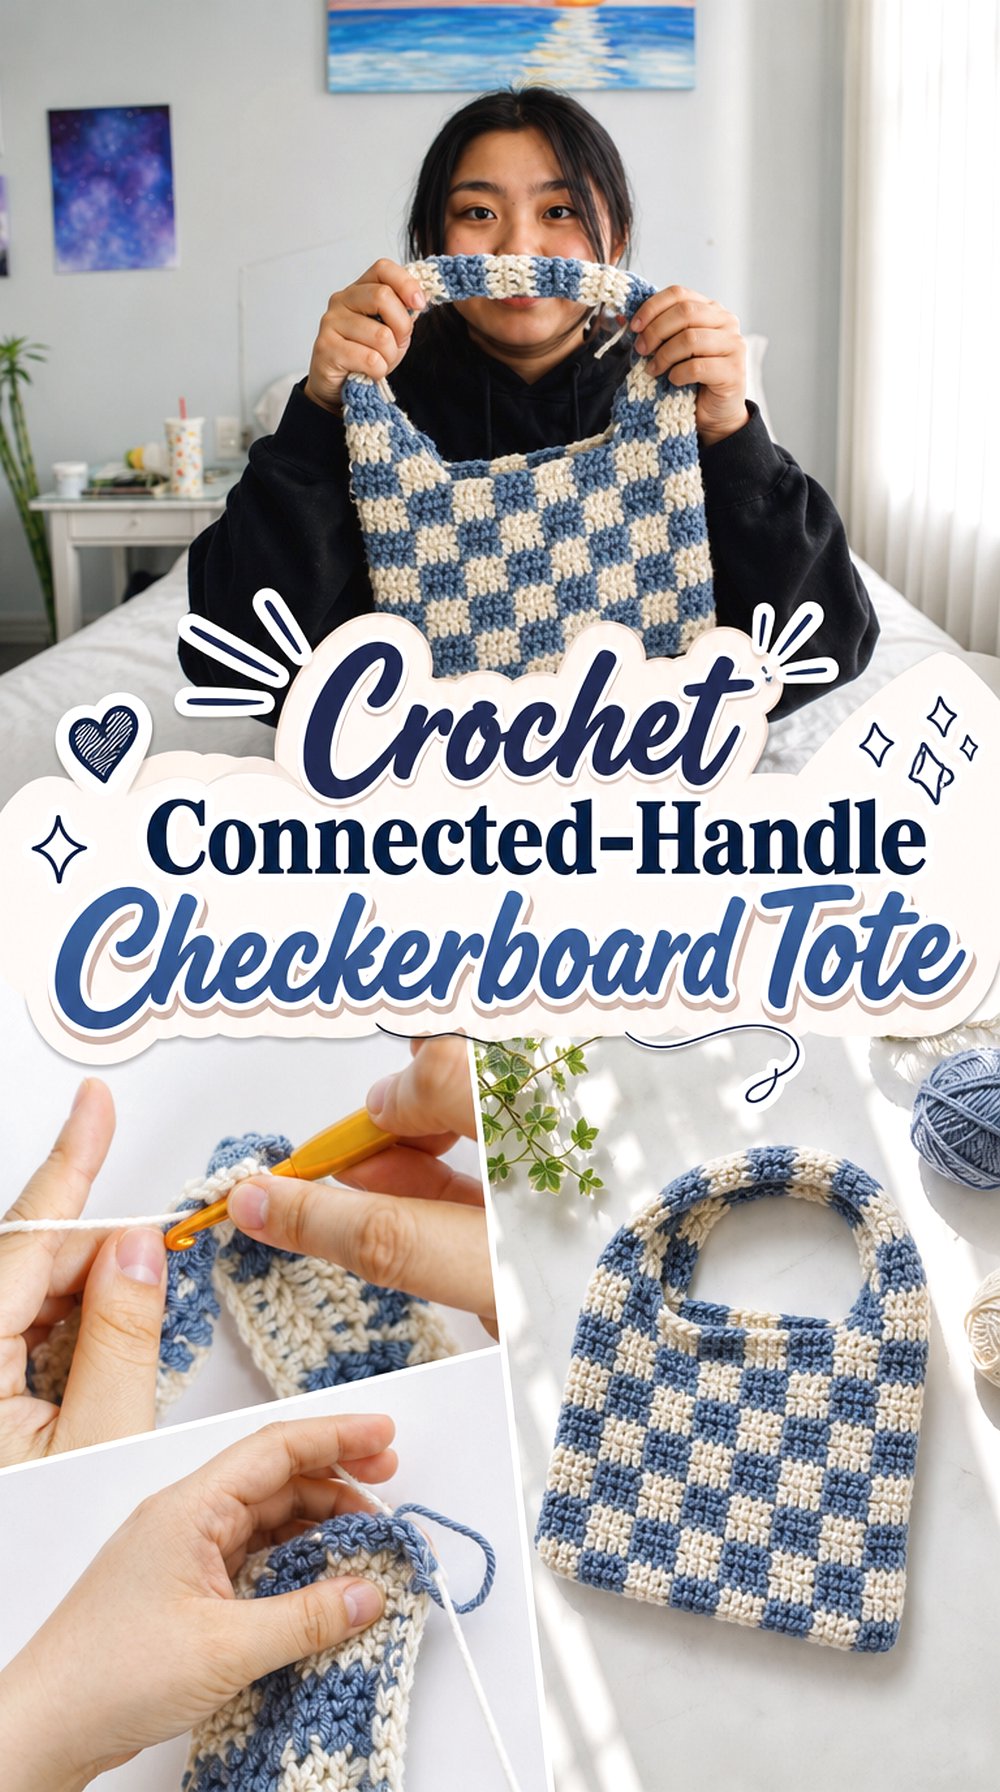
A connected-handle shoulder shape creates a stronger relationship between the upper body and straps than a tote with two independent handles. Alli Nicole’s tutorial is presented as a checkered shoulder bag and offers a useful reference for this more integrated silhouette.
Translate it into fall with burgundy and cream, brown and camel, or moss and oatmeal. This is best considered a shoulder-tote option rather than a large shopping bag. The narrowed upper shape changes how the checks transition toward the handle area, which makes it visually different from the rectangular totes earlier in the list.
Connected Handles Create a Different Shoulder Line
When the body flows toward the handles, the top edge naturally narrows and draws the eye upward. That can make the bag feel more like an accessory and less like a basic shopper.
Keep that relationship in mind if you change the width. A much broader body may need proportionally reconsidered upper shaping; otherwise the transition can become abrupt instead of maintaining the original tapered look.
Expand Shoulder-Bag Scale Only After Swatching
If the original proportions are smaller than the tote you have in mind, avoid multiplying dimensions blindly. More width and height also mean more fabric weight hanging from the handle area.
Make a generous swatch with your intended yarn and see how it stretches when held vertically. Then decide whether a larger adaptation still makes sense or whether a dedicated full-size tote tutorial would give you a more predictable result.
Creator: Alli Nicole
19. Crochet Compact Checkerboard Tote Style Bag
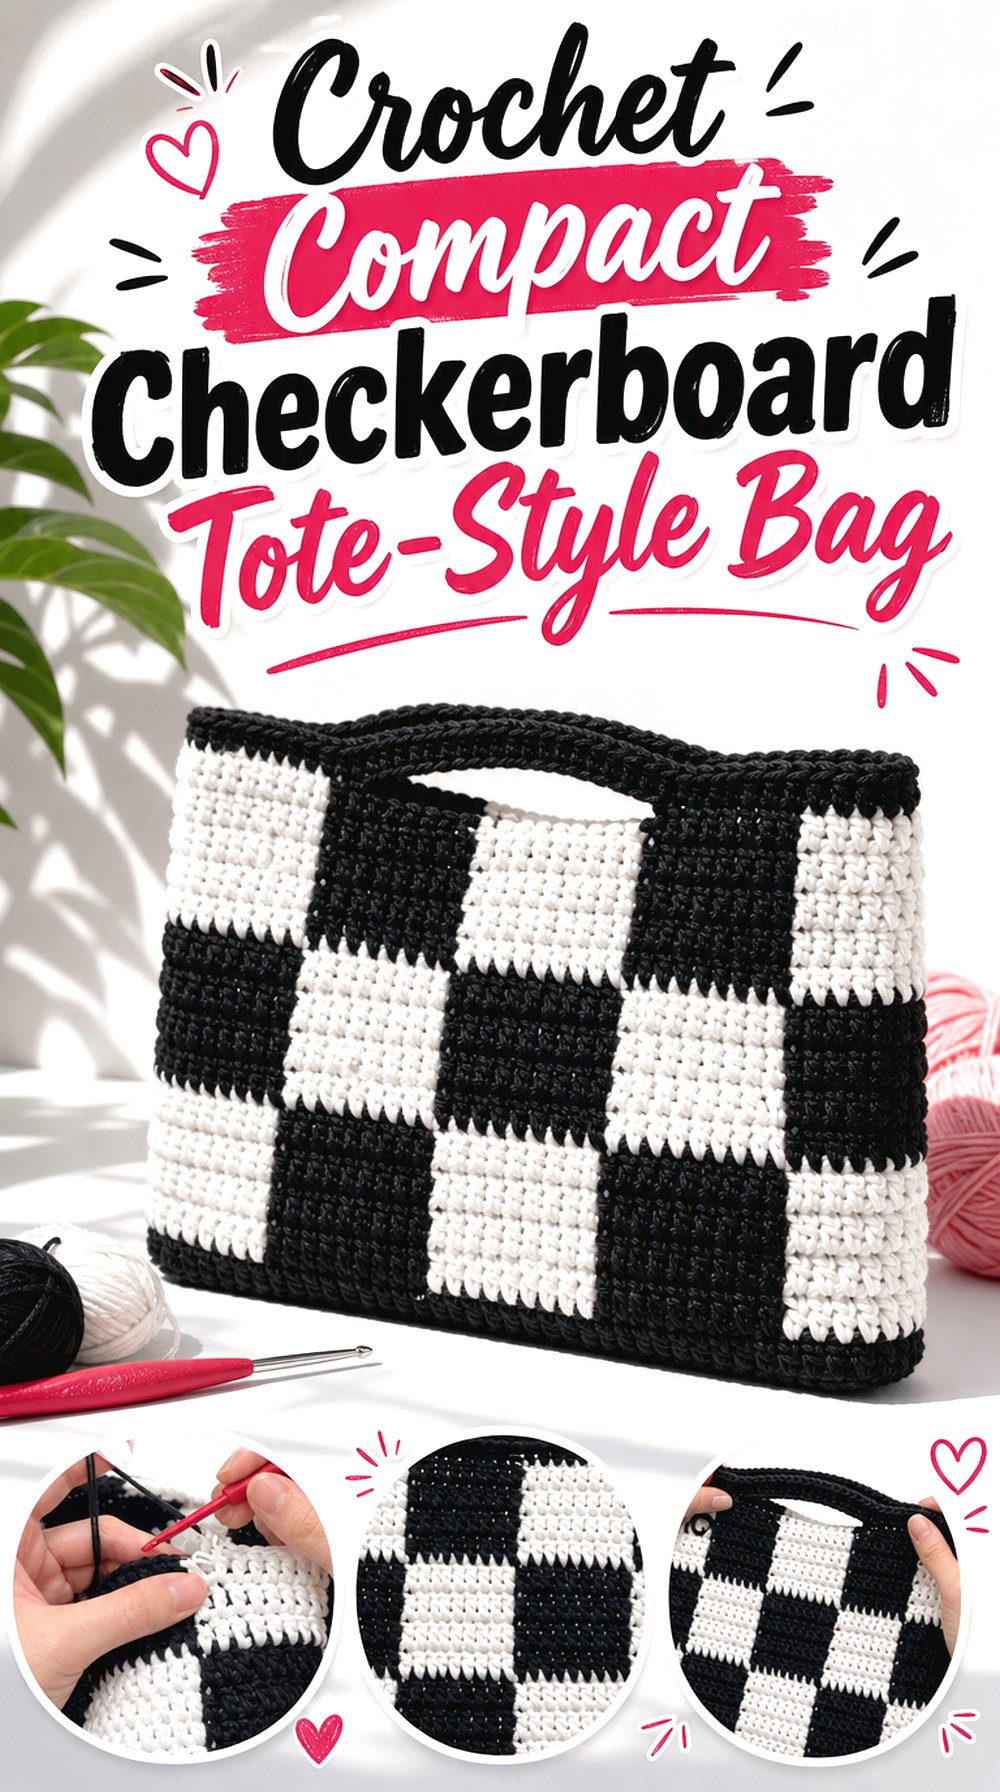
The final idea deliberately stays compact. The KOKKOS checker bag tutorial offers a smaller checkerboard format that can inspire a tote-style autumn accessory without pretending it is the same thing as the larger market totes in this collection.
Use a concentrated fall palette such as chocolate and mustard, blackened plum and cream, or olive and camel. At this scale, fewer visible checker repeats mean each color block has more influence over the final look. Keep the bag compact if you want a fashion accessory; if you need true tote capacity, borrow the palette rather than enlarging the construction without a separate plan.
Compact Checker Bags Need a Clear Tote Adaptation Plan
A small checker bag and a full tote may share the same visual motif, but their structural demands are different. Increasing the body can affect handle placement, stretch, opening width, and the amount of weight the fabric carries.
Decide whether you actually need to enlarge it. Sometimes the better solution is to retain the compact construction as an autumn shoulder bag and use a dedicated tote tutorial elsewhere in this article for larger carrying needs.
Keep the Fall Palette Crisp at Small Scale
With fewer checks visible at once, muddy color relationships have a bigger effect. Choose two shades that remain distinct even when viewed in a small area.
Chocolate and mustard will read more boldly; olive and camel are softer; burgundy and cream create higher contrast. Make a small sample containing both colors before committing, because two skeins that look separate in the ball can blend more once interlocked stitch by stitch.
Creator: 코코스뜨개 KOKKOS knit&crochet
How the 19 Fall Checkerboard Totes Compare
For the clearest classic tote silhouette, the VivCrochets, MitchesGetStitches, Cat Kemble, and Kenikse Crochet options put the checkerboard across a recognizable carrying-bag form. The MitchesGetStitches construction stands out when a defined base and tapered straps matter, while the lined Let’s All Crochet version is the stronger choice when interior organization is a priority.
For softer patterning, the HayHay Crochet, meowci, and Cute Crochet gingham projects offer more nuanced three-color layouts. Craft Folk moves in the opposite direction with chunky scale and heavier visual texture.
If you primarily want a fashion accessory, the IsabelPost, Pim, Alli Nicole, Henri Purnell, and KOKKOS sources lean closer to shoulder-bag proportions. Treat those as intentionally smaller options rather than assuming every design should be enlarged into the same tote size.
Conclusion
The most useful way to choose among these 19 crochet fall checkerboard tote bag ideas is to start with function, then color. Pick a lined tote if interior control matters, a defined-base design for a more structured silhouette, gingham for a softer autumn pattern, chunky crochet for visual weight, or a slouchy shoulder style when drape matters more than a boxy shape.
After choosing the construction, build the fall mood with contrast: rust and cream for classic warmth, moss and oatmeal for subtle color, burgundy and tan for richness, or chocolate and mustard for a bolder retro look. Use each original tutorial for its exact construction details rather than transferring dimensions or assembly assumptions from one bag to another.
Frequently Asked Questions
What yarn qualities are useful for a fall checkerboard crochet tote?
Look first at the fabric you want rather than choosing by fiber name alone. A tote that needs a firm rectangular shape benefits from yarn and tension that resist excessive stretching, while a shoulder tote can work with more drape. Make a checkerboard swatch and handle it vertically as well as flat. That reveals stitch definition, flexibility, color interaction, and stretch more reliably than judging the yarn in the skein.
Do checkerboard crochet totes need a fabric lining?
Not every checkerboard tote needs lining, but it can be useful when the crochet fabric stretches, has openings that could catch small objects, or needs a cleaner interior. It may also help the bag retain its intended dimensions during use. Because a lining changes flexibility and care, decide whether you want one before finalizing the top edge. The Let’s All Crochet tutorial above is especially relevant if you want lining demonstrated as part of the project.
How can I keep the checker squares from looking uneven?
Uneven blocks can come from changes in colorwork tension, different yarn behavior, or inconsistent fabric width. Periodically lay the work flat and compare several blocks together rather than focusing on one stitch. Avoid pulling carried or inactive yarn tightly enough to compress the fabric. For panel-built totes, compare the finished panels before assembly so differences can be addressed before the seam has to absorb them.
Can I make a shoulder-bag tutorial into a much larger tote?
Sometimes, but it should not be treated as a simple scale-up. More width and height add fabric weight and can change strap stretch, handle placement, opening proportions, and the way the upper bag holds its shape. If a creator provides resizing guidance, follow that source. Otherwise, a dedicated tote tutorial is usually a more reliable starting point than inventing new dimensions from a smaller shoulder bag.
What fall colors work well for a crochet checkerboard tote?
Rust with cream, chocolate with mustard, olive with oatmeal, burgundy with tan, and plum with warm beige are useful starting points, but contrast matters more than any specific palette. Put the yarns together in natural light and step back several feet. The checks should remain readable at the level of contrast you want. For gingham, choose three shades with a clear relationship rather than three unrelated autumn colors.
Why do crochet tote straps stretch even when the bag body seems firm?
Straps experience repeated lengthwise tension, so they can behave differently from the body even when made from the same yarn. Strap length, width, stitch direction, fiber elasticity, and the weight carried all influence the result. Before relying on a tote for regular use, check how the handles behave with ordinary contents. If stretching is a concern, consider a construction with wider or tapered straps, lining, or another appropriate reinforcement approach.