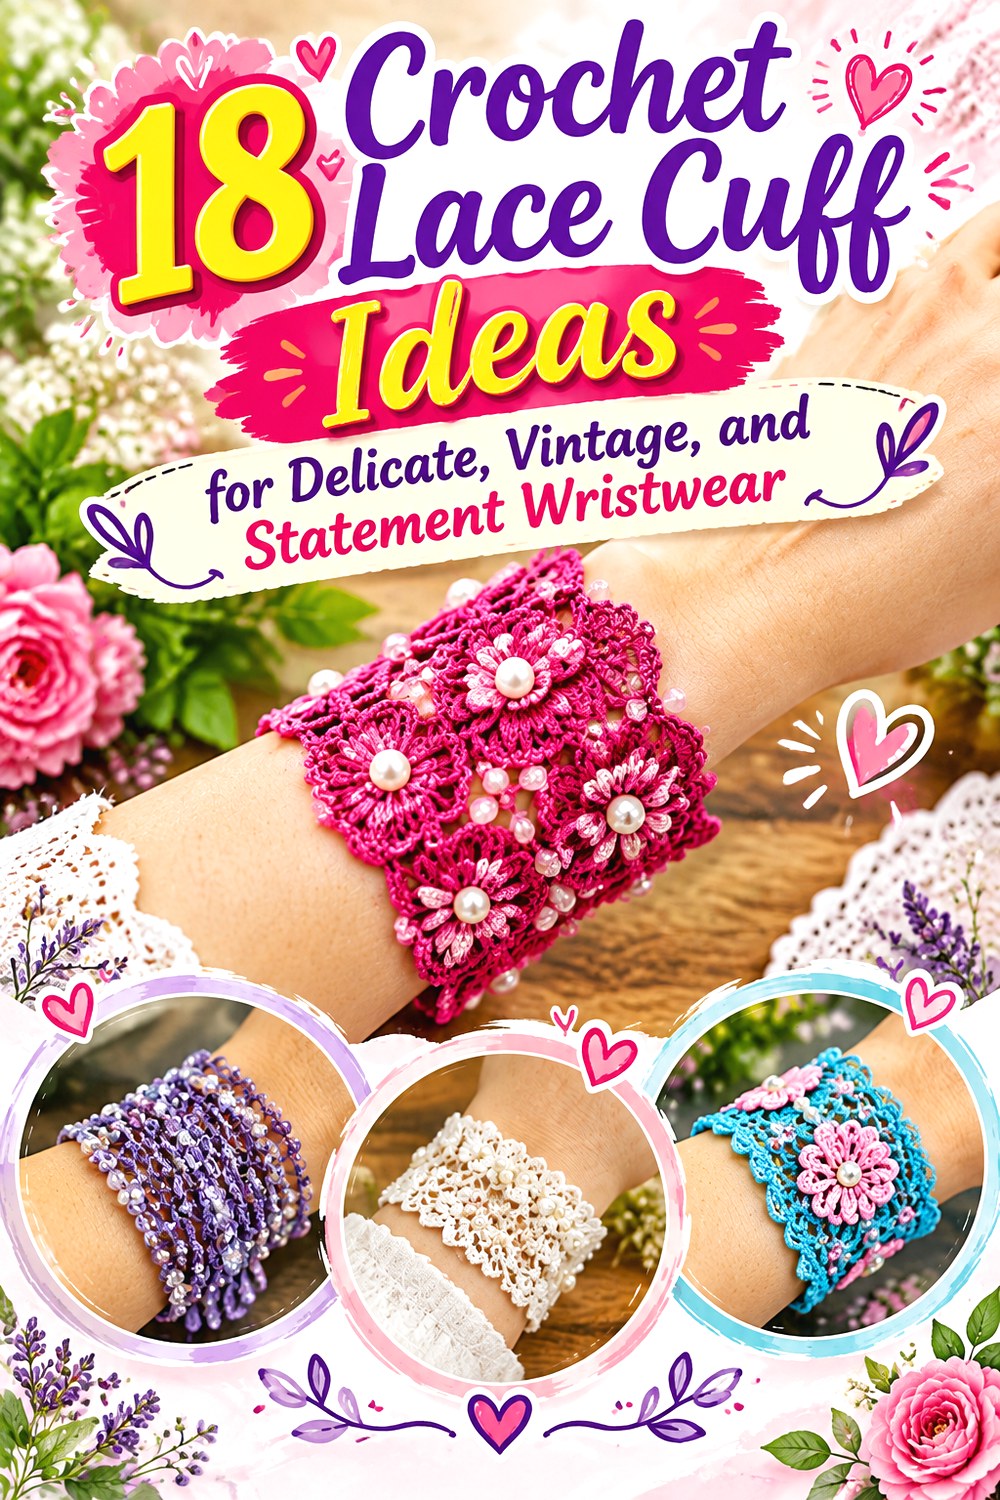
18 Crochet Lace Cuff Ideas for Delicate, Vintage, and Statement Wristwear
Crochet lace cuffs can be barely wider than a bracelet or substantial enough to transform the end of a sweater sleeve. This collection covers that full range, including fine thread bands, shell lace, flared Victorian-inspired cuffs, ruffled wrist warmers, adjustable ties, beadwork, dimensional flowers, and wide statement pieces.
The construction differences matter as much as the styling. A slide-on cuff needs enough room to pass over the hand, while a buttoned or clasped bracelet can sit closer to the wrist. Fine thread emphasizes stitch definition but also exposes uneven tension; wider yarn cuffs are softer and more noticeable beneath clothing. The 18 ideas below pair those decisions with original tutorials so you can compare the finished forms first, then visit the credited creator for exact construction details.
Quick List
- Crochet Flared Picot Lace Cuff
- Crochet Antique Thread Lace Cuffs
- Crochet Victorian Arm-Length Wrist Cuff
- Crochet Ruffled Sleeve Lace Cuff
- Crochet Victorian Wrister Cuffs
- Crochet Shell-Lace Button Cuff
- Crochet Adjustable Lacy Tie Bracelet
- Crochet Beaded Boho Statement Cuff
- Crochet Scalloped Shell Bracelet Cuff
- Crochet Woven-Color Button Cuff
- Crochet Chevron Wrist Cuff
- Crochet Floating-Strand Lace Cuff
- Crochet Bridal Thread Lace Bracelet
- Crochet Linked-Motif Lace Tie Cuff
- Crochet Minimal Beaded Chain Cuff
- Crochet Wide Beaded Lattice Cuff
- Crochet 3D Flower Lace Cuff
- Crochet Wire-and-Bead Lace Cuff
Choose Materials for Lace Definition, Drape, and Structure
Fine crochet thread can make open spaces, picots, shells, and miniature motifs look especially crisp. It also makes variations in tension easier to see, so a smooth thread and steady handling are useful when the lace itself is the focal point. Several tutorials in this collection deliberately use crochet thread, while others use standard yarn to create a softer, more substantial cuff.
Changing yarn weight is more than a color substitution. A thicker yarn can enlarge motifs, widen an edging, and change how a bracelet sits against the wrist. Softer fibers may drape attractively but can make a wide cuff feel less structured. Beads add another variable: the yarn or thread has to pass through the chosen beads, and the finished weight may affect stretch. Check the original tutorial’s material recommendations before substituting, then make a small sample when the change is substantial.
Size the Cuff Around Its Actual Closure
Start with the wrist measurement, but also consider how the cuff gets onto the hand. A seamless or sewn ring must usually pass over the widest part of the hand, whereas a button, tie, hook, magnetic clasp, or jewelry clasp allows a closer wrist fit. Moogly’s Chevron Cuff is a useful example because the source specifically distinguishes a loose bangle construction from a closer cuff with fasteners.
For wide designs, also check comfort while bending the wrist. The dimension that looks dramatic when the arm is straight may feel restrictive if the cuff pushes into the hand. When making a pair, record your final measurements rather than relying only on row counts; small tension changes can otherwise make the second cuff noticeably different.
Plan Blocking and Finishing Before Adding Hardware
Open crochet often looks clearer after appropriate blocking, but the correct method depends on the fiber. Follow the yarn or thread care information rather than assuming every cuff should be steamed or treated the same way. Celtic Knot Crochet, for example, blocks the bracelet band before the jewelry hardware is attached, allowing the openwork to be shaped first.
Buttons, beads, clasps, and other findings should also be treated as functional parts rather than last-minute decoration. A heavy button can pull on a lightweight cuff; D60 Crochet specifically cautions that overly heavy buttons may stretch its bracelet. Check attachment points for distortion before fastening off permanently. For metal or wire designs, smooth finishing is particularly important because unfinished ends or poorly positioned hardware can make an otherwise attractive cuff uncomfortable against the skin.
1. Crochet Flared Picot Lace Cuff
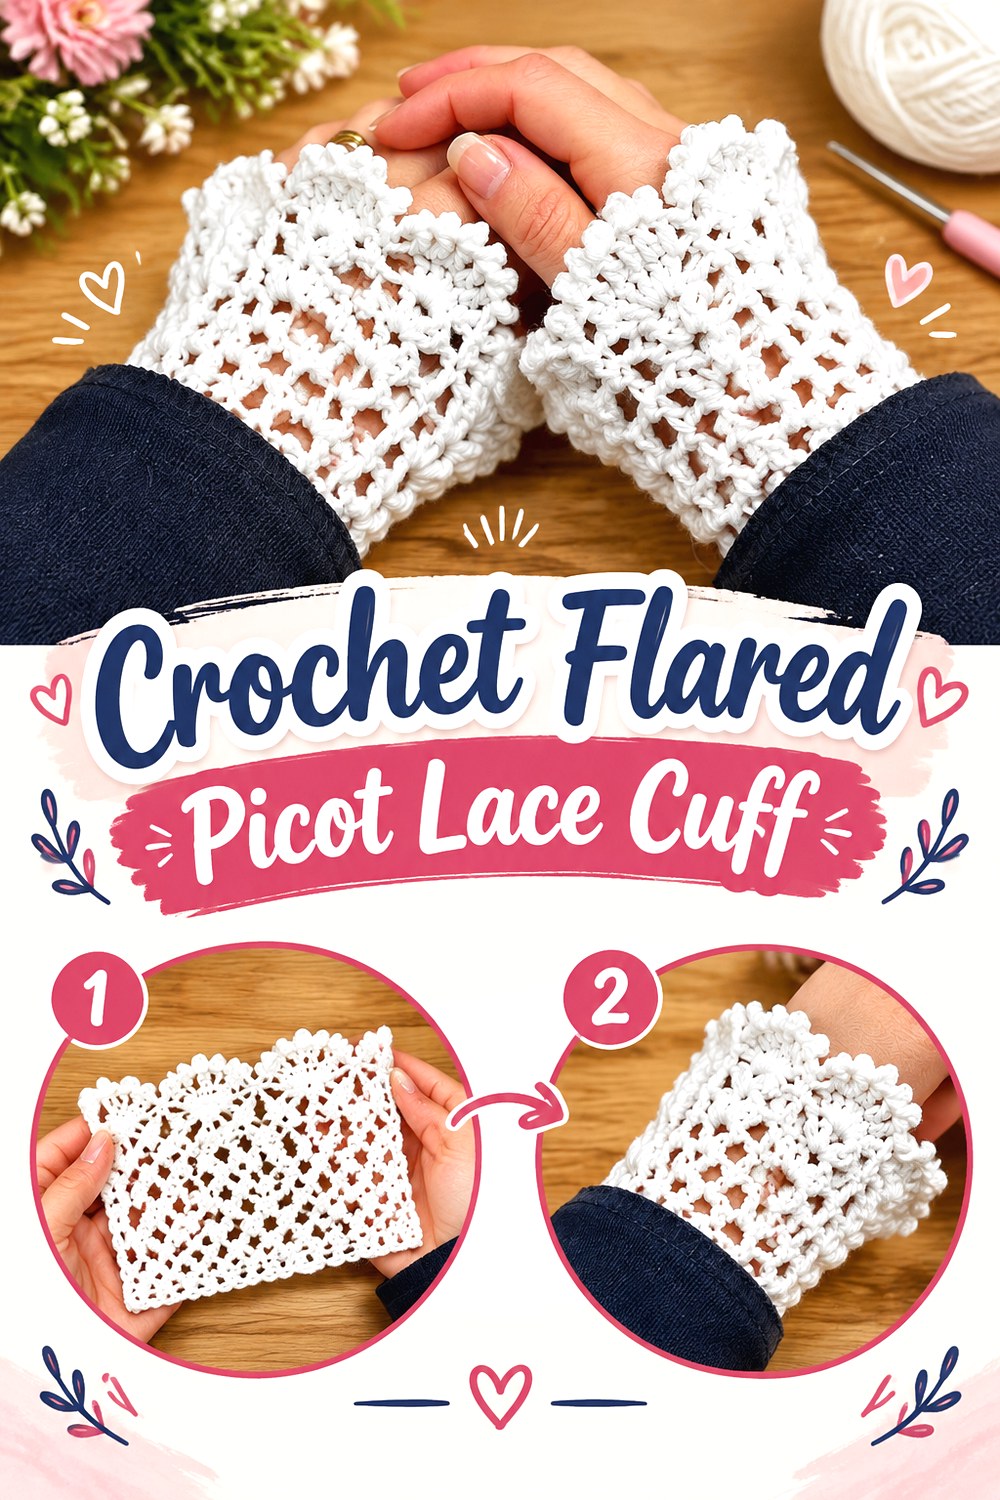
This direction starts with a controlled wrist base and lets the decorative crochet expand outward into a noticeably flared lace edge. Alextitia Tuto Crochet’s source demonstrates a ribbed foundation followed by progressively more decorative openwork, including V-shaped sections, fans, and a picot finish. The result sits somewhere between jewelry and a detachable garment cuff rather than behaving like a flat bracelet.
That flare makes it especially useful when you want lace to remain visible below a plain sleeve. It also introduces a practical contrast: the base needs to stay secure at the wrist while the outer section needs enough freedom to spread instead of collapsing against the arm.
Balance the Fitted Base Against the Flare
The visual effect depends on the lower wrist section looking more controlled than the expanding lace. Before adding a large decorative edge, check the base around the intended wrist without overstretching it. A base that is already loose can make the added lace feel unstable, while one that is excessively tight may be uncomfortable even if the flare looks attractive.
Watch the Spacing Between Fans
Open fans and picots make irregular tension conspicuous. Periodically lay the cuff flat and compare the spacing around the circumference. A section that begins to bunch or spread much more aggressively than its neighbors is easier to correct before the final edging is completed. Gentle blocking may refine the shape, provided the chosen fiber permits it.
Give the Edge Somewhere to Sit
A dramatic lace edge works best when the clothing above it does not crush the flare. Compare the finished cuff depth with the sweater, blouse, or jacket you plan to wear it with. A very tight sleeve may hide the defining feature, while a slightly shorter or roomier sleeve lets the scalloped edge function as an intentional trim.
Original Tutorial and Creator Credit
Creator: Alextitia Tuto Crochet
2. Crochet Antique Thread Lace Cuffs
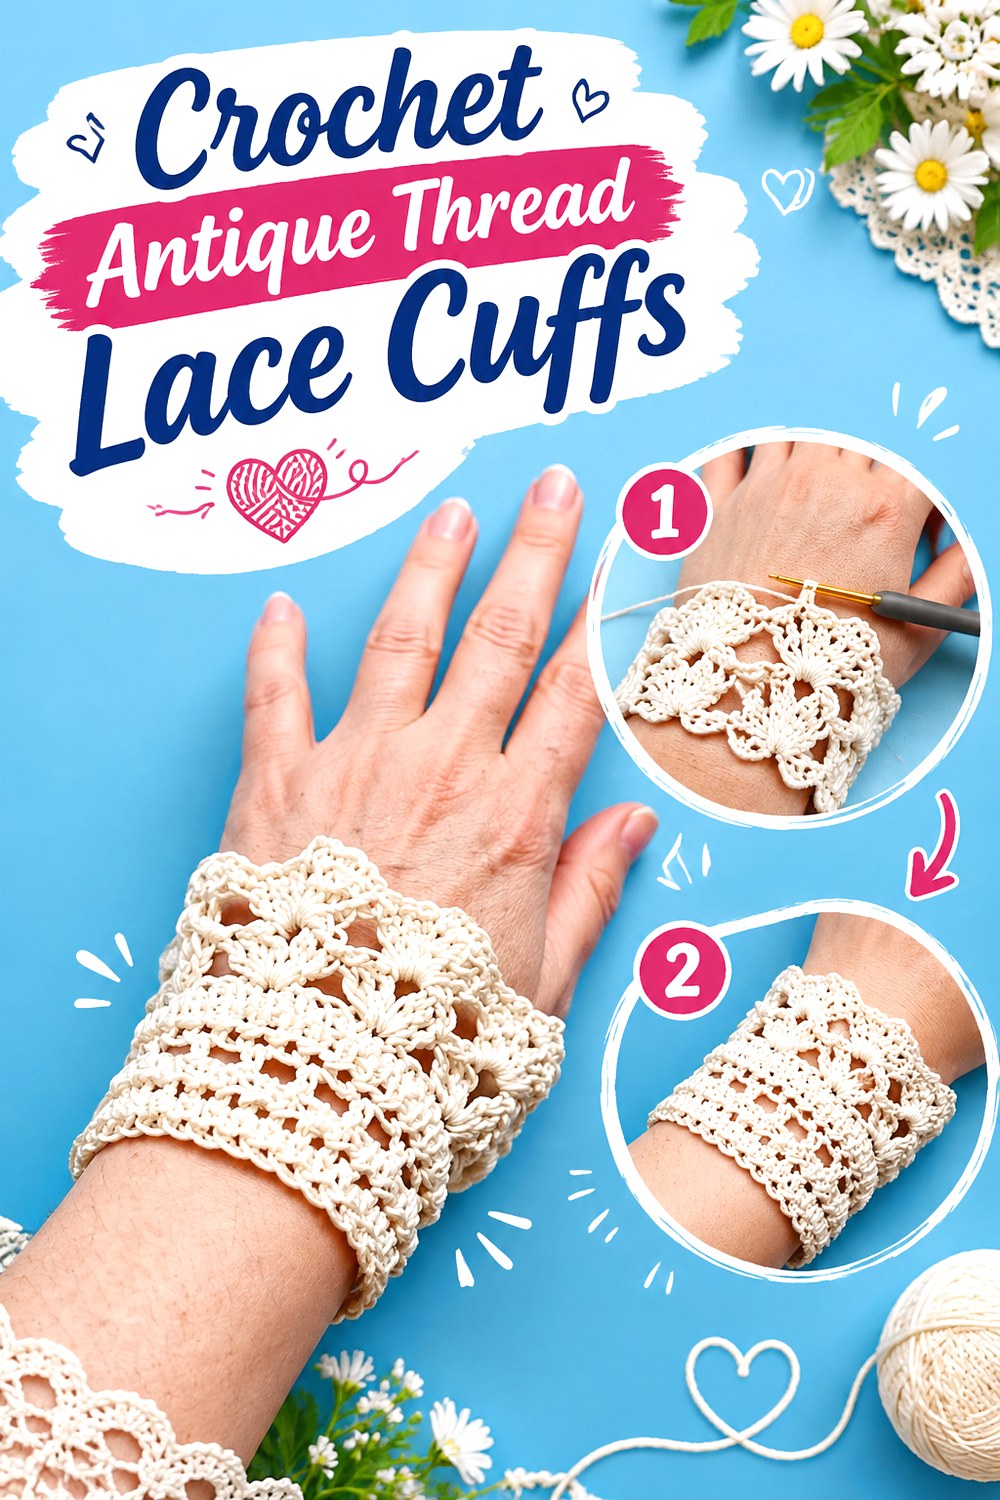
For a lighter historical look, these paired thread cuffs focus on fine-scale lace rather than bulky warmth. Jayda InStitches presents them as antique-inspired cuffs made with crochet thread, making the project a relevant bridge between contemporary wrist accessories and Victorian or Edwardian styling. The fine material keeps the surface visually delicate even when the cuff itself has enough width to be noticeable.
This style suits blouses, dresses, costume wardrobes, or sweaters that need a detachable lace accent without a full lace sleeve. Because a pair is worn side by side visually, consistency matters more than it does with a single bracelet.
Fine Thread Magnifies Tension Changes
Small stitches create excellent definition, but they also give the eye fewer distractions from irregular edges or changing gauge. If thread crochet is unfamiliar, make a short sample before committing to both cuffs. The goal is not an arbitrarily tight fabric; it is consistent tension that allows the open areas to remain recognizable.
Compare the Two Cuffs as You Work
Do not finish the first cuff, put it away, and assume the second will automatically match. Place the pair together at several checkpoints and compare width, circumference, and the apparent openness of the lace. If your tension naturally changes after becoming comfortable with the stitch pattern, catching that shift early can save substantial reworking.
Coordinate with the Sleeve Opening
Antique-style cuffs are most convincing when they look integrated with the clothing rather than randomly layered over it. Check where the garment sleeve ends and how much lace you want exposed. A narrower cuff can act as a subtle trim; a broader version becomes a deliberate historical or romantic styling feature.
Original Tutorial and Creator Credit
Creator: Jayda InStitches
3. Crochet Victorian Arm Length Wrist Cuff
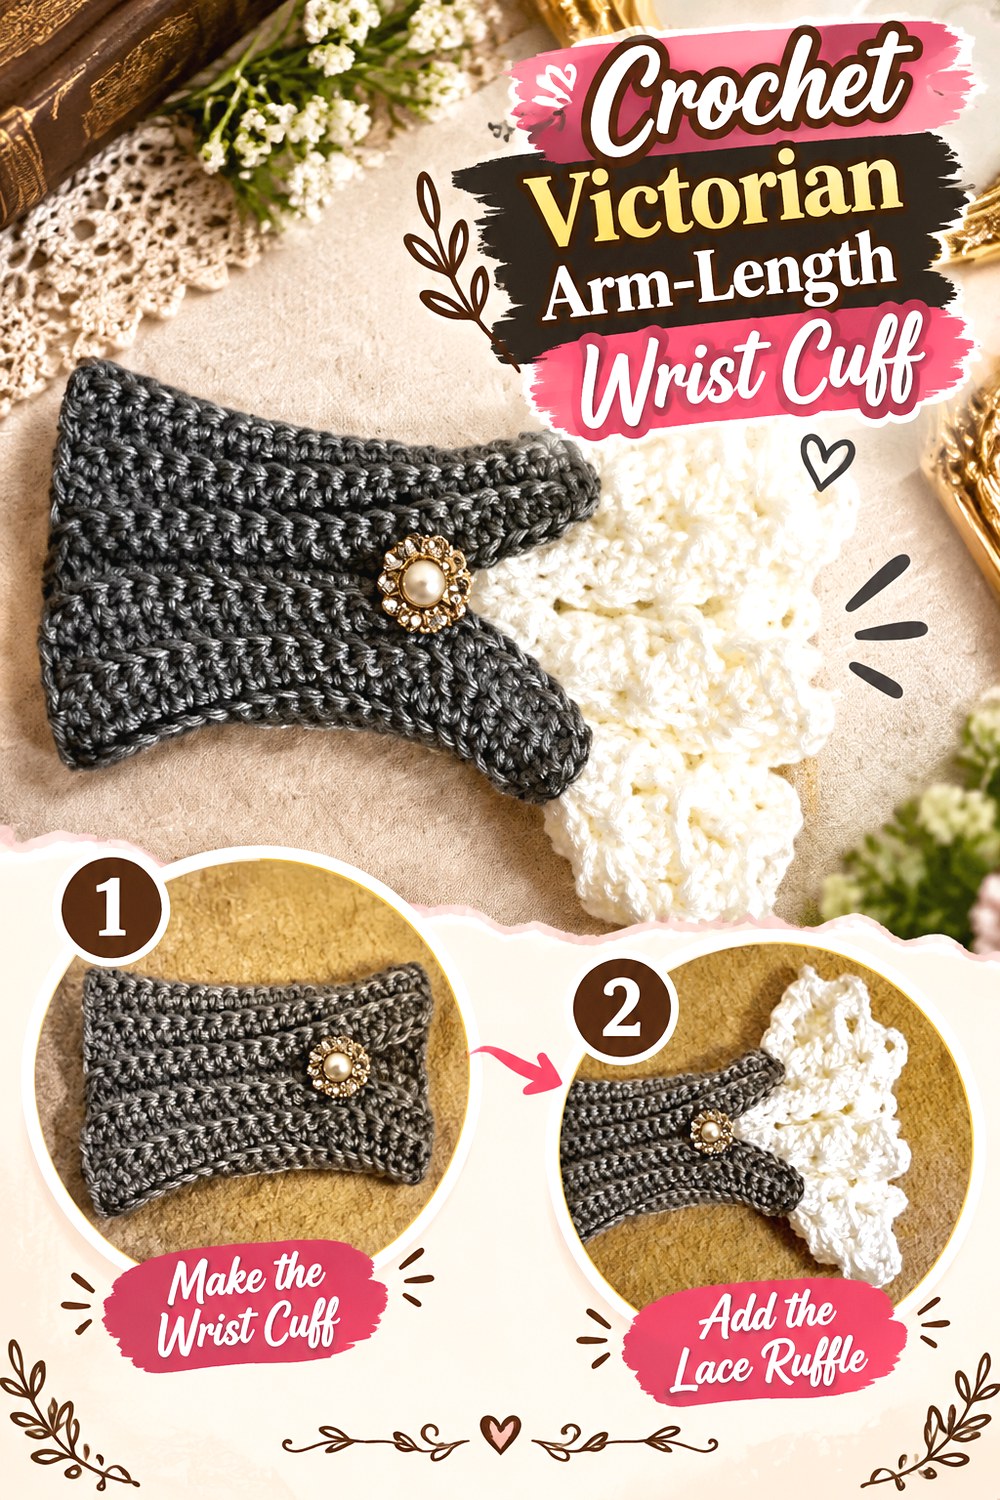
Bag-O-Day Crochet’s Victorian-style wrist arm cuff moves beyond the proportions of a conventional bracelet. Its longer silhouette creates a stronger costume or alternative-fashion statement, giving the lace more visual space along the lower forearm. That scale is the defining difference: instead of concentrating all the detail immediately around the wrist, the accessory becomes part cuff and part short arm warmer.
Longer cuffs can be striking with short sleeves, layered gothic clothing, historical-inspired outfits, or a simple top that leaves the forearm exposed. They also require more fit planning because the circumference of the arm changes as you move away from the wrist.
Measure Beyond the Wrist
A measurement taken only at the wrist may not describe how a longer cuff will fit higher on the arm. Compare the intended length against both the wrist and the wider forearm area before committing to a fixed circumference. If the tutorial’s proportions differ from yours, review its construction before deciding where an adjustment can be made without disrupting the lace.
Check Hand Movement at the Lower Edge
An elongated cuff can look well fitted while the arm is still but interfere with normal wrist movement if it extends too far toward the hand. Try the developing piece in a typing, gripping, and wrist-bending position. That simple checkpoint can help distinguish a dramatic wearable cuff from one better reserved for costume use.
Decide How Structured You Want the Silhouette
Fine thread emphasizes delicacy, while a more substantial yarn can make the same general scale feel closer to an arm warmer. Substitution can also change the size of the lace openings and overall bulk, so avoid assuming that changing fiber or yarn weight will preserve the original proportions automatically.
Original Tutorial and Creator Credit
Creator: Bag-O-Day Crochet
4. Crochet Ruffled Sleeve Lace Cuff
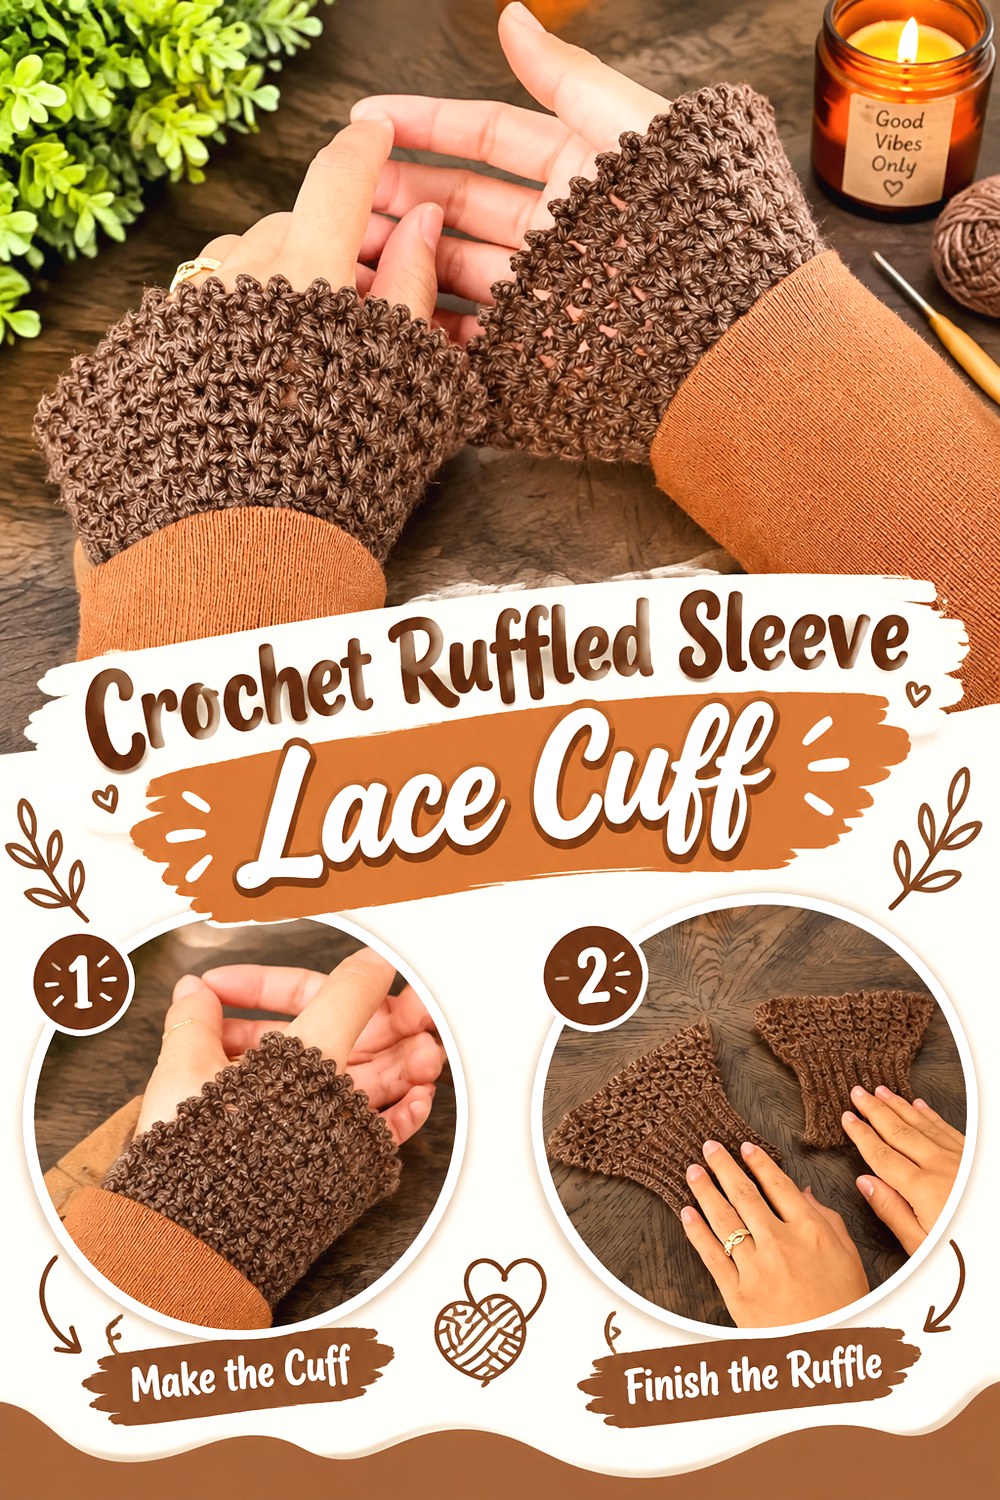
This cuff uses contrast rather than uniformly open lace. KnitcroAddict builds a ribbed wrist section and finishes it with a ruffled edge, creating a neat fitted-to-flared silhouette that can peek from under a sweater, cardigan, or jacket. The creator identifies the project both as ruffle cuff wrist warmers and ruffled sleeve cuffs and demonstrates the ruffle around the ribbed base.
Compared with the finer thread pieces in this list, this direction feels more like clothing trim. The lace effect comes from the spreading edge and negative space rather than a narrow jewelry band, making it useful for cool-weather layering when you still want decorative movement at the wrist.
Keep the Ribbing More Controlled Than the Ruffle
The design reads clearly because the wrist section and decorative edge behave differently. Check that the ribbing fits comfortably before building the flare. If both portions spread equally, the ruffle loses definition; if the base is excessively tight, the contrast may look good but feel unpleasant during wear.
Leave Room Around the Sleeve
A full ruffle can disappear underneath a snug coat sleeve or be pushed upward by a tight sweater cuff. Compare the finished edge with the garments you intend to layer over it. The project has more impact when enough of the ruffle remains unobstructed to spread naturally.
Expect Yarn Choice to Change the Ruffle
The source uses a lightweight/DK yarn but notes that other yarn can be used. A substitution will not necessarily produce the same degree of flare. A thicker or firmer material can make the edging more sculptural, while a very soft fiber may create a looser fall. Sample the edge if that silhouette is important.
Original Tutorial and Creator Credit
Creator: KnitcroAddict
5. Crochet Victorian Wrister Cuffs
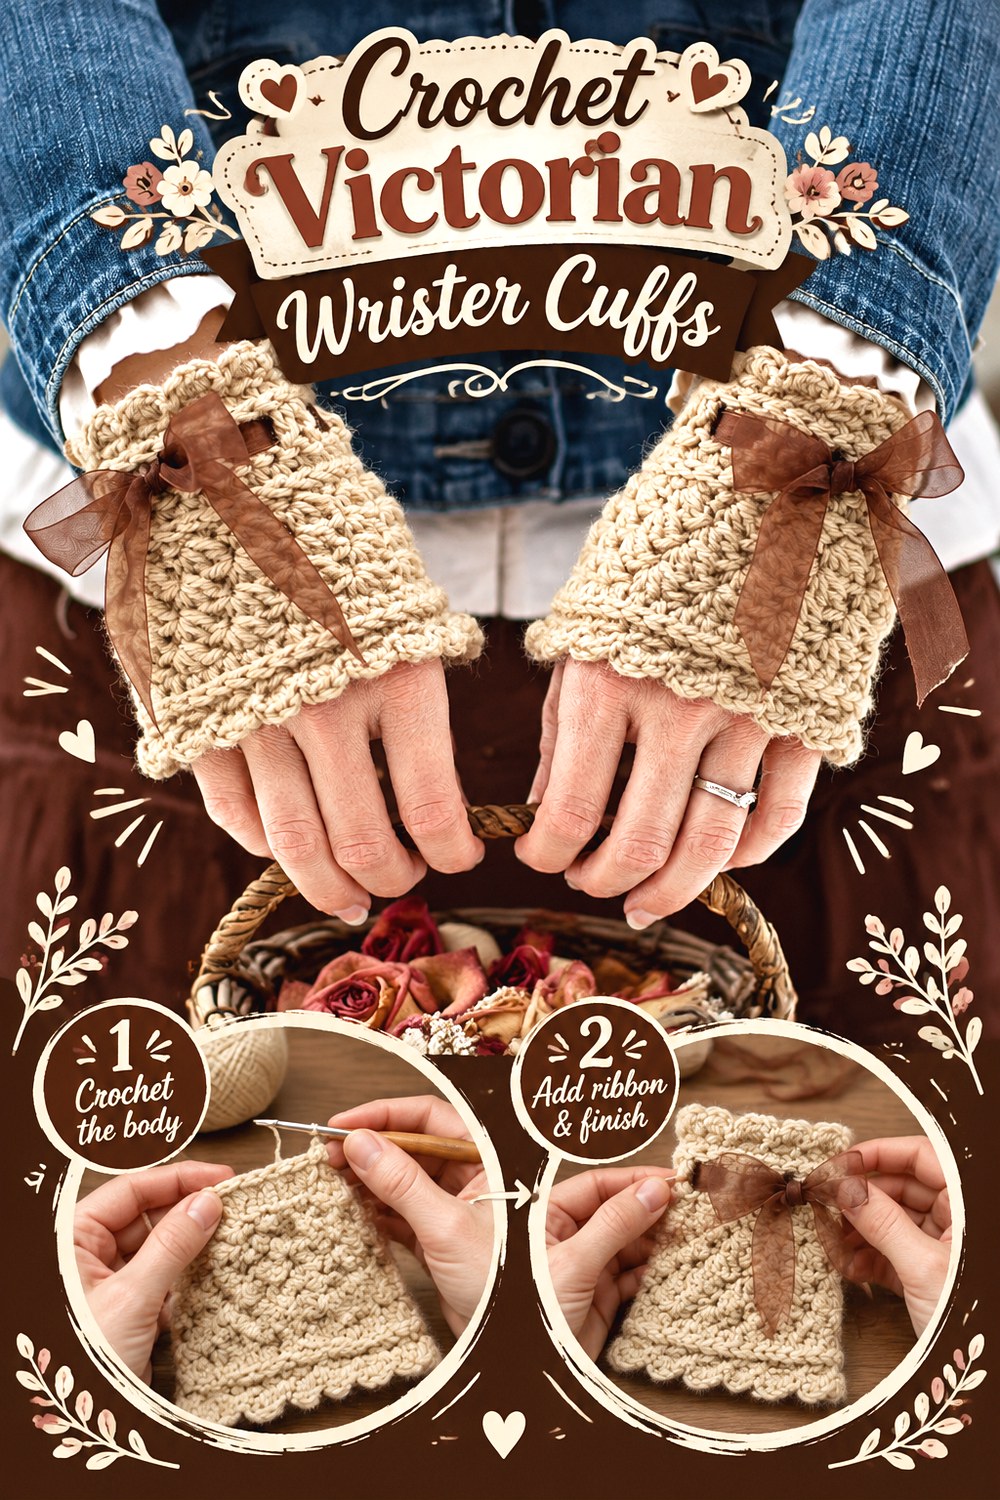
Kirsten Holloway Designs approaches the cuff as a wrist warmer with a pronounced Victorian character. The designer describes the pieces as “wristers,” or wrist warmers, intended to dress up everyday outfits or costumes. This makes them a useful choice for readers who want more substance than thread jewelry while keeping the decorative focus around the wrist.
Because the project is wearable fabric rather than a narrow bracelet, think about how it interacts with sleeves and hand movement. This option works particularly well when you like historical styling but want the accessory to read as a soft textile rather than conventional jewelry.
Position the Decorative Area Where It Will Show
When a wrist warmer sits partly underneath a sleeve, only part of its surface may remain visible. Before making stylistic adaptations, decide whether the main texture should sit immediately below the hand or farther up the wrist. That decision can influence which clothing layers work best with the finished pair.
Keep the Pair Visually Consistent
Paired accessories amplify small differences. Use the same measuring points for both cuffs and compare them before final finishing. If the construction includes a directional or spiral-looking texture, also check that the second cuff is oriented in the way you want rather than simply matching the first piece’s row count.
Prioritize Comfortable Wrist Flexion
Decorative wristers should still allow normal hand movement. Try them with the wrist bent rather than judging fit only while the arm is straight. If an adaptation makes the hand edge too firm or bulky, revisit that modification instead of assuming the fabric will become comfortable through wear.
Original Tutorial and Creator Credit
Creator/Site: Kirsten Holloway Designs
6. Crochet Shell Lace Button Cuff
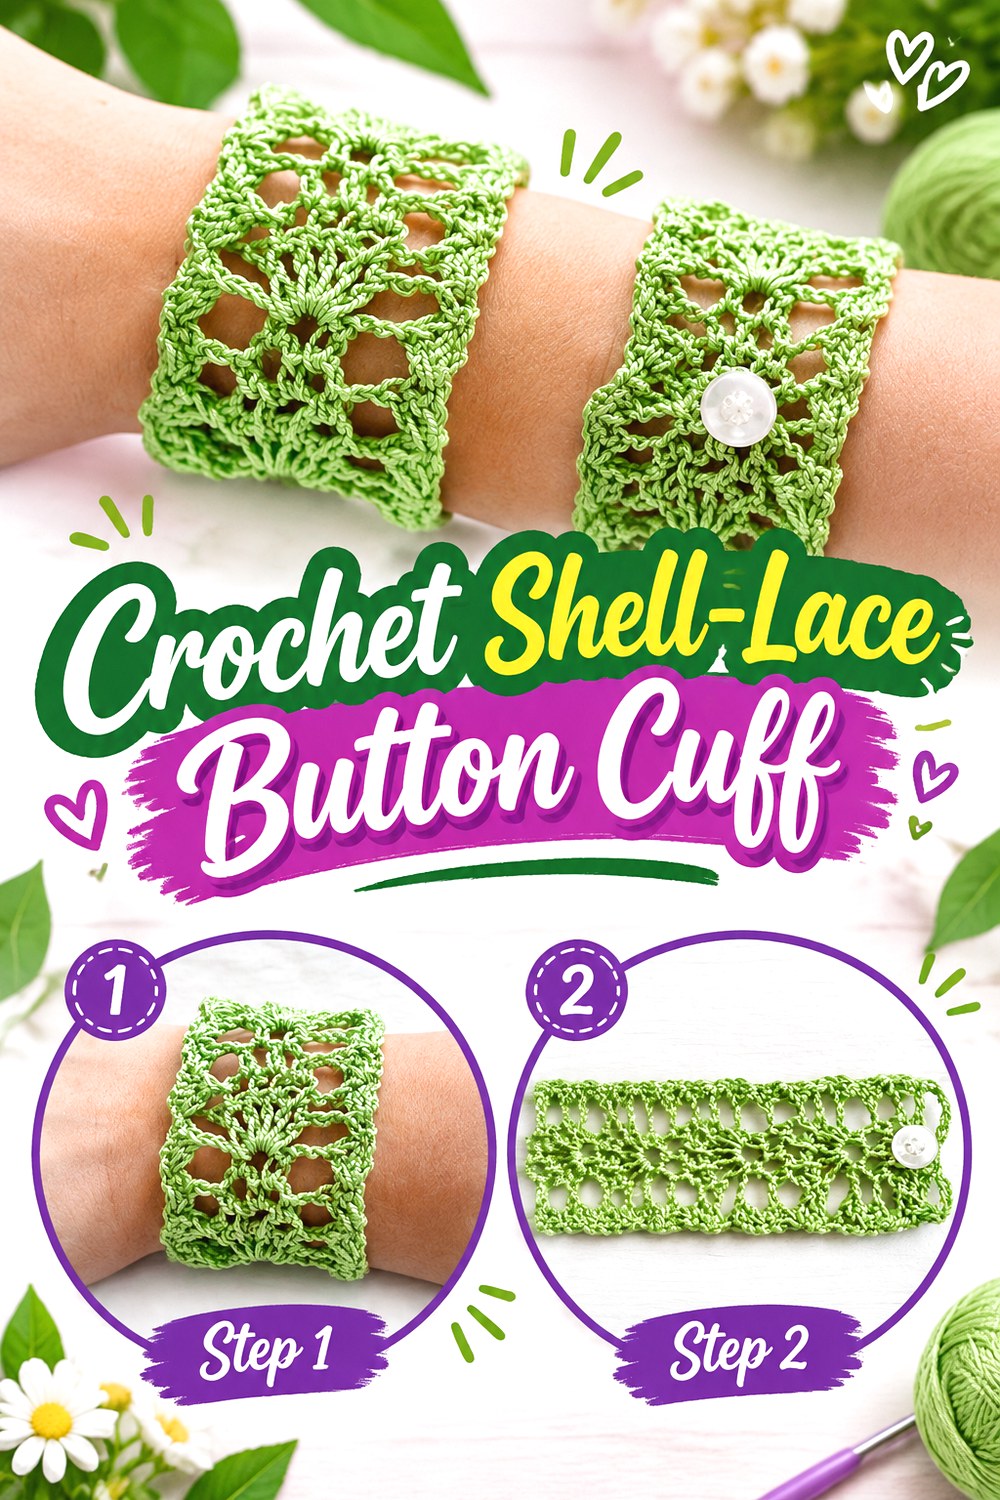
Oui Crochet’s lace cuff bracelet uses a defined shell-based lace pattern and a small button closure. An especially practical feature is that the open lace itself accommodates the button, so the design does not depend on a separately constructed buttonhole. The source uses Size 5 crochet thread, reinforcing the fine, jewelry-like character of the piece.
Visually, this cuff lands between a narrow bracelet and the wider historical cuffs above. The centered openwork gives it enough presence to stand on its own while the fine thread keeps it light. It is a good direction when the lace pattern, rather than beads or colorwork, should carry most of the visual interest.
Let the Lace Help with the Closure
Because the source uses an existing lace opening for the button, button selection affects more than decoration. Test the actual button against the finished opening before sewing it permanently in place. Too small and it may slip through; too large and repeated fastening can distort the surrounding stitches.
Protect the Shell Shape with Even Tension
Shell lace looks orderly when the repeated units are similar in height and openness. If one edge begins tightening, do not rely on blocking to fix a substantial structural difference. Count carefully and compare the width every few repeats, especially when working with fine thread.
Choose a Smooth Thread for Definition
Highly textured or fuzzy material can obscure small spaces that give shell lace its character. A smooth thread makes the individual stitch groups easier to read. If you substitute a thicker yarn, expect a proportionally larger and potentially softer cuff rather than an identical bracelet in another fiber.
Original Tutorial and Creator Credit
Creator/Site: Oui Crochet
7. Crochet Adjustable Lacy Tie Bracelet
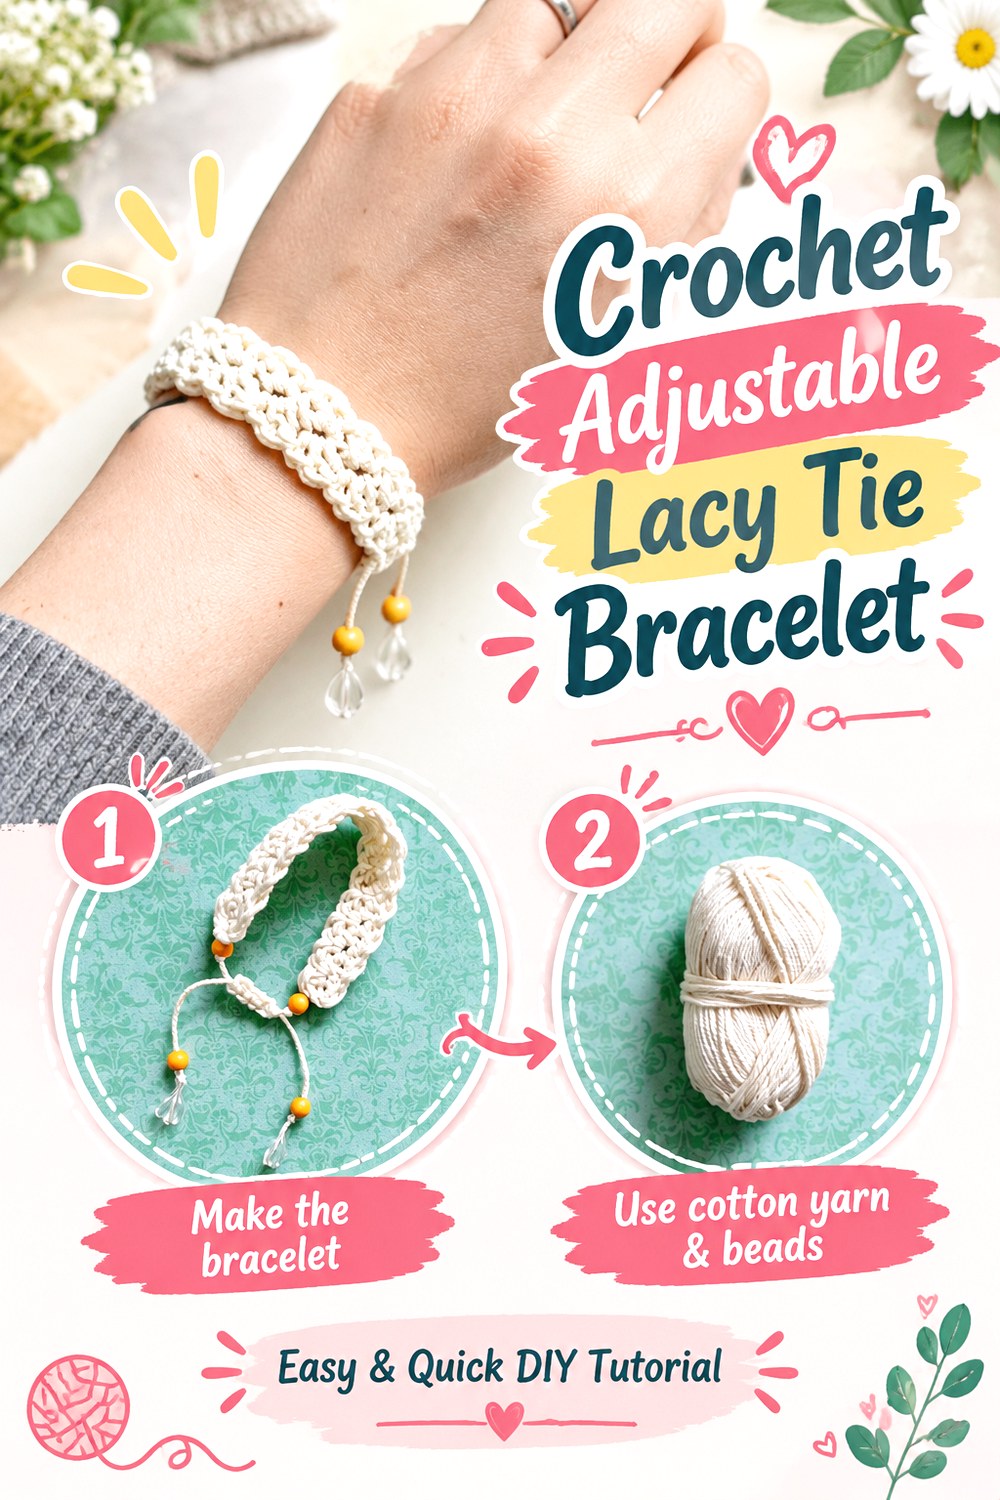
Sweet Softies takes a different approach to fit by making the bracelet adjustable rather than relying on a fixed circumference. The creator describes a lacy accessory with a yarn-based adjustable clasp, eliminating the requirement for a purchased metal clasp. The source also explains that the scale can change substantially depending on whether fine embroidery thread or thicker yarn is used.
That makes this idea particularly flexible for gifts or situations where the exact wrist measurement is uncertain. It is slimmer than most statement cuffs, so it can also be stacked with other bracelets without creating the bulk of a wide wrist warmer.
Decide How Much Adjustment You Actually Need
An adjustable closure is useful only if enough range remains after the decorative portion is completed. Test the bracelet on the smallest and largest wrist positions you expect it to accommodate. Avoid making the lace section so long that the closure has no meaningful room left to tighten.
Use Material Scale as a Design Choice
The source explicitly discusses using different yarn or thread weights for more delicate or bulkier versions. Fine material pushes the design toward jewelry; thicker yarn makes the crochet itself more visually dominant. When changing scale, verify that the closure still slides and sits comfortably rather than assuming the original fastening behavior will remain unchanged.
Original Tutorial and Creator Credit
Creator: Sweet Softies
8. Crochet Beaded Boho Statement Cuff
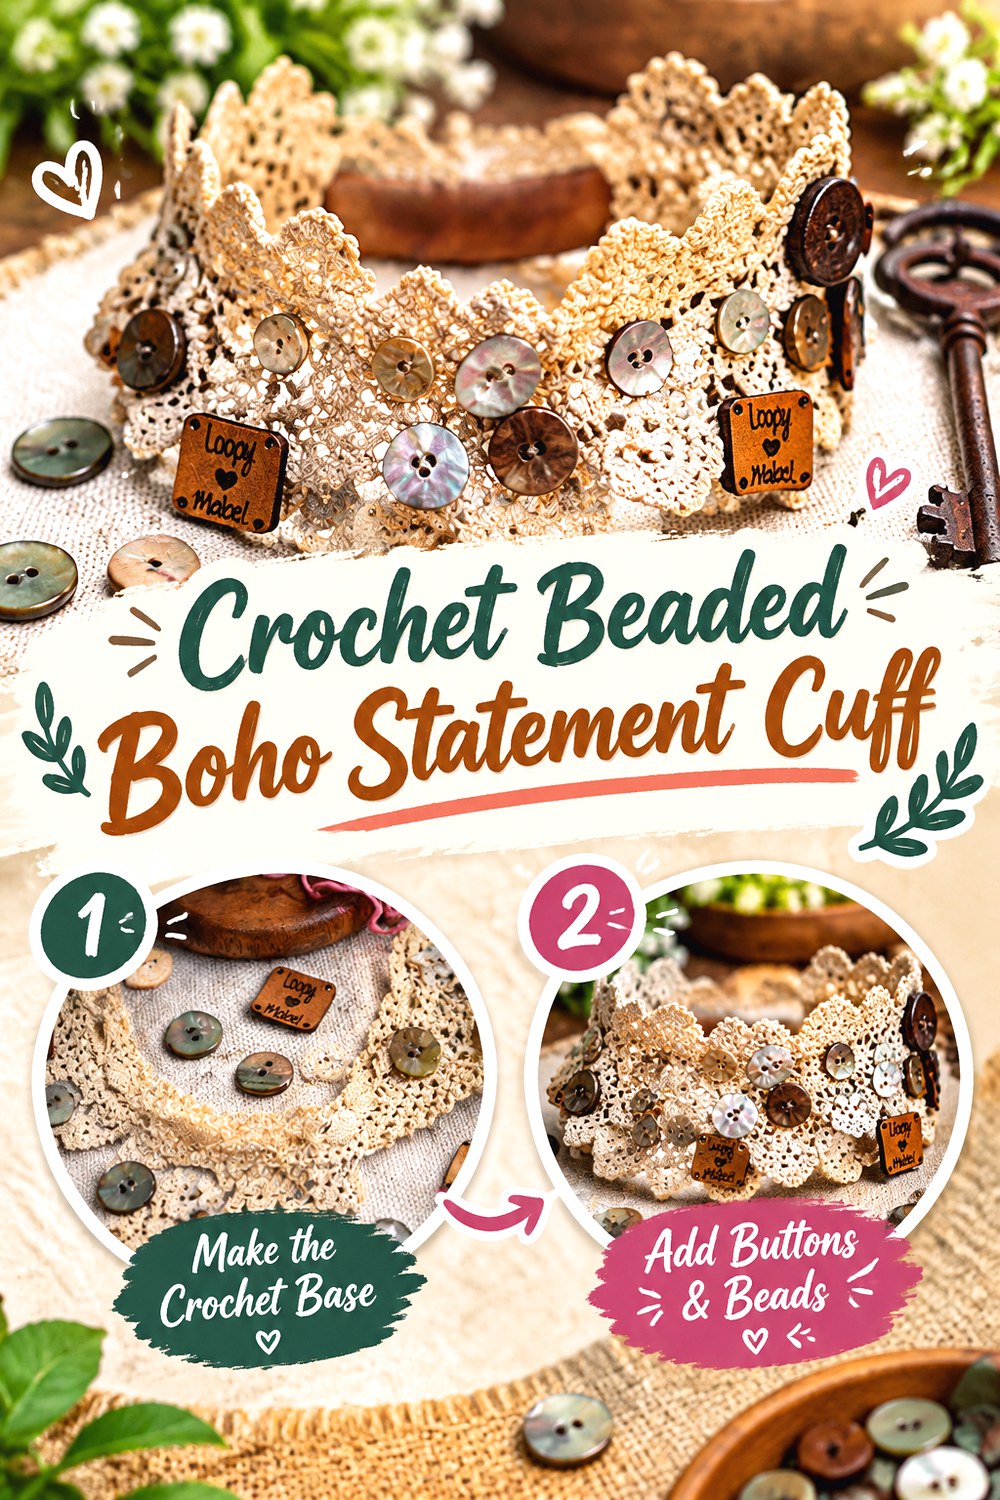
Loopy Mabel Crochet’s Cora design combines crochet fabric with beads to create a much more substantial jewelry piece. The tutorial presents it as a boho-style beaded cuff and lists glass beads, mercerized DK yarn, and buttons among the materials used.
This is a stronger visual statement than a fine lace bracelet because the beadwork contributes both surface detail and physical weight. It works well when you want crochet to function as a textile base for jewelry components rather than as the only decoration. The wider shape also means fit, closure placement, and weight distribution deserve more attention than they would on a slim tie bracelet.
Treat Beads as Added Weight
A bead is small, but a whole cuff can contain enough of them to alter how the fabric hangs. Hold the developing piece around the wrist before finishing and see whether the beadwork pulls downward or causes the top edge to flare. If so, review tension and fit before adding more embellishment.
Plan the Decorative Rhythm Early
Bead spacing looks most intentional when it relates to the underlying crochet. Before committing to an altered bead arrangement, map the repeat across the usable cuff width. An awkward half-repeat beside the closure may be more noticeable on a wide cuff than a slight change in the center.
Reinforce the Closure Area Visually
The ends of a statement cuff have to balance the decorative middle. Position buttons or other closures so the fabric lies flat rather than twisting when fastened. If you substitute heavier components, check whether the edge needs more support; additional decoration should not force the closure to carry unnecessary weight.
Original Tutorial and Creator Credit
Creator: Loopy Mabel Crochet
9. Crochet Scalloped Shell Bracelet Cuff
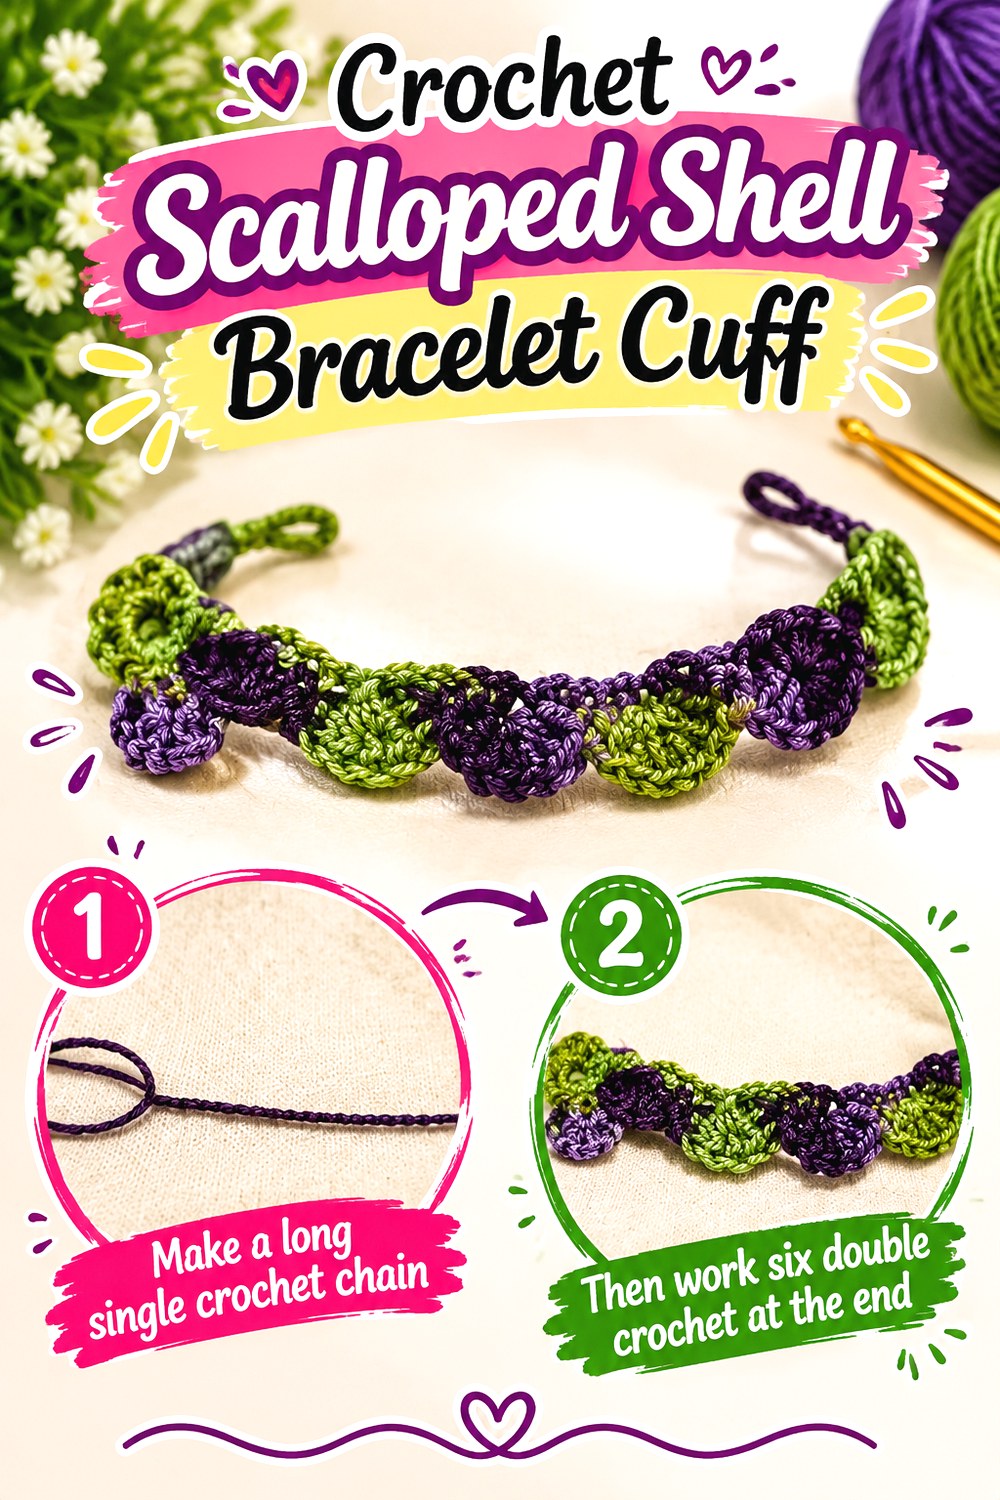
Crochet Jewel’s bracelet concentrates its texture into repeated shell shapes, producing a narrow scalloped band rather than a broad rectangle. The source is specifically a shell-stitch bracelet tutorial and demonstrates the accessory as a small piece of crochet jewelry.
Compared with the wider shell-lace cuff from Oui Crochet, this idea lets the silhouette itself become the decoration. It can be worn alone for a light effect or grouped with other narrow bracelets. Because there is little fabric outside the shell repeat, any change in gauge can quickly affect both length and the regularity of the edge.
Keep Each Scallop Similar
A narrow shell band offers nowhere for uneven repeats to hide. Compare each new scallop with the previous few rather than waiting until the entire bracelet is finished. Consistent tension at the base of each shell helps prevent the strip from alternating between tight and loose sections.
Size It with the Finished Fastening in Mind
Check how the final fastening overlaps, joins, or sits between shell sections before deciding the band has reached the correct length. If you alter the closure from the tutorial, test it on the wrist first; a small hardware change can shift where the decorative repeat ends.
Original Tutorial and Creator Credit
Creator: Crochet Jewel
10. Crochet Woven Color Button Cuff
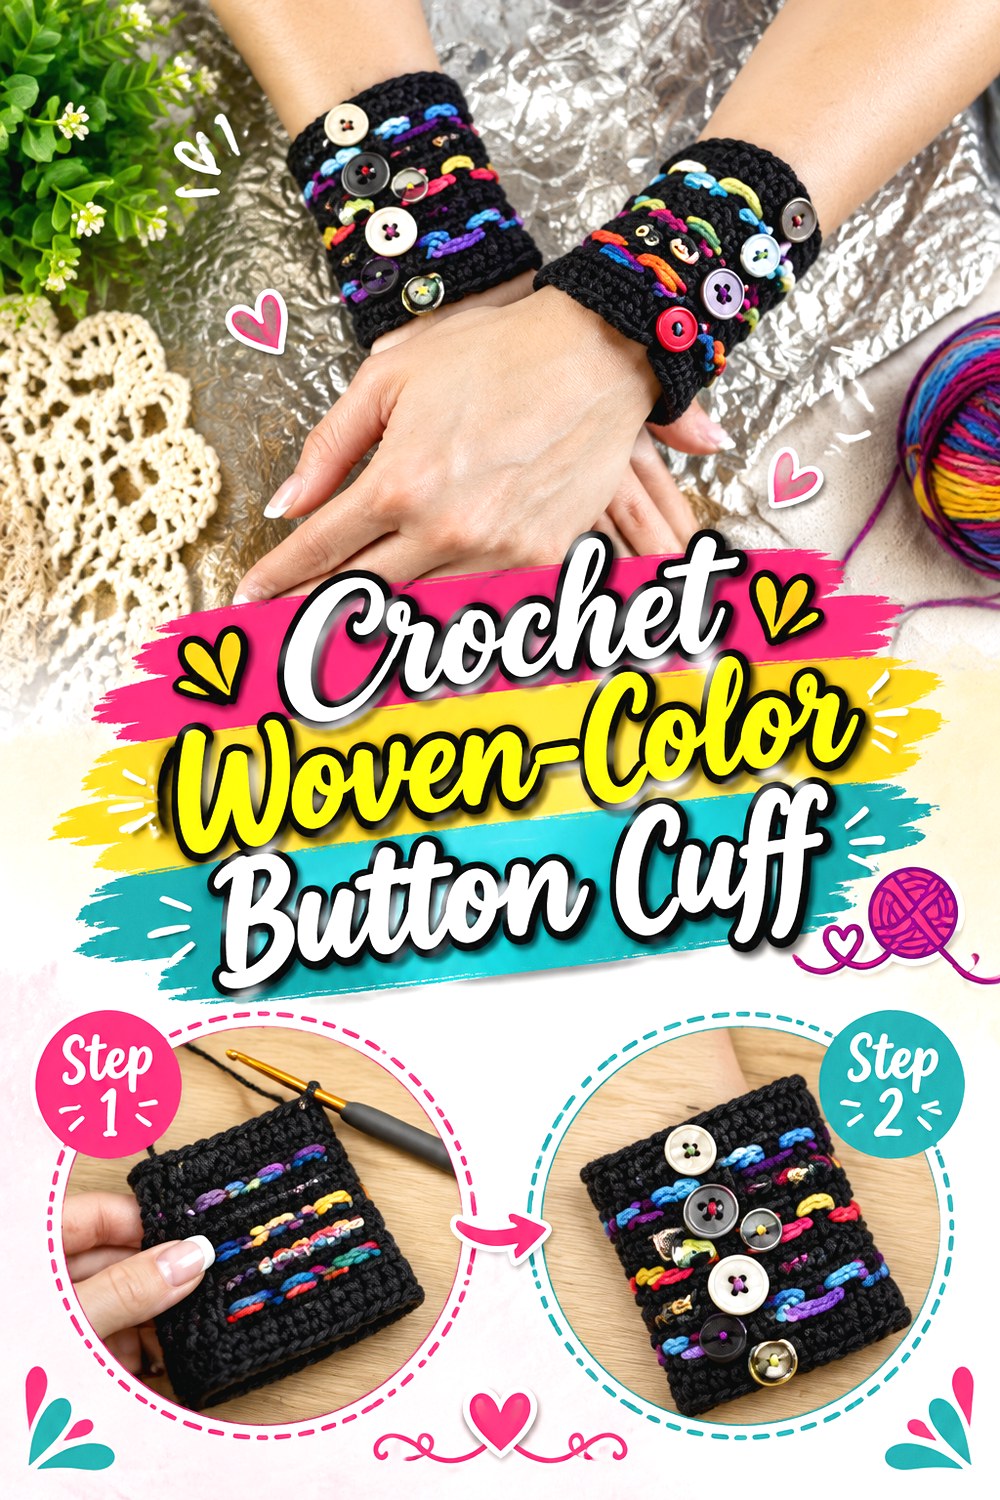
D60 Crochet’s cuff has a distinctly textile-based boho look. The pattern creates a wide bracelet with open sections through which additional chains of color are woven, then finishes the piece with buttonholes and multiple buttons. The source identifies Lynne Samaan as the designer and gives the finished example substantial width, making this a true statement cuff rather than a slim bracelet.
The woven strands introduce visual color without relying on conventional striping. That also means there are two tension systems to manage: the structural crochet base and the decorative chains passing through it.
Avoid Pulling the Woven Chains Too Tight
Decorative chains should add color without drawing the cuff inward. Lay the piece flat while inserting them and check both long edges. If the base begins to bow, the decorative strand is probably shortening the fabric rather than resting inside it.
Keep Button Weight Proportional
D60 Crochet explicitly warns that heavy buttons can stretch the bracelet. This matters more when several buttons are involved. Choose closures that provide enough presence for the broad cuff without making one edge noticeably heavier than the rest of the fabric.
Test a Wide Cuff During Wrist Flexion
A broad bracelet covers more of the joint than a narrow band. Before placing all the buttons permanently, wrap the cuff into its intended position and bend the wrist normally. Slightly shifting the closure location may improve comfort without changing the decorative front.
Original Tutorial and Creator Credit
Creator/Site: D60 Crochet — Lynne Samaan
11. Crochet Chevron Wrist Cuff
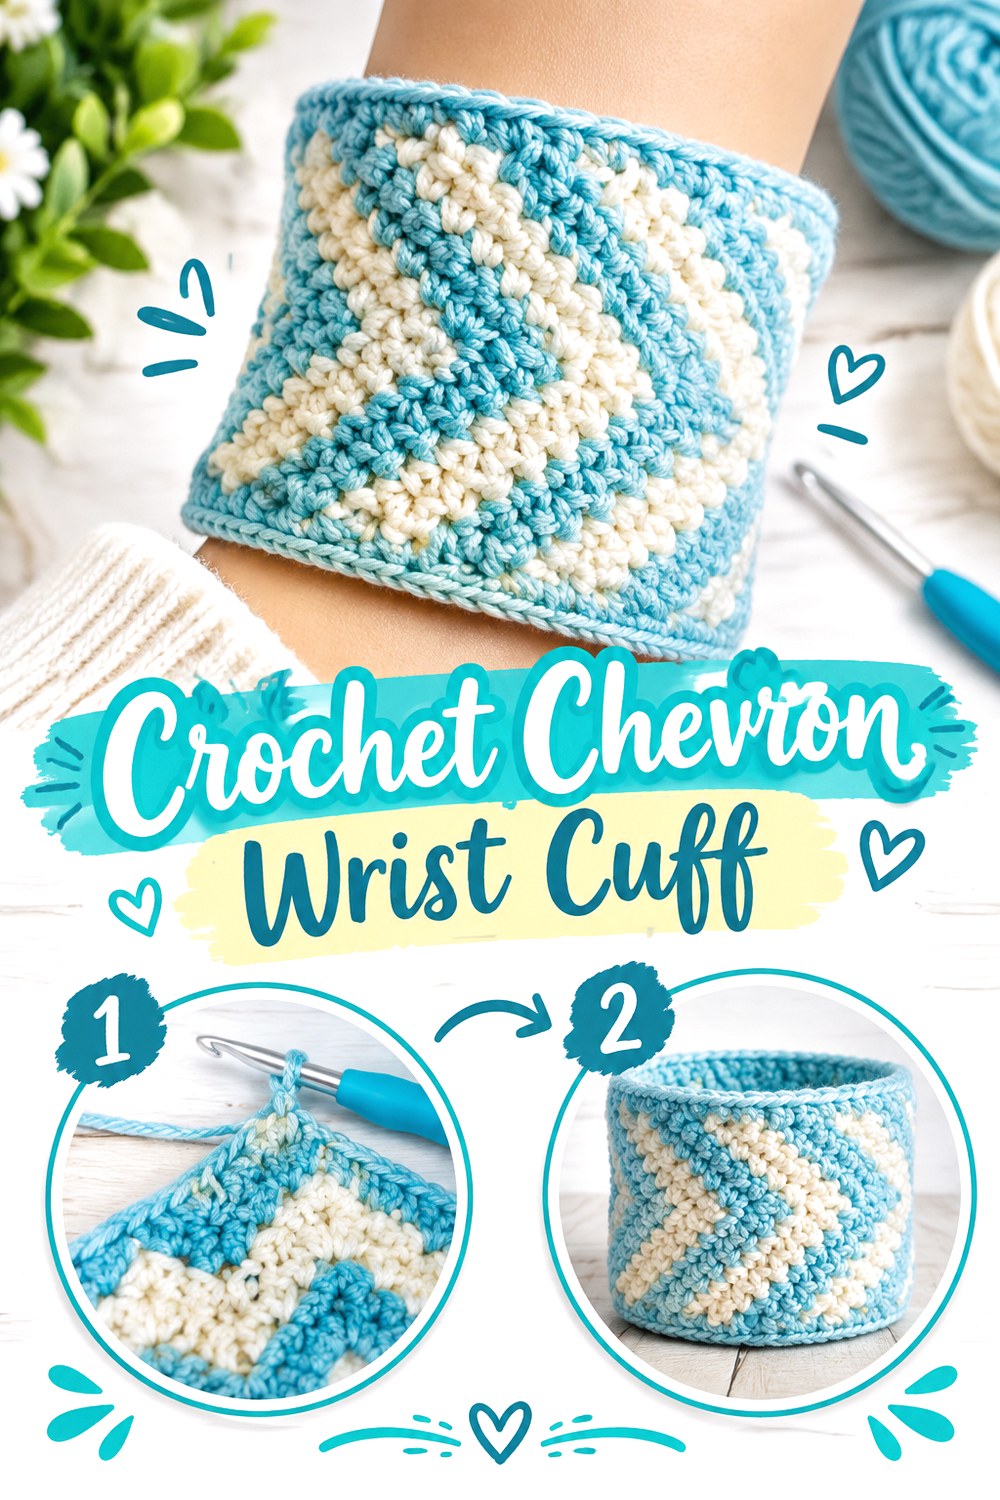
Rather than traditional floral lace, Moogly uses repeated chevrons to create negative space through shape and movement. Tamara Kelly’s original Chevron Cuff includes two wearing options: a loose bangle-style version that must pass over the hand and a tighter cuff that can use fasteners such as buttons or hooks and eyes.
That construction choice makes this one of the clearest examples of why sizing and closure need to be planned together. The zigzag surface also gives the bracelet a graphic quality that separates it from romantic shells and picots, making it suitable for readers who like open crochet but want a more geometric look.
Choose Bangle or Fitted Cuff First
Do not use the wrist circumference alone if you plan to seam the bracelet into a slide-on bangle. Moogly specifically distinguishes the two fitting approaches. Decide how the piece will be worn before finalizing length, because the hand and wrist require different clearances.
Use the Chevron Peaks as a Gauge Check
Repeated peaks and valleys make tension changes easy to diagnose. Lay the strip flat and check whether the center points continue to align. A drifting edge can signal an incorrect stitch count or a change in tension before the discrepancy becomes difficult to repair.
Let the Border Stabilize Rather Than Distort
The source finishes the bracelet edges with a border. When adapting yarn or hook size, make sure that finishing edge lies flat. A border worked too tightly can pull the chevrons inward, while an overly loose border may wave around the circumference.
Original Tutorial and Creator Credit
Creator/Site: Moogly — Tamara Kelly
12. Crochet Floating Strand Lace Cuff
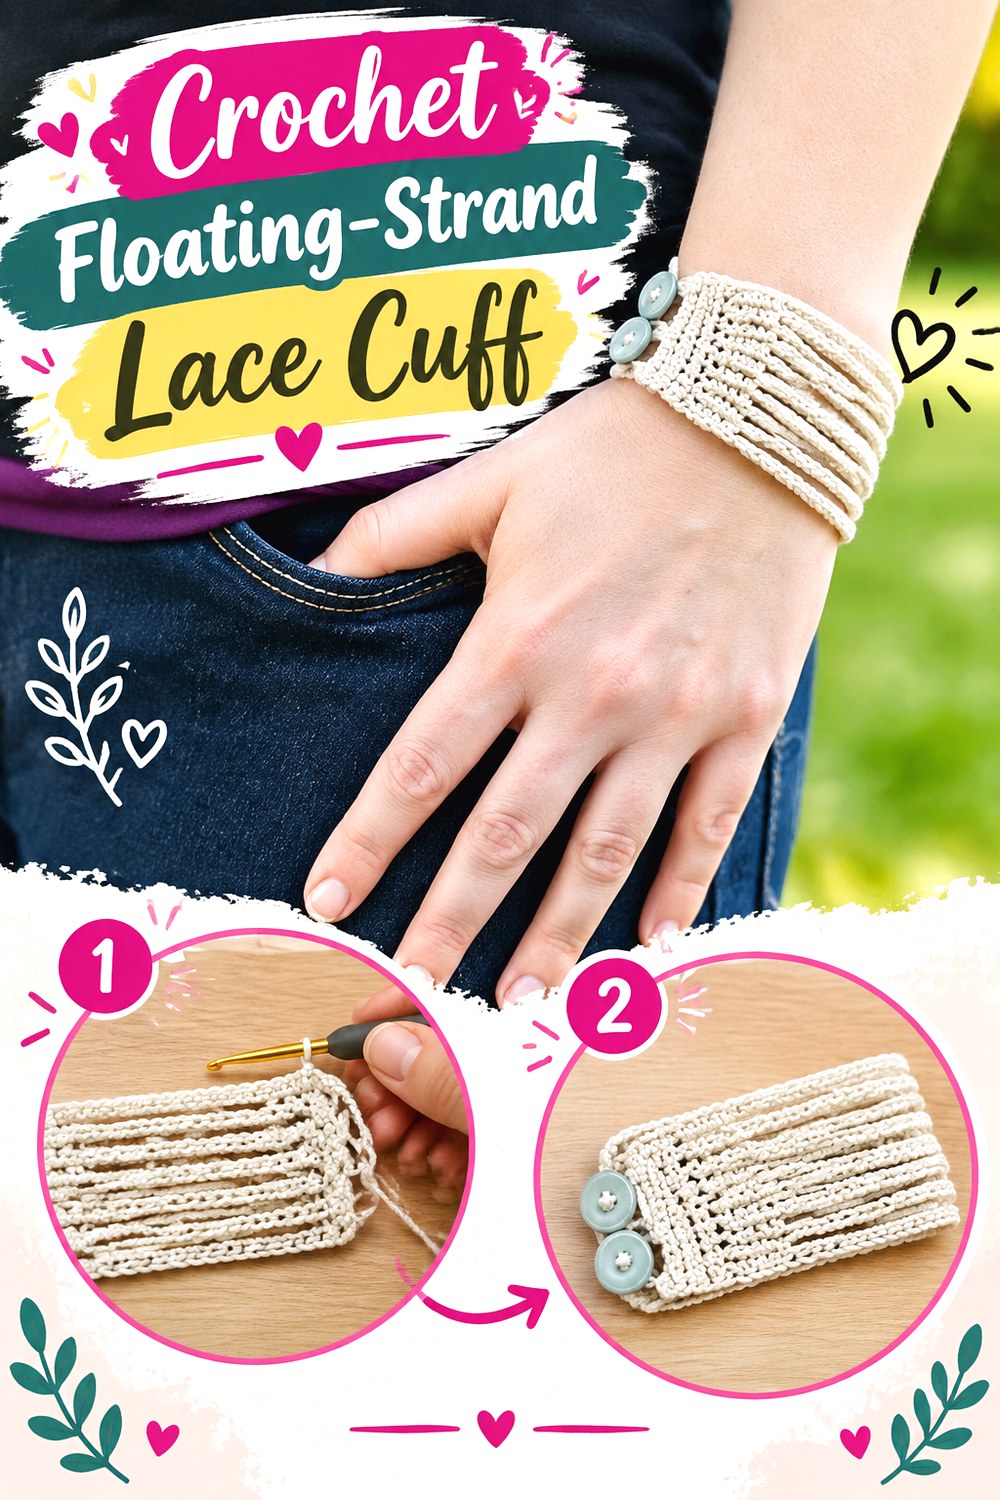
The Leah Bracelet from Divine Debris produces openness in a very different way: elongated chain sections create separate-looking strands between more solid end areas. The source notes that the bracelet is worked in three parts and uses crochet thread, with buttons added at the fastening end. It also specifically cautions that tension in the chain sections can affect how independently those rows move.
The result is airy without relying on shells, fans, or circular motifs. That linear construction makes this a strong choice for a contemporary cuff, especially when made in contrasting or changing colors.
Keep Long Chain Sections Consistent
The designer specifically notes that chain tension affects the finished look. If one strand is significantly tighter, it can draw the end sections toward each other; if much looser, it may droop. Periodically align the two solid ends and compare the spans before continuing.
Use the Solid Ends to Control the Fit
The denser end sections visually anchor the open center and carry the closure. When adapting length, consider where the buttons will sit and how much of those solid sections will overlap. Moving the closure can be more effective than changing the decorative middle after it has been completed.
Think About Snagging
Long open strands are part of this cuff’s appeal, but they are naturally more exposed than compact stitches. Consider the intended setting. Smooth sleeves and occasional wear are different demands from working around bag hardware, rough outerwear, or equipment that could catch open loops.
Original Tutorial and Creator Credit
Creator/Site: Divine Debris
13. Crochet Bridal Thread Lace Bracelet
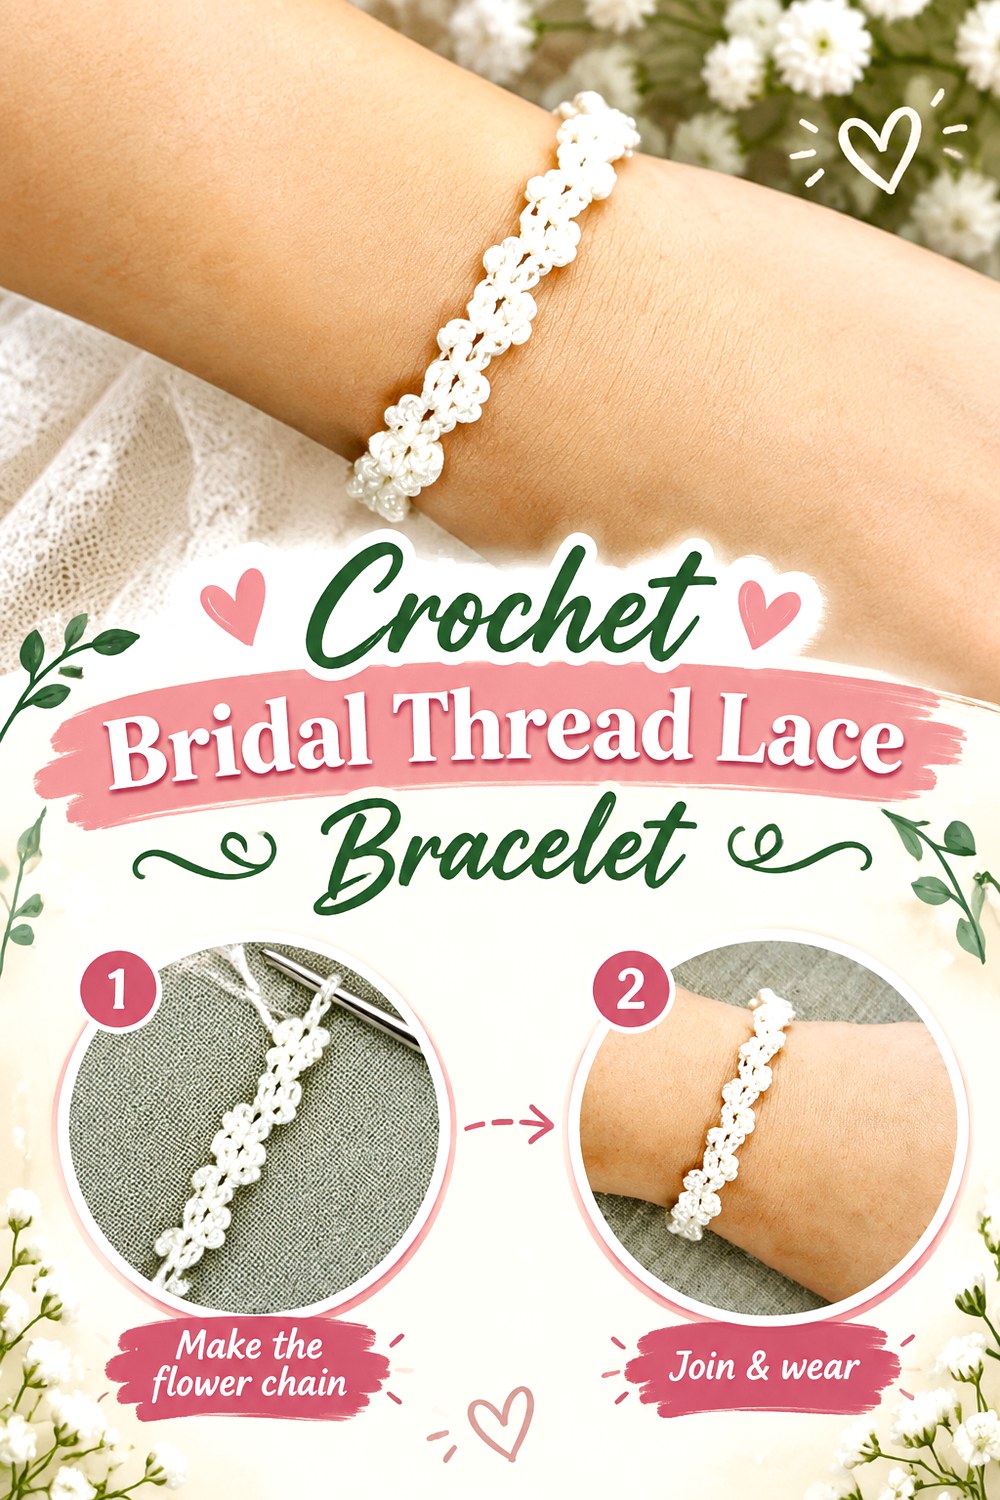
Oombawka Design Crochet’s bridal bracelet is deliberately narrow and delicate. Rhondda Mol describes the piece as vintage-style lace worked lengthwise, with the option to stitch the ends together for a cuff or add a clasp or other closure. The original design is only about a quarter-inch wide, so this idea reads more like a fine lace trim around the wrist than a broad textile bracelet.
The source also discusses adding beads or pearls to the edge. That gives the design obvious bridal potential without making embellishment mandatory, and it can be equally effective in non-bridal colors.
Make the Finish Proportionate to the Lace
A very narrow bracelet can be visually overwhelmed by bulky hardware. If you replace the source’s simple joining or closure options, compare the clasp width with the lace itself. The fastening should secure the bracelet without becoming the largest element unless that contrast is intentional.
Add Beads with Restraint
The source explains that beads or pearls can be incorporated along the edge. Because the crochet is so narrow, even small additions become prominent. Sample a short section first and confirm that the embellishment does not twist the lace or make the bracelet noticeably heavier on one side.
Original Tutorial and Creator Credit
Creator/Site: Oombawka Design Crochet — Rhondda Mol
14. Crochet Linked Motif Lace Tie Cuff
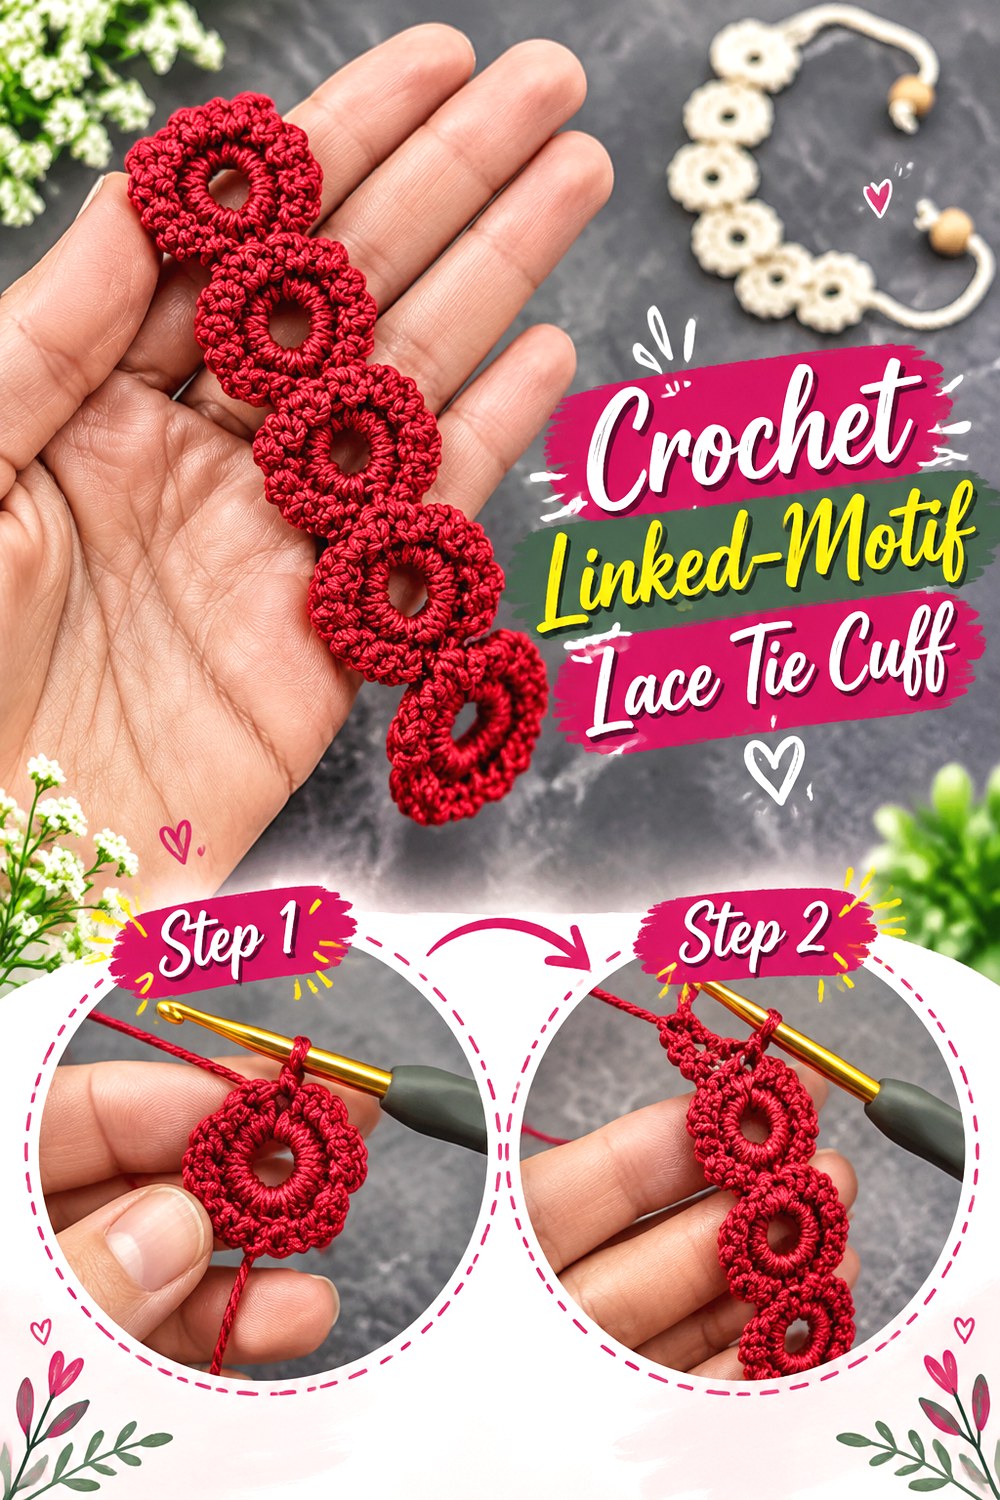
Crochet Bits constructs its lace bracelet as a chain of repeated decorative elements rather than as one continuous fabric panel. The original pattern uses fine cotton, builds the bracelet until the desired number of elements gives the needed length, and finishes with ties that have wooden beads at their ends.
That combination gives this idea an ornamental, almost lace-trim appearance while avoiding fixed metal hardware. The repeated motifs create more visual rhythm than a plain tie bracelet, and the loose ends add movement. It is a useful direction when you want the closure itself to remain part of the textile design.
Use the Motif Repeat as Your Sizing Unit
With linked motifs, changing length is most natural at the repeat level rather than by randomly stretching the final piece. Compare the completed motifs against the wrist before adding another. Also remember that the tie closure contributes usable fitting range beyond the decorative portion itself.
Keep Both Ties Visually Balanced
The beaded tie ends are visible when worn, so substantial differences in length can look accidental. Before attaching or securing the terminal beads, place the bracelet flat and compare both ends. For safety and durability, make sure decorative beads are firmly retained rather than relying on an insecure temporary knot.
Original Tutorial and Creator Credit
Creator/Site: Crochet Bits — Crochet Bits Team
15. Crochet Minimal Beaded Chain Cuff
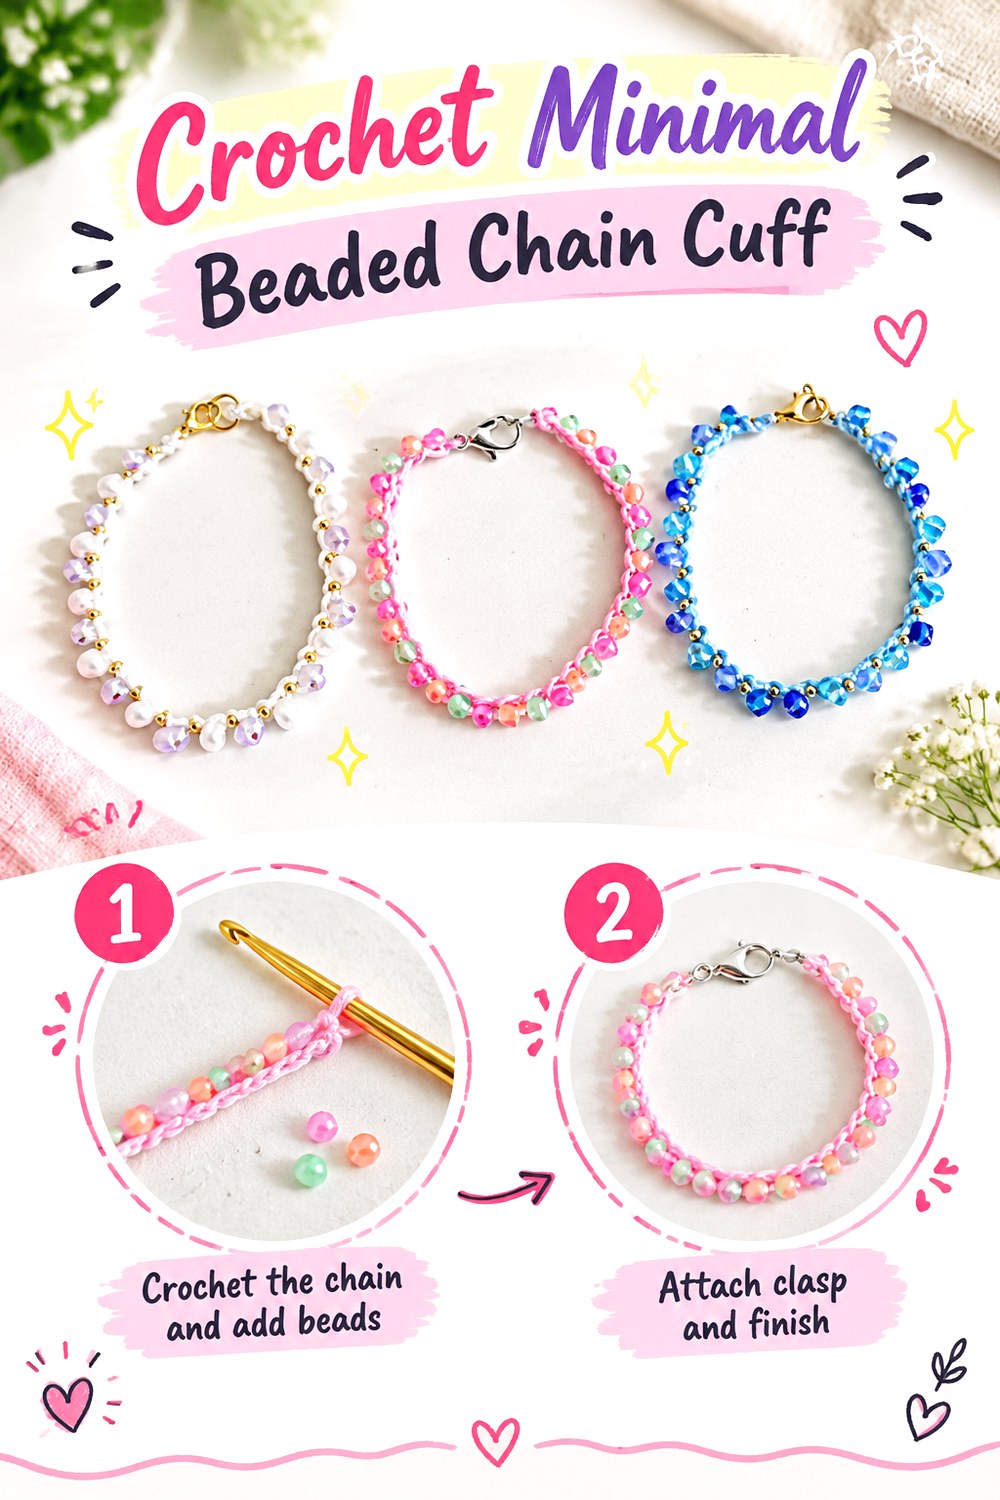
Chabepatterns strips the crochet element down dramatically: this bracelet uses thread-weight yarn, beads, and chain stitches, with a lobster clasp and jump ring as the jewelry closure. The source describes the crochet portion as a single row in which the beads are incorporated along the chain.
That makes it the most minimal lace-like option in the collection. Instead of a visible fabric panel, negative space and bead spacing create the design. It is a good reference for readers interested in hybrid crochet jewelry where the hook connects the decorative components without producing a conventional cuff fabric.
Check Bead and Thread Compatibility First
Chabepatterns specifically notes that the thread must work with the chosen bead openings. Test several beads before stringing an entire bracelet’s worth. Decorative pieces that barely fit can abrade or fray the yarn as they are moved into position.
Metal Hardware Makes Length More Precise
A lobster clasp does not offer the same adjustment range as a long tie. Measure with the intended clasp and jump ring included rather than treating the crochet section as the full wrist circumference. The completed bracelet should close without needing the chain to stretch aggressively between beads.
Original Tutorial and Creator Credit
Creator/Site: Chabepatterns
16. Crochet Wide Beaded Lattice Cuff
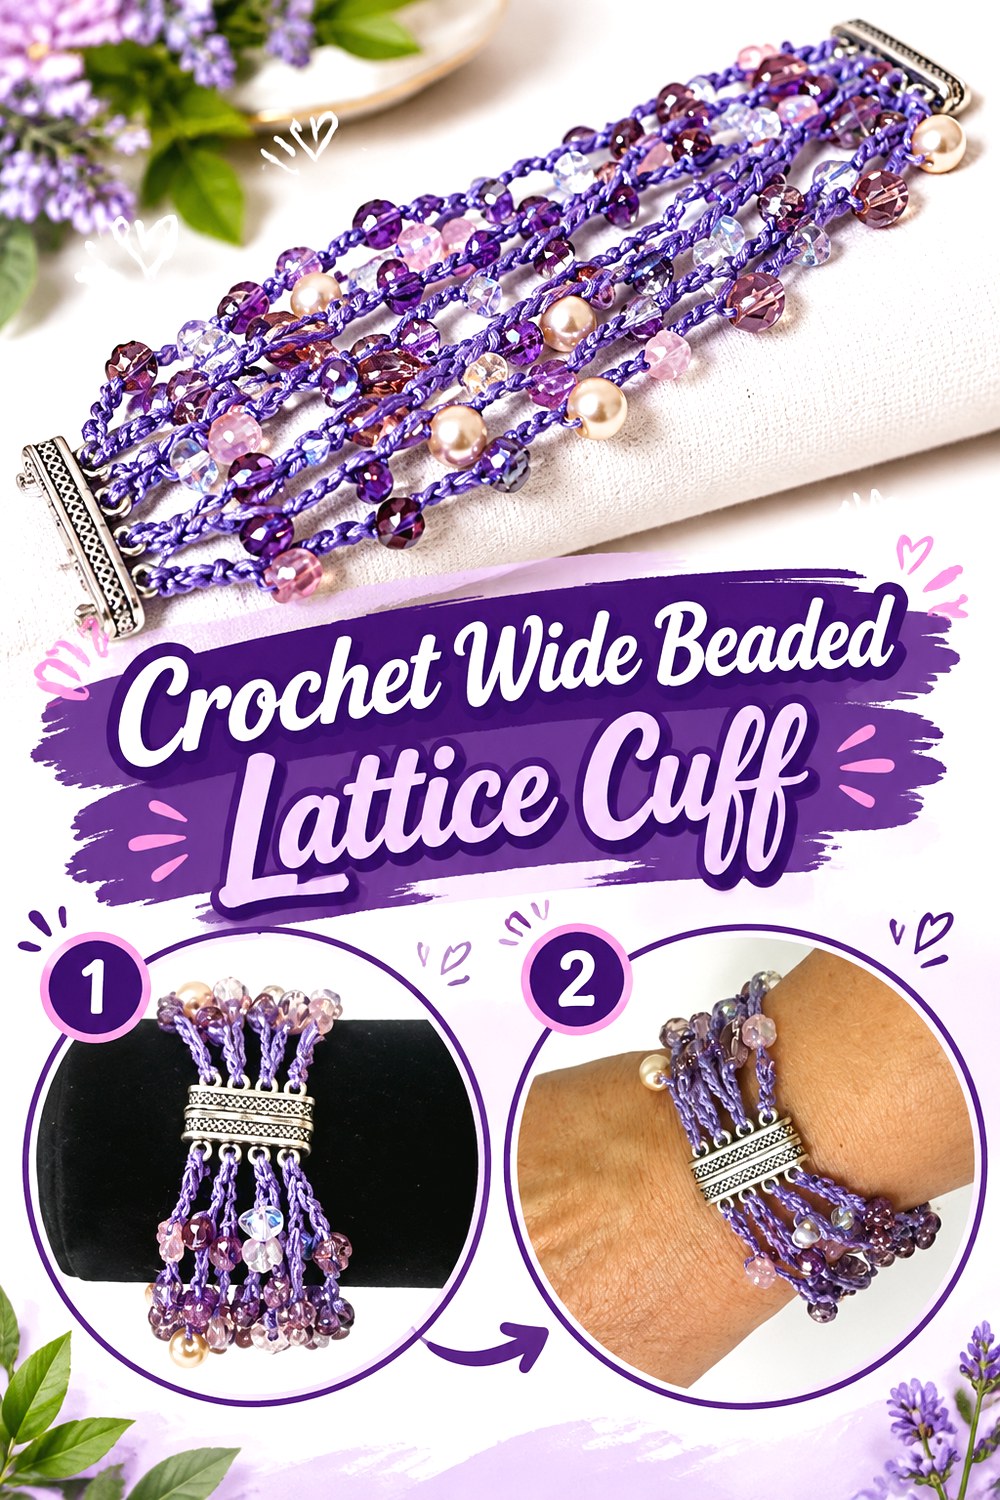
Kristin Omdahl’s Venus bracelet brings bead crochet back to a wide cuff format. The original pattern uses fingering-weight bamboo yarn, assorted beads, and a magnetic closure, with the source listing a finished example approximately two inches wide.
Unlike the single-row Chabepatterns bracelet, this piece has enough width for the beads to form a substantial surface across the wrist. It is suited to readers who want the delicacy of fine yarn and open crochet while retaining the visual impact of a traditional cuff bracelet. The magnetic closure also changes the fit and finishing decisions compared with buttoned or tie-based designs.
Distribute Bead Weight Across the Width
On a wide cuff, an uneven concentration of beads may pull one section more strongly than another. Lay the work flat as it grows and check that the decorated areas remain balanced. If you change bead sizes, sample first; equal bead counts do not necessarily produce equal weight.
Align the Magnetic Closure Carefully
A broad closure needs both bracelet edges to meet evenly. Before permanently securing the hardware, wrap the cuff around the wrist and check whether the top and bottom edges line up. Even a small twist can be more noticeable when the fastening spans much of the cuff width.
Avoid Assuming More Width Means More Tightness
Wide bracelets can feel snugger because more skin area is covered, even at a comfortable circumference. Allow enough ease for normal movement and test wrist flexion. Fine yarn may also respond differently to the weight of the beadwork over time, so avoid fitting it by stretching the crochet aggressively.
Original Tutorial and Creator Credit
Creator/Site: Kristin Omdahl
17. Crochet 3D Flower Lace Cuff
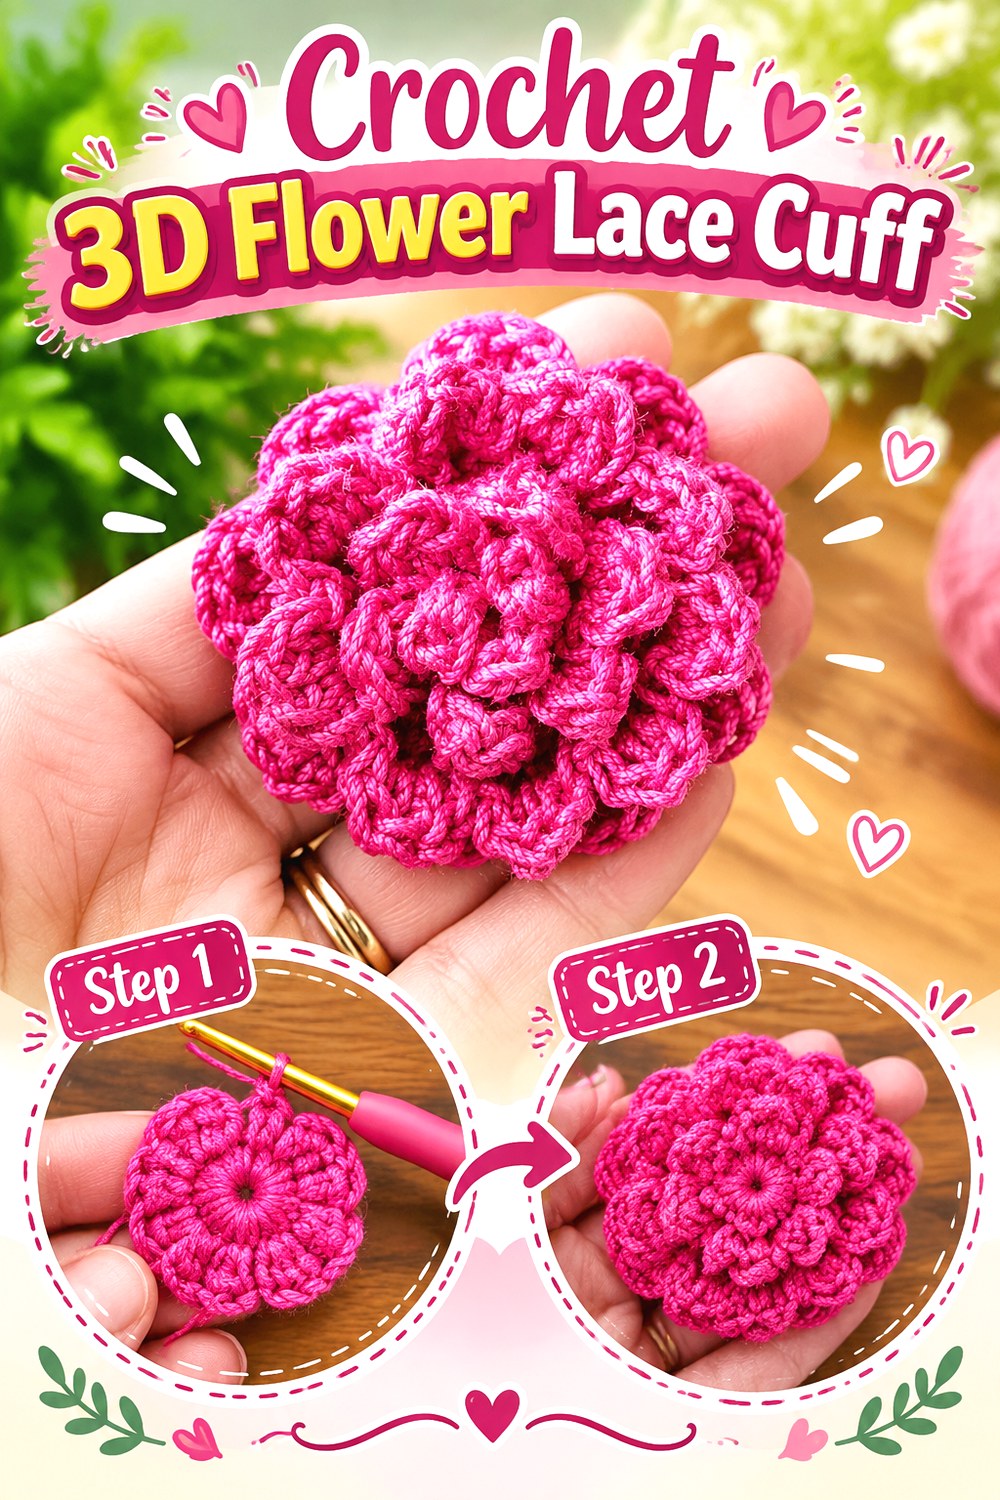
Celtic Knot Crochet combines a fine open bracelet band with a dimensional flower centerpiece. Jennifer Ryan designed the flower to be interchangeable, allowing the decorative focal point to be switched rather than permanently limiting the bracelet to one flower. The source uses crochet thread for both the flower and the narrower bracelet component and includes jewelry findings in the assembly.
This idea differs from a repeated floral garland because one sculptural motif dominates the wrist. It is well suited to occasion accessories or anyone who wants a small lace bracelet to act as a support for a larger crochet ornament.
Scale the Flower Against the Wearer’s Wrist
A dimensional flower occupies visual and physical space differently from flat lace. Before attaching the centerpiece, place it over the band and compare the diameter with the wrist. If you change thread size, remember that the flower and bracelet may not scale at exactly the same visual rate.
Secure Removable Components Deliberately
The source uses jewelry findings to make the flower interchangeable. If you retain that feature, check every connection after assembly. A removable centerpiece is only useful when it stays reliably attached during normal wear and does not leave sharp or awkward hardware against the skin.
Shape the Band Before Hardware Goes On
Celtic Knot Crochet blocks the bracelet length before adding the finishing hardware. That order is useful because it lets the open sections settle into their intended shape without forcing the clasp or jump rings through the blocking process. Follow fiber-appropriate care when applying the same principle to substitutions.
Original Tutorial and Creator Credit
Creator/Site: Celtic Knot Crochet — Jennifer Ryan
18. Crochet Wire and Bead Lace Cuff
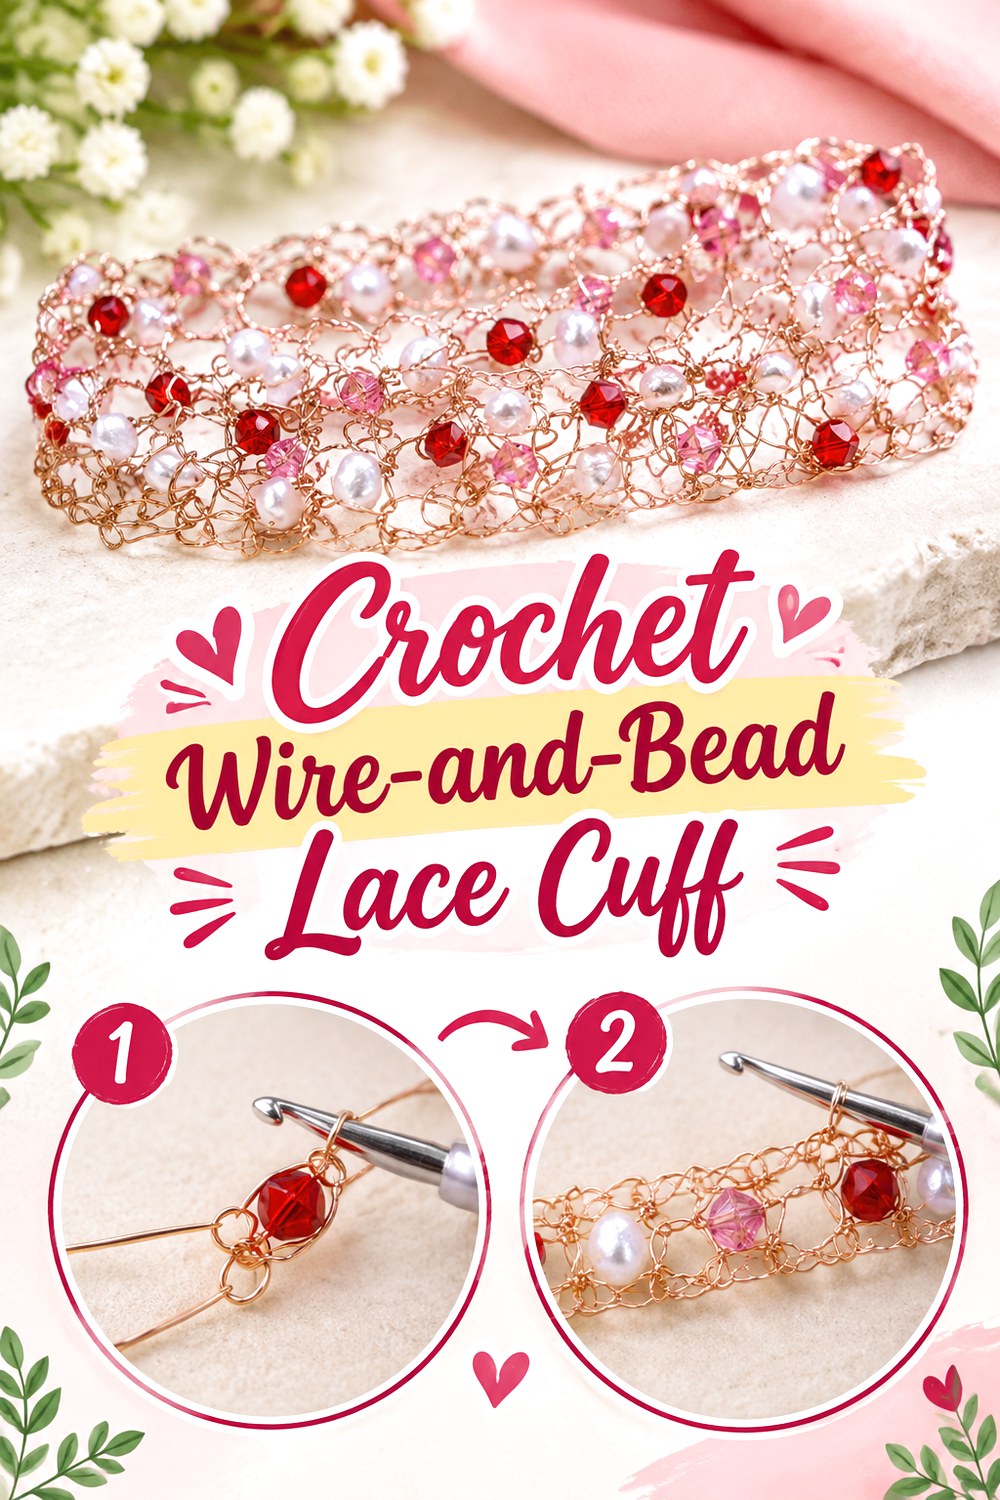
For the most jewelry-oriented interpretation, Bead World’s tutorial replaces yarn with fine wire and incorporates beads into a rectangular crocheted cuff. Bailey Ienuso’s tutorial uses single crochet to form the wire piece and finishes it with a multi-strand slide clasp.
The resulting structure is unmistakably crochet but behaves very differently from textile lace. Wire holds openings more rigidly, beads become integral to the surface, and finishing requires jewelry-making awareness as well as hook skills. This is a strong final option for readers who want the open, intricate character of crochet lace but a more metallic statement-jewelry finish.
Expect Wire to Behave Differently from Yarn
Wire does not rebound or slide through the fingers like fiber. Avoid assuming that your normal yarn tension should transfer directly. The goal is an even rectangle without repeatedly bending the wire unnecessarily, since excessive manipulation can affect both appearance and handling.
Match the Clasp to the Cuff Width
Bead World uses a multi-strand slide clasp for the rectangular cuff. A broad closure helps support the edge across its width. If changing hardware, compare attachment points carefully so the cuff does not narrow abruptly or twist toward a single fastening point.
Inspect Every Finished Wire End
This is one project where surface finishing directly affects wearability. Before putting the cuff on, run a finger carefully around the edges and attachment area to detect projecting wire ends or rough hardware. The piece should be treated as jewelry rather than as a soft yarn accessory when considering skin comfort and storage.
Original Tutorial and Creator Credit
Creator/Site: Bead World — Bailey Ienuso
Comparing the Main Crochet Lace Cuff Styles
| Style direction | Examples from this list | Best when you want | Main decision before starting |
|---|---|---|---|
| Flared or ruffled cuffs | 1, 4 | Lace visibly extending beyond a sleeve | How much flare can remain unobstructed |
| Victorian wristwear | 2, 3, 5 | Historical, gothic, costume, or romantic styling | Wrist and forearm fit rather than bracelet length alone |
| Fine thread lace | 6, 7, 13, 14 | Lightweight jewelry and crisp stitch definition | Closure style and thread-scale tension |
| Graphic textile cuffs | 10, 11, 12 | A modern or boho cuff where crochet structure is prominent | Whether the bracelet is slide-on or fastened |
| Beaded crochet | 8, 15, 16 | Crochet combined with jewelry detailing | Bead weight, thread compatibility, and hardware |
| Dimensional or rigid statement cuffs | 17, 18 | A focal flower or metallic jewelry effect | Component security and comfort against the wrist |
The most important distinction is not simply “wide versus narrow.” Consider whether the cuff behaves like soft clothing, textile jewelry, or conventional jewelry with crochet incorporated into it. That determines which measurements matter, how much stretch is useful, and what kind of finishing deserves the most attention.
Conclusion
These 18 crochet lace cuff ideas range from tiny thread bracelets to ruffled sleeve accents, Victorian wristers, broad beaded pieces, dimensional flower jewelry, and even a structured wire cuff. For a subtle accessory, start with a narrow shell, bridal, or tied lace band. If you want the cuff to reshape an outfit, the flared, ruffled, arm-length, woven-color, or wide beaded options create much more visual presence.
Whatever style you choose, decide on fit and fastening before making major material changes. Thread, yarn, beads, and wire all affect the way an open structure sits on the wrist. Use the credited original tutorials near each idea for the creator’s exact construction, materials, and finishing details.
Frequently Asked Questions
What yarn or thread works best for crochet lace cuffs?
There is no single best material because the desired structure varies. Smooth crochet thread gives small shells, picots, and motifs crisp definition, while standard yarn creates a softer and more substantial cuff. Fine material also makes tension differences easier to see. When substituting, compare the new yarn’s thickness with the original tutorial and sample enough of the lace to judge both scale and flexibility before making the full cuff.
How do I size a crochet lace cuff correctly?
Measure the wrist where the cuff will sit, then account for the fastening method. A buttoned, tied, or clasped cuff can usually be fitted closer to the wrist. A closed ring or bangle needs enough circumference to pass over the widest part of the hand. Wider cuffs should also be tried on while bending the wrist. When making paired cuffs, record the actual finished measurements so the second piece can be matched accurately.
Can I replace a button with a clasp or tie?
Often, but only when the construction provides an appropriate attachment point. A metal clasp may require a firmer edge than a soft tie, while a button needs either a dedicated loop or a lace opening that holds it securely. Changing the fastening may also change the usable bracelet length. Review the original construction first and test the replacement before cutting or permanently securing yarn ends.
Do crochet lace cuffs need blocking?
Many openwork designs benefit from shaping, but blocking should be appropriate for the specific fiber rather than applied automatically. It can help regularize shells, motifs, and lace openings or encourage a decorative flare to sit evenly. Check the yarn or thread care information before using water, steam, or heat. When jewelry hardware is involved, it is often simpler to shape the crochet before permanently attaching components that should not be exposed to the blocking process.
What should I consider when adding beads to lace cuffs?
Check that the yarn or thread passes through the bead opening without abrasion, and consider the cumulative weight rather than judging one bead in isolation. Heavy embellishment can pull lightweight crochet out of shape, especially around closures. Lay the piece flat periodically to check distribution. Beads and findings also change care requirements, so follow the material guidance for every component rather than assuming the finished cuff can be washed exactly like an unembellished yarn project.
Can a narrow crochet bracelet pattern be made into a wider cuff?
Sometimes, but simply repeating rows may not preserve the intended fit or edge treatment. Extra width changes how much of the wrist is covered and may require a stronger closure, different motif placement, or additional structure. First determine whether the original stitch pattern repeats cleanly across the width. If the tutorial does not explain widening, treat the change as an adaptation and sample it before committing to the full bracelet.