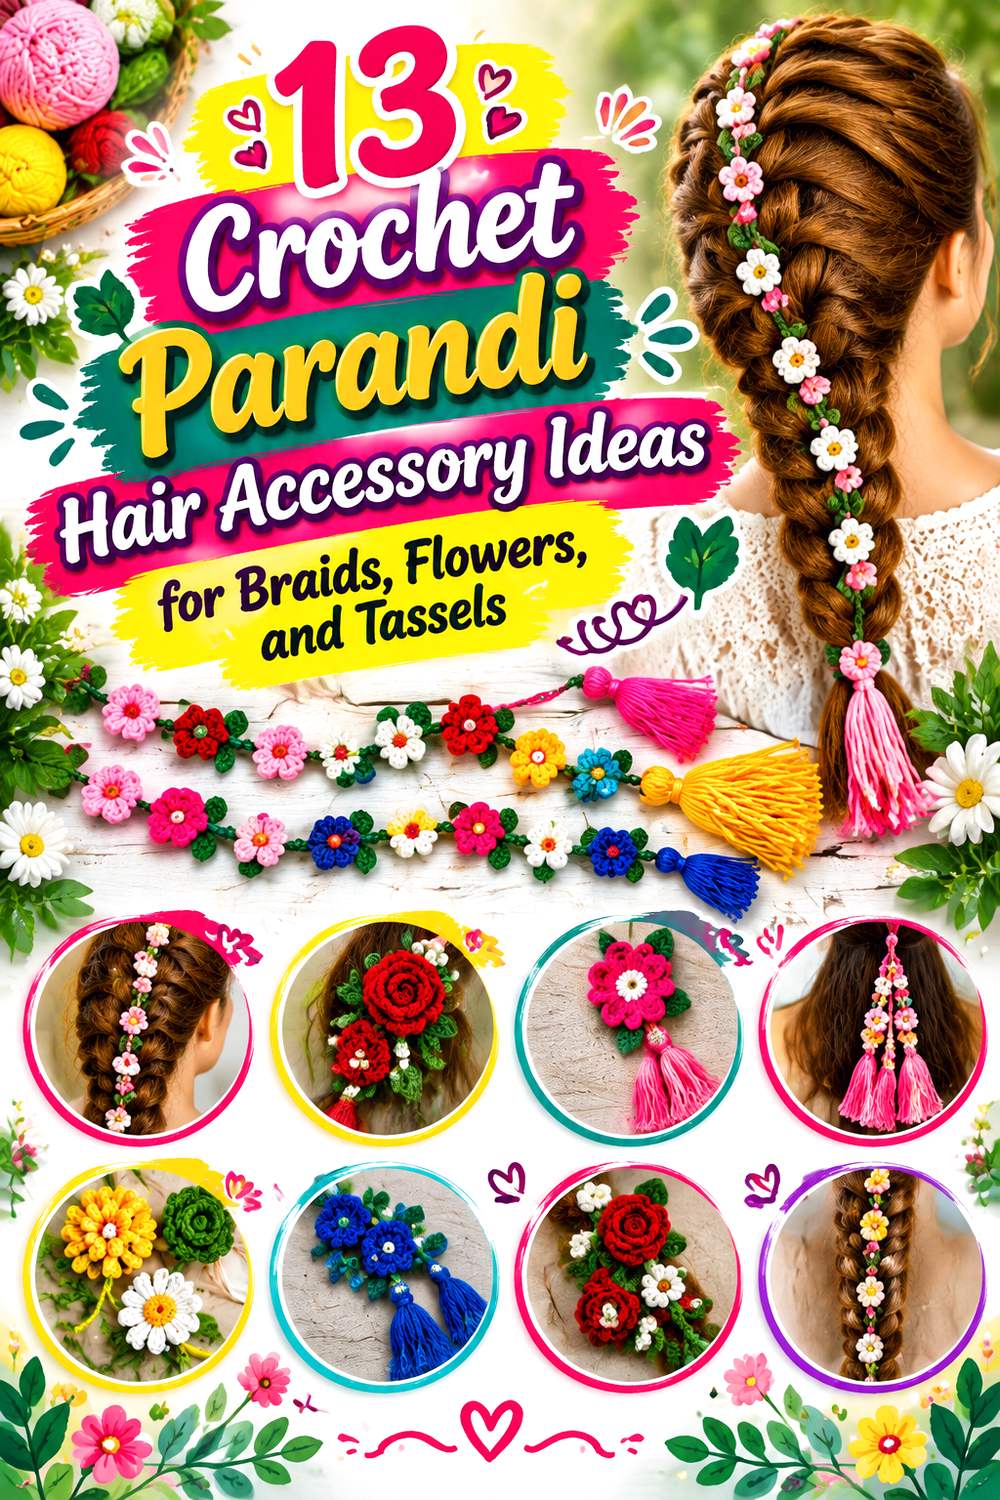
13 Crochet Parandi Hair Accessory Ideas for Braids, Flowers, and Tassels
A crochet parandi can be built around very different visual ideas. Some versions let long laccha-dori cords and tassels create most of the movement, while others turn lotus flowers, mixed blossoms, leaves, pearls, or ghungroo accents into the focal point. Those choices influence more than appearance: they change how much bulk sits beside the braid, where decoration remains visible, and how the accessory hangs once it is worn.
The 13 ideas below use dedicated parandi, paranda, pranda, or laccha-dori tutorials from different creators. Alongside the inspiration, you will find practical checkpoints for choosing length, arranging motifs, controlling weight, keeping the braid connection manageable, and adapting decorative density without reconstructing the creators’ patterns. Use the comparisons to choose a direction first, then follow the credited original tutorial for its exact construction.
Quick List
- Crochet Open-Bloom Custom-Drop Parandi
- Crochet Streamlined Laccha-Dori Hair Parandi
- Crochet Lotus-Centerpiece Braid Parandi
- Crochet Botanical Leaf-and-Tassel Paranda
- Crochet Alternating Blossom Trail Paranda
- Crochet Integrated No-Sew Flower-Vine Parandi
- Crochet Bridal Floral Parandi with Pearl Highlights
- Crochet Extended Punjabi Braid Tassel Parandi
- Crochet Rose-Marigold-Daisy Garden Parandi
- Crochet Ghungroo Swing Braid Parandi
- Crochet Fine-Cord Laccha-Dori Parandi
- Crochet Focal-Cluster Statement Pranda
- Crochet Petite-Flower Airy Strand Parandi
Plan the Braid Attachment and Finished Drop First
Judge parandi length from the place where the accessory will actually enter the braid, not simply from the top of loose hair. Part of the upper section may disappear inside the hairstyle, while tassels or dimensional flowers can make the finished accessory appear longer than its plain strand measurement suggests.
A useful planning check is to mock up the intended braid before every decoration is permanently positioned. Notice how much of the upper crochet section must remain easy to grip, which portions are visible from the back, and where you want the lower decoration to finish. There is no universal ideal length because hair length, braid position, styling preference, and motif size all vary.
Keep the working connection relatively uncluttered unless the selected tutorial specifically uses decoration there. A striking flower has little visual value if it becomes buried inside the braid.
Balance Yarn, Motif Density, and Movement
A yarn substitution can change the scale and behavior of the entire accessory. A material that produces crisp, substantial flowers may also create firmer cords, while a softer choice can give long strands more movement but alter stitch definition or vertical stretch. Crochet Diaries, for example, explicitly notes flexibility in yarn choice and customizable length for its parandi tutorial.
Before committing to many repeated motifs, make a representative flower, leaf, or section of cord and let it hang vertically. Compare its size with the intended braid rather than judging it only in your hand.
Decoration density deserves the same test. Continuous flowers create a fuller visual band, whereas visible cord between motifs preserves a lighter silhouette. Neither approach is automatically better. Decide whether the braid, the floral crochet, or the tassel ending should dominate, and let the other elements support that choice.
Treat Pearls, Ghungroo, and Other Hard Accents as Structural Details
Pearls, beads, and ghungroo-style pieces introduce contrast that yarn alone cannot provide, but they also add attachment points, weight, movement, and potential snagging surfaces. Plakshi Jain’s dedicated ghungroo parandi tutorial confirms that metallic accents can be incorporated directly into this kind of crochet accessory.
Temporarily position embellishments after enough of the crochet base exists to show how it naturally hangs. Then hold the piece vertically and move it gently. Look for parts that collide repeatedly, pull one strand lower, catch neighboring yarn, or sit where the braid needs to be handled.
Small detachable components also require judgment based on the intended wearer. If they are unsuitable, an all-yarn flower center or tassel can preserve the overall design without hard pieces. For cleaning, follow the actual yarn label and creator guidance because mixed-material accessories may need different care from plain crochet.
1. Crochet Open Bloom Custom Drop Parandi
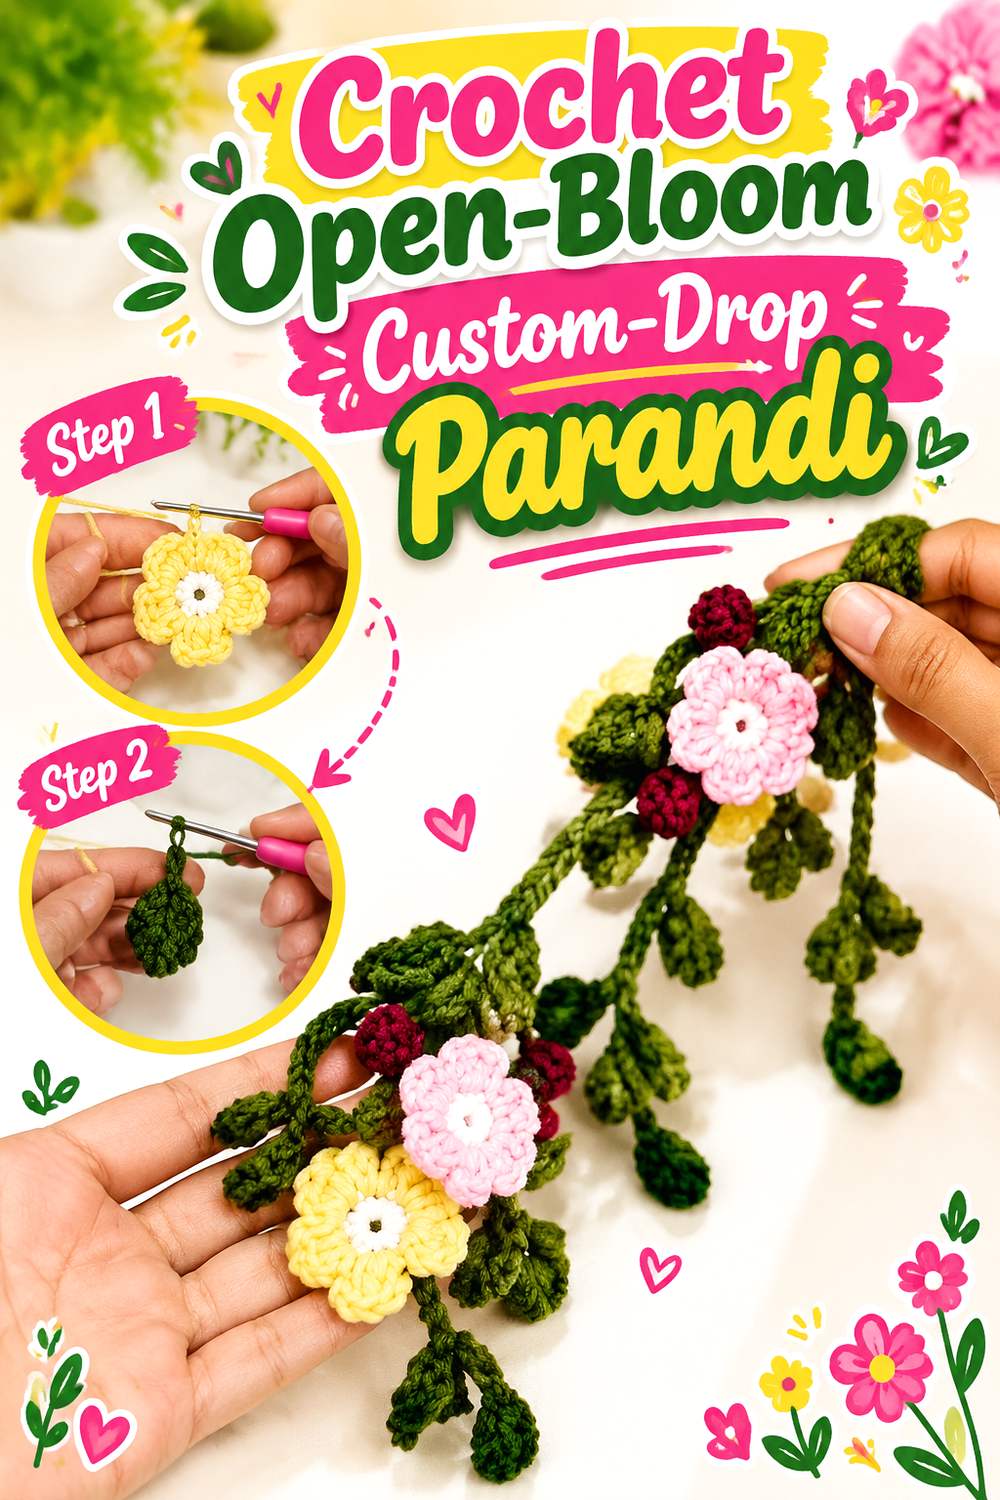
This version gives individual flowers room to punctuate long strands rather than converting the entire accessory into a dense garland. Crochet Diaries’ dedicated parandi tutorial is particularly useful for this direction because the creator notes that the overall length can be customized and that yarn choice is flexible.
The open composition makes this a good option when you want the braid, connecting cord, flowers, and lower finish to remain visually distinct. Instead of planning the flower count first, establish where the accessory begins and ends on the hairstyle. That creates a clear framework for deciding how much open strand should remain between decorative areas.
Measure From the Point That Actually Enters the Braid
A strand held against loose hair may give a misleading impression of the final drop. Mock up the hairstyle and identify the real connection point first. Then hold the developing parandi from there and decide where its lowest feature should finish.
This check is especially useful before adding flowers to the upper portion. Motifs placed too close to the joining area can disappear inside the braid, while moving the first visible bloom slightly downward can give the same amount of crochet more impact.
Check a Substitute Yarn While It Is Hanging
The tutorial permits flexibility in yarn choice, but different yarns will not necessarily create identical results. Make a short sample that includes both the connecting structure and one representative flower.
Let the sample hang rather than stretching it flat. Compare its flexibility, flower scale, stitch definition, and tendency to lengthen under its own weight. If the new yarn creates a noticeably larger motif or firmer strand, reconsider spacing before producing the complete set of decorations.
Keep Open Space Deliberate
Visible cord is part of this design, not an unfinished gap waiting to be filled. Arrange the completed motifs temporarily, then view the parandi from normal hairstyle distance.
If every bloom is recognizable, adding more flowers may only increase bulk. If the arrangement feels sparse, concentrate a small group in one visible section rather than automatically covering the whole strand. A clear rhythm between decorated and undecorated areas can make the long silhouette easier to read.
Original Tutorial and Creator Credit
Creator: Crochet Diaries
2. Crochet Streamlined Laccha Dori Hair Parandi
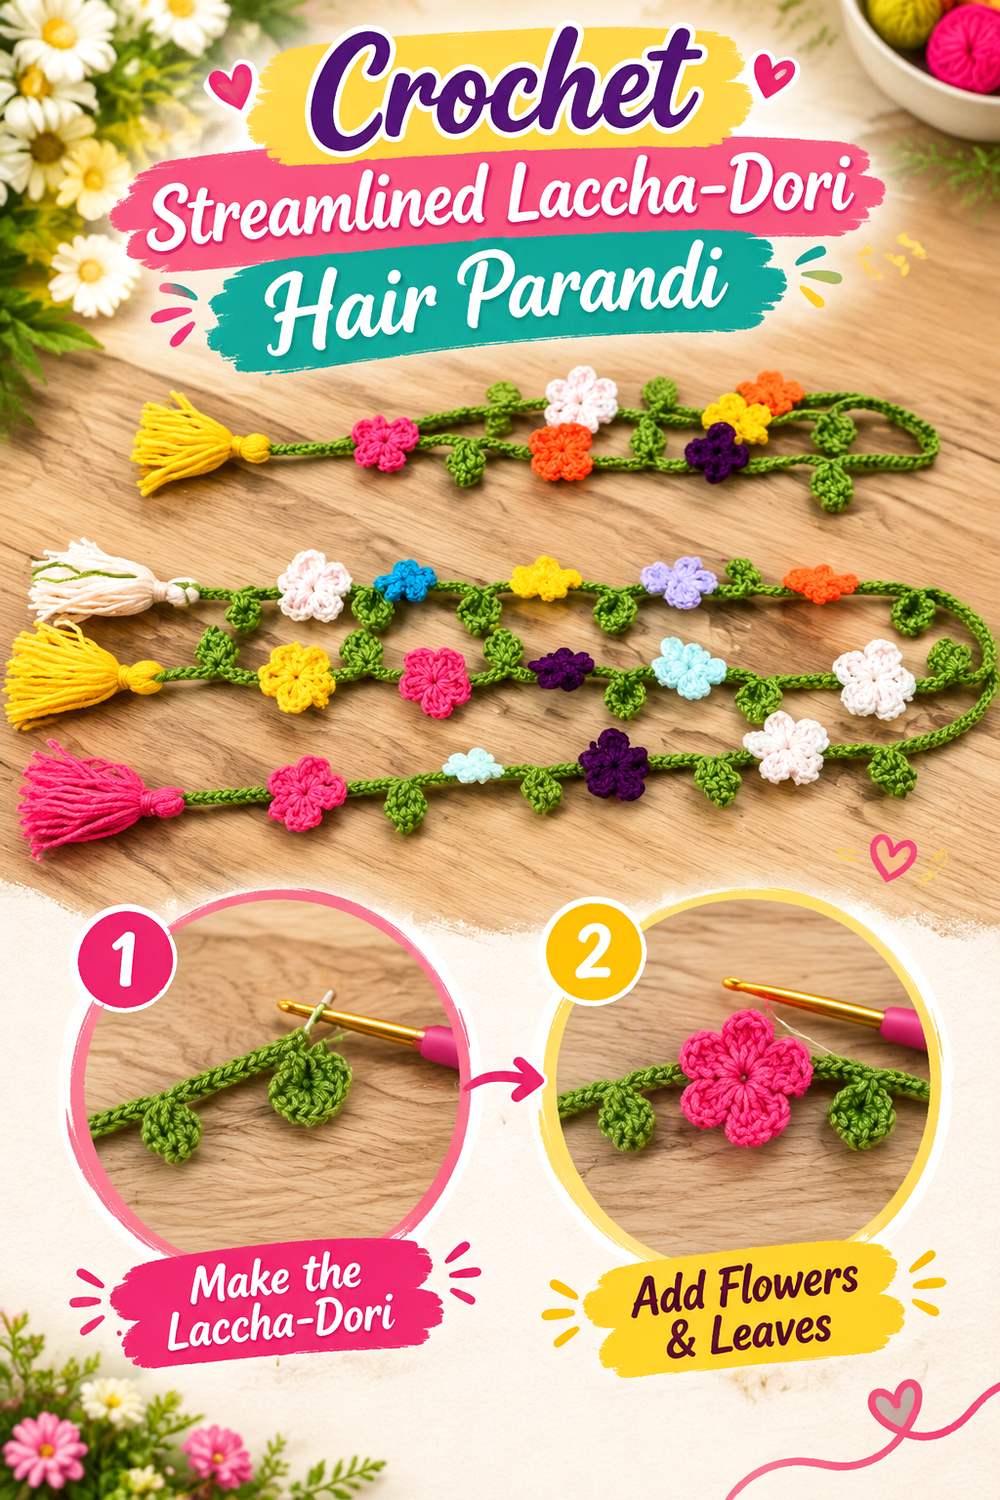
Here, long cords carry more of the visual work than repeated large flowers. Crochet with Khalida presents the project specifically as a parandi, laccha dori, or paranda and focuses on a flowing finished accessory.
That makes this design a useful counterpoint to the heavily floral options in the list. With fewer dominant motifs, strand consistency becomes easier to see, and the lower finish can act as the main decorative event. This style is worth considering when an outfit, earrings, or braid already contains substantial detail and you want the crochet to extend the vertical line without covering much of the hair.
Long Cords Reveal Tension Changes Quickly
Differences that are nearly invisible in a small flower can become obvious across a long narrow strand. Let each completed section hang naturally at intervals and compare neighboring cords before adding elaborate ends.
If one strand consistently twists, contracts, or drops differently, investigate it while the construction is still accessible. A large tassel may hide the very bottom, but it will not correct an uneven cord higher up.
Preserve Working Space at the Top
The upper part of the parandi needs to function with the hairstyle. A large flower or bulky decorative join placed directly at the connection can make the piece harder to braid in and may remain hidden anyway.
Practice positioning the plain upper section first. Once you know how much material your chosen hairstyle uses for attachment, begin the visible decoration below that zone. This makes the design choice respond to the wearer instead of an arbitrary spacing rule.
Let the Lower Finish Carry the Drama
A streamlined middle gives you freedom to make the bottom more visually decisive. Before permanently attaching a tassel or flower cluster, hold it under the finished cords and check the transition in scale.
The ending should look related to the structure supporting it. If an oversized tassel seems disconnected from very fine cords, either reduce its visual mass or introduce a gradual decorative transition before the final element.
Original Tutorial and Creator Credit
Creator: Crochet with Khalida
3. Crochet Lotus Centerpiece Braid Parandi
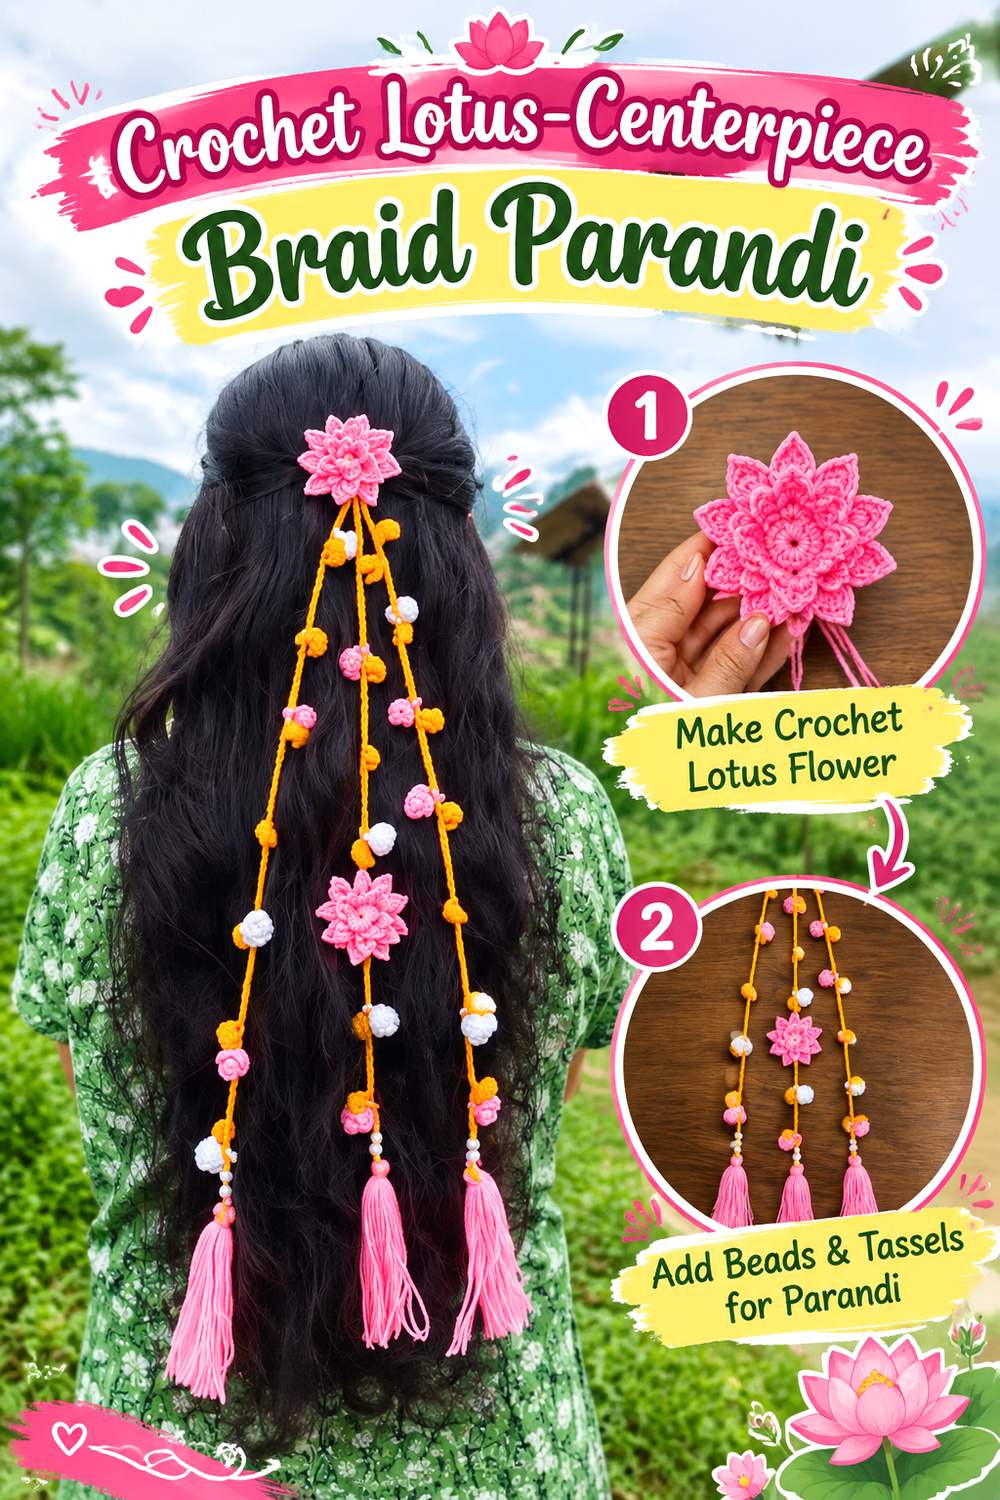
A recognizable lotus immediately gives the accessory a stronger motif identity than a sequence of generic blossoms. Stuck In Loops has a dedicated long-form tutorial titled around a crochet lotus parandi/laccha dori, so the floral feature is part of the actual parandi concept rather than an unrelated flower tutorial being adapted afterward.
This idea works best when the lotus is allowed to remain the visual leader. Large dimensional petals already occupy considerable visual space, especially against the texture of a braid. Keep supporting flowers, leaves, cords, or tassels quieter enough that viewers can still identify the lotus instead of seeing one undifferentiated mass of yarn.
Make One Lotus Before Planning the Entire Layout
Changing yarn, hook choice, or personal tension can change the finished scale and firmness of a flower. Complete one representative lotus before deciding how many can comfortably fit along the accessory.
Hold it beside the intended braid and view it from the front and side. If the bloom is larger or deeper than expected, fewer widely separated motifs may create a clearer result than trying to force the original layout into a different yarn scale.
Give Layered Petals Breathing Room
A dimensional flower can lose its silhouette when another large motif presses directly against it. Temporarily arrange the completed components on the hanging strands before fixing every connection.
If petals overlap constantly, increasing the gap may preserve both flowers better than making additional decorative changes. Space can also keep a broad floral motif from making the entire parandi feel stiff through one concentrated section.
Build a Supporting Hierarchy
Once the lotus establishes the theme, decide which secondary element is truly necessary. Smaller leaves can direct the eye, a plain cord can provide separation, and a restrained tassel can finish the lower edge.
Avoid giving each component the same size and contrast. A parandi with one obvious focal hierarchy often reads more clearly against braided hair than a design in which every flower, bead, and tassel competes equally.
Original Tutorial and Creator Credit
Creator: Stuck In Loops
4. Crochet Botanical Leaf And Tassel Paranda
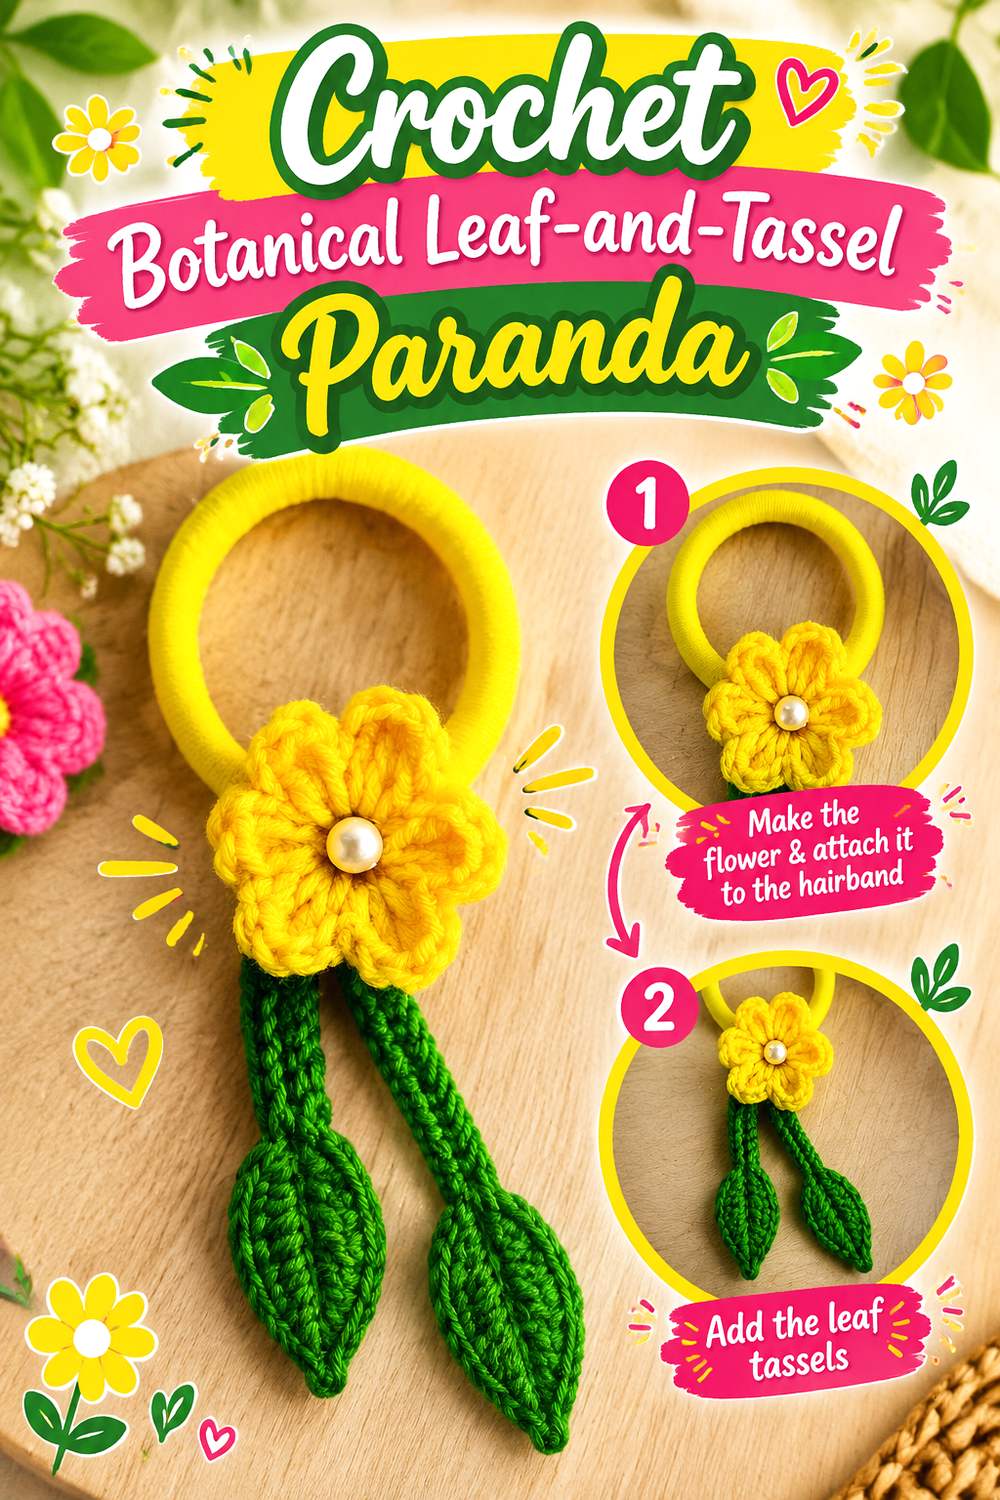
Nitya Uphaar’s paranda combines flowers, leaves, tassel finishing, and braid placement in one dedicated hair-accessory tutorial. The result suggests a more botanical top-to-bottom composition than a plain cord-led parandi.
Leaves are especially valuable here because they can visually connect larger blooms without requiring another full flower in every gap. The tassels then provide a recognizable endpoint and introduce movement below the more detailed botanical section. This combination suits a maker who wants substantial decoration but still wants the flowers, foliage, and final strands to remain separate visual layers rather than becoming a continuous solid band.
Use Leaf Direction to Guide the Eye
Leaves are directional shapes, so their orientation affects the way the accessory appears to flow. Arrange them before final attachment and vary their direction deliberately rather than allowing every leaf to point identically by accident.
Then hang the paranda vertically. Gravity may make a leaf that looked well positioned on a table fold across a flower. Adjusting orientation before final finishing can preserve both the foliage and the bloom underneath it.
Make the Tassels Feel Like an Ending
The tassel section should visually complete the strands instead of competing with an equally dense floral cluster immediately above it. Hold the proposed tassels below the flower-and-leaf arrangement before securing them.
If the bottom overwhelms the botanical section, reduce its visual mass or create more space above it. If the tassels disappear beneath large flowers, a simpler transition can help them read as an intentional finish.
Check Which Side Faces Outward in the Braid
Directional motifs can rotate once the paranda becomes part of a hairstyle. Use a loose practice braid and observe which surface naturally faces outward.
That trial may change where you want the largest flowers or leaves. There is little benefit in placing the most detailed motif perfectly on a flat work surface if the braid consistently turns it toward the hair once worn.
Original Tutorial and Creator Credit
Creator: Nitya Uphaar
5. Crochet Alternating Blossom Trail Paranda
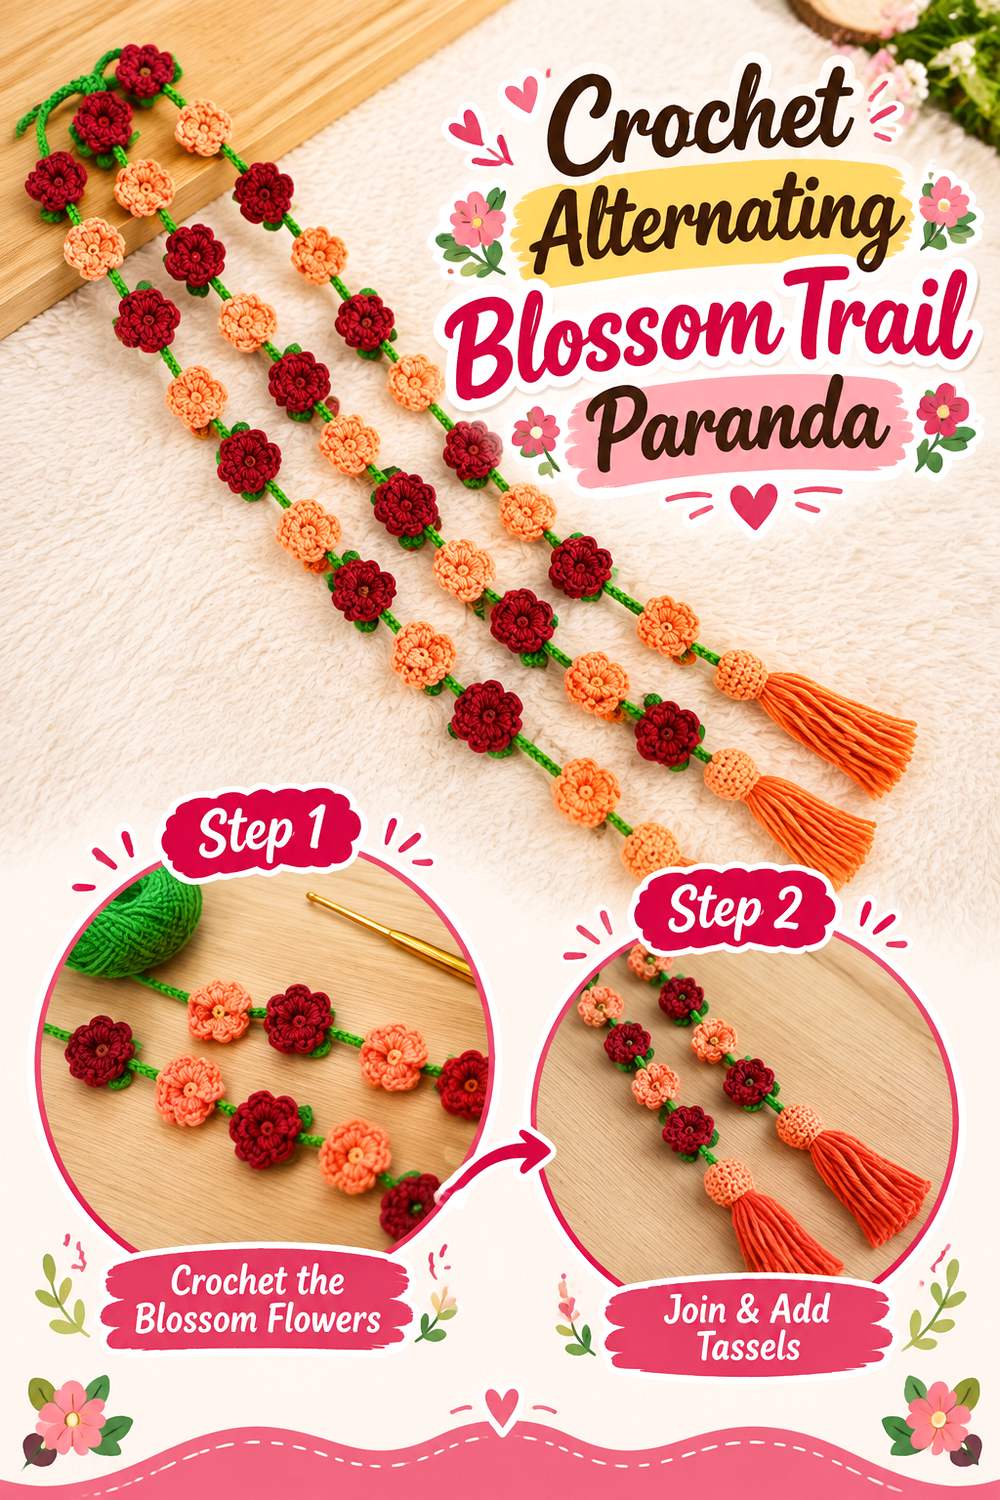
Repeated flowers turn this design into a study in rhythm rather than one oversized focal point. Sonia’s wool world provides a dedicated crochet flower paranda/hair-accessory video, making the floral trail itself a direct project reference.
This approach offers room to experiment with a restrained alternating palette, a gradual color progression, or one recurring anchor shade. The important distinction is that the visual effect comes from the sequence as a whole. Because the same basic flower language repeats down the accessory, differences in spacing, motif scale, and accidental color clustering are more noticeable than they would be in a deliberately irregular garden-style parandi.
Arrange the Entire Color Sequence First
Make enough representative flowers to see how the palette behaves before attaching them in final order. Lay them along the strand, then hang the proposed arrangement vertically.
Look for unwanted clusters where similar colors collect in one area or where the strongest shade appears only at one end. An intentional sequence does not need perfect mathematical repetition, but viewers should be able to read some visual relationship between the blooms.
Compare Repeated Flowers Side by Side
Repetition makes differences in size easier to spot. Place completed flowers together before assembly and check whether one is substantially larger or denser.
If a variation cannot be corrected easily, it may work better as a deliberate lower focal bloom than as an accidental interruption halfway down an otherwise consistent sequence. That decision turns a minor mismatch into a purposeful hierarchy.
Leave Enough Cord to Separate the Flowers
Flowers placed continuously edge-to-edge can begin to read as a single thick band. If you want a lighter paranda, leave intervals where the connecting strand remains visible.
View the piece against the intended hairstyle, not just a white table. Braided hair already supplies considerable texture, so slightly more separation may help individual flower shapes remain identifiable.
Original Tutorial and Creator Credit
Creator: sonia’s wool world
6. Crochet Integrated No Sew Flower Vine Parandi
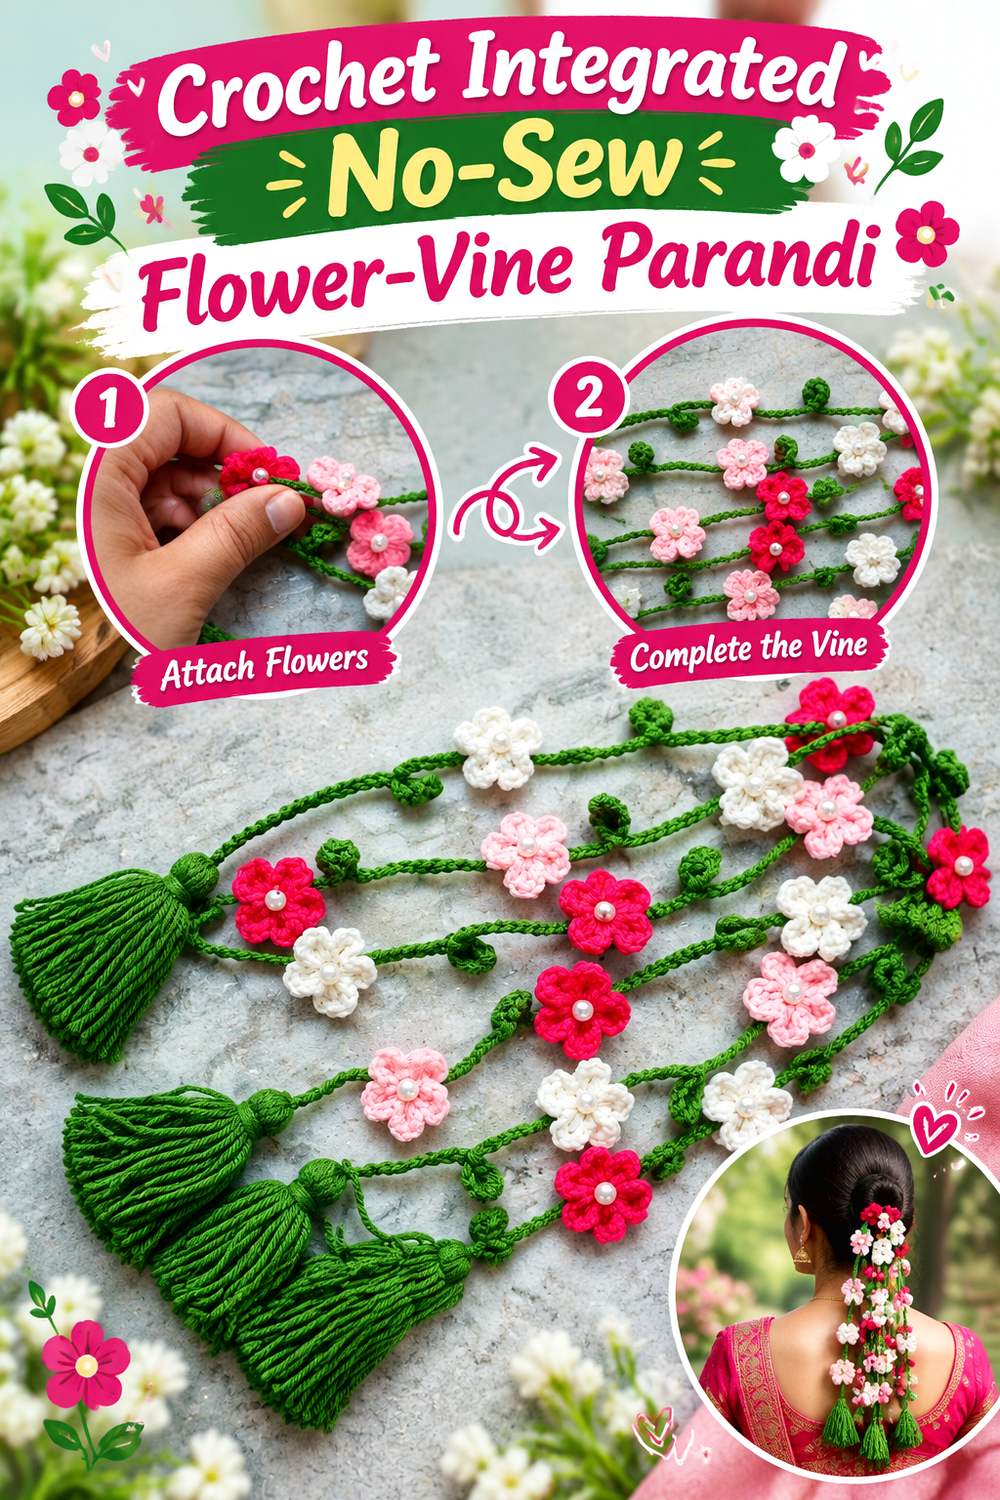
This project stands apart because its main distinction is construction rather than merely color or flower choice. Cute Crochet presents the parandi as a no-sew laccha-dori tutorial, giving makers an alternative to a design assembled from many separately stitched-on motifs.
An integrated structure can create a continuous vine-like flow from one decorative area to the next. The trade-off is that placement decisions matter earlier. When flowers form as part of the developing structure, you have less freedom to slide every bloom into a new position during final assembly. This is therefore a good option for makers who prefer fewer sewing stages and are comfortable evaluating spacing as the project grows.
Check Orientation While You Still Can Adjust It
Integrated motifs may naturally rotate as the strand lengthens. Stop occasionally and let the developing parandi hang from its actual upper end.
If two neighboring flowers consistently turn inward or overlap, deal with that while the relevant section remains easy to access. Waiting until the full accessory is complete gives you fewer opportunities to change a built-in spacing issue.
Keep the Vine Flexible Through Curves
A decorative vine can look excellent in a straight line but behave differently when incorporated into a braid. Gently curve the developing work by hand and see whether the motifs move with it.
If one zone becomes noticeably rigid, adding more dense decoration there may intensify the issue. Preserve enough flexibility for the structure to follow the hairstyle rather than expecting the braid to force a stiff floral section into place.
Reassess Everything After the Tassels Are Added
The lower finish changes the way a long accessory hangs. Once tassel elements are in place, suspend the parandi again and compare the tails.
Look for sections that now twist, pull lower, or collide because of the extra material at the bottom. This is a finishing checkpoint, not a guarantee about durability; the vertical test simply reveals behavior that a flat work surface can hide.
Original Tutorial and Creator Credit
Creator: Cute Crochet
7. Crochet Bridal Floral Parandi With Pearl Highlights
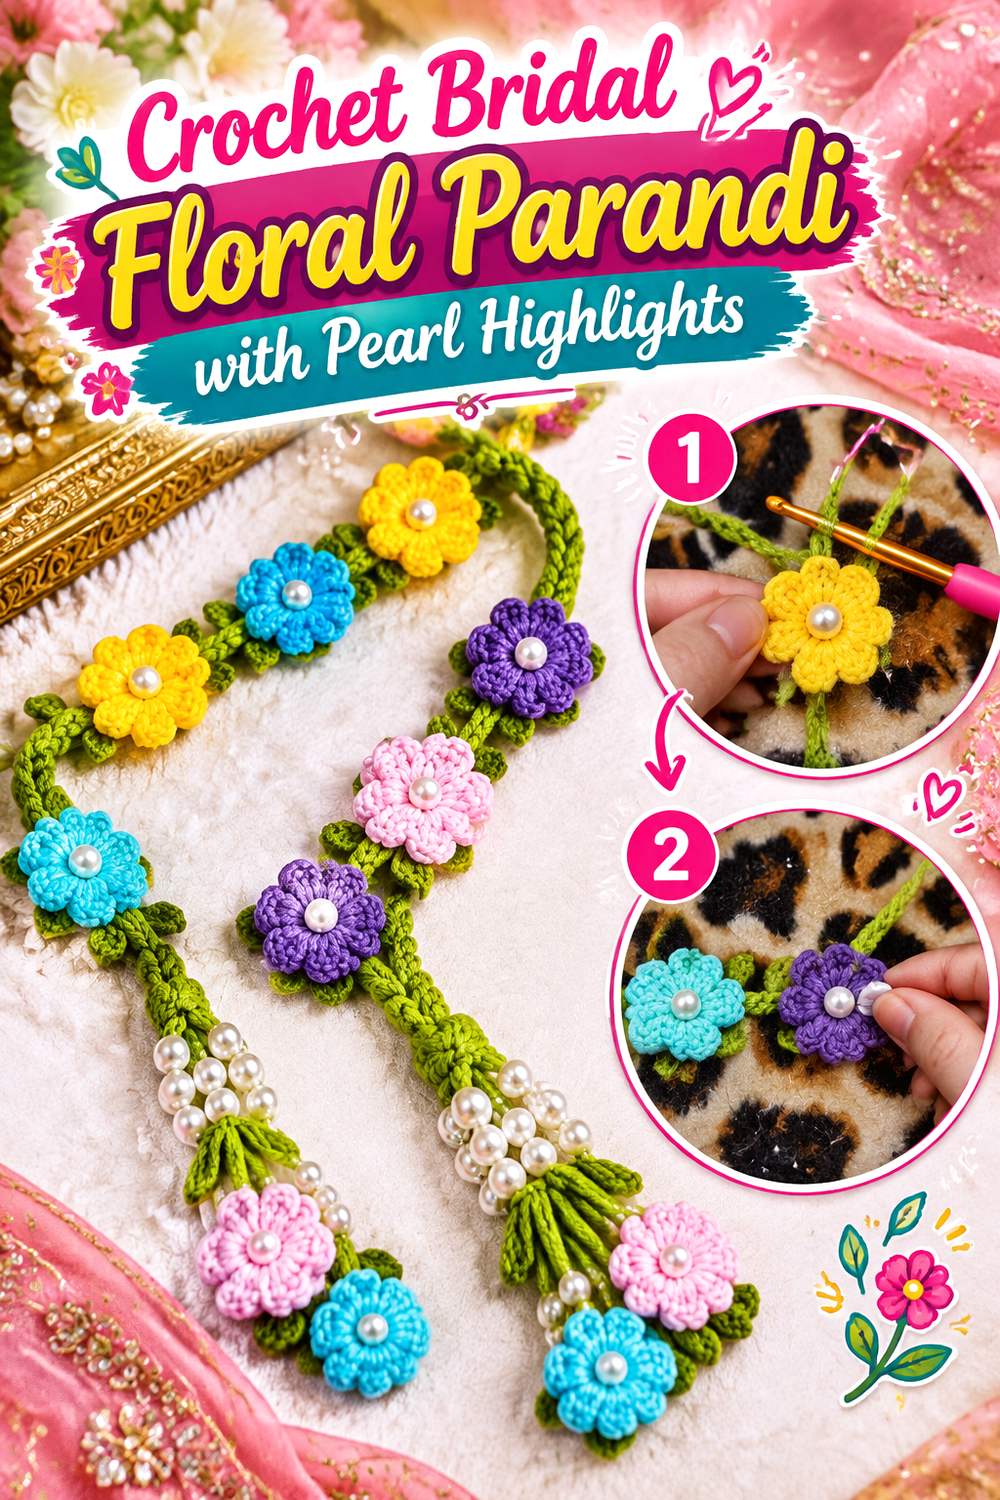
Gharwalikahani presents its crochet parandi specifically in a wedding hair-accessory context, which changes how the design should be evaluated. Rather than considering the crochet alone, think about how flowers and optional reflective details will sit beside earrings, hair jewelry, embroidered fabric, pins, or a dupatta.
A bridal or formal parandi does not need maximum decoration everywhere. Strategic flowers and pearl-like highlights can remain more legible when calmer sections separate them. The most useful planning step is a hairstyle trial before the final arrangement is locked in, especially when other accessories may cover part of the braid.
Plan With the Full Hairstyle, Not an Empty Braid
Formal styling may change the braid’s thickness, attachment point, or visible surface. Place a temporary version of the parandi with the intended hairstyle and identify the sections viewers can actually see.
Reserve the most detailed blooms for those areas. There is little value in concentrating pearls and dimensional flowers where hair padding, pins, or another accessory will hide them.
Let Reflective Accents Remain Accents
Pearls can attract attention quickly because their surface contrasts strongly with yarn. Temporarily place them after the flowers rather than assuming every bloom requires a reflective center.
If the crochet begins to read mainly as a line of shiny points, reduce the number of accents and let the petals regain visual priority. Any change in embellishment quantity also changes the cumulative weight hanging from the strands.
Check Contact With Jewelry and Fabric
A long formal accessory may move against earrings, necklaces, lace, embroidery, or a dupatta. Gently bring a finished sample section near those surfaces and look for obvious catching points.
Pay particular attention to unsecured yarn tails, open decorative loops, bead connections, and raised flower edges. Simplifying one troublesome area can be more practical than accepting an accessory that repeatedly catches on the rest of the outfit.
Original Tutorial and Creator Credit
Creator: Gharwalikahani
8. Crochet Extended Punjabi Braid Tassel Parandi
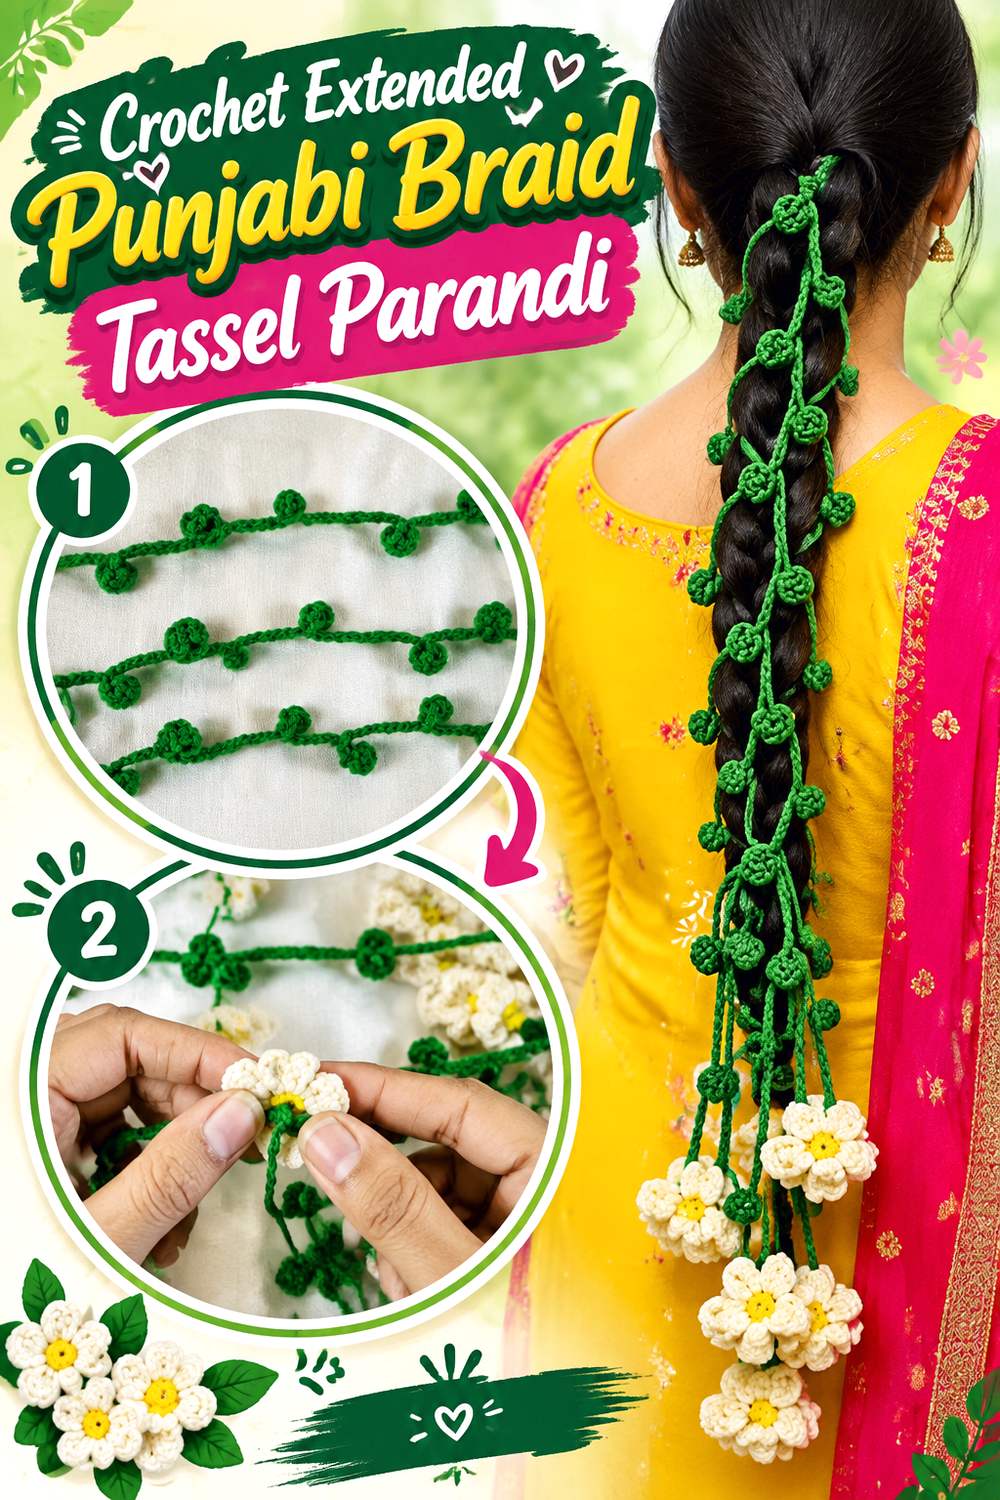
This idea places the long braid-extension silhouette ahead of dense floral coverage. Crocheter priyanka W🧶ऊN’s tutorial is explicitly presented as a handmade crochet Punjabi hair parandi/paranda, providing a direct reference for an elongated tassel-led accessory.
Choose this direction when the strong vertical continuation beneath the braid matters more than having flowers across every section. With a cleaner upper line, differences in cord length and lower balance become more visible, so the full accessory should be judged while hanging. The result can look especially intentional when the tassel finish provides the main visual movement and the rest of the crochet remains comparatively restrained.
Judge the Proportion From Behind
A long parandi changes the silhouette of the entire hairstyle, so looking at the accessory in your hands is not enough. Attach or temporarily position it with the braid and step back.
The ideal lower endpoint depends on the wearer, braid position, outfit, and desired visual extension. Another maker’s finished dimensions should not automatically become your target if the hairstyle proportions are different.
Let the Tassel Be the Focal Point
If movement at the bottom is the main appeal, give it room to lead. A restrained upper section can make the tassel look more dramatic without increasing the total amount of decoration.
Before adding optional flowers or beads, view the basic braid-and-tassel silhouette with the intended outfit. You may find that the long vertical line already provides enough interest.
Compare All Tails From One Shared Point
Hold the completed strands together from the actual attachment point rather than checking them individually. This reveals whether one cord curls, stretches, or finishes noticeably differently once the group is hanging.
An even lower edge and a deliberately staggered one can both work. The important distinction is intention: accidental length differences generally look less controlled than an obvious planned arrangement.
Original Tutorial and Creator Credit
Creator: Crocheter priyanka W🧶ऊN
9. Crochet Rose Marigold Daisy Garden Parandi
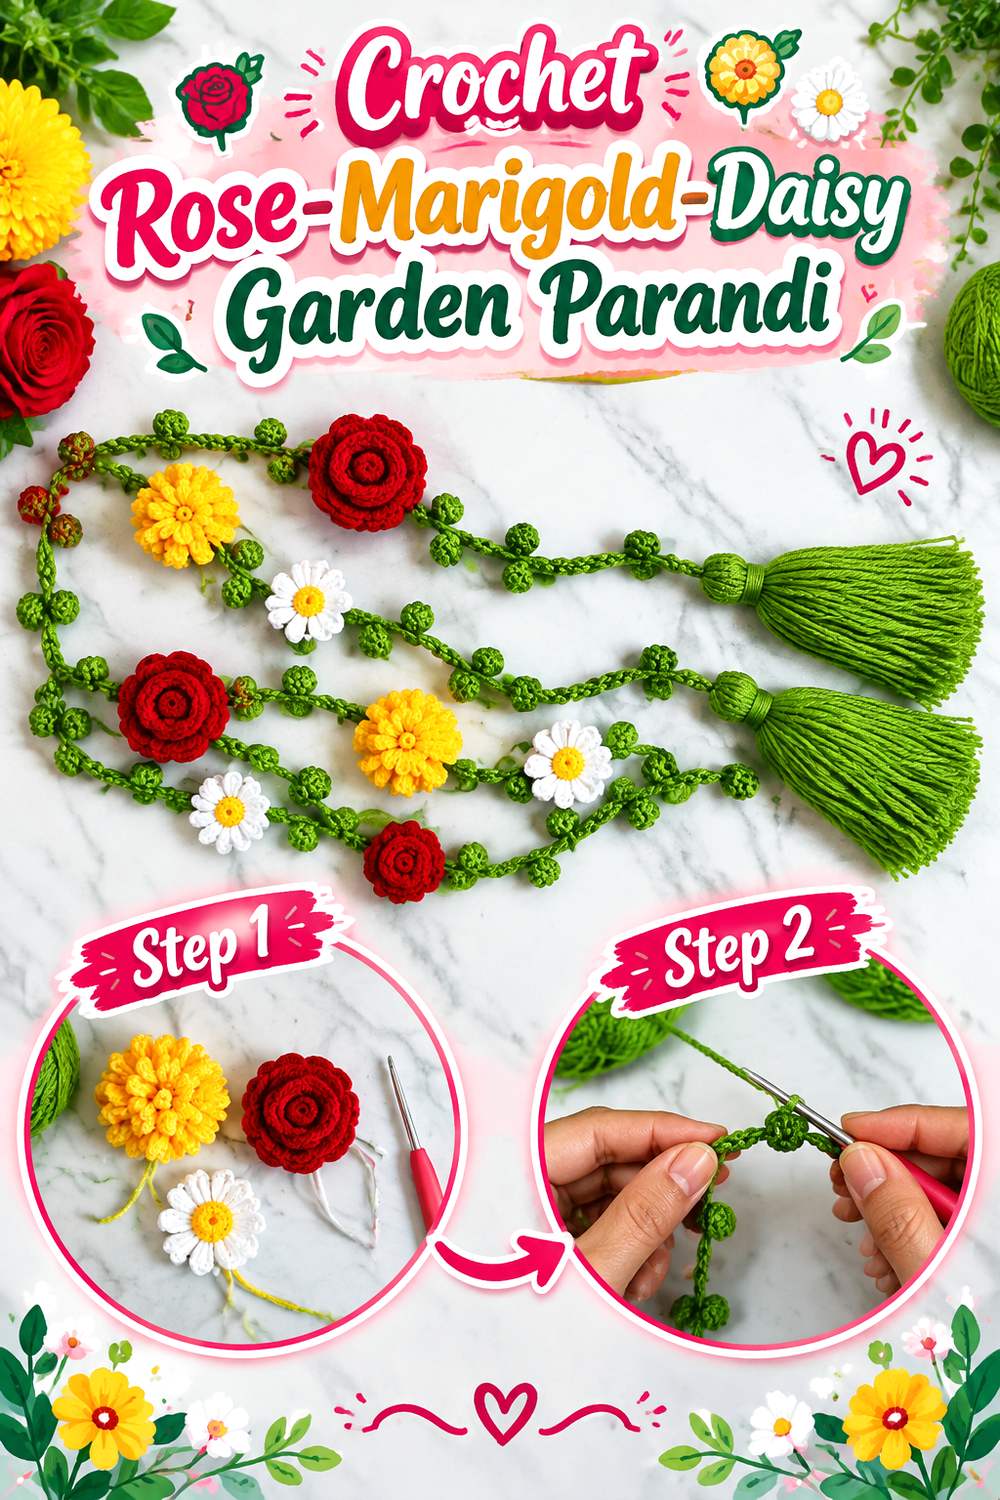
Sara’s Art Diary takes the opposite approach to a single-motif parandi by bringing rose, marigold, and daisy elements into one hair accessory. The source title explicitly identifies all three flower types.
That mixture creates a garden-like composition in which not every motif has the same scale, density, or visual weight. Equal physical spacing therefore may not look visually balanced. A layered rose can dominate more space than a flatter daisy even when the gap between their centers is identical. This project suits makers who want variety along the length and are willing to arrange the complete motif set before committing to permanent placement.
Choose One Flower to Anchor the Rhythm
A mixed collection becomes easier to organize when one motif repeats often enough to provide continuity. Decide which bloom will act as that anchor before filling every gap with a different flower.
The remaining motifs can then appear as contrast rather than unrelated additions. Lay everything out before assembly so the balance is judged across the whole parandi instead of one attractive section at a time.
Separate the Densest Flowers
Layered or tightly worked blooms can create a thick patch when several sit beside one another. Use a flatter flower, leaf, or visible cord between dense motifs when the arrangement begins to feel crowded.
The intervals do not need to be identical. The goal is to keep each flower readable once the strands hang together beside an already textured braid.
Connect the Tassel Palette to the Flowers
A tassel creates another large block of color at the bottom. Before securing it, hold the proposed finish below the completed flower sequence.
If the tassel introduces several completely unrelated shades, the ending may feel detached from the garden above it. Repeating one established flower color can help connect the lower finish without adding another motif.
Original Tutorial and Creator Credit
Creator: Sara’s Art Diary
10. Crochet Ghungroo Swing Braid Parandi
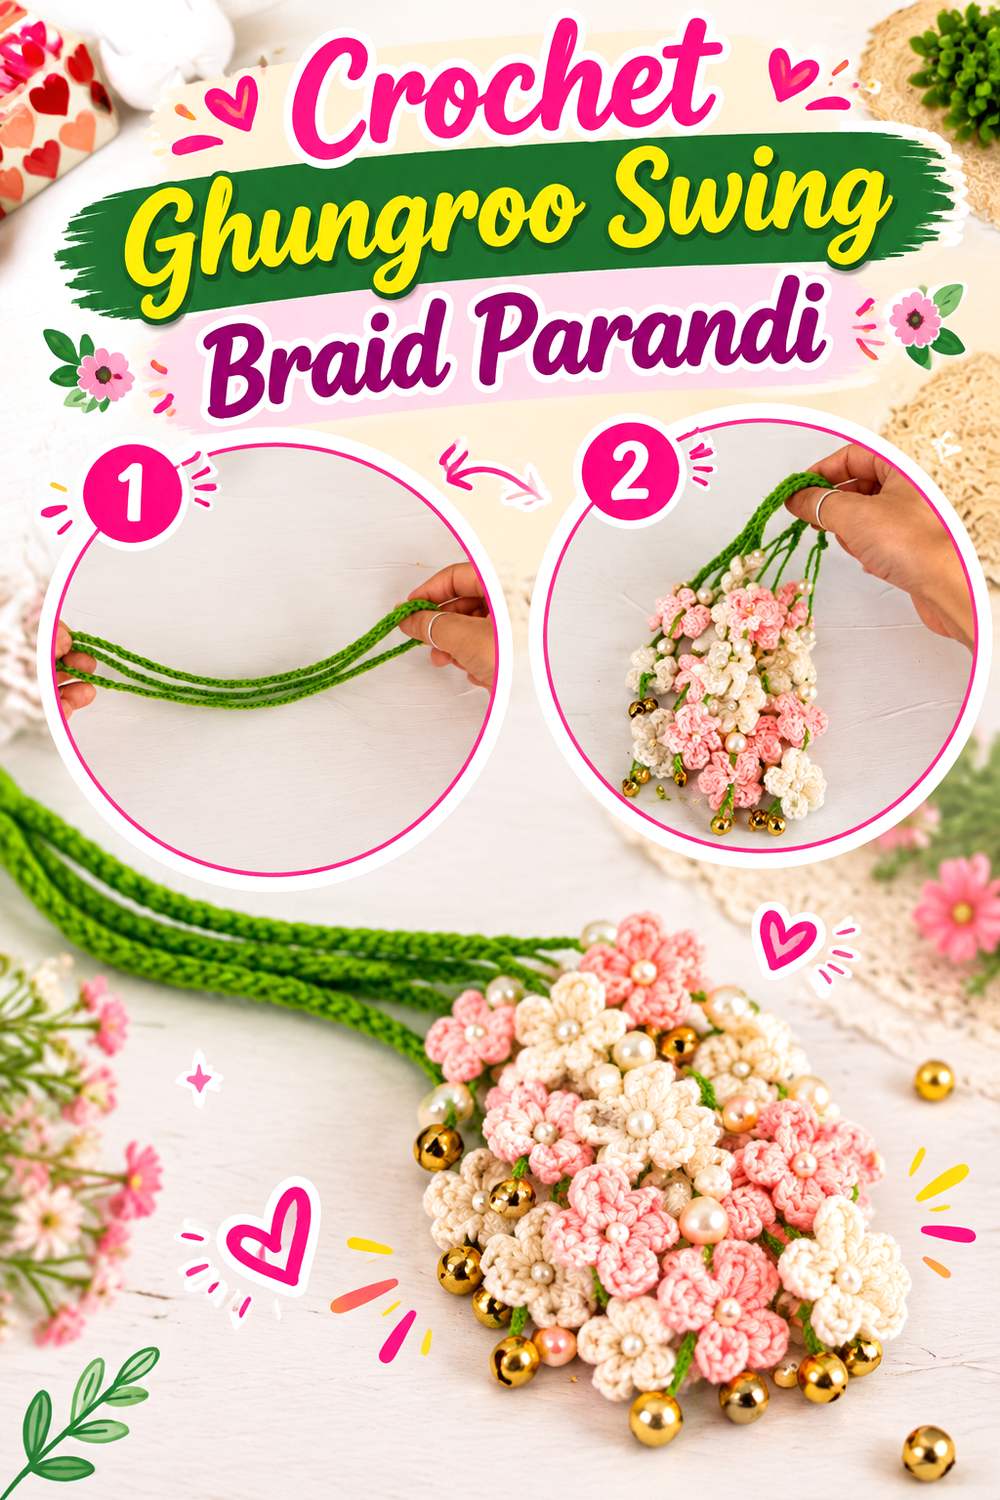
Ghungroo-style accents make this design distinct from pearl-centered and yarn-only floral parandi because the embellishment contributes sound and movement as well as shine. Plakshi Jain | Crochet has a dedicated tutorial specifically for a crochet ghungroo parandi.
The strongest use of the metallic pieces is usually selective. Concentrating them where they remain visible gives the lower section a clearer role without crowding the braid connection. Because hard components can affect the way each tail hangs, build enough of the crochet base to understand its natural behavior before deciding where every accent belongs.
Understand the Plain Base Before Adding Metal
Let the crochet structure hang on its own first. This establishes whether any twisting or unevenness comes from the yarn construction rather than the added pieces.
Once the base behaves predictably, place ghungroo accents temporarily and compare several arrangements. Keeping this sequence separate makes it easier to see whether a new imbalance is caused by decoration or by the underlying strands.
Watch and Listen During a Gentle Movement Check
Move the completed lower section gently and observe both appearance and sound. Metallic pieces that repeatedly collide, tangle with yarn, or pull one strand farther down may benefit from greater separation or fewer accents.
More pieces do not automatically create a stronger design. A controlled pattern of movement can make individual ghungroo details more noticeable than a crowded cluster.
Keep Hard Pieces Away From the Working Tie
The upper connection needs to be handled while the parandi is positioned with the braid. Metallic components buried there add weight without contributing much visible decoration.
Leave the working area comparatively soft and manageable, then place the harder embellishments farther down where they can actually be seen and where their movement is less likely to interfere with the attachment.
Original Tutorial and Creator Credit
Creator: Plakshi Jain | Crochet
11. Crochet Fine Cord Laccha Dori Parandi
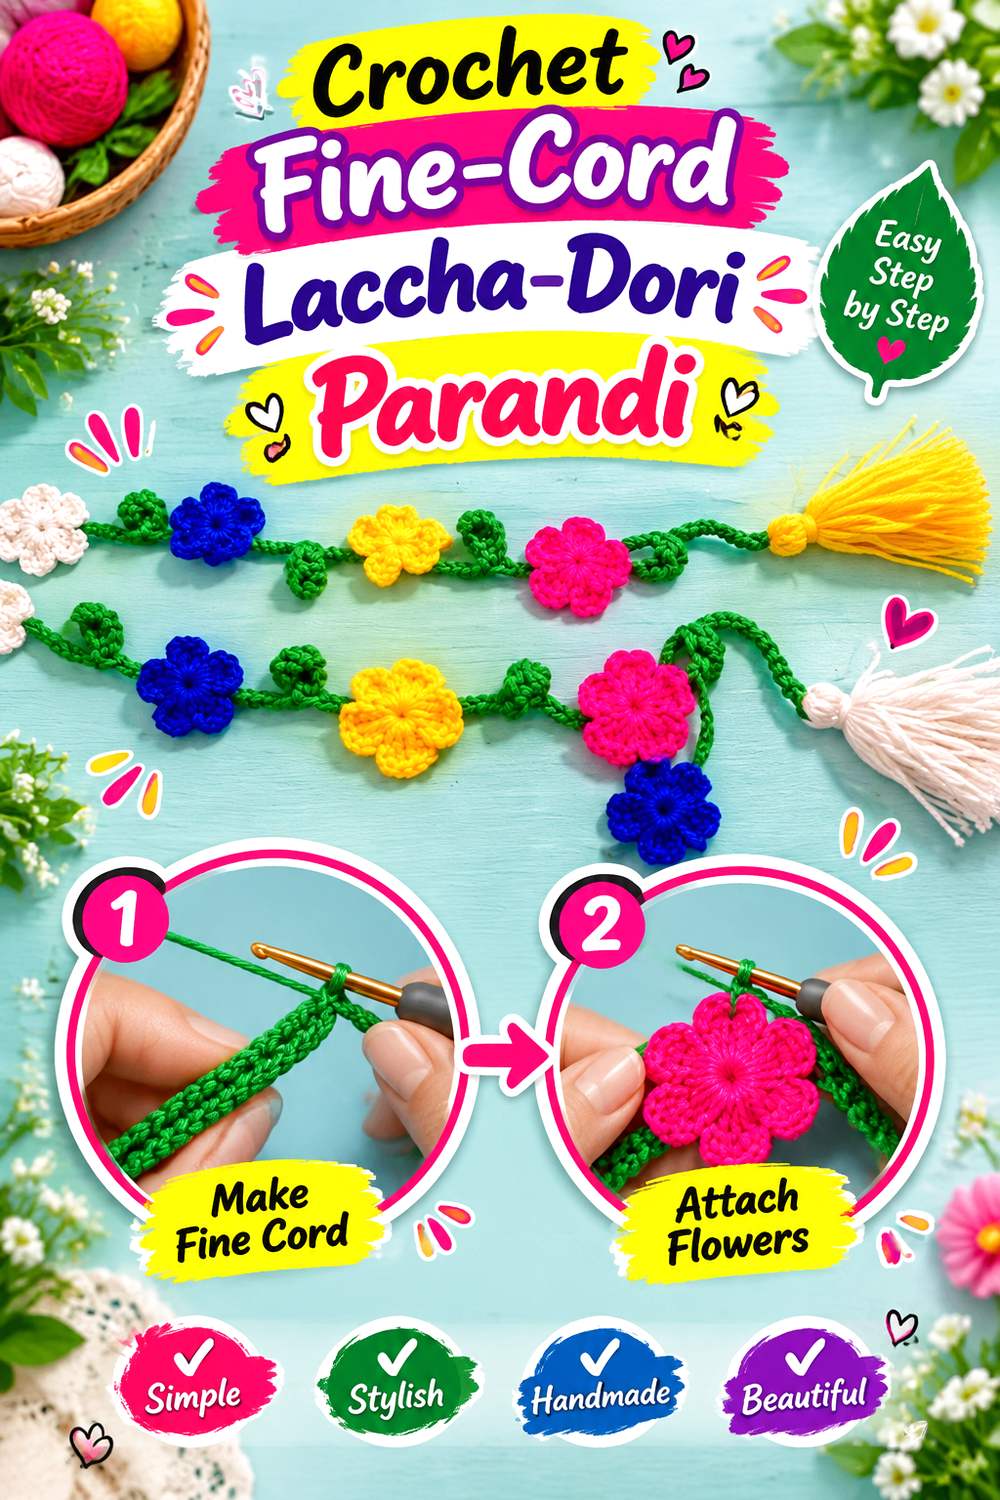
Crochetnook’s dedicated laccha-dori parandi tutorial supports a slimmer interpretation where the narrow strands remain visually important instead of serving only as supports for oversized flowers.
A fine-cord design can complement a braid without covering much of it, which makes negative space an intentional part of the finished look. Because there is less decorative mass to distract from the underlying crochet, clean hanging lines and controlled lower proportions become especially noticeable. This is a useful choice if you prefer the texture of crochet cords and a defined tassel finish but do not want the full botanical density of the rose, lotus, or mixed-garden projects.
Inspect Fine Cords for Spiral Twist
Long narrow crochet structures can reveal directional tension by spiraling. Let each main cord hang freely before adding heavier ends and compare it with the others.
If one repeatedly twists much more than its neighbors, address the underlying issue first. Hiding the lower end beneath a large tassel does not remove a visible spiral higher up the accessory.
Protect the Slim Profile
Open space is one of this style’s distinguishing features. Resist adding flowers simply because bare cord appears between decorative points.
View the developing parandi beside the actual braid and outfit. If the crochet line remains visible and balanced, the emptier sections are doing useful design work by preventing the accessory from becoming another full floral garland.
Keep the Ending in Scale
A very large lower cluster can make fine cords appear visually unable to support their own finish even if the construction itself is secure.
Before final assembly, bundle the planned tassels or flowers temporarily beneath the strands. Compare a fuller and a quieter ending. The best choice is the one that looks intentionally related to the scale of the cords above it.
Original Tutorial and Creator Credit
Creator: Crochetnook
12. Crochet Focal Cluster Statement Pranda
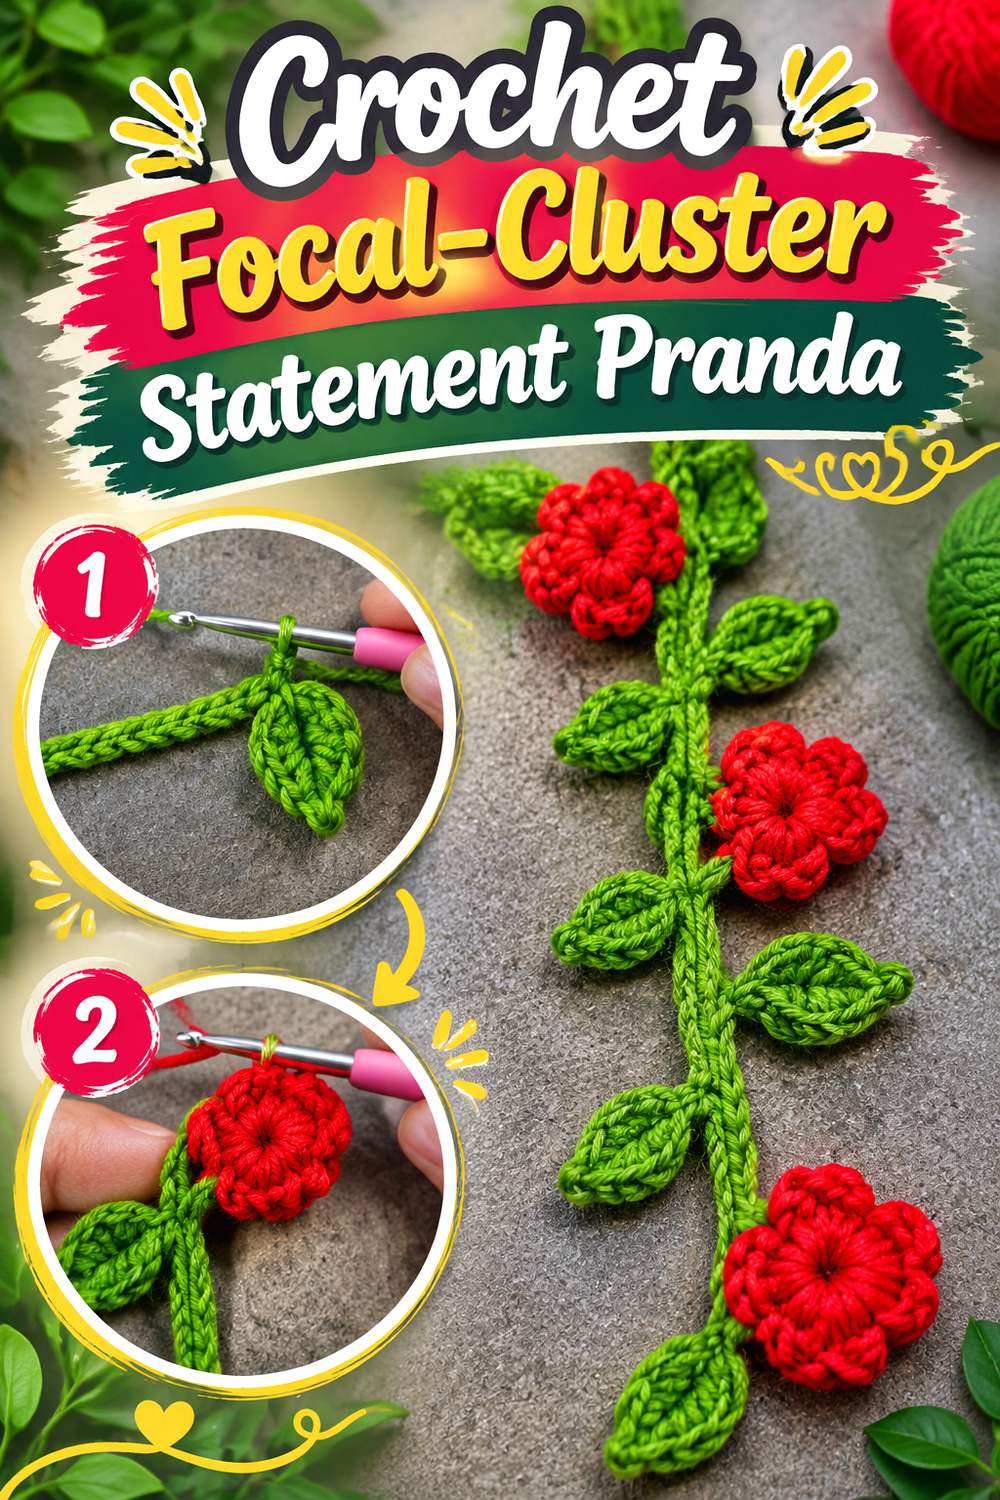
Devsha Textile’s long-form source is explicitly a handmade crochet pranda tutorial, giving this idea a direct foundation for a richer statement accessory. Rather than treating every inch as equally important, this interpretation concentrates the strongest decoration into one clearly chosen focal zone.
That zone could sit around a lower flower grouping, a strong color contrast, or the area immediately above the tassels. The surrounding sections should be calmer enough for the focal point to matter. This approach differs from the evenly repeated blossom trail because visual hierarchy—not repetition—is the main organizing principle. It can accommodate substantial decoration without requiring the entire hanging length to become equally dense.
Choose Where the Eye Should Land
Hang the unfinished pranda and identify the section you want viewers to notice first. Then compare every proposed addition with that goal.
If all flowers have the same size, spacing, and color contrast, the design may feel busy without having a true focal point. Increase detail deliberately in one zone and give neighboring sections more breathing room.
Test Contrast Against Hair, Not Just Yarn Skeins
Colors that look clearly separated when placed side by side on a table can behave differently against dark, light, or highly textured hair.
Hold representative flowers beside the intended hairstyle before making the complete motif set. If the most important bloom disappears, changing its surrounding color or position may be more effective than simply adding more decoration.
Inspect Complex Joins While the Piece Hangs
A statement pranda may contain more attached components and therefore more places where orientation matters. Suspend it and move it lightly.
Look for flowers that consistently flip backward, leaves that fold over neighboring details, and visible yarn tails. Correcting one prominent connection can improve the entire composition more than adding another decorative element.
Original Tutorial and Creator Credit
Creator: Devsha Textile
13. Crochet Petite Flower Airy Strand Parandi
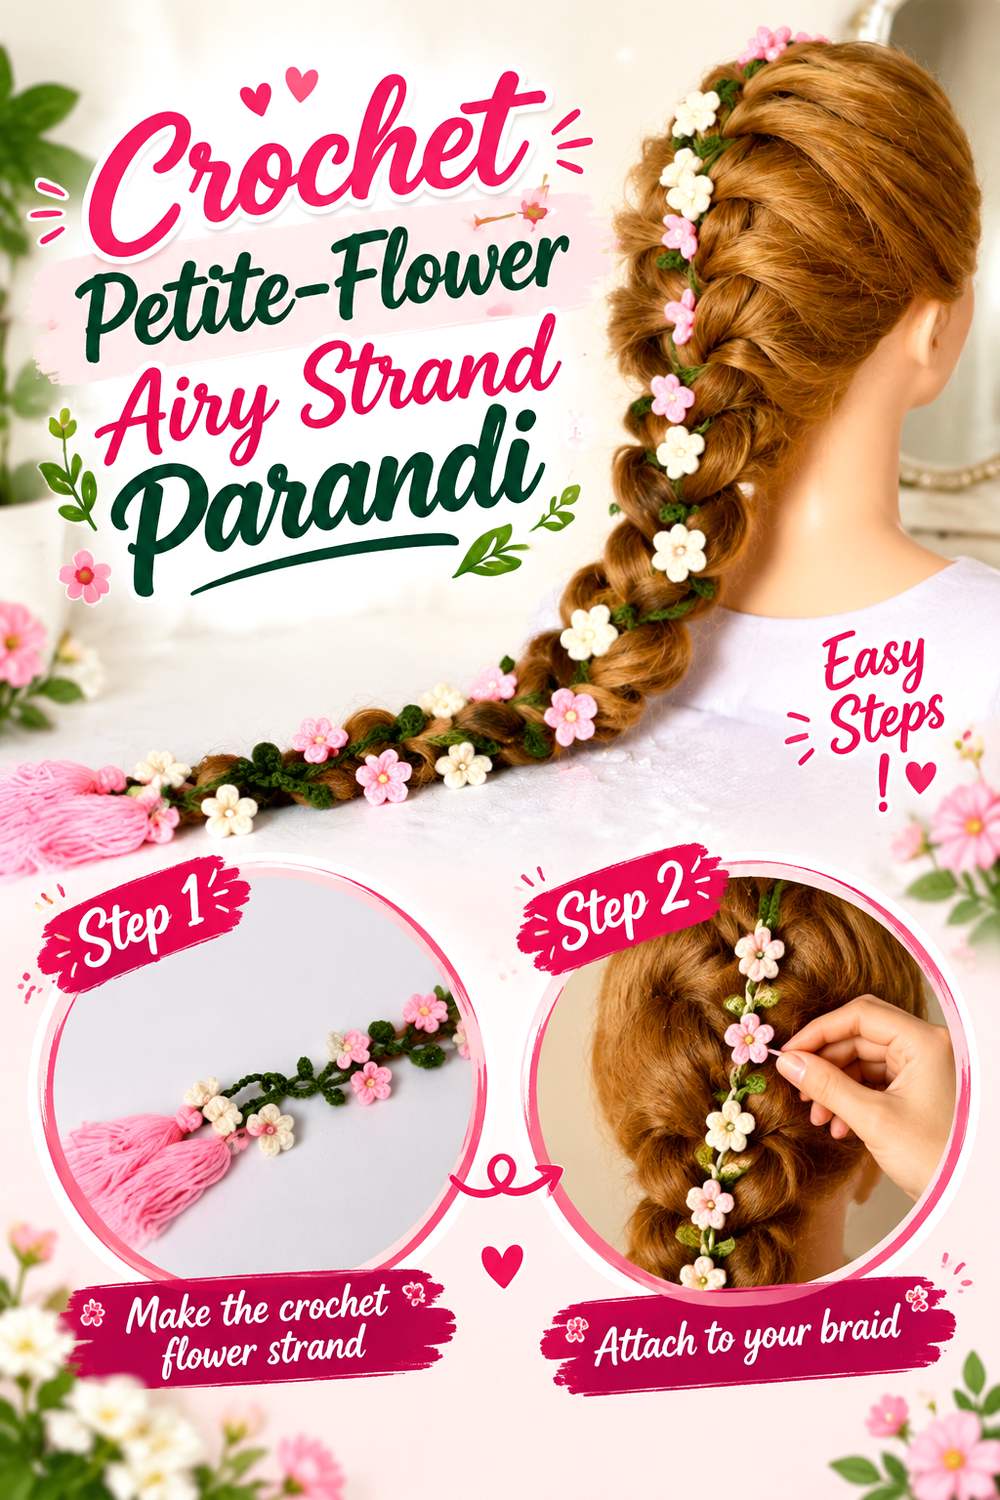
The final idea keeps floral decoration deliberately lighter. ers creative art has a dedicated step-by-step crochet parandi video, providing a direct construction reference rather than requiring a flower vine or headband to be converted into a braid accessory.
For this interpretation, let smaller flowers interrupt the strands at selected points while keeping plenty of the connecting structure visible. The result differs from both the dense bridal parandi and the mixed-garden version because open space and movement remain major visual features. It works particularly well when the hairstyle or clothing already has strong detail and you want the crochet to add color without becoming another wide decorative band.
Small Flowers Still Need Visible Placement
Petite motifs can disappear more easily inside the braid. Use a practice hairstyle to identify which sections of the strand remain exposed, then reserve the clearest flowers for those positions.
If individual blooms look too subtle, a short intentional group may create more impact than adding flowers evenly across the entire length.
Keep Air Between Decorative Sections
A lighter parandi depends on restraint. Once several flowers are attached, step back and view the full silhouette before deciding that every remaining gap requires decoration.
Visible strand preserves flexibility and gives the eye somewhere to rest. If the flowers already read clearly at normal viewing distance, additional motifs may change the design from airy to crowded without adding useful detail.
Finish Both Sides Carefully
Sparse designs reveal finishing details more readily because there are fewer motifs to conceal joins. Turn every flower connection over and inspect the reverse side as well as the front.
Secure and finish yarn ends appropriately for the chosen construction, especially around areas that may sit against hair. A tidy back matters on a moving accessory because different surfaces may become visible during wear.
Original Tutorial and Creator Credit
Creator: ers creative art
How to Choose Among These 13 Crochet Parandi Styles
| If you want… | Consider… | Main planning priority |
|---|---|---|
| Adjustable floral length | Open-Bloom Custom-Drop Parandi | Measure from the actual braid connection |
| Clean flowing cords | Streamlined Laccha-Dori Hair Parandi | Consistent tension and lower balance |
| One recognizable flower | Lotus-Centerpiece Braid Parandi | Finished motif scale |
| Flowers plus foliage | Botanical Leaf-and-Tassel Paranda | Leaf direction and tassel proportion |
| Repeating color rhythm | Alternating Blossom Trail Paranda | Sequence and even motif scale |
| Minimal motif sewing | Integrated No-Sew Flower-Vine Parandi | Early spacing and orientation |
| Formal styling | Bridal Floral Parandi with Pearl Highlights | Coordination and snag checks |
| Strong braid extension | Extended Punjabi Braid Tassel Parandi | Overall drop and strand alignment |
| Several flower types | Rose-Marigold-Daisy Garden Parandi | Visual balance between motif sizes |
| Metallic movement | Ghungroo Swing Braid Parandi | Weight, spacing, and attachment |
| Narrow profile | Fine-Cord Laccha-Dori Parandi | Twist control and proportional ending |
| Rich focal decoration | Focal-Cluster Statement Pranda | Clear visual hierarchy |
| Light floral detail | Petite-Flower Airy Strand Parandi | Open spacing and clean finishing |
Conclusion
These 13 crochet parandi ideas cover much more than different flower colors. A slim laccha-dori design emphasizes cord and movement, a lotus parandi creates one obvious botanical theme, and the rose-marigold-daisy version uses variety as the main attraction. Tassel-led Punjabi styles extend the braid visually, while pearl and ghungroo projects introduce harder embellishments that require extra attention to placement and finishing. The no-sew option changes the construction approach itself.
Before choosing, decide what should be noticed first: the long strands, flowers, tassels, reflective accents, or the way the accessory becomes part of the braid. Then test the attachment, hanging length, motif direction, and overall bulk against the intended hairstyle. For exact construction, materials, and assembly, follow the original tutorials credited with each project.
Frequently Asked Questions
How long should a crochet parandi be?
There is no single finished length that suits every wearer. The important measurement begins where the parandi actually enters the completed braid and ends where you want its lowest tassel or flower to fall. Part of the upper section may disappear into the hairstyle. Mock up the braid before finalizing the strands, and use any sizing or adjustment guidance supplied by your chosen tutorial as the primary reference.
What type of yarn works well for a crochet parandi?
Start with the material specified by the original tutorial when possible. If you substitute, make a representative cord and flower before committing to the full accessory. Compare flexibility, stitch definition, surface feel, motif size, and vertical stretch. A firmer yarn may make flowers look crisp but produce more substantial strands, while a softer yarn can change both movement and motif definition. The result matters more than matching color alone.
Should I make the flowers before deciding their spacing?
For motif-heavy designs, making at least one representative flower first is useful because its actual scale may differ from what you imagined. When several flowers repeat, producing a small group lets you compare tension and arrange the color sequence before permanent attachment. Lay or temporarily position the motifs, then hang the accessory vertically. Gravity can reveal overlaps and rotations that are difficult to notice while everything is flat.
How can I stop a floral parandi from looking too bulky?
Give one feature visual priority. If flowers are the main attraction, use smaller leaves or more visible cord between them. If tassels should dominate, keep the upper length comparatively restrained. Also sample your intended yarn because a thicker or firmer substitution can increase the scale of every repeated element. Open space is useful design space; a parandi does not need flowers covering its entire length to look complete.
Are pearls, beads, or ghungroo appropriate for every parandi?
No. These details add shine, movement, or sound, but they also add weight, hard surfaces, and additional attachment points. Check how each one behaves while the accessory hangs and moves, and make sure the connection is appropriate for the intended wearer. Small detachable components may be unsuitable in some situations. An all-yarn flower center, knot, or tassel can provide decoration without using the same hard embellishments.
How should a finished crochet parandi be stored and cared for?
Avoid crushing dimensional flowers or knotting long cords tightly during storage. Keeping the strands straight or loosely supported can help prevent unnecessary bends, while tassels should be separated rather than tangled together. Cleaning depends on the actual yarn, beads, metal pieces, and other materials used, so do not assume every parandi has the same washing requirements. Follow the yarn manufacturer’s care information and any relevant guidance from the original creator.