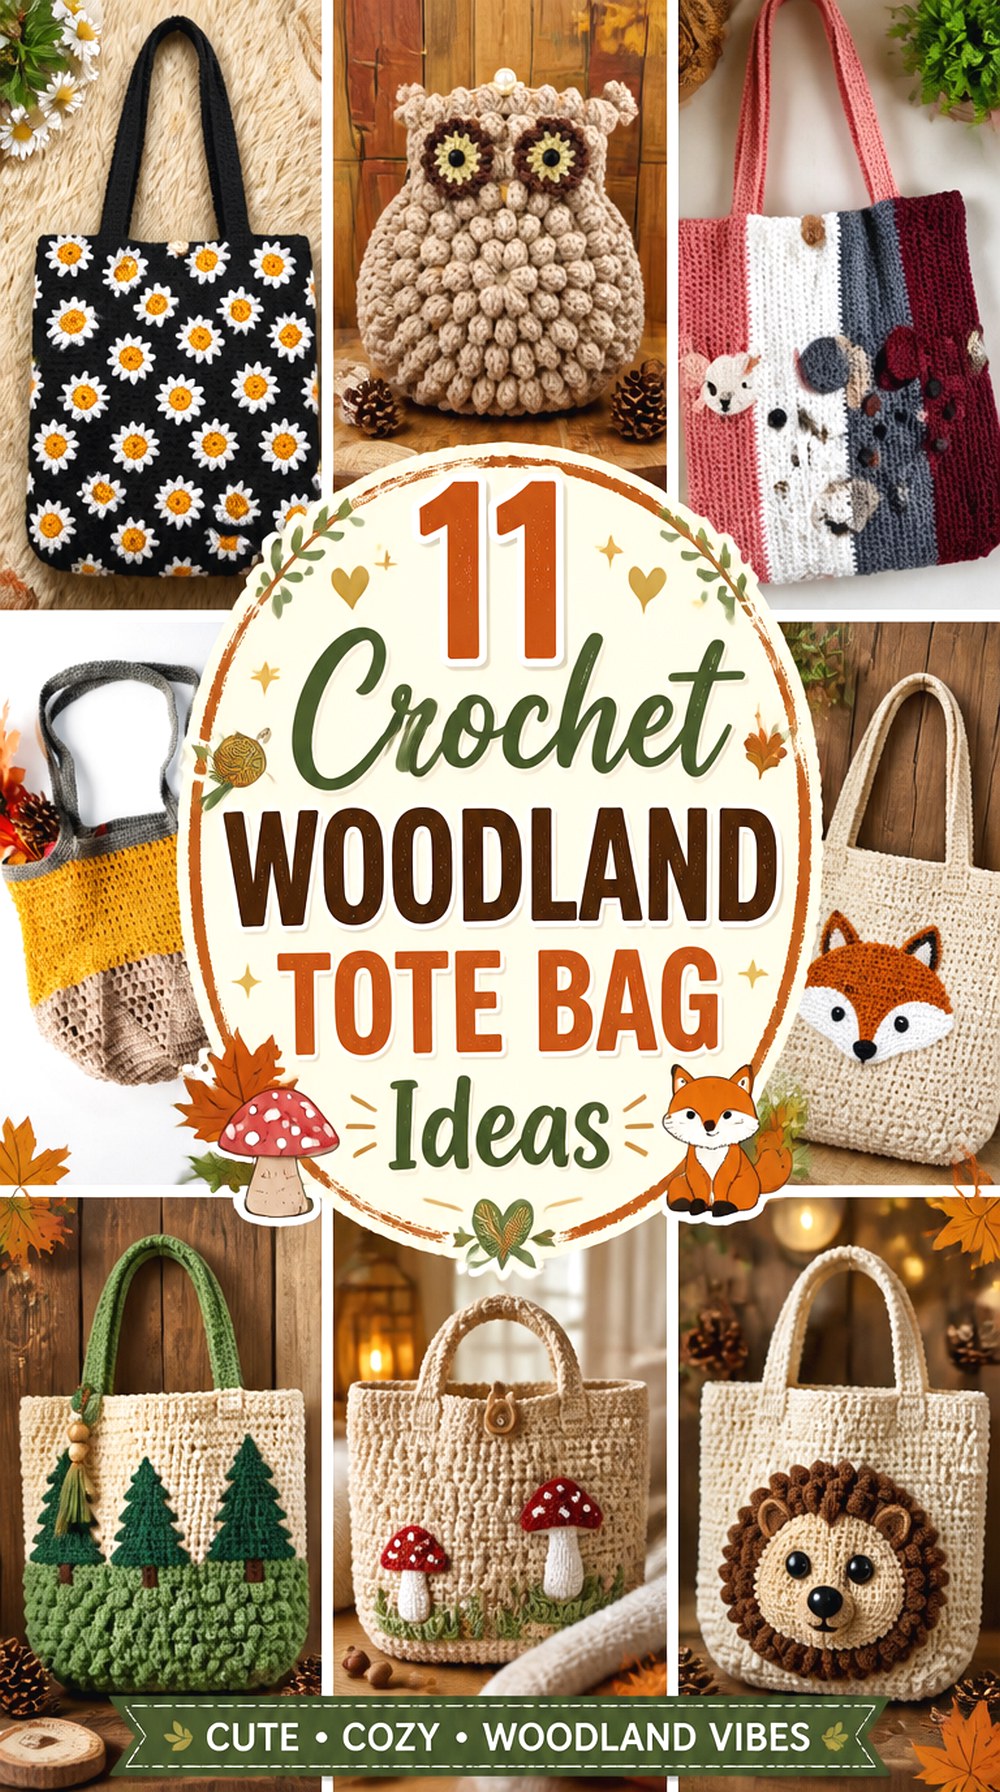
11 Crochet Woodland Tote Bag Ideas
Woodland crochet bags can take very different forms. One maker may want a practical square tote with a single mushroom accent, while another may prefer repeated botanical motifs, a textured leaf surface, or a bag that turns a fox, bunny, or owl into the main design. Those differences affect much more than appearance: they change the amount of joining, the way the bag hangs, the opening, the interior finish, and how much attention the decorative details need.
The 11 ideas below mix true totes with a few smaller woodland character carry bags so you can compare several construction directions rather than seeing the same bag recolored repeatedly. Each project is paired with an original YouTube tutorial. Use the comparisons and checkpoints here for planning, then follow the credited creator for exact stitches, measurements, materials, and assembly.
Quick List
- Crochet Mushroom Applique Woodland Tote
- Crochet Mushroom Granny Square Patchwork Tote
- Crochet Textured Leaf Woodland Tote
- Crochet Acorn Market Tote
- Crochet Sunflower Granny Square Woodland Tote
- Crochet Fox Woodland Character Bag
- Crochet Bunny Woodland Tote
- Crochet Owl Woodland Character Bag
- Crochet Strawberry Foraging Tote
- Crochet Daisy Motif Woodland Tote
- Crochet Lined Flower Woodland Tote
Choose the Woodland Theme by Construction, Not Just Motif
A mushroom, leaf, flower, or animal can appear on a tote in several ways. A flat applique keeps most of the bag construction simple and puts the theme in one focal area. Granny-square designs spread the woodland detail across multiple panels, making square consistency and joining much more important. Textured stitches can create leaves without separate motifs, while character bags depend heavily on face placement and silhouette.
Decide first whether you want the bag to function primarily as an everyday tote or as a statement accessory. A rectangular body usually gives you a more familiar opening and storage shape. A fox, bunny, or owl bag can provide much stronger woodland character, but the decorative form may matter more than maximum interior space. That distinction helps narrow the list before color choices enter the decision.
Plan Structure, Stretch, and Interior Finish Before You Start
Crochet fabric can stretch when a bag is loaded, especially at the handles and opening. Fiber, stitch density, strap length, lining, seams, and the weight placed inside all influence how much movement you eventually see. A dense tote body generally behaves differently from an open market fabric or a soft motif construction, so do not assume two bags of similar visual size will carry in the same way.
If you want a cleaner interior or regularly carry small objects, check whether the chosen tutorial includes lining or whether you are comfortable adding one independently. Also inspect how the straps connect to the body. Long unsupported crochet straps may lengthen during use. For a motif bag, examine the joins before committing to the full layout; for an animal design, make sure decorative attachments will not interfere with the opening or handle area.
1. Crochet Mushroom Applique Woodland Tote
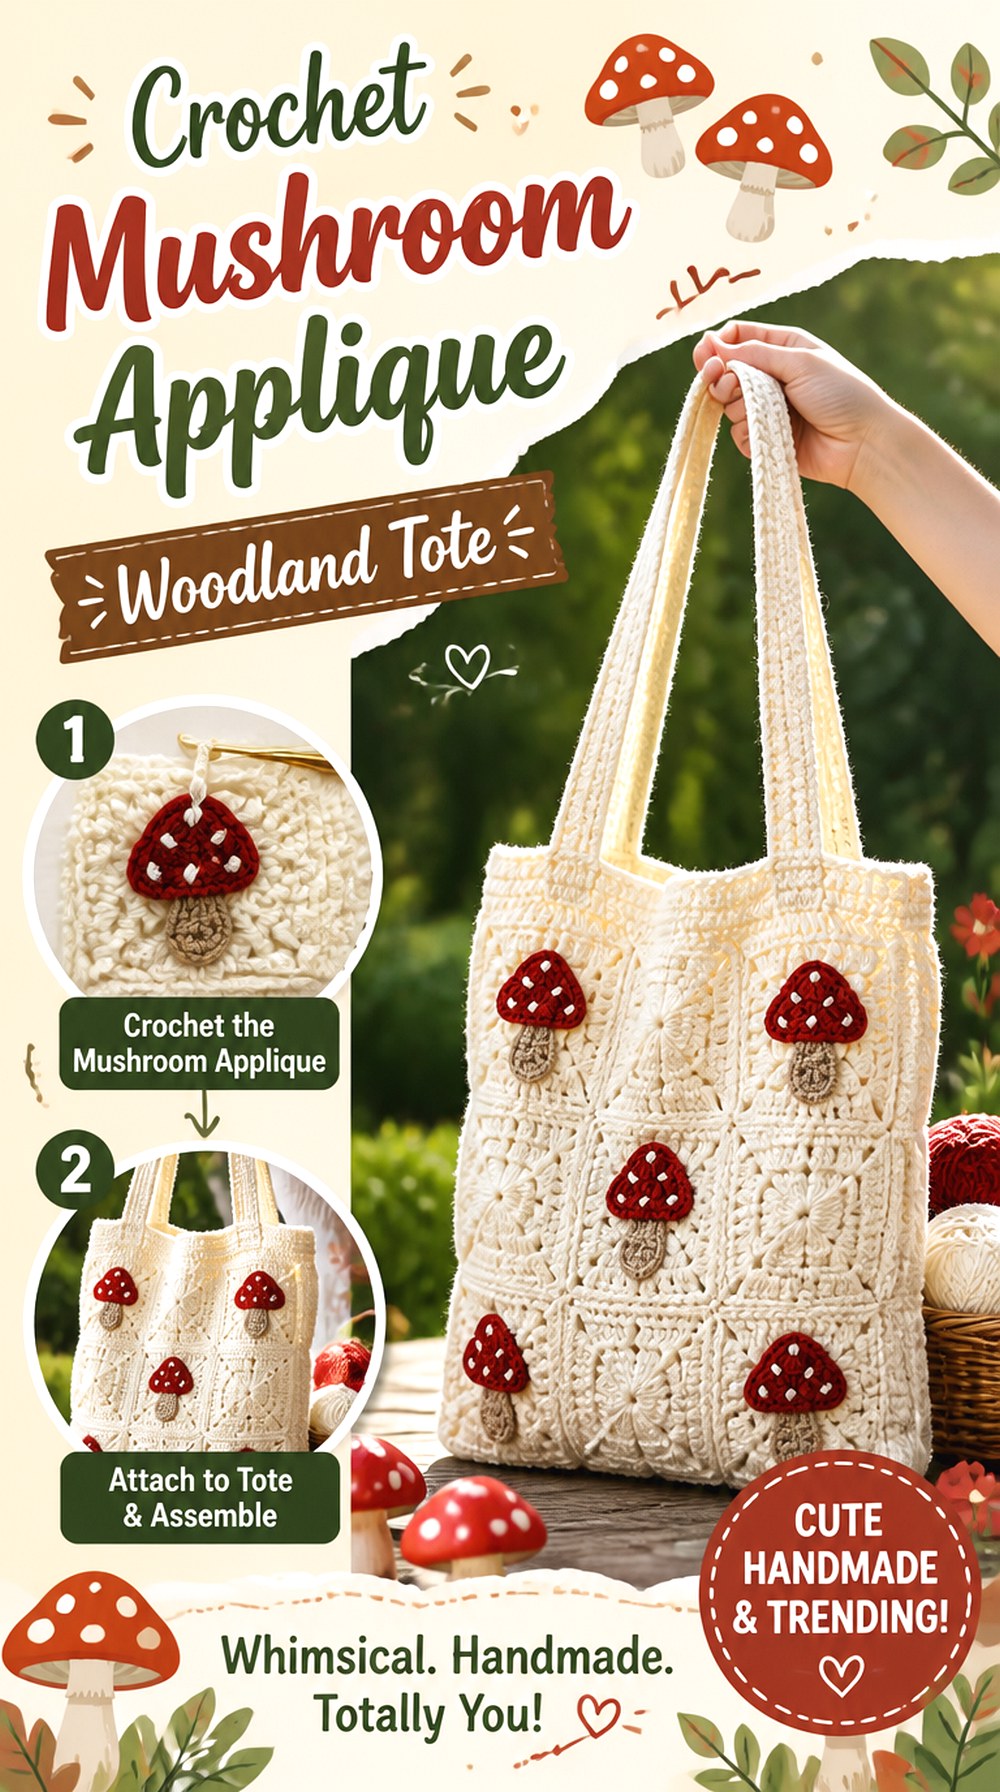
This design keeps the familiar form of a solid crochet tote and uses a mushroom applique as the woodland focal point. That makes it one of the more restrained choices in the collection: the bag remains recognizably tote-shaped instead of becoming a mushroom-shaped novelty purse. The source also presents the applique as a customizable decorative element, so the construction can work well for someone who likes a strong theme on the front without repeating the motif over the entire bag.
It is especially useful if you want the mushroom to read clearly from a distance while keeping most of the body visually quiet. Think about contrast, placement, and interior use before treating the decorative front as the only decision.
A Single Mushroom Needs Intentional Placement
With one main applique, a small shift in position changes the whole composition. Center placement creates a clear graphic front, while placing the mushroom too close to the opening can make it compete with the handles. Before sewing any separate motif permanently, lay the finished applique on the completed or nearly completed panel and view the bag from carrying distance rather than only close up.
Also check that the mushroom edges lie flat enough for your intended use. Raised corners can catch more easily than a smoothly attached motif.
The Solid Body Keeps Joining to a Minimum
Compared with a tote assembled from numerous woodland granny squares, a predominantly solid body removes the challenge of matching many separate motifs. That can be useful when you want the theme to come from surface decoration rather than patchwork construction.
The trade-off is that the main tote fabric becomes more visually noticeable. Uneven tension or a wavy upper edge has fewer motifs to disguise it, so periodically set the work flat and check that the body is developing evenly.
Keep the Decoration Clear of High-Stress Areas
Handles and upper corners receive more repeated movement than the center of a tote panel. A decorative mushroom positioned away from those areas is less likely to compete with strap attachments or become distorted when the opening is pulled outward.
If you plan to add a lining later, complete and secure the exterior decoration first. That makes it easier to hide attachment tails or stitching behind the lining instead of leaving the interior finishing visible.
2. Crochet Mushroom Granny Square Patchwork Tote
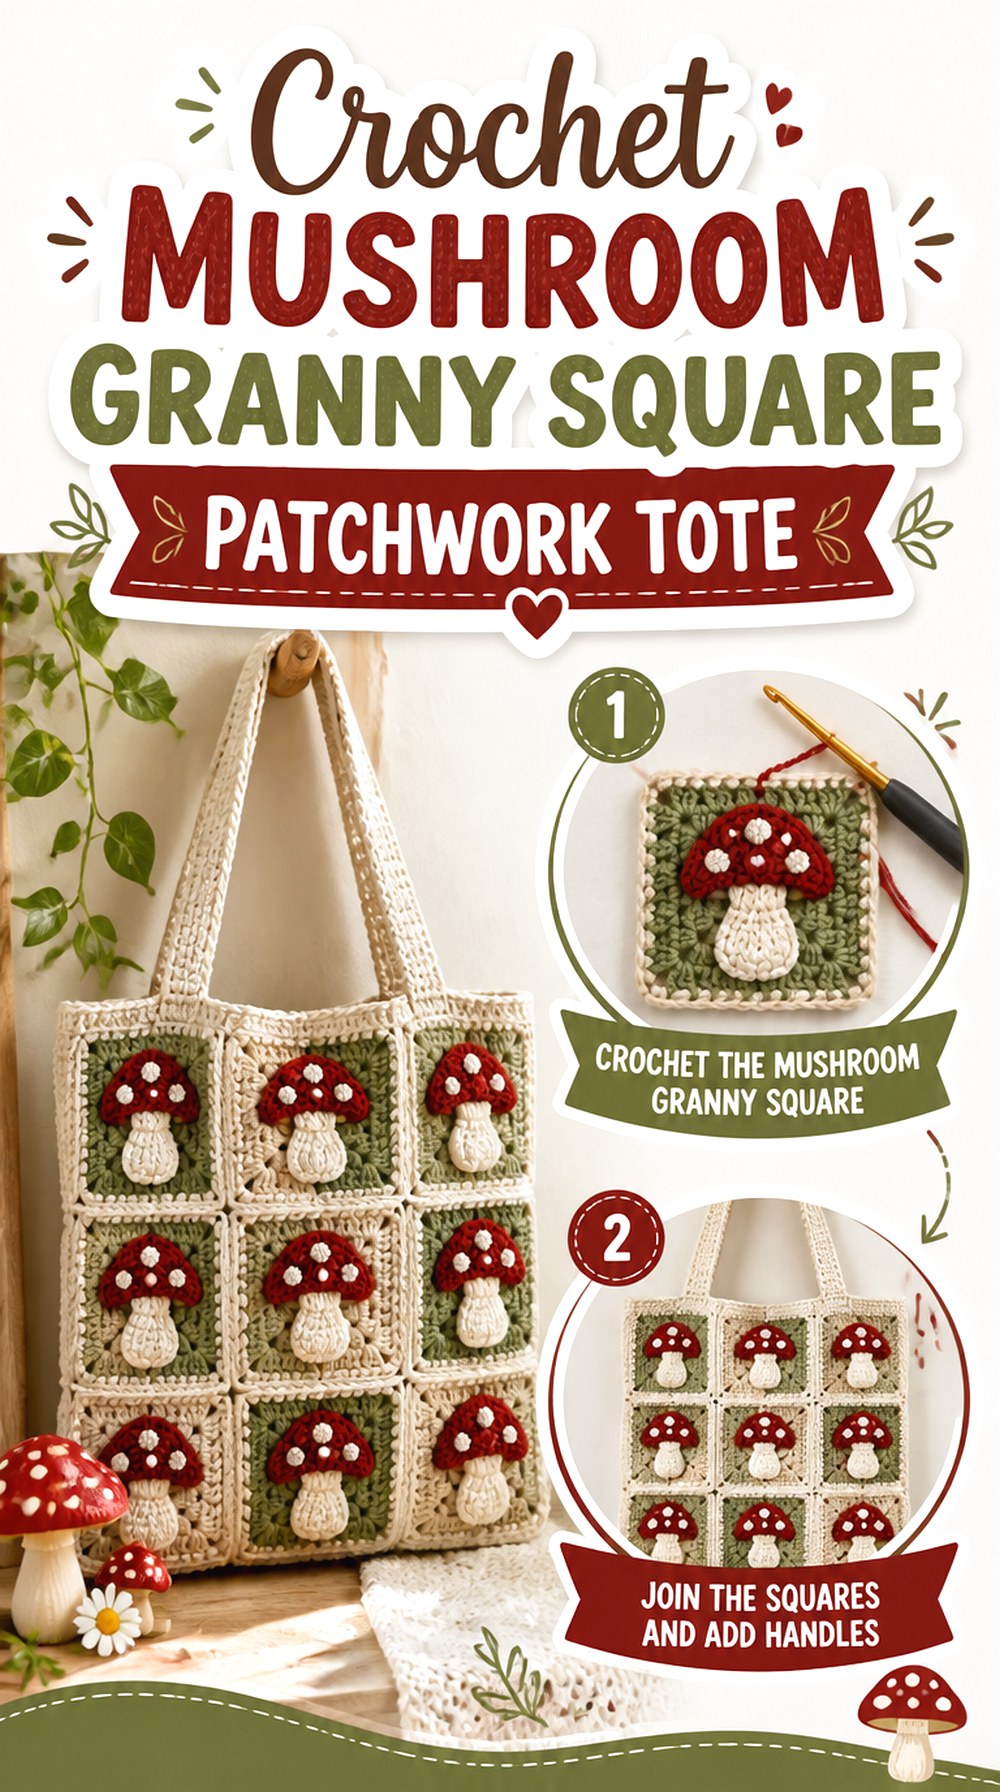
Rather than placing one mushroom on a plain panel, this tote uses granny-square construction to make the woodland idea part of the bag itself. That creates a busier patchwork surface and makes the joins, square proportions, and arrangement visible design features. It is a strong option for readers who enjoy working motifs separately and then watching the bag take shape during assembly.
The source combines vlog-style footage with tutorial content, so previewing the lesson first is worthwhile if you prefer a tightly structured demonstration. The finished direction is most distinct from the first mushroom tote because repetition—not a single applique—creates the forest-floor character.
Blocked Square Size Matters Before Assembly
Repeated squares need to agree with one another closely enough to form clean panels. If several mushroom squares finish at noticeably different dimensions, pulling them into alignment during joining can create ripples or distorted corners.
Before committing to the final layout, compare the relaxed or blocked dimensions of the motifs. Correcting inconsistent squares early is generally easier than trying to force an uneven completed panel into a tidy tote shape.
Mushroom Direction Changes the Patchwork Effect
A motif with an obvious top and bottom needs more layout planning than a traditional abstract granny square. Place the squares on a flat surface before joining and decide whether every mushroom should face the same direction or whether a deliberately varied orientation fits the look you want.
Remember to think about the back as well as the front. An attractive front panel can still feel unfinished if the motif arrangement changes unexpectedly around the sides or reverse.
Preview the Tutorial Format Before Gathering Supplies
This source is described as part vlog and part tutorial rather than a purely instructional lesson. That format may be enjoyable for crocheters who like following the project in context, but viewers who depend on uninterrupted demonstrations should scan the full video first.
Mark the portions that show motif construction, joining, and bag finishing. That small preparation can reduce repeated searching once you have several separate squares waiting to be assembled.
Original Tutorial and Creator Credit
Creator: hobby moth
3. Crochet Textured Leaf Woodland Tote
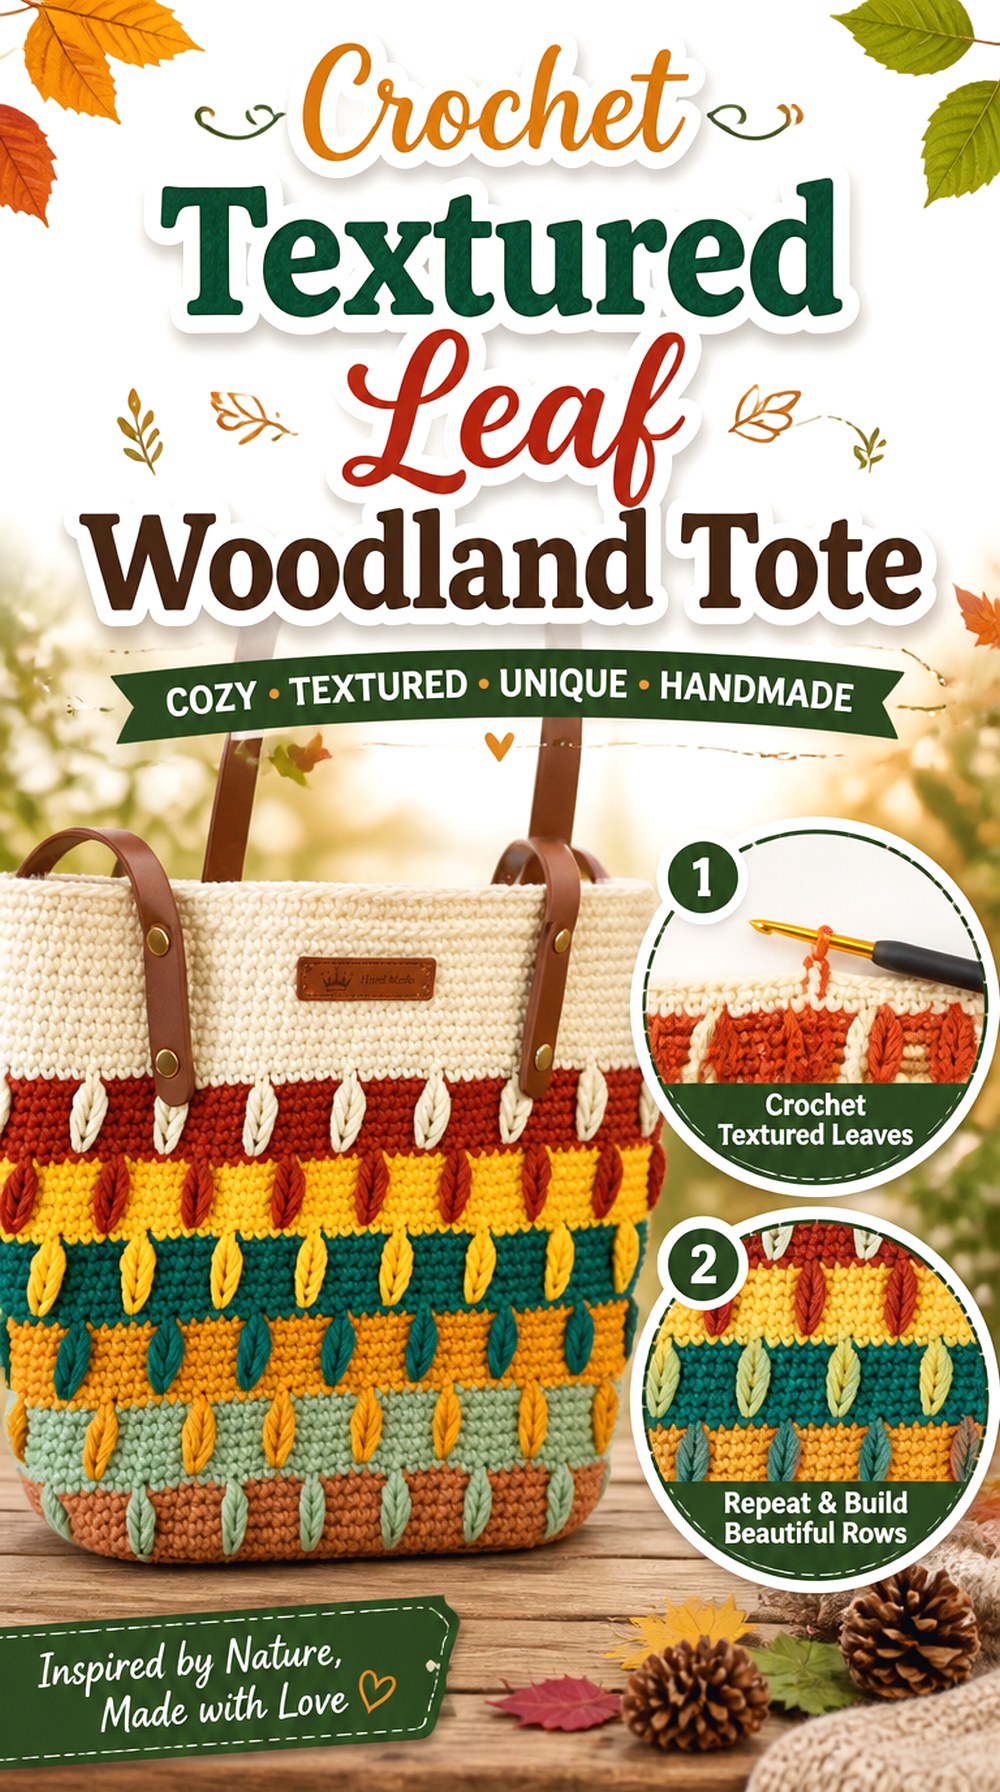
This botanical tote creates its identity through repeated leaf-like texture instead of sewn-on decorations. That gives the bag a continuous woodland surface and makes stitch definition more important than motif placement. The tutorial also shows a separate bag base and installed straps, which gives this project a noticeably different construction direction from the softer granny-square options.
A leaf-textured bag suits someone who wants nature inspiration without literal animals or mushrooms. It can read as botanical year-round rather than purely seasonal. Because the surface itself carries the design, yarn behavior and tension deserve extra attention: a highly textured fabric can become visually muddy if the stitches collapse together.
Leaf Texture Needs Enough Definition to Stay Visible
Raised or dimensional texture depends on shadows between stitches. If the yarn is extremely fuzzy or the fabric is worked so tightly that the relief compresses, the leaf effect may become harder to read.
Make a small practice area before committing to the whole bag if you are substituting yarn. You do not need to reproduce the creator’s exact materials, but you should be able to distinguish the leaf structure clearly in the fabric you plan to use.
Separate Handles Change the Stress Points
This design uses installed straps rather than relying entirely on long crochet handles grown from the bag body. That means the points where those handles connect deserve close attention during finishing.
Before loading the finished tote, inspect whether the attachment sits evenly on both sides and whether the bag hangs level. If you change the handle style from the source, consider how a narrower or heavier handle could concentrate force differently along the upper edge.
A Defined Base Can Help the Bag Read as More Structured
A distinct bag base separates this project from very soft patchwork totes that collapse almost completely when empty. Structure at the bottom can influence how the leaf texture hangs and whether the body looks rounded or more upright.
Decide whether you like that firmer profile before choosing the tutorial. If your priority is a bag that folds very flat for storage, a softer motif tote may be more suitable than a design built around a more defined base.
Original Tutorial and Creator Credit
Creator: Vicky Crochet
4. Crochet Acorn Market Tote
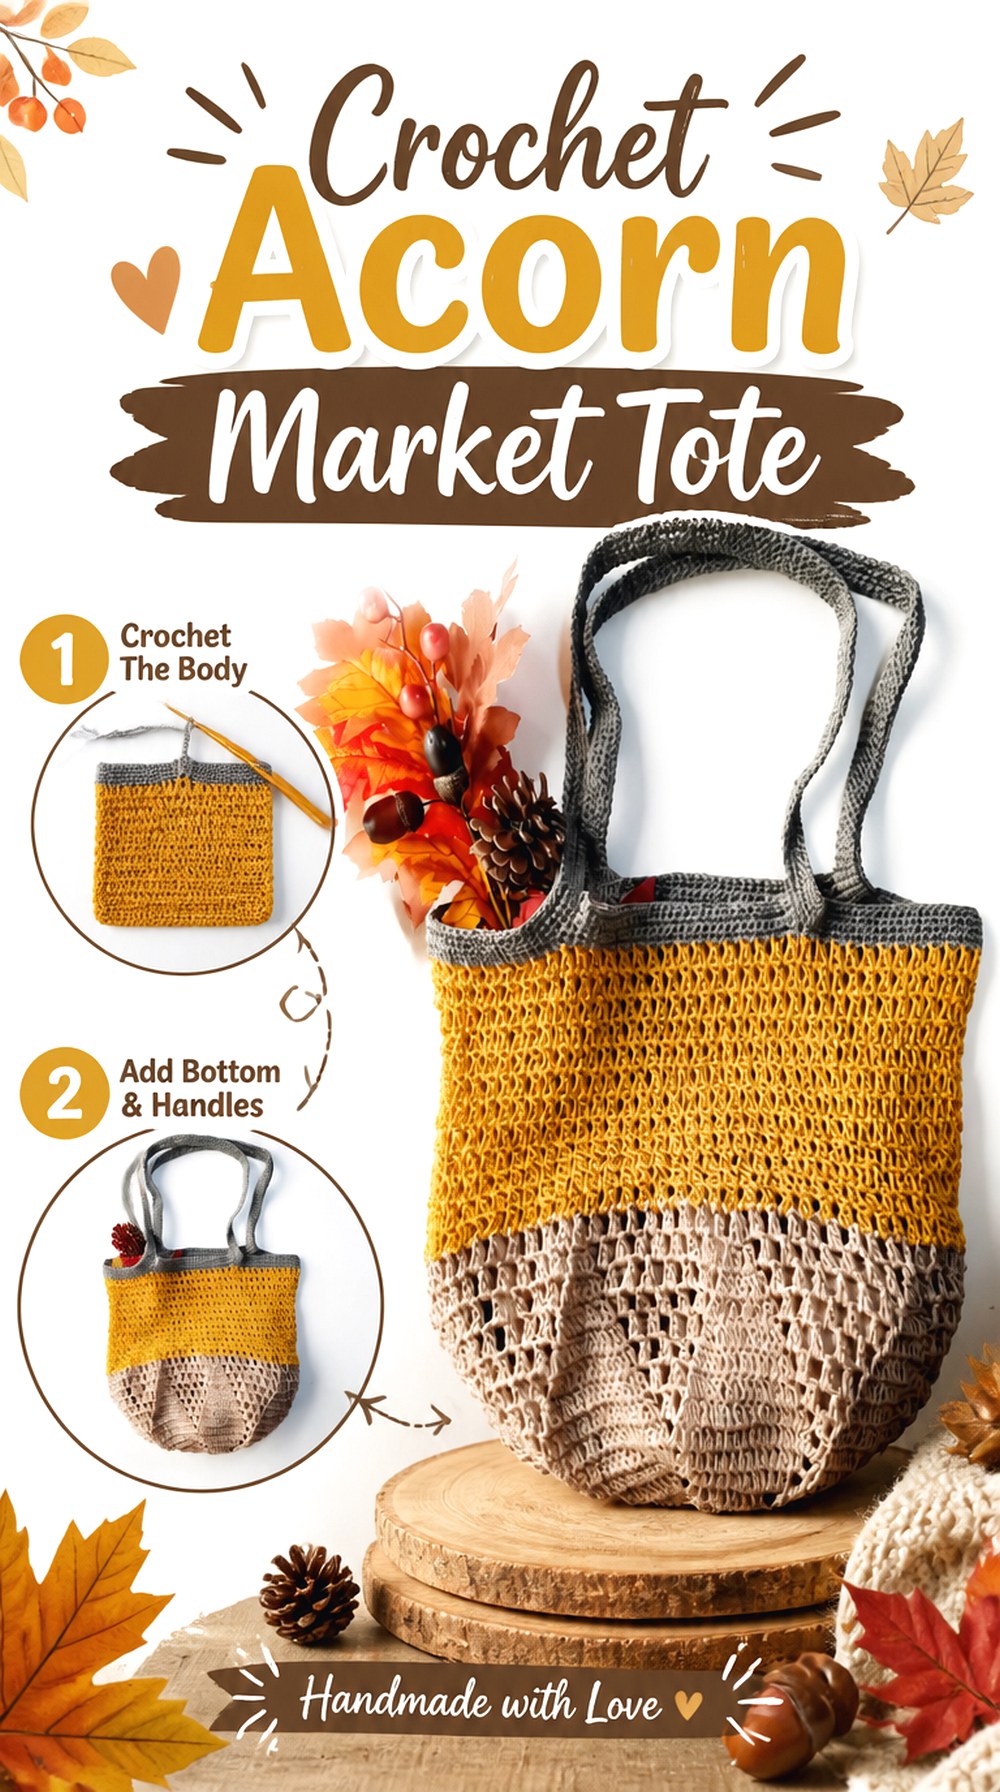
The Acorn Market Bag takes the woodland theme in a more understated direction. Instead of attaching a literal stuffed acorn or animal face, the project uses a market-bag format with an autumnal acorn identity. The creator describes it as an original design and provides a complete video tutorial, making it a useful choice for readers who want something nature-inspired without turning the tote into a character piece.
A market-style bag also behaves differently from a dense everyday tote. Fabric openness, stretch, and the shape of the loaded bag become important considerations. Choose this one when flexibility and a lighter visual profile appeal more than a rigid rectangular silhouette.
Market Fabric Changes Shape When It Is Filled
Open or flexible crochet fabric can look compact when empty and expand considerably once objects are placed inside. That behavior is useful for a market bag, but it also means the finished outline shown flat does not tell the whole story.
Before deciding what you will use it for, watch how the creator displays the completed bag. Avoid assuming a particular carrying capacity from its name alone, and keep small items in a separate pouch if the stitch openings could allow them to slip through.
Acorn Styling Can Stay Subtle
Not every woodland bag needs an obvious animal face or large mushroom. An acorn-inspired market tote can sit comfortably with everyday clothing while still fitting a forest or fall theme.
If you change colors, keep enough distinction between sections for the design to remain readable. Earthy brown, green, gold, or cream are intuitive choices, but color should support the construction rather than become the only feature differentiating the project.
Check Handle Behavior on an Expandable Bag
When the body of a market tote stretches, the handles can feel different than they do on an empty bag. That is why handle length should be judged together with the loaded body rather than in isolation.
Follow the creator’s construction first if this is your first time with this style. If you later adapt the bag, compare how the altered handle length affects where the expanded body sits against your hand, shoulder, or side.
Original Tutorial and Creator Credit
Creator: HandmadebyRaine
5. Crochet Sunflower Granny Square Woodland Tote
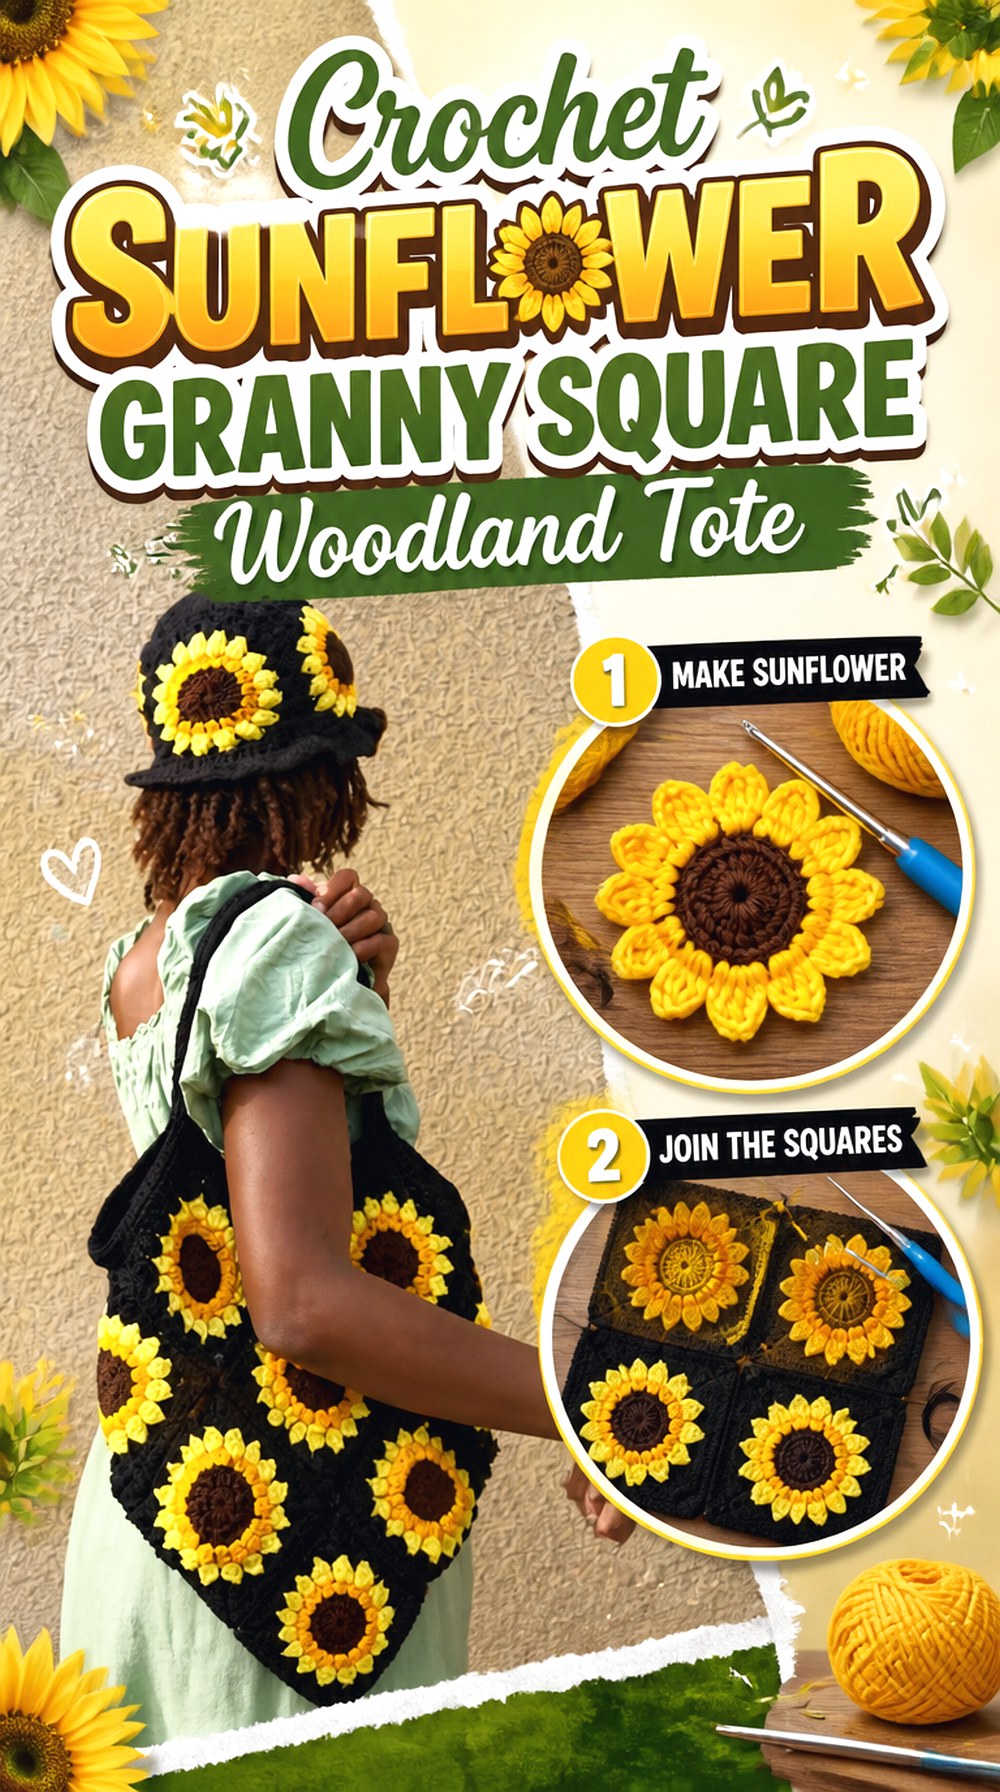
This tote uses sunflower granny squares to create a recognizable botanical surface while keeping a practical tote silhouette. The creator’s tutorial includes the flower square, joining, and strap stages, so the nature theme and bag construction are shown as one project instead of requiring unrelated tutorials to be combined.
Sunflowers are brighter than many traditional woodland motifs, but they work naturally in an earthy forest-and-meadow palette when paired with greens, browns, creams, or muted golds. This is a good direction for someone who enjoys repeated motifs but wants a clearer floral focal point than a traditional geometric granny square provides.
Plan the Flower Distribution Before Joining
Repeated sunflower centers naturally attract the eye. If some squares use dramatically different contrasts, one side of the tote can appear much heavier than the other even when the physical construction is balanced.
Lay out every completed square before joining. Photograph the arrangement, step away from it, and look for areas where several dark or bright motifs cluster together. Rearranging at this stage is much easier than undoing finished seams.
Joining Becomes Part of the Botanical Design
The line between granny squares can either disappear into the background or create a visible grid. Neither approach is automatically better; the right choice depends on whether you want the bag to read as one field of flowers or as individual framed motifs.
Use the creator’s joining section for the original finish. If you change yarn colors, consider how strongly the join will contrast with the outer round of each sunflower square before committing to all seams.
Watch for Stretch Where the Strap Meets Motifs
A strap attached near motif seams can place repeated pull on an area already containing joins. Before regular use, inspect the upper squares and strap connection together rather than treating them as unrelated finishing details.
If the fabric begins to distort during a fitting check, address that before loading the bag more heavily. Lining or reinforcement may be worth considering when compatible with the construction, but follow the tutorial for the original method first.
Original Tutorial and Creator Credit
Creator: Mainmade Crochet
6. Crochet Fox Woodland Character Bag
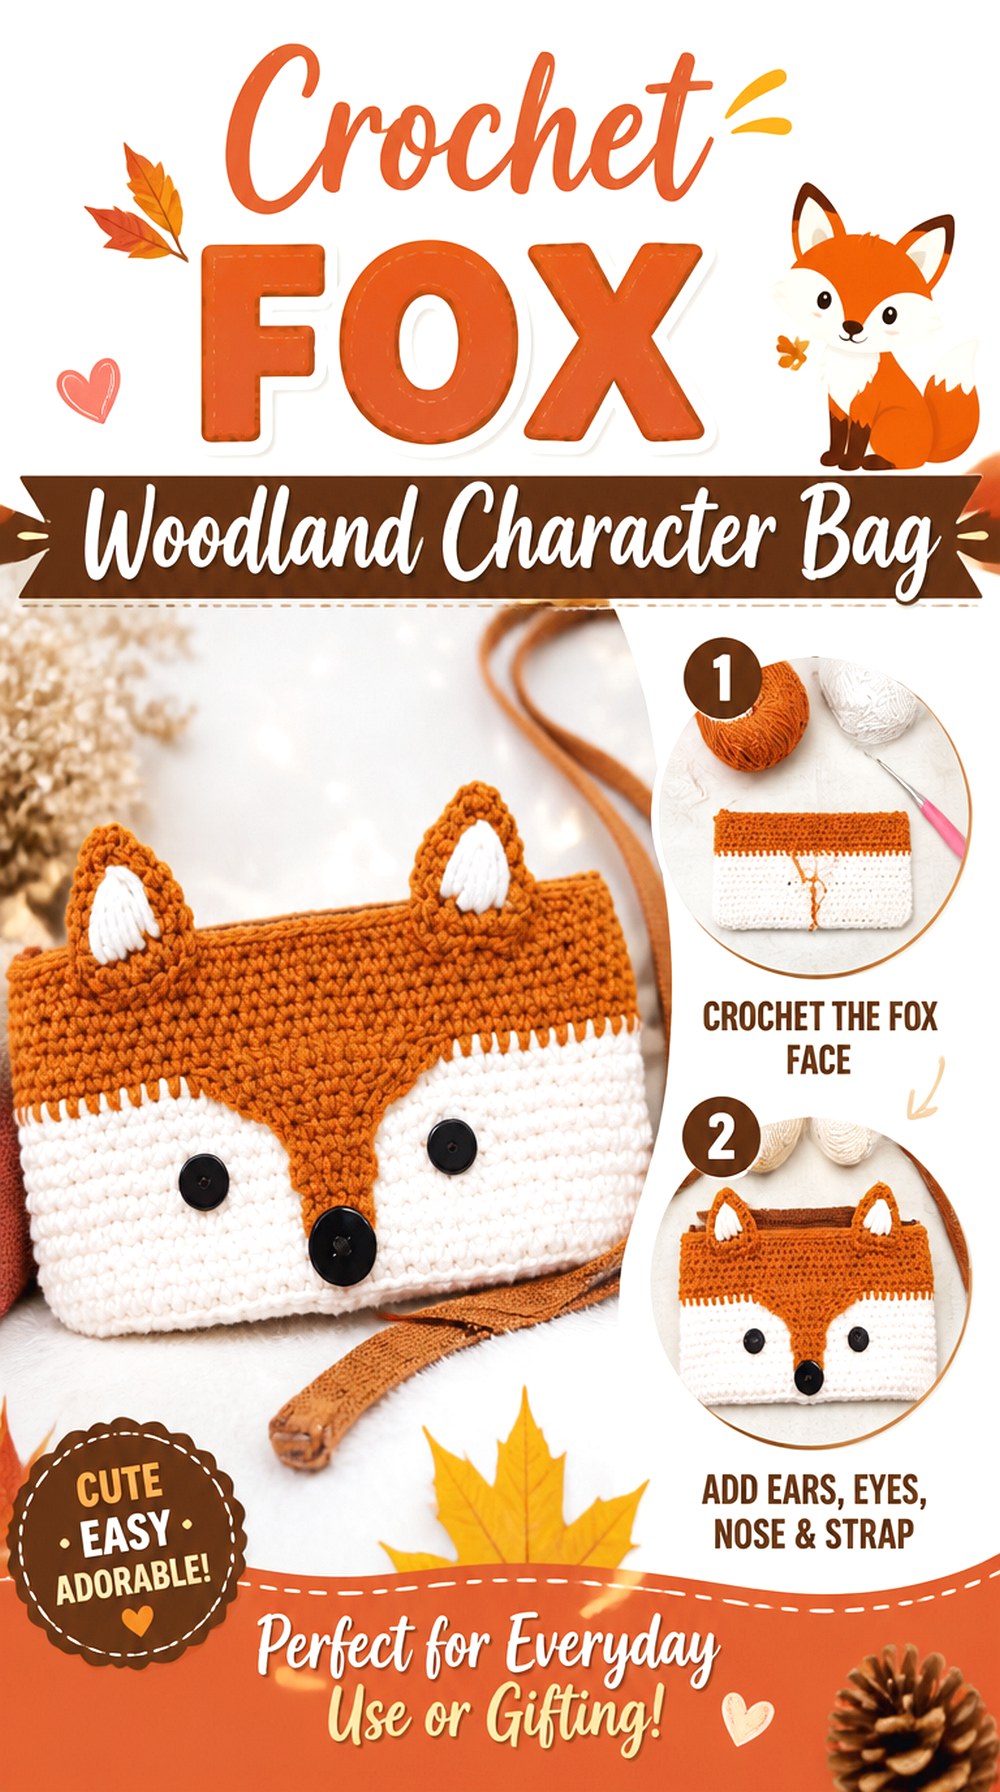
A fox bag gives the collection its strongest classic woodland-animal look. Rather than depending on botanical repetition, the recognizable character becomes the focal point, so proportion, symmetry, ears, and facial placement affect the finished result. This makes it feel more like a themed accessory than a neutral shopping tote.
The original source demonstrates a crochet fox bag as a complete character project. Before choosing it, compare the finished scale in the video with what you actually intend to carry. Character bags can look substantial in close-up footage while functioning more like a purse or small carry bag than a roomy market tote.
Facial Symmetry Matters More Than Extra Decoration
Fox features are immediately recognizable when the eyes, muzzle area, ears, and color divisions feel balanced. Small placement differences can change the expression more than adding another decorative element would.
Before permanently securing separate facial pieces, pin or temporarily position them and view the bag upright. Check it from several feet away as well as close up. The goal is not mathematical perfection, but an intentional face that does not appear pulled to one side.
Ears Change the Bag’s Outer Silhouette
Protruding ears give the fox its character, but they also make the upper outline less compact than a standard rectangular tote. Think about storage and everyday handling if the bag will regularly be placed inside another bag, locker, or crowded shelf.
Finish ear attachments securely and check that they do not interfere with the opening. If the handles pass close to them, make sure repeated movement does not continually fold or tug on the decorative pieces.
Treat the Finished Size as a Choosing Point
A woodland character bag should be selected for what it actually holds, not simply because the fox design is appealing. Watch the completed-project views carefully and confirm any dimensions the creator supplies before planning its use.
If you need space for books, a large project, or shopping, one of the rectangular totes in this list may be more appropriate. The fox design makes more sense when character and compact carry are priorities.
Original Tutorial and Creator Credit
Creator: Mamie Crochet
7. Crochet Bunny Woodland Tote
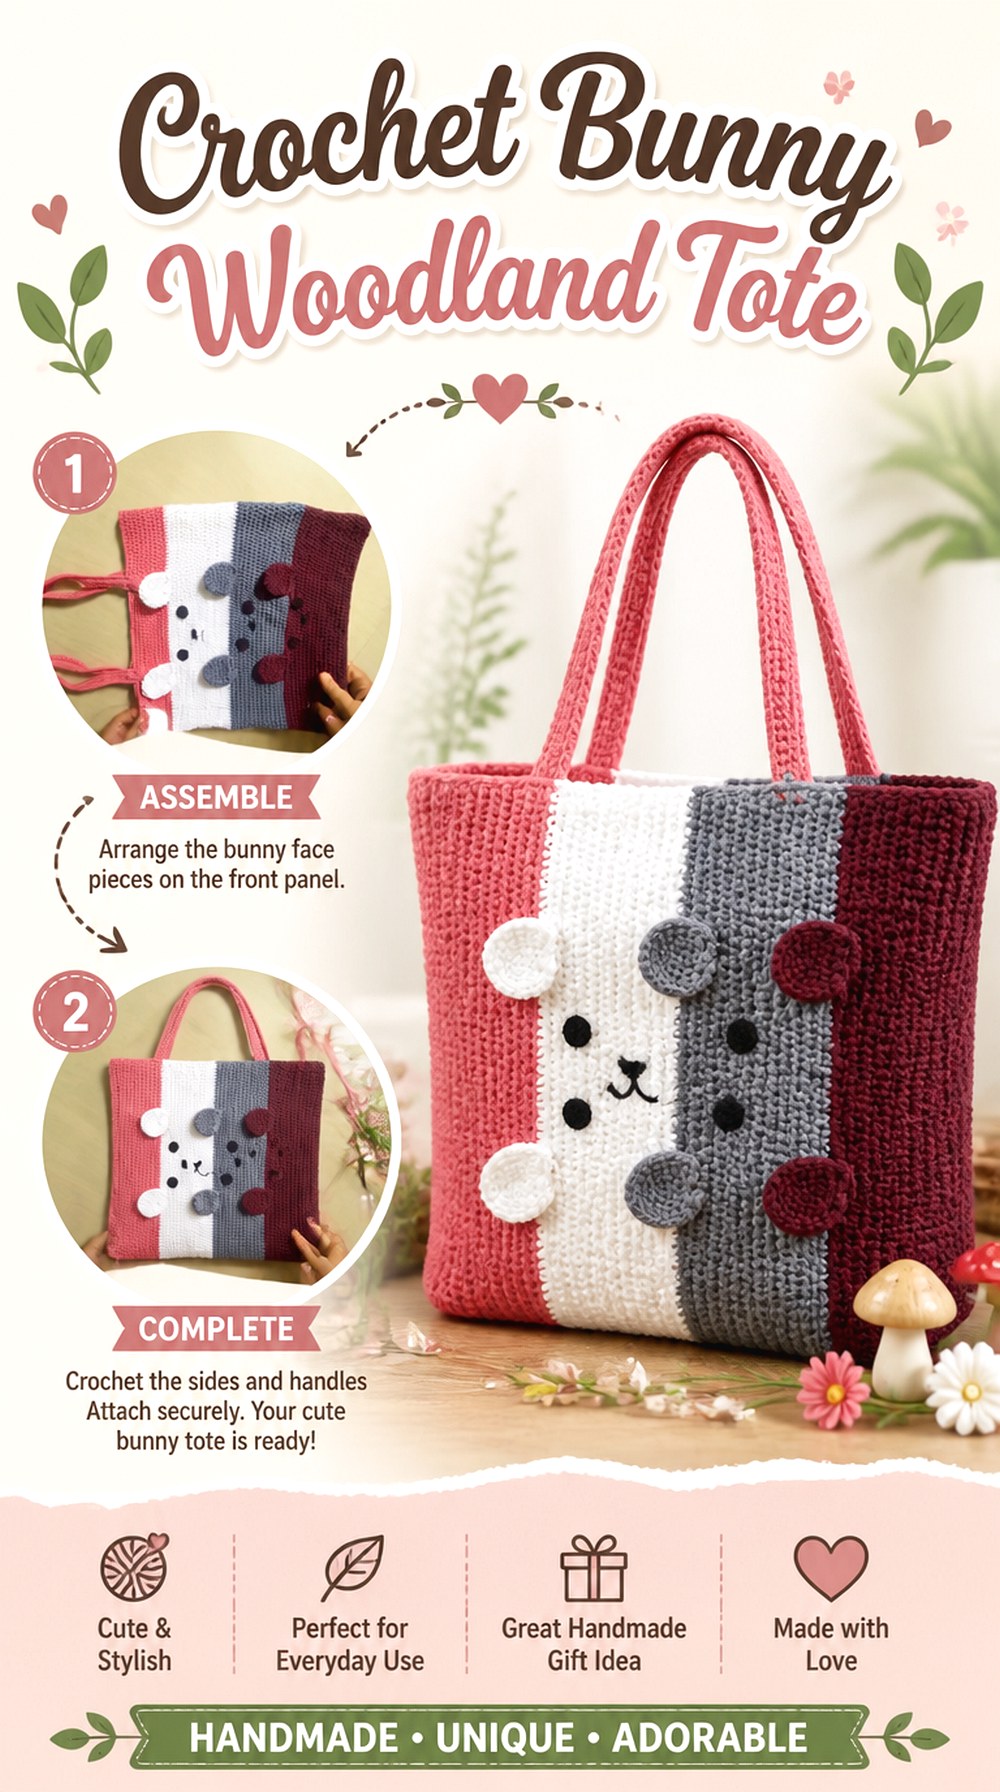
This bunny tote combines a conventional bag body with a recognizable rabbit feature set, including the prominent ears that give the project its woodland identity. The tutorial separates the main bag, strap, bunny components, and facial finishing into visible sections, which makes it useful for understanding how character decoration relates to the functional tote beneath it.
It offers a softer storybook look than the fox option and can work well as a themed gift or playful everyday accessory. Because the face and ears are added details, finishing deserves as much attention as the crochet fabric itself.
Tall Bunny Ears Affect Balance at the Top
Long ears shift visual weight above the bag opening. If they lean unevenly or sit too close to one handle, the tote can appear off-center even when the body is correctly shaped.
Position both ears before fastening either one permanently. Check the bag hanging naturally rather than only lying on a table; gravity can change their angle and reveal asymmetry that was not obvious during assembly.
Keep Facial Details Secure for the Intended User
Eyes, noses, buttons, beads, or other small embellishments require extra judgment when a bag may be given to a young child or used around pets. Do not assume a decorative attachment is suitable for unsupervised use simply because it appears in a crochet project.
Where relevant, consider secure yarn embroidery or another appropriate alternative, and inspect sewn pieces periodically. Follow the creator’s method for the original design while adapting safety decisions to the actual recipient.
Check the Strap Before Final Character Placement
The tutorial treats the strap and bunny components as separate parts of the project, which gives you a useful planning checkpoint. Before permanently positioning the face, confirm how the bag hangs with its strap attached.
A motif that looks centered on a flat panel can shift visually when the bag is carried. Finishing the main structure first helps you judge the bunny face in the orientation people will actually see.
Original Tutorial and Creator Credit
Creator: Crocheting is passion
8. Crochet Owl Woodland Character Bag
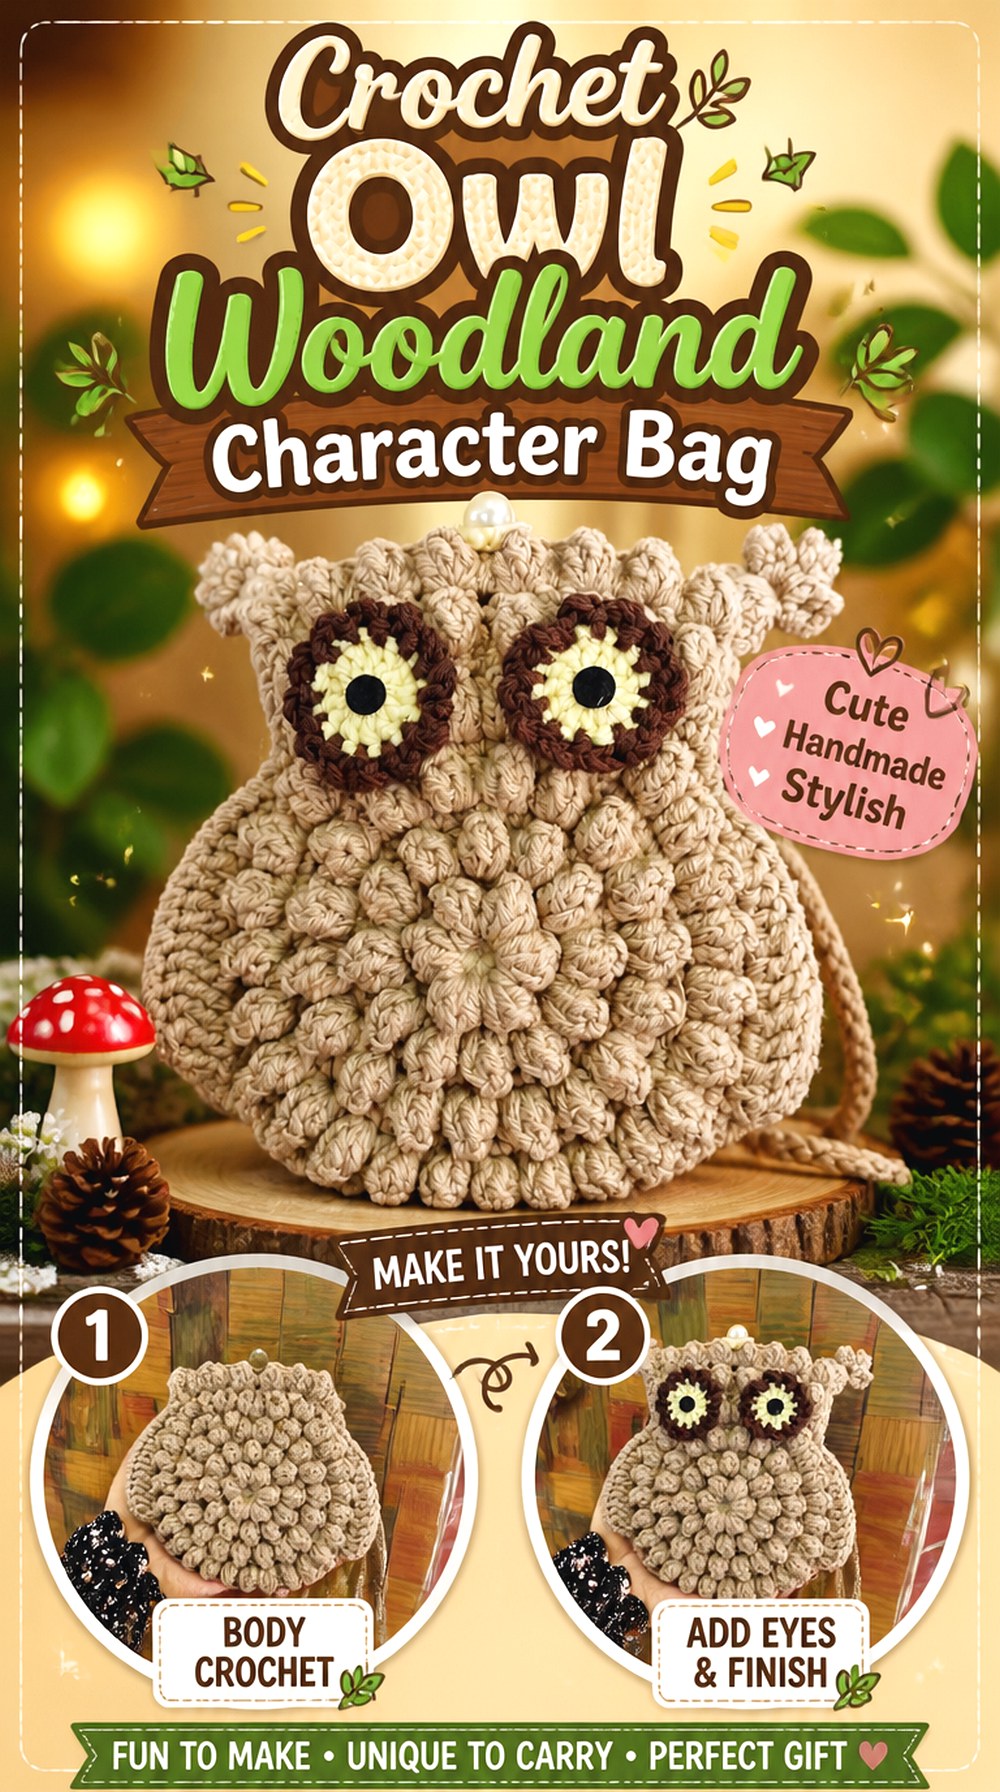
An owl bag introduces a rounder, more graphic woodland animal to the list. Large eyes and a centered beak naturally dominate the front, so this design depends less on repeated surface pattern and more on the relationship between a few strong features. It offers a useful alternative to the long-eared bunny and pointed fox because the character reads through the front face rather than an elongated silhouette.
The selected source is presented as a full owl bag video tutorial. Since the available video description provides little supporting detail, use the finished views and creator’s instructions to confirm dimensions, materials, opening, and carrying style instead of assuming them.
Large Eyes Set the Entire Expression
Owl eyes usually become the first feature viewers notice. Uneven spacing, different heights, or one eye sitting closer to an edge can make the whole bag look tilted even when the body itself is symmetrical.
Arrange both eye pieces and the beak together before securing them. The beak can serve as a useful central reference point. View the face while the bag is upright so you can judge its expression in the same position it will normally be carried.
Check Whether Decoration Crowds the Opening
A strong owl face can occupy much of the front panel. That is visually effective, but decorative components near the upper edge should not make the bag awkward to open or place unnecessary bulk under a handle attachment.
During finishing, open the bag fully and move the straps through their normal range. If any piece continually folds, rubs, or catches, correct the positioning before the final attachment is reinforced.
Choose This for Character Before Maximum Capacity
The owl option makes sense when the woodland animal itself is the reason for the project. If carrying capacity, flat storage, or a very wide opening comes first, one of the rectangular botanical totes may give you a more straightforward solution.
Use the creator’s finished-object views to judge scale. Do not infer that an owl “bag” is equivalent to a full-size market tote unless the tutorial clearly supports that use.
Original Tutorial and Creator Credit
Creator: Crochet Domain
9. Crochet Strawberry Foraging Tote
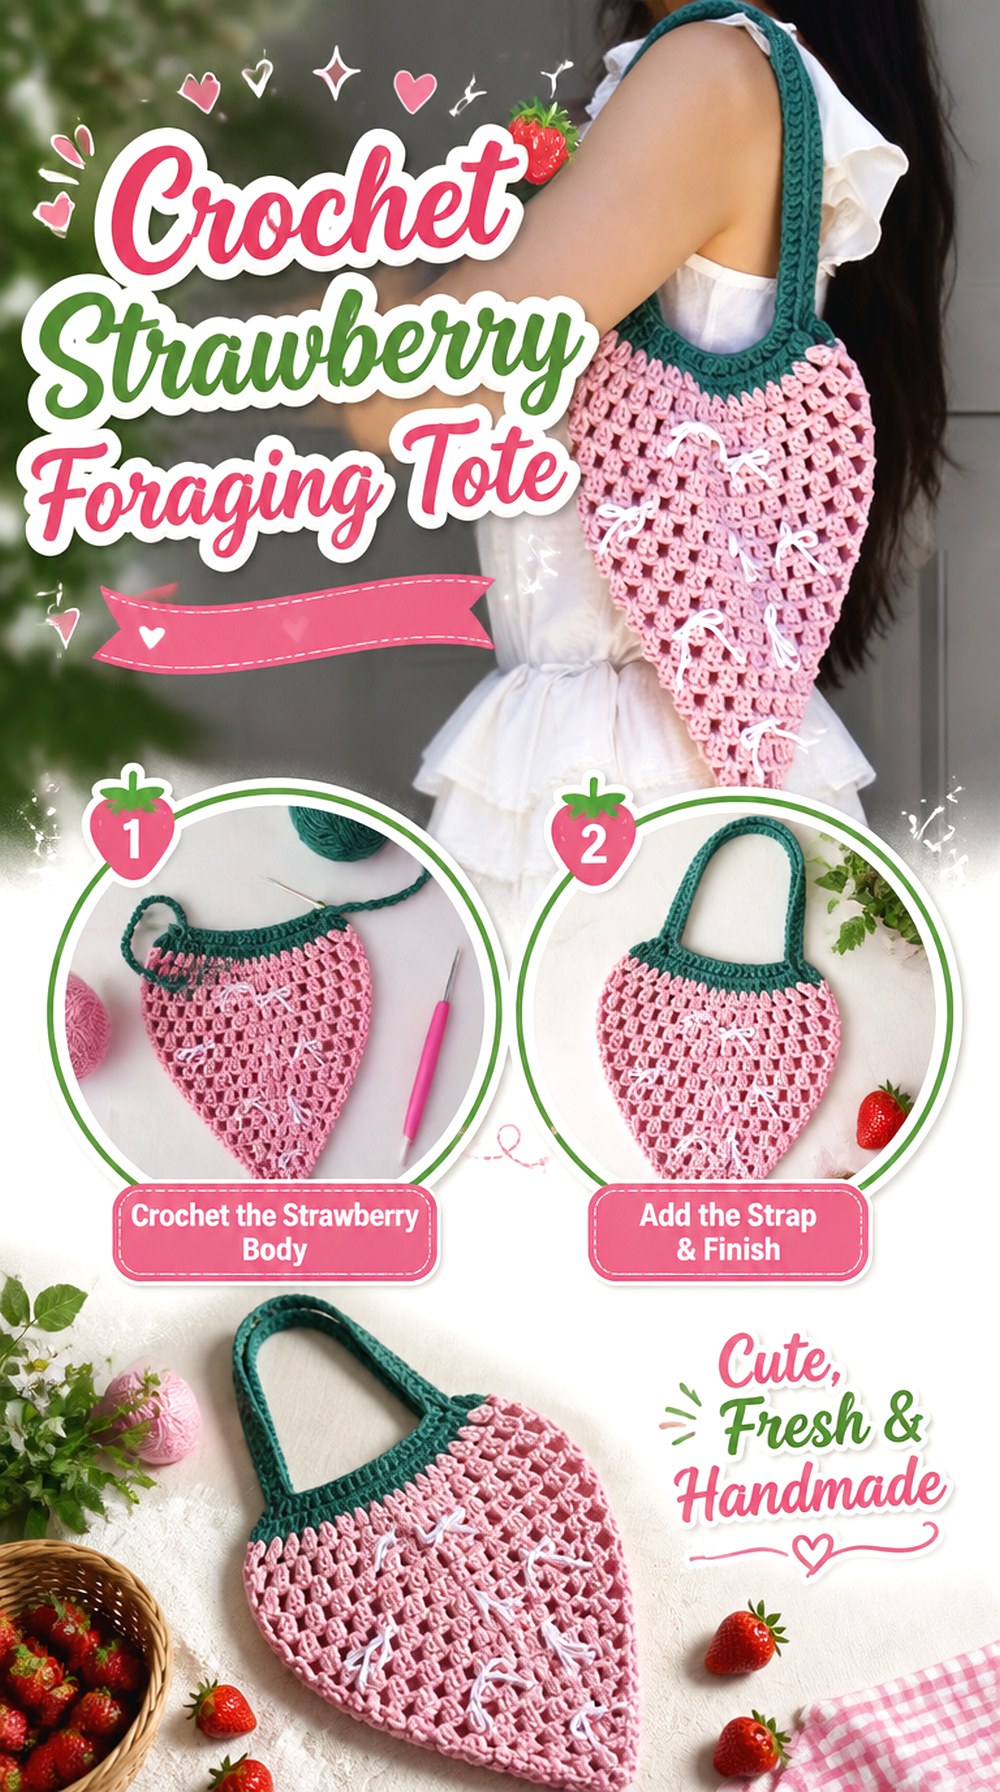
A strawberry tote brings a berry-foraging angle to the woodland theme. Instead of building the bag from square motifs, this project uses a continuous tote body with strawberry decoration, producing a cleaner overall silhouette than the sunflower or mushroom patchwork versions. The source tutorial also identifies cotton yarn for its original project, but substitutions should still be judged by the fabric you want rather than copied automatically.
This design suits readers who want the theme to feel playful and botanical without making the whole bag resemble an animal. The berries can create a repeated surface rhythm while the main tote remains practical and easy to recognize.
Berry Spacing Controls Whether the Surface Feels Busy
Small repeated strawberries can look intentional and balanced when their spacing is consistent. Too many concentrated in one area may make the tote visually heavy, while very sparse placement can make the decoration look accidental.
Before attaching all separate motifs, arrange them on the finished body. Fold the bag naturally around its sides so you can see whether berries disappear into seams or cluster unexpectedly near the edges.
A Continuous Body Behaves Differently From Granny Squares
Because this tote is not primarily a patchwork of joined floral squares, you avoid the challenge of matching numerous motif dimensions. Instead, the main checkpoints become body tension, upper-edge shape, and the way the surface decoration sits on that fabric.
That makes it a useful alternative for someone who likes repeated woodland details but does not want every decorative element to serve as a structural panel.
Consider How the Strawberries Will Wear
Raised appliques or dimensional berry details can receive more abrasion than a completely flat stitch pattern. If the tote will regularly rub against clothing or other bags, inspect the attachment points and weave ends securely.
A lining can also help keep the interior cleaner when numerous decorations have been sewn through the outer fabric, although you should decide whether that addition fits the original construction and your sewing comfort.
Original Tutorial and Creator Credit
Creator: JasmineTea
10. Crochet Daisy Motif Woodland Tote
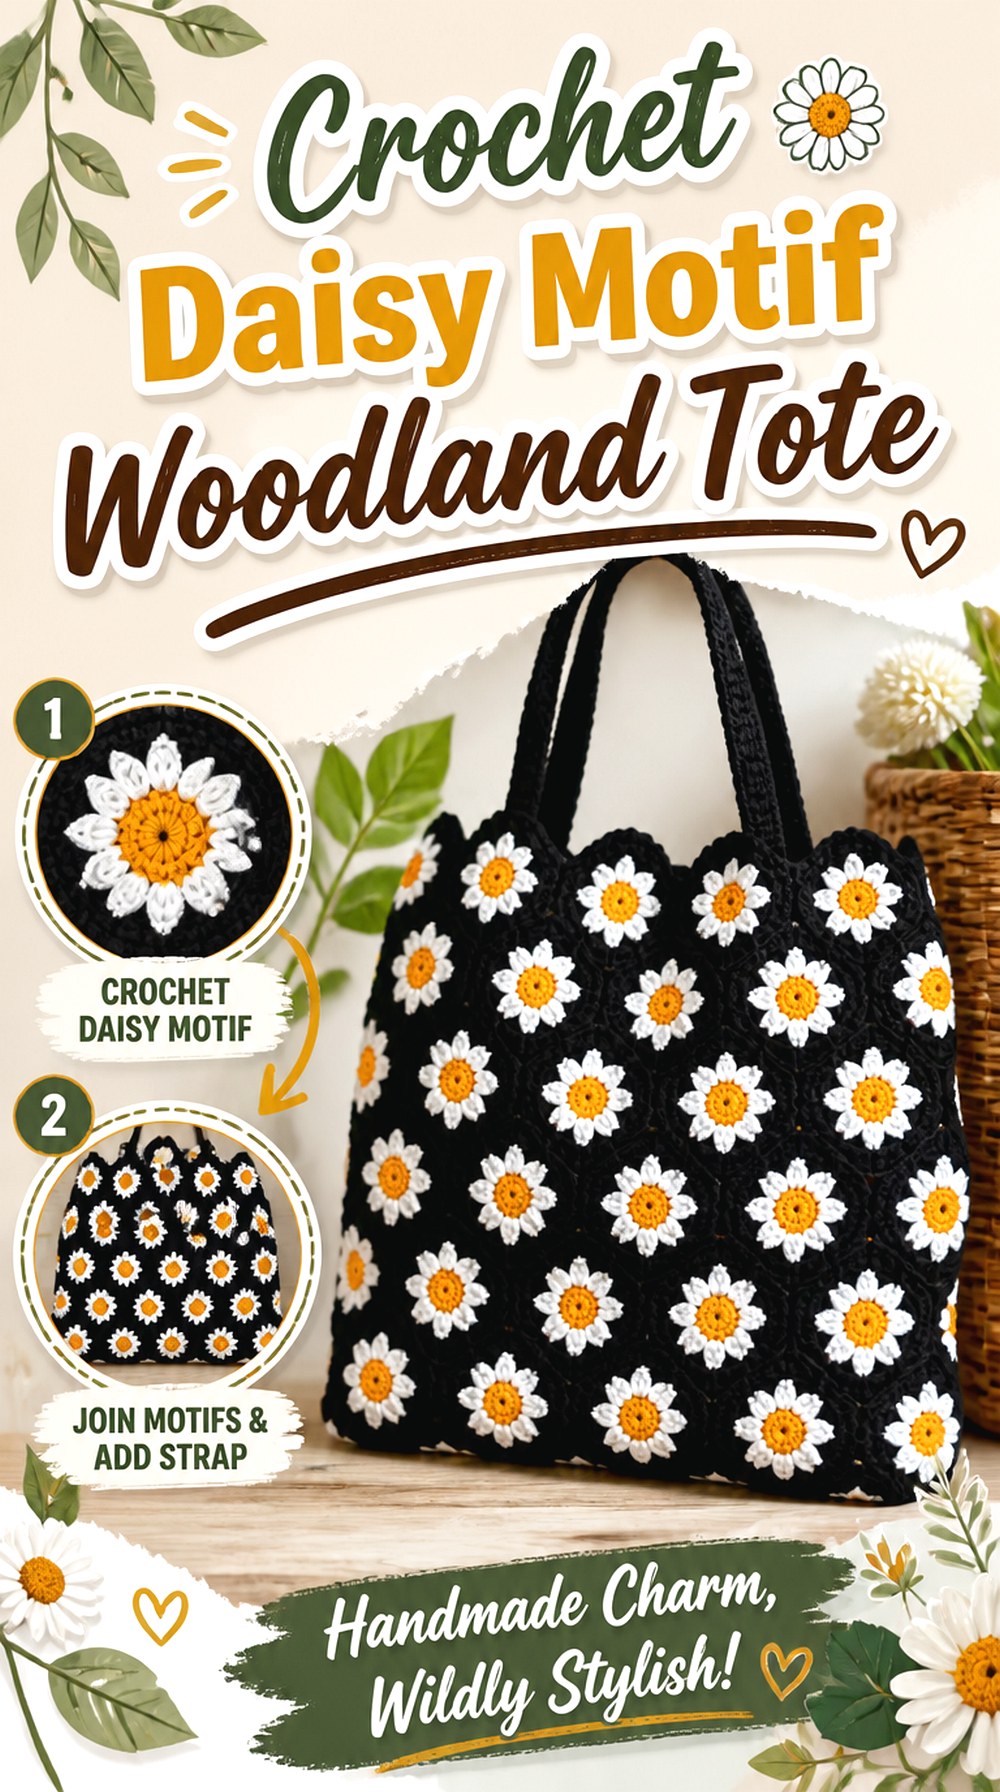
This floral tote offers another way to create a nature-focused bag with repeated flowers, but its visual emphasis differs from the sunflower option. The tutorial is specifically presented as a daisy tote bag and provides a right-handed version, making it useful for readers who want to follow a floral construction from one dedicated source.
Because flower motifs can be described differently across creators—the source also uses sunflower-related tags—preview the completed bag before selecting colors or assuming exactly how the petals will read. What matters here is the finished floral motif construction and how that repeated design forms the tote.
Preview the Flower Shape Before Choosing a Palette
A white-and-yellow daisy treatment and a darker sunflower treatment can make the same general floral structure read very differently. Since the source language around the motif is not perfectly uniform, use the finished visual result as your reference.
Before buying yarn specifically for the project, decide whether you want a light meadow feel, a deeper woodland palette, or a higher-contrast flower. Keep enough contrast for petals and centers to remain distinct.
Repetition Makes Consistency More Noticeable
When the same floral unit appears again and again, differences in motif diameter, corner shape, or outer-round tension are easier to see. Compare the pieces as you work instead of waiting until every flower is finished.
If one motif is consistently larger, identify the reason early. Changes in tension or yarn can compound across a panel and create unnecessary difficulty during joining.
Plan Which Side Will Act as the Main Front
A floral tote can look attractive from every direction, but the joins or motif distribution may still produce one side you prefer. Arrange the completed pieces before final assembly and select the front intentionally.
This matters particularly if you later add a closure, label, lining pocket, or other feature that makes one side function differently. Choosing the front early prevents those finishing details from competing with your strongest floral arrangement.
Original Tutorial and Creator Credit
Creator: Stitches nook
11. Crochet Lined Flower Woodland Tote
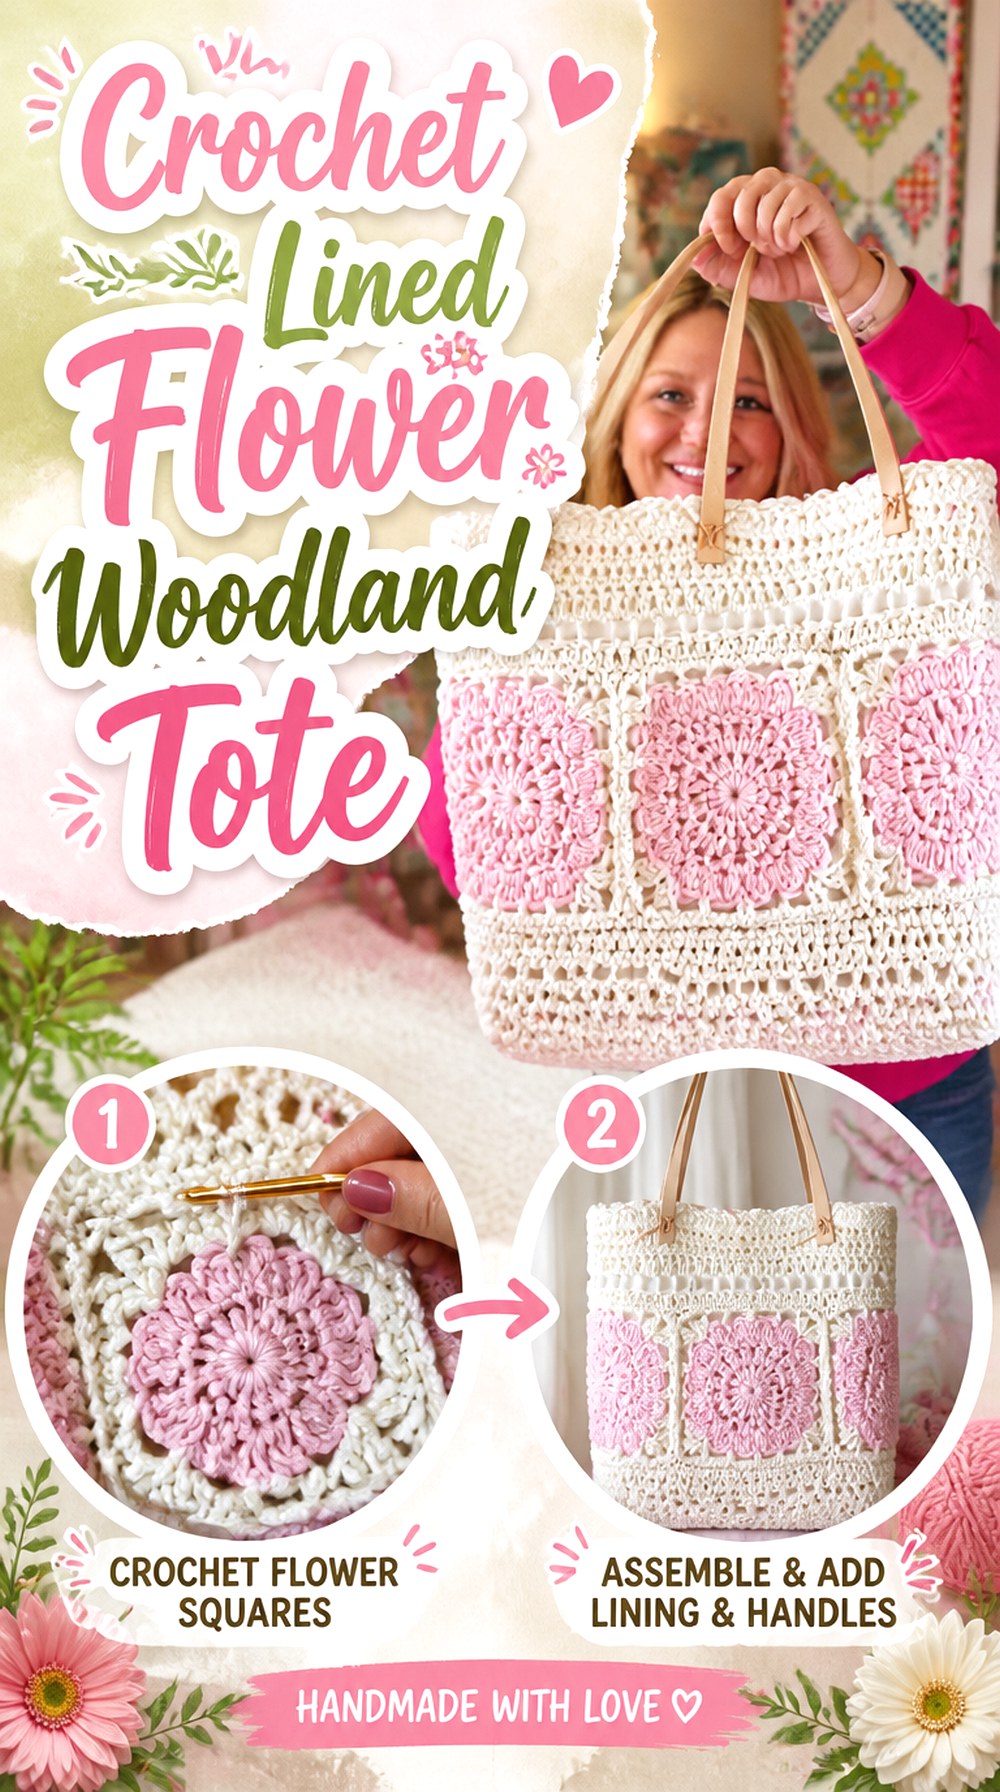
This flower tote is the most structured finishing direction in the collection. The creator’s listed supplies include lining fabric, interfacing, and a separate handle kit, so the project combines crochet with sewing and added structure rather than asking the yarn fabric to do every job. That makes it an especially useful comparison with the soft motif totes.
The finished result still fits a woodland or garden-inspired collection through its flower design, but the interior and handle treatment make the practical decisions different. Choose this route when a polished lining and more defined bag form matter enough to justify extra finishing beyond crochet alone.
Interfacing Changes What the Lining Can Do
A simple fabric lining can cover the back of crochet stitches and help contain small items. Adding interfacing goes further by introducing body to the interior fabric, which can influence how firmly the bag stands and how the sides behave.
Follow the creator’s guidance closely if you use the original system. If you substitute another interfacing, remember that a very stiff product can make a soft crochet exterior behave differently from the finished project shown.
Purchased Handles Create a Distinct Finish
Separate handles give this tote a noticeably different upper edge from bags with long crocheted straps. They can make the project look more structured and reduce the amount of crochet fabric used for the carrying portion, but they also introduce hardware or attachment points that must align carefully.
Before securing them permanently, check that both handles sit at matching positions and that the bag does not pull upward more strongly on one side.
Finish the Crochet Exterior Before Cutting the Lining
Crochet dimensions can shift with yarn choice, tension, and finishing. If you are adapting the source rather than following its exact materials, measuring the actual completed exterior before finalizing a custom lining is safer than relying on an assumed size.
Lay the bag naturally rather than stretching it flat. The lining should work with the crochet shell, not force the exterior into dimensions it does not comfortably hold.
Comparing the 11 Woodland Tote Directions
If you want a familiar everyday shape with the least visual complication, the Mushroom Applique Woodland Tote keeps one focal motif on a solid body. For motif lovers, the Mushroom Granny Square, Sunflower, and Daisy totes make repeated crochet pieces a major part of the structure.
The Leaf Tote is different because texture creates the botanical design without relying on individual sewn-on motifs. The Acorn Market Tote offers the most flexible market-bag direction, while the Lined Flower Tote moves toward a more structured interior and purchased-handle finish.
For stronger storybook character, choose the Fox, Bunny, or Owl designs. These should be selected primarily by finished scale and silhouette rather than assuming they provide the same capacity as a rectangular tote. The Strawberry Foraging Tote sits between those groups, keeping a standard bag body while adding repeated nature-inspired decoration.
Conclusion
The most useful way to choose among these 11 crochet woodland tote bag ideas is to start with construction. Pick the mushroom applique or strawberry tote when you want a familiar bag body with surface decoration. Choose the leaf or acorn designs when texture and flexible botanical styling matter more. Sunflower, daisy, and mushroom granny-square totes suit makers who enjoy repeated motifs and visible assembly, while fox, bunny, and owl bags put the woodland character itself first.
For a firmer, more finished interior, the lined flower tote offers a noticeably different route. Once you have chosen the shape and function that suit you, use the original tutorials for exact stitches, dimensions, materials, joining, and finishing details.
Frequently Asked Questions
Are all 11 crochet woodland tote bag ideas full-size totes?
No. Most selections use recognizable tote or market-bag construction, but the fox and owl sources are better treated as woodland character carry bags until you confirm their finished dimensions. Character designs often prioritize silhouette and decorative details over maximum storage. If you specifically need space for books, shopping, or a larger crochet project, compare the completed size and opening with one of the rectangular or market-style tote tutorials before choosing.
What yarn qualities are useful for a crochet woodland tote?
The right choice depends on the construction. A less stretchy, well-defined yarn can help a tote retain cleaner structure and show leaf or motif details clearly, while a softer yarn can create a more relaxed bag. Cotton is common in bag projects, but it is not the only option. Follow the creator’s material guidance for the original version and make a fabric sample before substituting significantly different yarn weight, fiber, or texture.
How can I reduce stretching in a crochet tote strap?
Strap stretch depends on yarn, stitch construction, strap length, attachment, and what the bag carries. A denser strap, reinforcement, lining, or separate purchased handles may help in appropriate designs, but no single solution suits every tote. Inspect the attachment points as carefully as the strap itself. If a tutorial includes a specific reinforcement method, use the creator’s instructions rather than assuming an unrelated method will fit the construction.
Should woodland granny squares be blocked before joining a tote?
Blocking can be useful when repeated squares need to match in size and shape, particularly with mushrooms, sunflowers, daisies, or other directional motifs. Compare the squares before assembly and follow care instructions suitable for the actual fiber. Blocking cannot always correct a large tension difference, so a motif that remains substantially larger or smaller after finishing may need to be adjusted before it becomes part of the bag.
Can I add lining to a woodland tote when the original tutorial does not include one?
Often you can, but lining is an additional construction decision rather than a universal requirement. First finish or accurately measure the crochet shell so the fabric lining fits the real bag instead of an assumed dimension. Consider the opening, side depth, strap attachment, and whether you want pockets or interfacing. If you have not lined a crochet bag before, the Erica Arndt project in this list is useful because lining is already part of that tote’s planned finish.
Can I replace one granny-square flower with a mushroom or woodland animal square?
Only when the motifs are structurally compatible. Compare their blocked width, height, corner positions, outer-round stitch distribution, and fabric density before planning the complete tote. Two squares that look similar in a photograph can still join poorly if their dimensions or edge structures differ. Make one test motif first and place it beside the square used by the bag tutorial before producing an entire set.
Can I sell woodland bags made from these YouTube tutorials?
Do not assume that a public tutorial automatically includes commercial permission. Pattern and finished-item terms vary by creator, and some creators place restrictions or licensing conditions in their video descriptions, websites, or downloadable patterns. Check the current terms attached to the specific tutorial before selling finished bags. Creator credit does not replace permission, and it does not allow you to reproduce or resell the creator’s written pattern, charts, images, or instructional material.