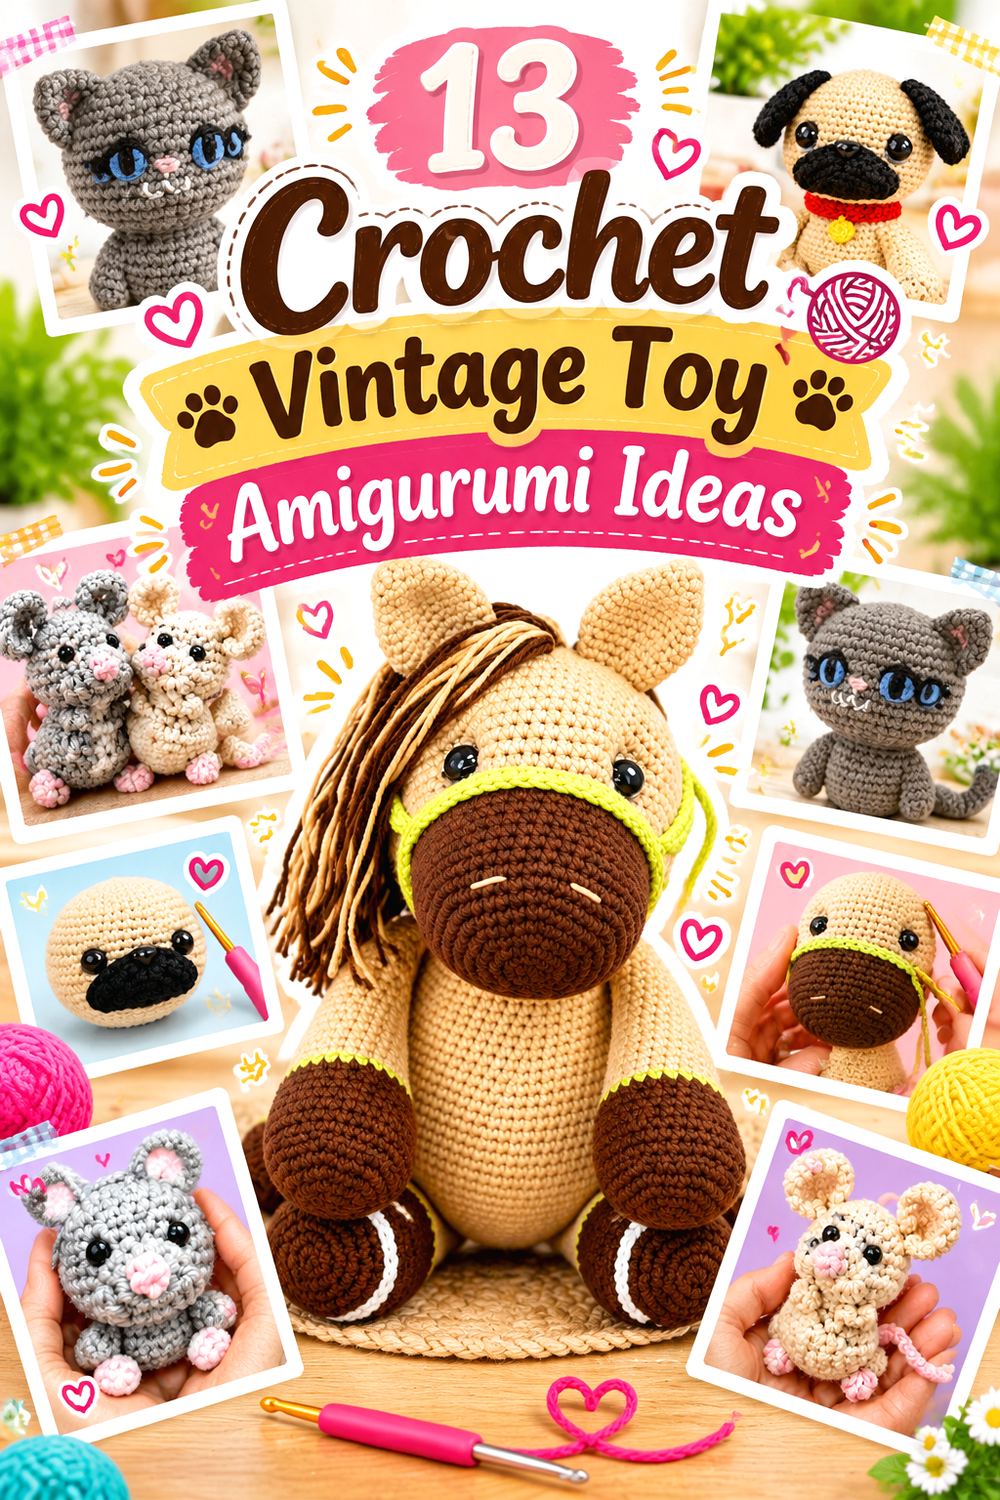
13 Crochet Vintage Toy Amigurumi Ideas
Vintage-style crochet toys can take several forms. Some echo familiar childhood shapes such as sock monkeys, teddy bears, dolls, and floppy-eared animals, while others get their nostalgic character from circus details, simple nursery silhouettes, restrained colors, or deliberately old-fashioned finishing. That variety matters because a toy can feel traditional without copying an actual historical pattern.
The 13 ideas below cover rounded amigurumi, flat-panel construction, dressed dolls, small pocket animals, and more detailed keepsake pieces. Each project is paired with an original tutorial source, while the surrounding guidance focuses on decisions the maker still needs to make: how firmly to stuff the piece, which details carry the vintage look, where assembly accuracy matters, and when detachable components deserve extra consideration.
Quick List
- Crochet Heirloom Sock Monkey Amigurumi
- Crochet Bow-Tie Teddy Bear Amigurumi
- Crochet Storybook Girl Doll Amigurumi
- Crochet Flat-Panel Lion Toy Amigurumi
- Crochet Flower-Crown Lamb Amigurumi
- Crochet Curved-Trunk Elephant Amigurumi
- Crochet Overall Bunny Amigurumi
- Crochet Cottage Duck Amigurumi
- Crochet Pocket Mouse Amigurumi
- Crochet Nursery Horse Amigurumi
- Crochet Circus Clown Amigurumi
- Crochet Curly-Tail Pug Amigurumi
- Crochet Kawaii Cat Amigurumi
What Makes a Crochet Toy Look Vintage?
A vintage impression usually comes from several choices working together rather than from one particular stitch. Familiar toy silhouettes are especially effective: a long-limbed monkey, round teddy, simple doll, floppy animal, or circus figure can immediately suggest an older toy-box aesthetic. Muted reds, warm creams, tobacco browns, faded pinks, gray-blues, and mustard tones can reinforce that direction without making the toy look artificially aged.
Finishing deserves equal attention. A restrained embroidered face often reads differently from oversized modern features, while bows, collars, simple overalls, mane treatments, and contrasting muzzles can create recognizable period-inspired character. Avoid assuming that “vintage” requires worn fibers or distressed materials. A clean, well-finished toy can still feel nostalgic through proportion, palette, and styling alone.
Yarn, Stuffing, and Shape Matter More Than Color Alone
Changing yarn affects more than size. A firm, smooth yarn can make sculpted details and facial shaping appear crisp, while fuzzy yarn can soften transitions and partially hide stitch definition. Heavier yarn may enlarge the project and increase the amount of stuffing required, so changing yarn weight is not always a simple visual substitution.
Stuffing also influences the finished personality. Very firm stuffing can emphasize a rounded, structured toy, but excessive pressure may stretch the crochet fabric enough for filling to become visible. Light stuffing creates softer limbs but may make a tall figure sag or twist. When adapting a tutorial, work from the designer’s construction first, then make small styling changes. Major changes to yarn thickness, hook choice, or limb proportions can alter assembly points and balance.
Decide Whether the Toy Is for Display or Play
A display keepsake and a frequently handled toy do not have identical finishing priorities. Buttons, beads, safety eyes, bells, long ties, and other attached details should be evaluated for the intended recipient rather than added automatically for appearance. Several of the featured tutorials use safety eyes or other components; that does not make every finished version suitable for every age or use.
For a toy intended for a young child or anyone likely to pull at or mouth components, embroidered facial features can remove some detachable elements. Secure yarn tails thoroughly and check seams before the piece is used. Also remember that care depends on the yarn, stuffing, and embellishments chosen. Follow the yarn label and the original designer’s guidance rather than assuming every amigurumi toy can be washed the same way.
1. Crochet Heirloom Sock Monkey Amigurumi
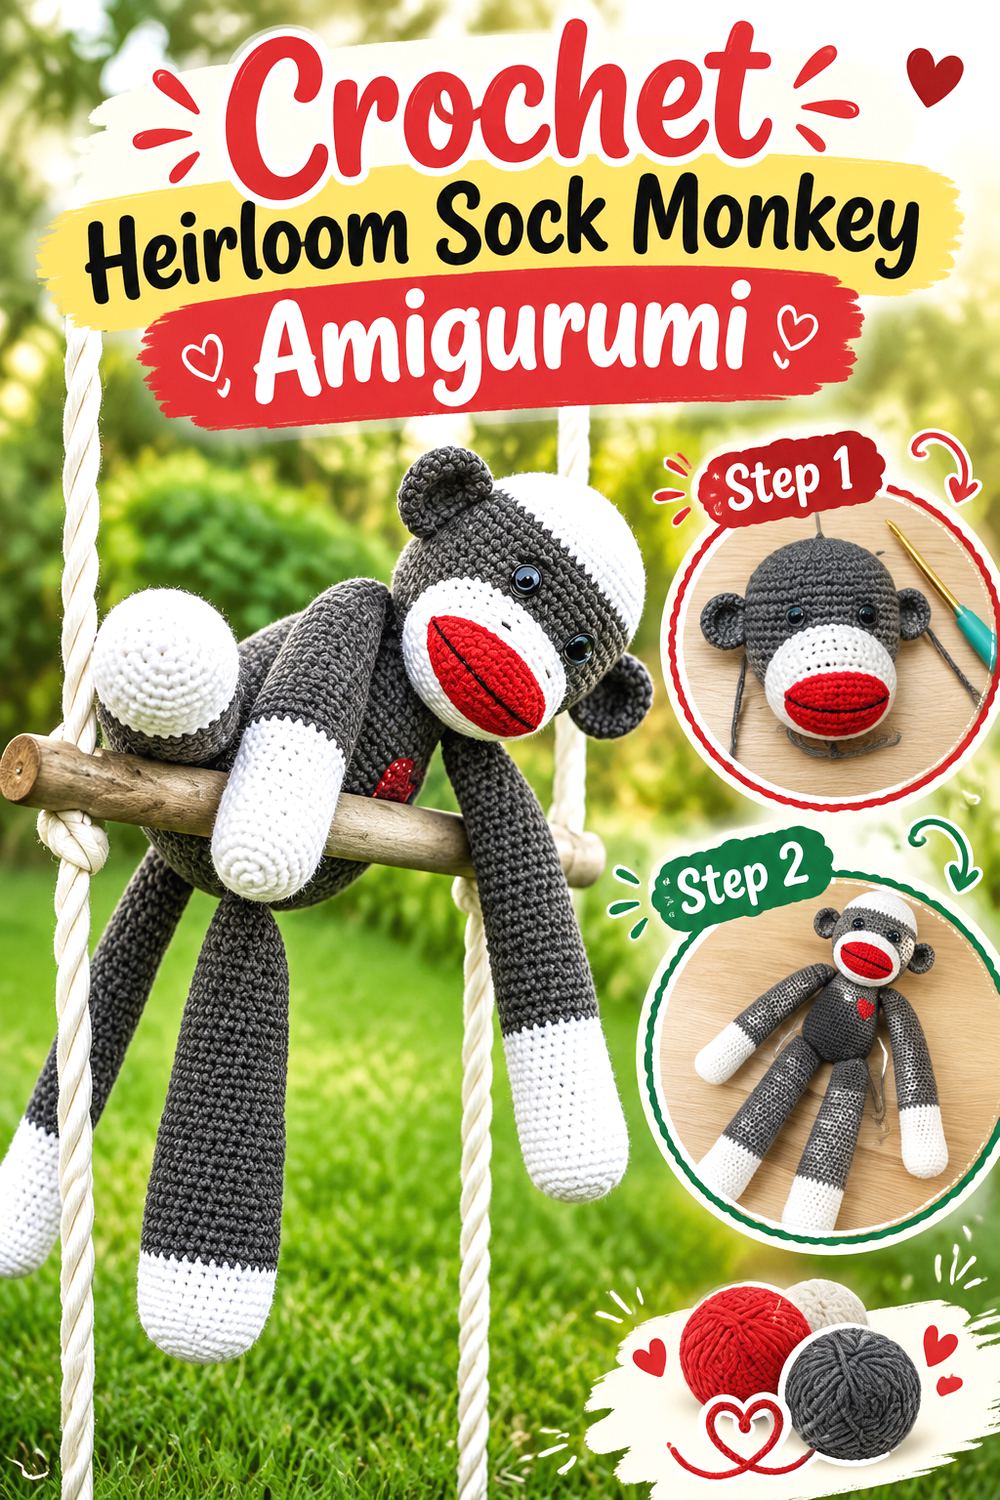
Few toy forms create an old-fashioned playroom feeling as quickly as a sock monkey. This crochet version keeps the elongated limbs, contrasting muzzle, rounded ears, and recognizable traditional color blocking while translating the familiar fabric toy into amigurumi. The original lilleliis design specifically references the long tradition of handmade sock monkeys and uses the classic gray, white, and red look as its visual starting point.
This is a strong choice when the goal is unmistakable nostalgia rather than a generic stuffed animal. It also offers plenty of room for restrained customization: changing the accent color, facial embroidery, or stripe placement can shift the mood without losing the underlying sock-monkey silhouette.
Preserve the Long-Limbed Proportions
The charm depends heavily on proportion. If you shorten the limbs dramatically or enlarge the head too much, the project can drift toward a conventional modern monkey rather than a sock-monkey-inspired toy. When substituting yarn, compare all components together before final assembly so the arms, legs, tail, and head still feel visually related.
A slightly softer limb can suit this kind of toy, but avoid stuffing so lightly that the arms collapse unpredictably. Consistency between matching pieces matters more than making them rigid.
Let the Contrast Do the Styling
Traditional sock monkeys rely on contrast around the muzzle and extremities, so the color arrangement already supplies much of the decorative interest. Extra appliqués, oversized bows, or several unrelated colors can compete with that graphic structure.
For a quieter heirloom look, consider cream rather than bright white and a muted brick or cranberry accent rather than an intense primary red. Those are styling choices, not requirements of the source pattern, so keep the tutorial’s construction intact while making palette decisions separately.
Check Seams Before Frequent Handling
Long appendages create leverage at attachment points. A seam that appears secure on a shelf may receive much more stress when the toy is repeatedly carried by one arm or leg. Before treating the finished piece as a play toy, inspect attachment areas and any embroidered features from several directions.
If you modify the project with buttons or other small additions, reassess the intended recipient. Decorative authenticity is less important than choosing finishing appropriate to how the toy will actually be used.
Original Tutorial and Creator Credit
Creator/Site: lilleliis
2. Crochet Bow Tie Teddy Bear Amigurumi
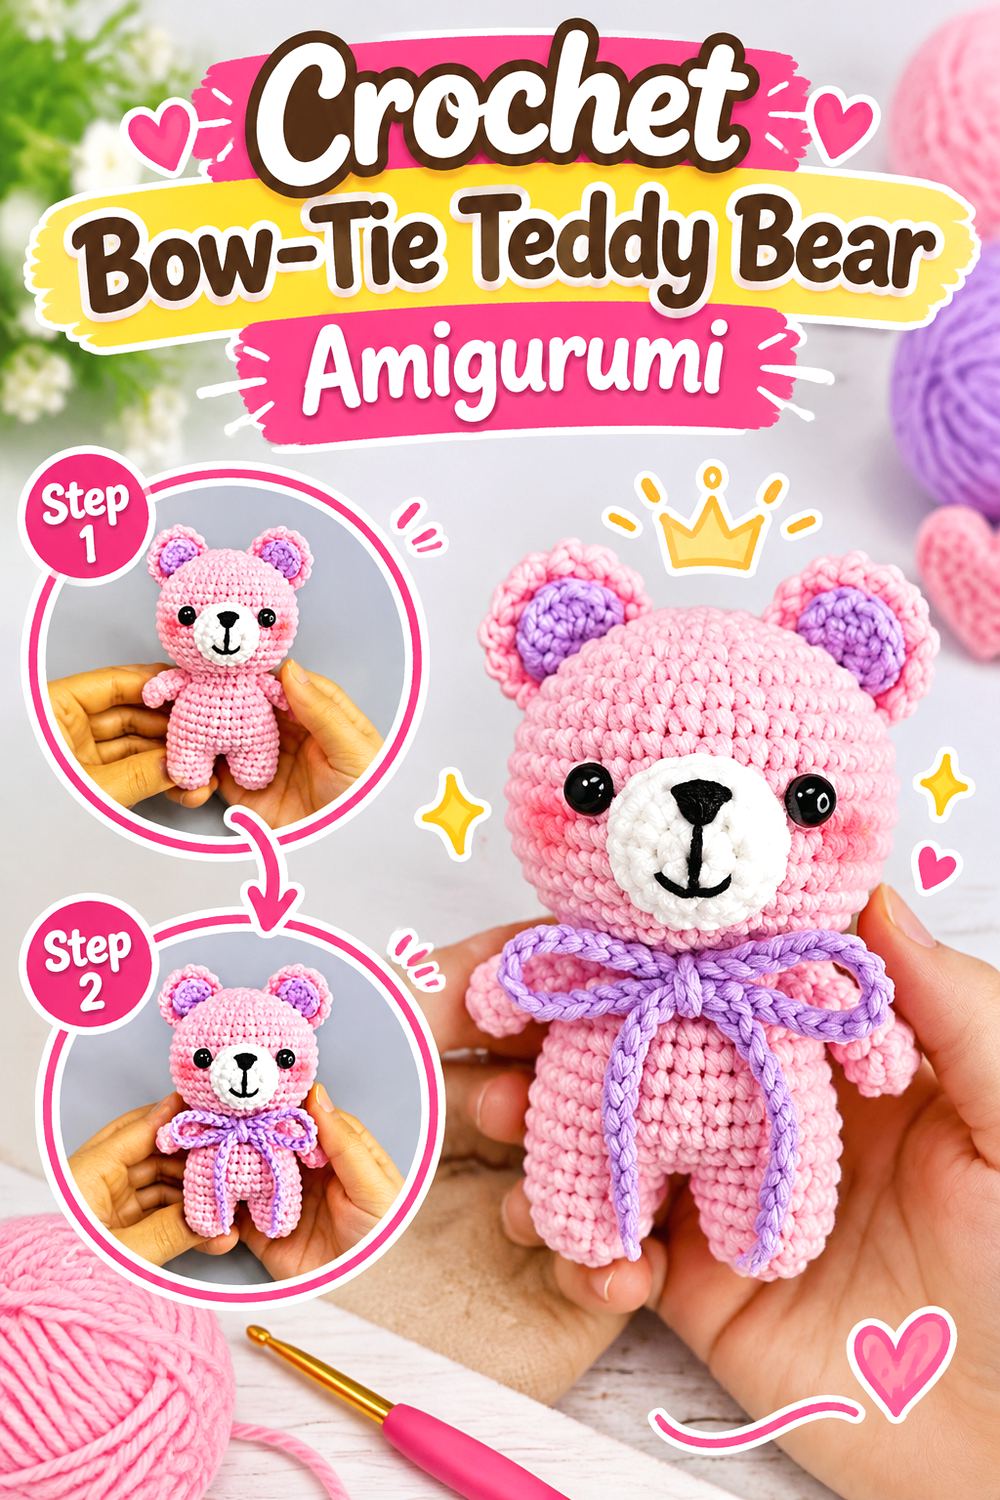
A small rounded teddy bear belongs naturally in a vintage toy collection because the silhouette does not depend on novelty details. Tata Crochet Patterns’ tutorial shows a compact bear with separate ears, limbs, muzzle shaping, and a bow, giving the finished toy a dressed-up keepsake quality without turning it into a full character doll.
This idea suits makers who want the nostalgia of a traditional teddy but prefer neat amigurumi shaping over a shaggy or jointed bear. A brown, biscuit, cream, or faded honey palette can strengthen the classic impression, while the bow provides one controlled point for contrast.
Build the Expression Around the Muzzle
A teddy’s personality changes quickly with the relationship between its muzzle, nose, eyes, and ears. Before permanently securing facial components, look at the head from the front rather than judging each part individually.
If you prefer an older storybook appearance, avoid adding too many competing facial details. A relatively simple expression often lets the rounded head and muzzle carry the character more effectively than elaborate decoration.
Keep the Bow in Scale
The bow works because it acts as an accent rather than the main body of the toy. If substituting a much thicker yarn, check whether the bow becomes visually heavy in relation to the bear’s neck and head.
You can also change the accessory color without altering the bear itself. Dusty blue, burgundy, faded green, or soft rose can create a period-inspired feeling while keeping the main body neutral.
Original Tutorial and Creator Credit
Creator: Tata Crochet Patterns
3. Crochet Storybook Girl Doll Amigurumi
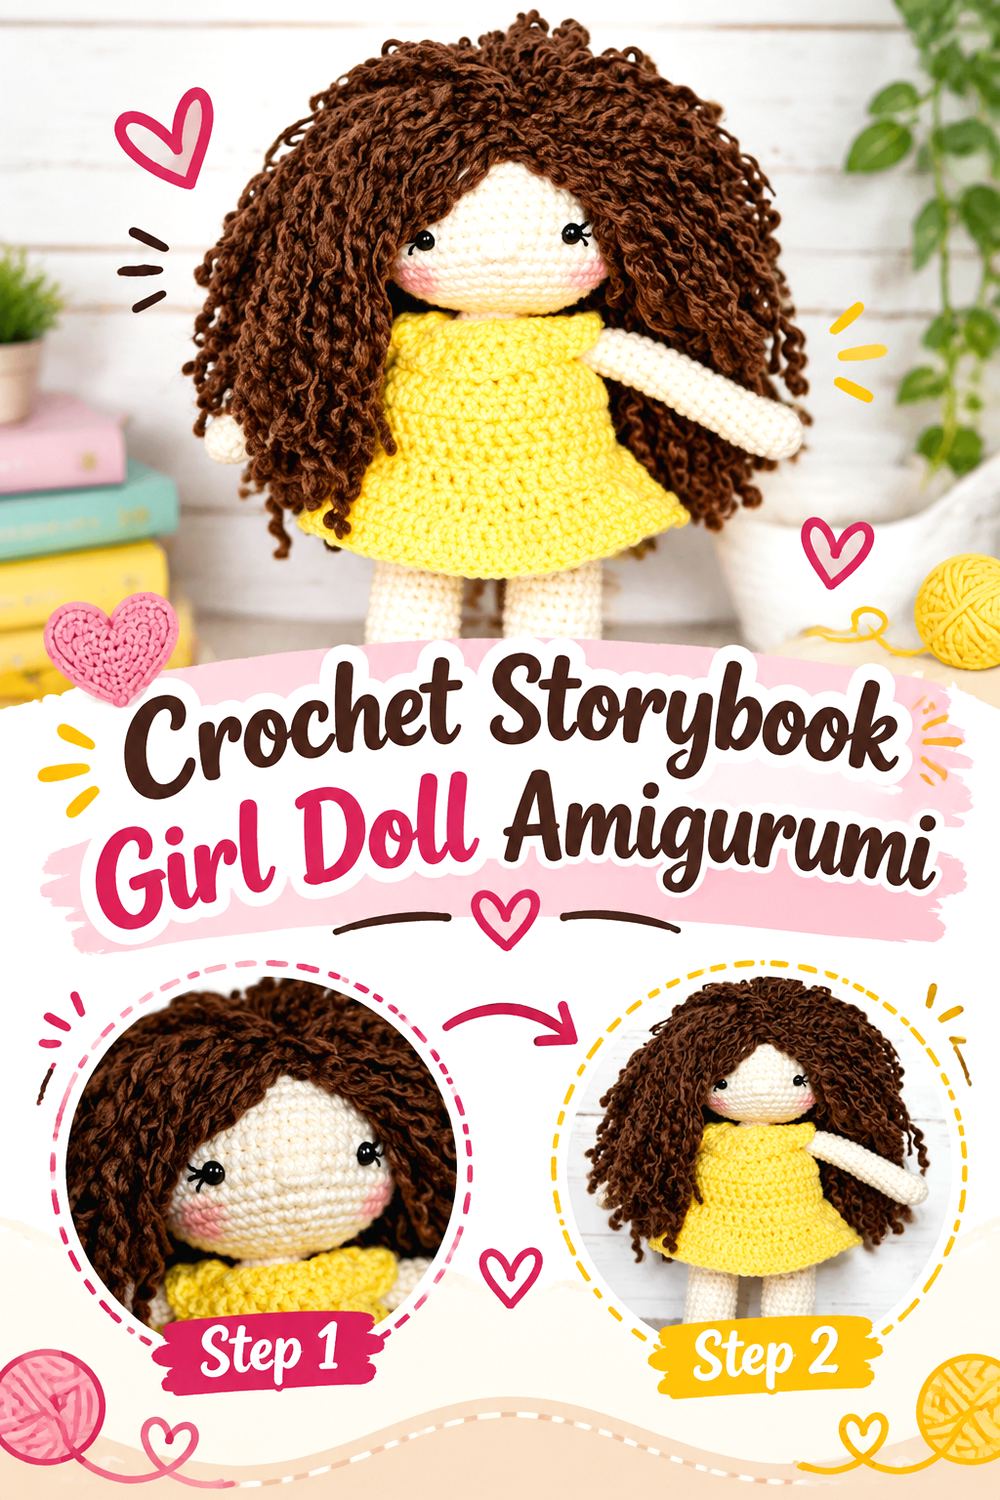
A handmade doll brings a different kind of nostalgia than an animal because clothing, hair, and facial placement become part of the design. The Friendly Red Fox’s free doll pattern creates a compact doll with long legs, yarn hair, and a separate dress, leaving plenty of visible character without requiring a highly realistic human form.
For a vintage-toy interpretation, consider the doll as a storybook figure rather than a fashion doll. Simple hair, a limited dress palette, modest embellishment, and an embroidered expression can move it toward a keepsake look. Because several decorative systems meet at the head and torso, finishing accuracy has more visual impact here than on a very simple one-piece animal.
Make Hair Density a Design Decision
More yarn hair is not automatically better. Heavy hair can pull on the head, hide facial shaping, or overwhelm a smaller body. Before attaching the full amount, test several strands or sections and look at the doll from the side as well as the front.
A bob, braids, or restrained shoulder-length hairstyle can emphasize the handmade storybook character. If you change the hairstyle from the source design, keep weight and attachment security in mind.
Coordinate the Dress With the Body
The clothing should look like it belongs to the doll rather than like an unrelated cover placed over it. Yarn substitution can affect both body dimensions and dress fit, so changing only one component’s yarn thickness may create an unexpected mismatch.
If you want a more vintage palette, tiny stripes, muted solids, or a simple contrast edging may be enough. Avoid adding so much decoration that the doll’s face and silhouette disappear beneath the outfit.
Use Facial Placement as a Checkpoint
Human-style dolls are particularly sensitive to small differences in eye and mouth placement. Pin or mark planned positions before making irreversible choices whenever the construction allows.
For a play-oriented doll intended for a recipient for whom small components are unsuitable, embroidered eyes are one possible alternative to hardware. Keep this adaptation separate from the pattern instructions and make the choice based on intended use.
Original Tutorial and Creator Credit
Creator/Site: The Friendly Red Fox
4. Crochet Flat Panel Lion Toy Amigurumi
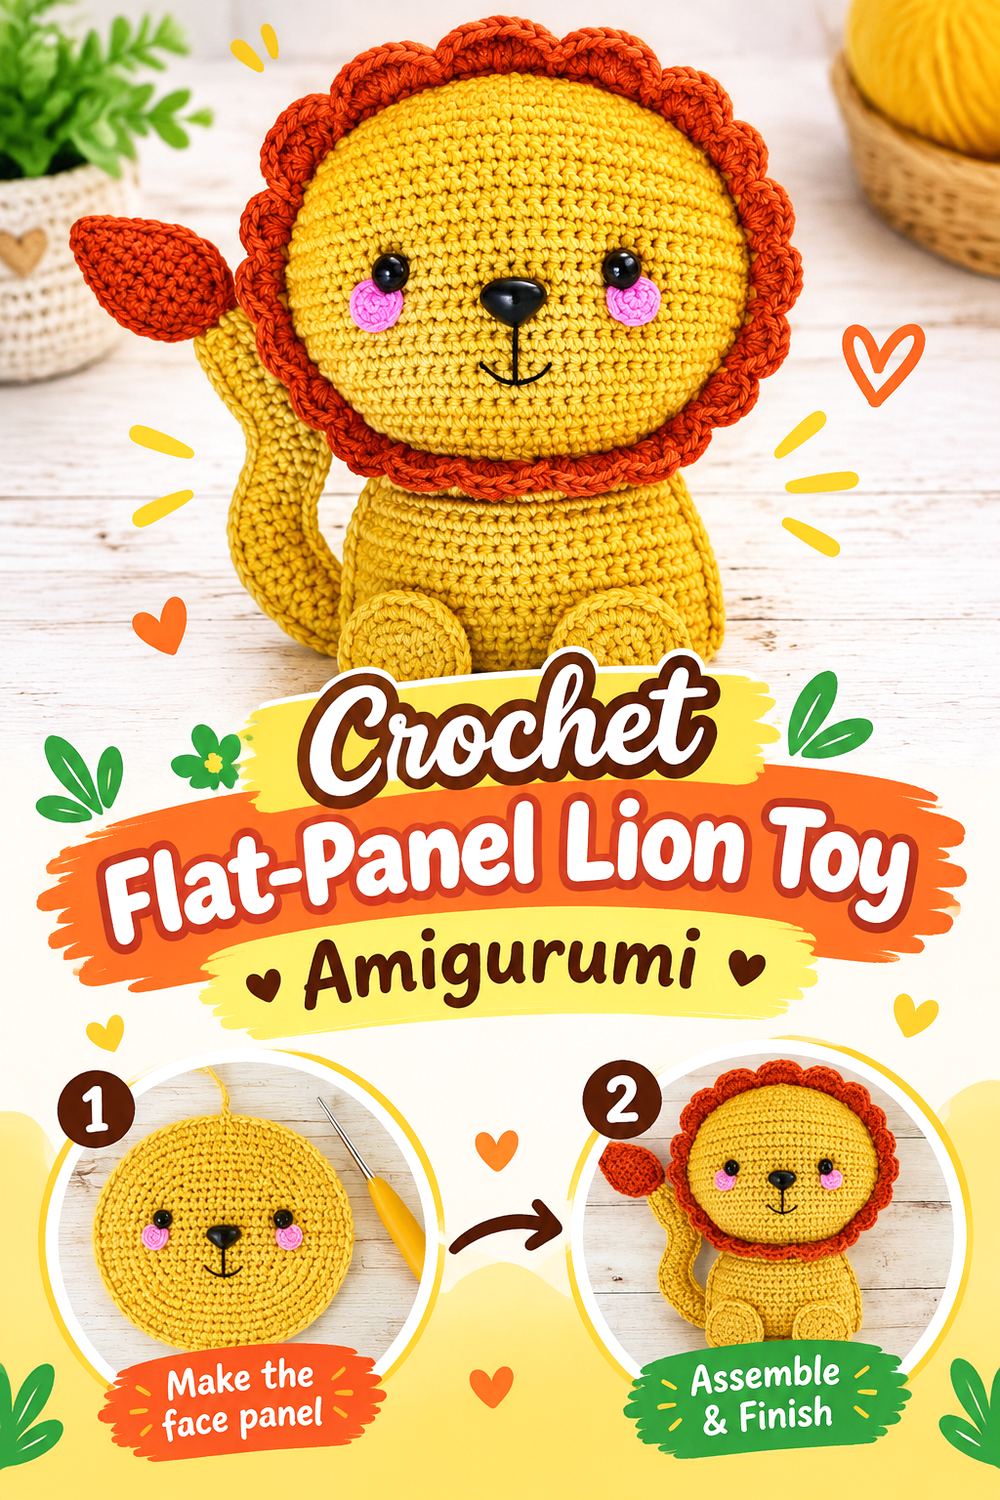
Not every amigurumi-style toy needs to begin as a spiral tube or sphere. Spin a Yarn Crochet’s Ragdoll Lion is constructed from flat panels that are joined and stuffed, creating a distinctly two-dimensional stuffed-toy silhouette. The designer also uses a shell-like mane treatment around the head, which gives the finished lion a strong graphic outline.
That construction makes this project particularly valuable in a vintage collection. It can evoke flat nursery toys and sewn cloth animals while still being crocheted. The broad front-facing body also creates more visual space for paws, cheeks, and facial placement than a narrow cylindrical amigurumi body.
Expect Assembly to Be Part of the Project
Flat-panel construction shifts the challenge from continuous shaping toward alignment and joining. Matching front and back pieces carefully helps prevent twisting, uneven edges, or stuffing that pushes one side farther out than the other.
Before closing a major section, compare the perimeter on both panels. When several smaller parts meet the body edge, pinning their position first can help preserve the intended silhouette.
Treat the Mane as the Main Focal Point
The mane supplies much of the lion’s identity, so it deserves more attention than secondary embellishment. If you use a dramatically heavier yarn for the mane than for the body, the edge can become bulky and visually dominate the face.
For a vintage nursery palette, mustard, ochre, rust, or brown can create warmth without relying on neon contrast. Keep the face relatively calm so the mane remains the strongest decorative border.
Watch Stuffing Along the Flat Edges
A flat toy does not need the same kind of densely rounded stuffing as a spherical amigurumi head. Overfilling can bow the panels and distort the perimeter.
Add filling gradually, especially near corners and narrow sections. The goal is an evenly padded form that retains its broad front-facing profile. If the edges begin pulling apart or stitches visibly stretch, reduce pressure before finishing the seam.
Original Tutorial and Creator Credit
Creator/Site: Spin a Yarn Crochet
5. Crochet Flower Crown Lamb Amigurumi
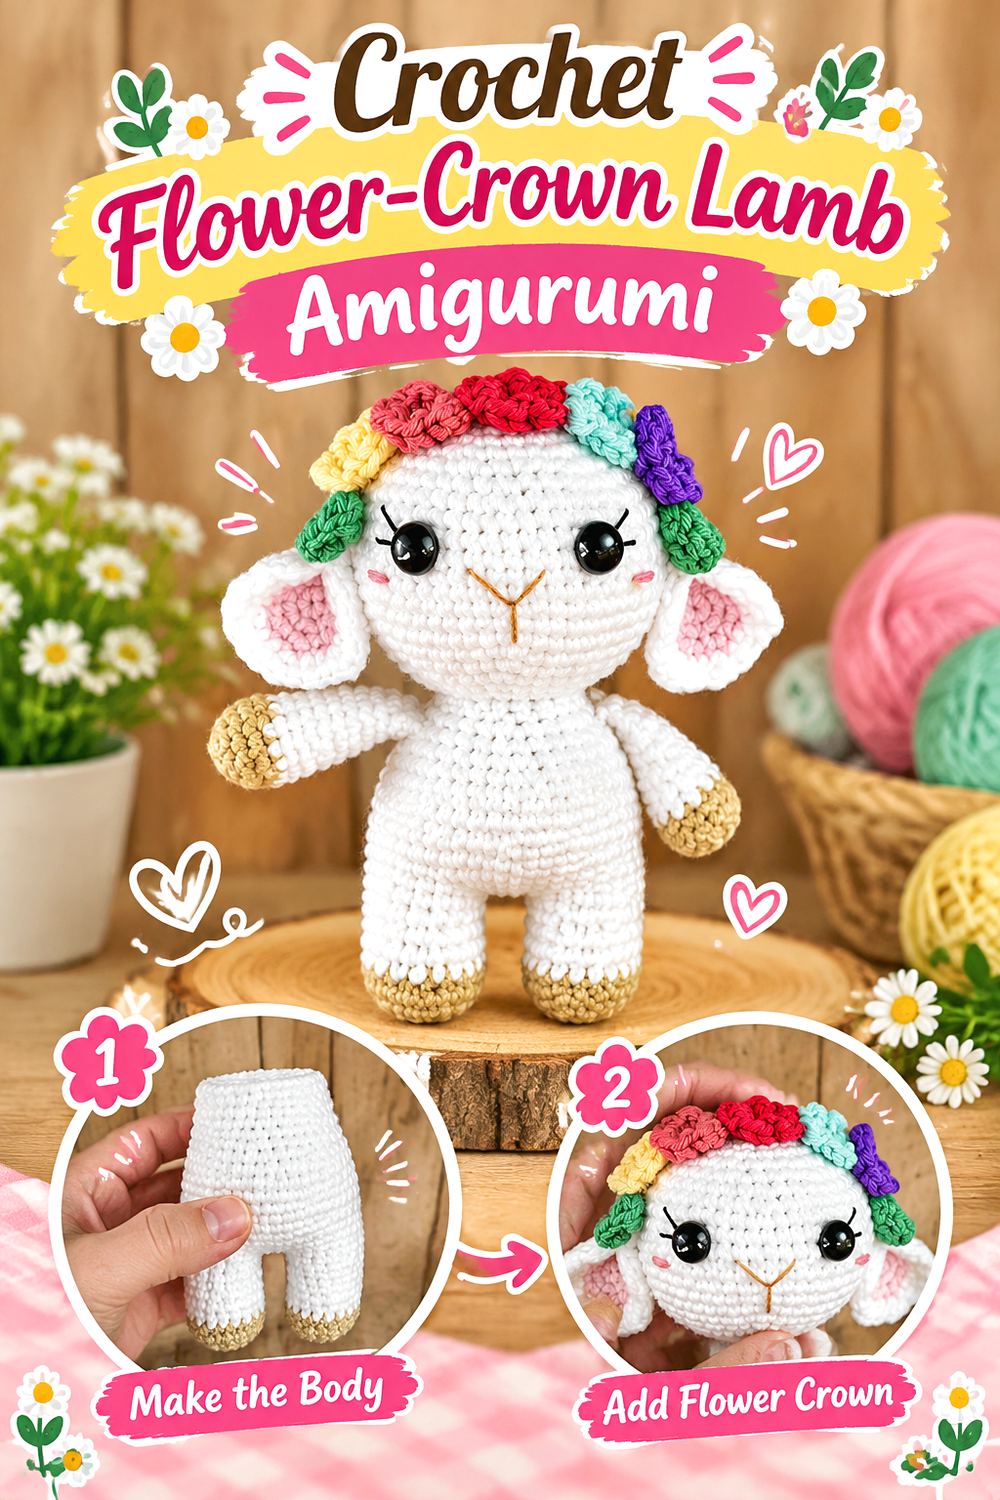
A lamb naturally fits the old-fashioned nursery-toy theme, and Grace and Yarn’s Lily the Lamb adds a restrained floral crown that gives the animal a keepsake finish. The source pattern joins the legs into the body and continues through the head, reducing some of the major assembly seams while leaving ears, arms, flowers, and other finishing elements to establish the final character.
This project sits between plain nursery animal and decorated display piece. Leave the flowers off for a quieter farm-toy look, or keep them as a gentle accent. Either way, the contrasting face and ear details deserve attention because they prevent a pale lamb from becoming visually flat.
Balance Softness Against Stitch Visibility
A lamb invites soft yarn choices, but very fuzzy fibers can obscure shaping and make it harder to see where stitches belong. If you substitute a textured yarn, consider whether you are comfortable locating decreases, joins, and attachment points with less visual guidance.
Another option is to reserve extra texture for selected areas while keeping the main fabric clearer. Whatever you choose, make a small swatch or test section before committing to the whole toy.
Keep the Crown Secondary to the Face
The floral crown is decorative, so its scale should support rather than hide the lamb’s expression and ears. Before sewing flowers permanently, arrange them with temporary pins and check the head straight on.
If the finished toy is intended for frequent play, additional sewn decorations create more attachment points to inspect. For display, you have more freedom to emphasize the crown as part of the vintage nursery styling.
Stuff the Joined Body Evenly
When several major sections flow together, uneven stuffing can produce a firm head above a soft torso or an unbalanced lower body. Add filling in stages and compare the symmetry from the front and side.
A well-supported neck and torso help the lamb retain its intended silhouette. At the same time, stuffing should not stretch pale fabric enough for the filling underneath to become visible through the stitches.
Original Tutorial and Creator Credit
Creator/Site: Grace and Yarn
6. Crochet Curved Trunk Elephant Amigurumi
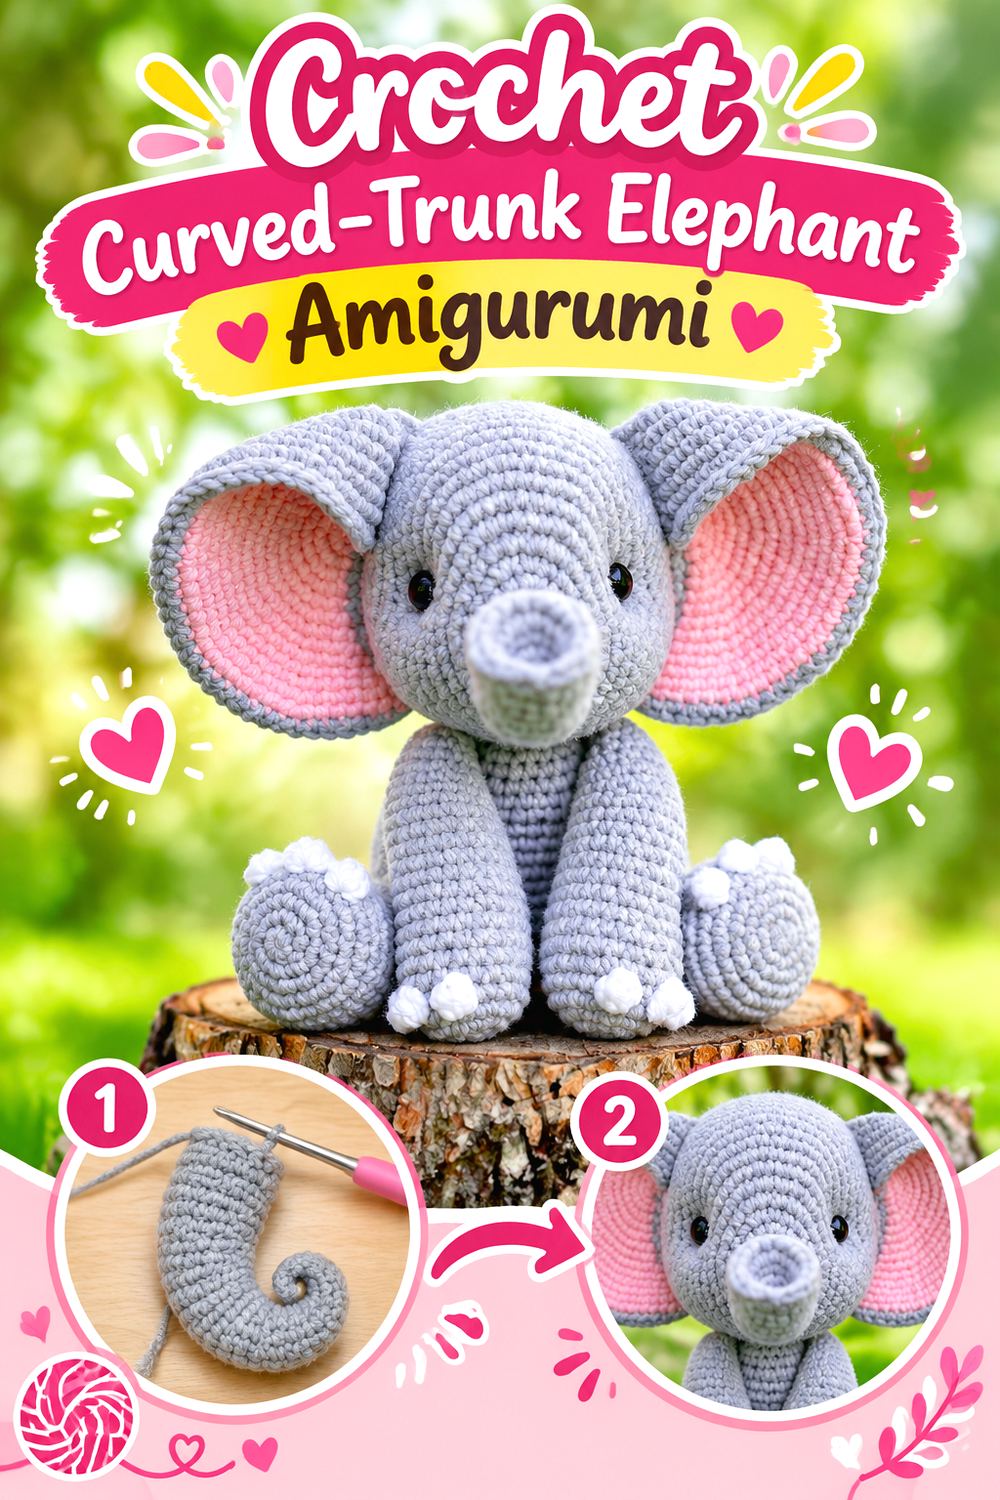
A rounded elephant has the visual simplicity associated with many classic nursery toys, but the trunk and ears make the silhouette unmistakable. Jess Huff’s Esther the Elephant uses a curved-up trunk, large two-color ears, and a construction updated to reduce sewing by incorporating several parts as the project progresses.
That makes this a useful option for a vintage-inspired collection that still benefits from contemporary construction thinking. Gray and dusty pink provide an obvious traditional direction, but warm taupe, muted blue-gray, or cream can work equally well if you want something less literal. The most important visual checkpoints are the trunk curve, ear symmetry, and head-to-body balance.
Protect the Trunk Silhouette
The trunk distinguishes the animal even before the ears are considered. If stuffing is pushed too firmly into a curved narrow section, it may resist the intended shaping; too little support can make the trunk look flattened.
Follow the source construction closely before experimenting with material substitutions. If you use a bulkier yarn, inspect the curve as you work because small shaping changes can appear more pronounced at a larger scale.
Compare Both Ears Before Moving On
Large ears act almost like a frame around the head, so small differences become noticeable. Place the toy facing you and compare ear angle, height, and amount of visible inner color.
If one ear appears to pull backward, check attachment tension before assuming the ear itself is wrong. Symmetry matters more here than on deliberately floppy features such as long bunny ears.
Use Limited Color to Keep the Nursery Feel
Because the elephant already includes a strong trunk and broad ears, it does not need numerous decorative colors. A main neutral plus one restrained accent can give it the straightforward appearance of an older stuffed animal.
If you add toenail, ear, or facial contrast, repeat colors intentionally rather than introducing unrelated shades. This keeps customization coherent without changing the tutorial’s fundamental construction.
Original Tutorial and Creator Credit
Creator/Site: Jess Huff
7. Crochet Overall Bunny Amigurumi
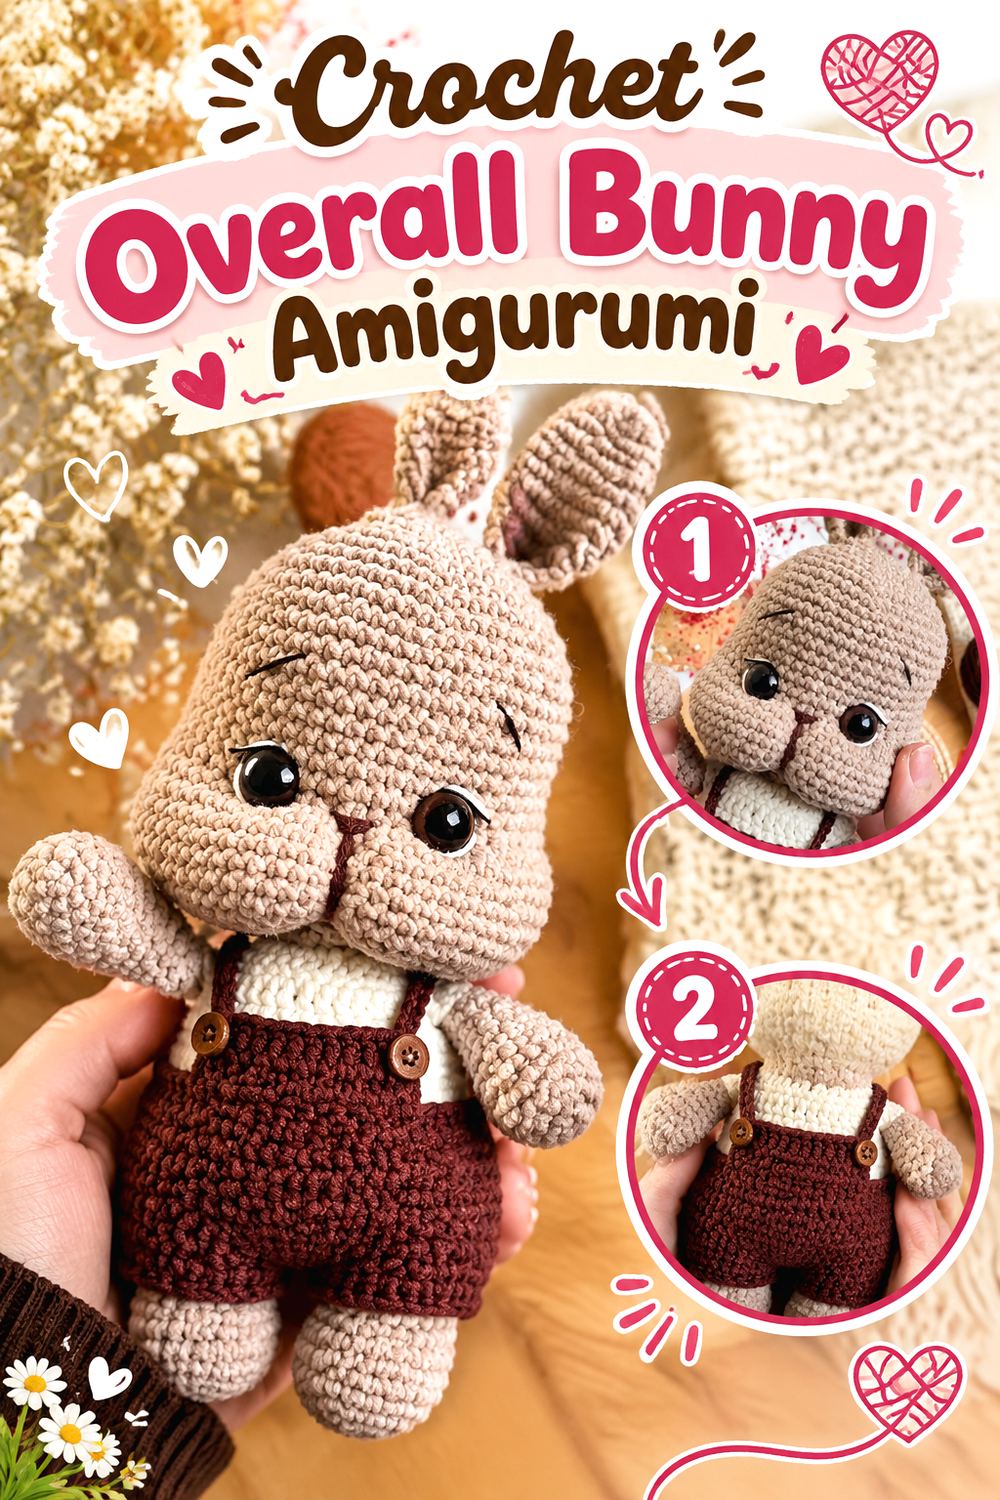
Long-eared bunnies can lean modern, rustic, or distinctly nostalgic depending on proportions and clothing. Hi DIY’s full bunny tutorial creates a substantial amigurumi rabbit with long ears, a shaped face, separate limbs, and an outfit element that can be used to push the finished piece toward an old storybook-toy aesthetic.
Instead of treating the overalls as an excuse for many bright colors, consider a restrained fabric-like palette: muted denim blue, brown, sage, or faded red against a cream, gray, or tan rabbit. That keeps the clothing readable while letting the long ears and rounded head remain the defining features.
Check Ear Weight After a Yarn Change
Long ears magnify differences in yarn weight and density. A yarn that seems only slightly heavier in a small swatch can create noticeably weightier ears on a finished rabbit.
Before permanent attachment, hold both ears in their planned position and observe how they fall. If you want a floppy vintage-rabbit look, natural drape may be welcome; if you want them positioned more deliberately, follow the tutorial’s intended construction rather than improvising internal supports.
Keep the Outfit From Overwhelming the Rabbit
Overalls can establish character quickly, but the rabbit should still read clearly when viewed from across the room. Strong contrast, multiple trims, and extra accessories can compete with the face and ears.
One garment color plus a small accent is often enough. If changing yarn for the outfit, compare thickness with the body yarn so the clothing does not unexpectedly become stiff or bulky.
Plan Facial Details Before Final Assembly
The source includes face shaping and embroidery as part of the tutorial. Those details influence whether the bunny reads as gentle, playful, or highly stylized.
If you change the eye treatment, mark both sides first and compare symmetry. For a toy intended for recipients for whom detachable eyes are not appropriate, an embroidered alternative may be worth considering instead of simply copying the hardware choice.
Original Tutorial and Creator Credit
Creator: Hi DIY
8. Crochet Cottage Duck Amigurumi
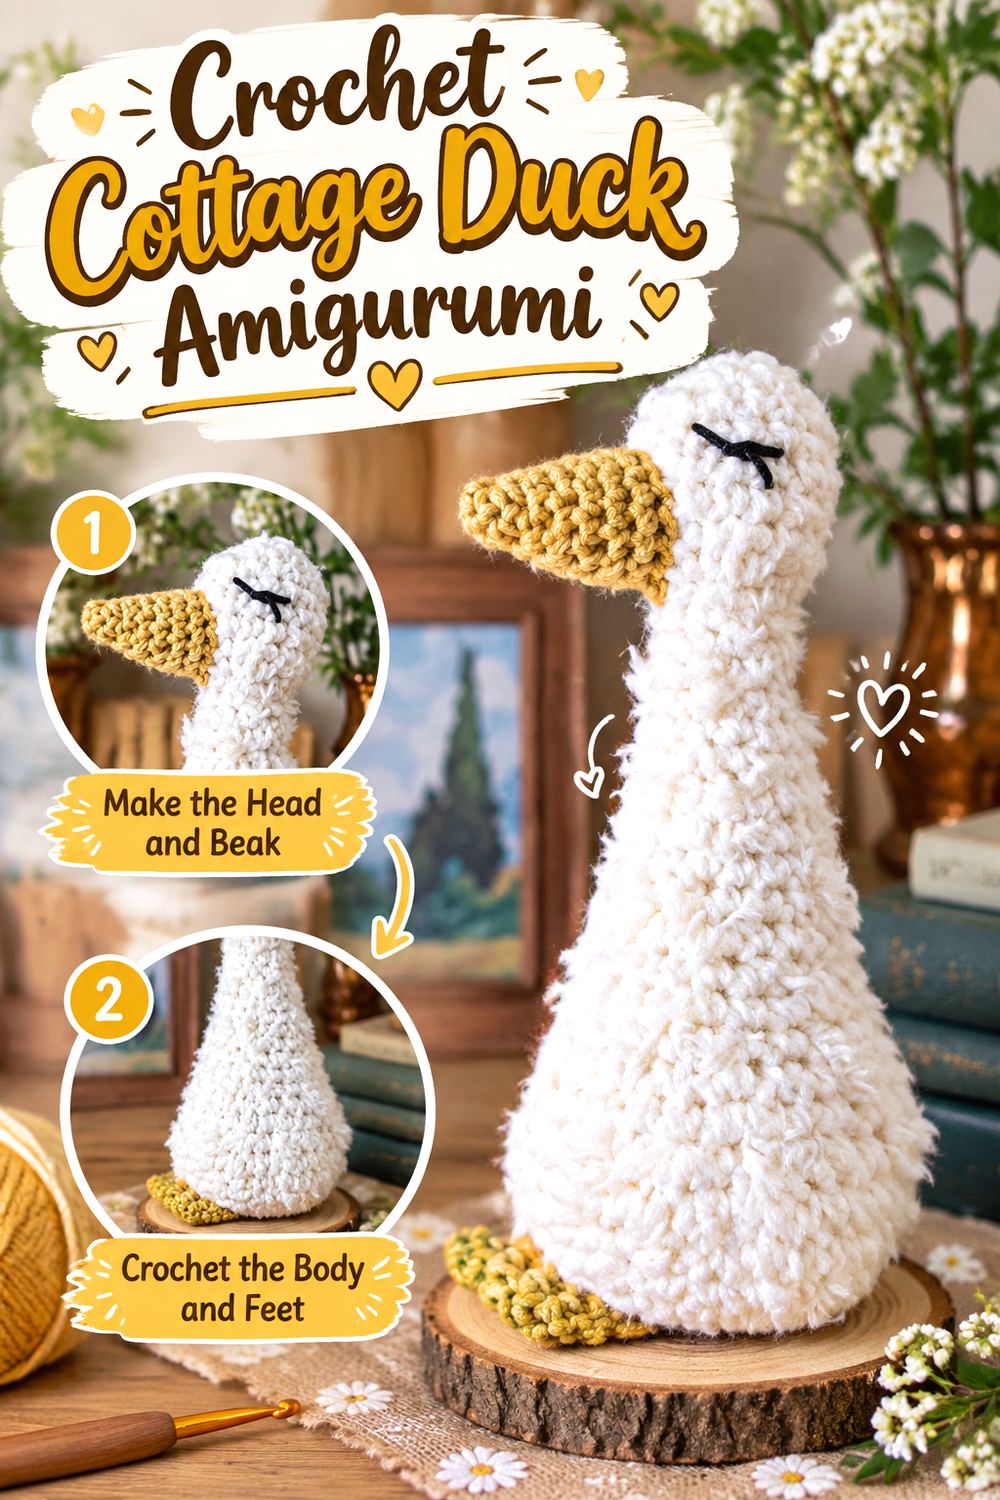
A squat handmade duck can look as though it belongs on an old nursery shelf, especially when the palette stays soft and the surface texture is not overly polished. Caitlin Van Wyk describes her Desk Duck as fitting a vintage-eclectic, cottage-style aesthetic and shows optional textural yarn choices alongside the basic amigurumi construction.
This idea differs from the upright dolls and long-limbed animals because its appeal comes from a compact body, simple beak, and rounded mass. It works well as a small display toy where silhouette and fiber choice create most of the character.
Decide How Fuzzy You Want the Finish
Faux-fur or eyelash-style accents can make a duck look softer and older, but highly textured fibers can hide the stitches underneath. If you have not used such yarn in amigurumi before, test a small section first.
A smooth main yarn with limited fuzzy accents offers a compromise: the shaping stays easy to read while the surface gains a slightly timeworn, cottage-toy quality.
Use the Beak as the Main Contrast
The beak is a small area with strong visual importance. You do not need several additional accent colors for the bird to read clearly.
Muted ochre, soft orange, or mustard against cream, pale yellow, or off-white can create sufficient definition. Check the beak position before securing it because even a simple round-bodied toy can look noticeably different when this central feature sits too high or low.
Original Tutorial and Creator Credit
Creator/Site: Caitlin Van Wyk
9. Crochet Pocket Mouse Amigurumi
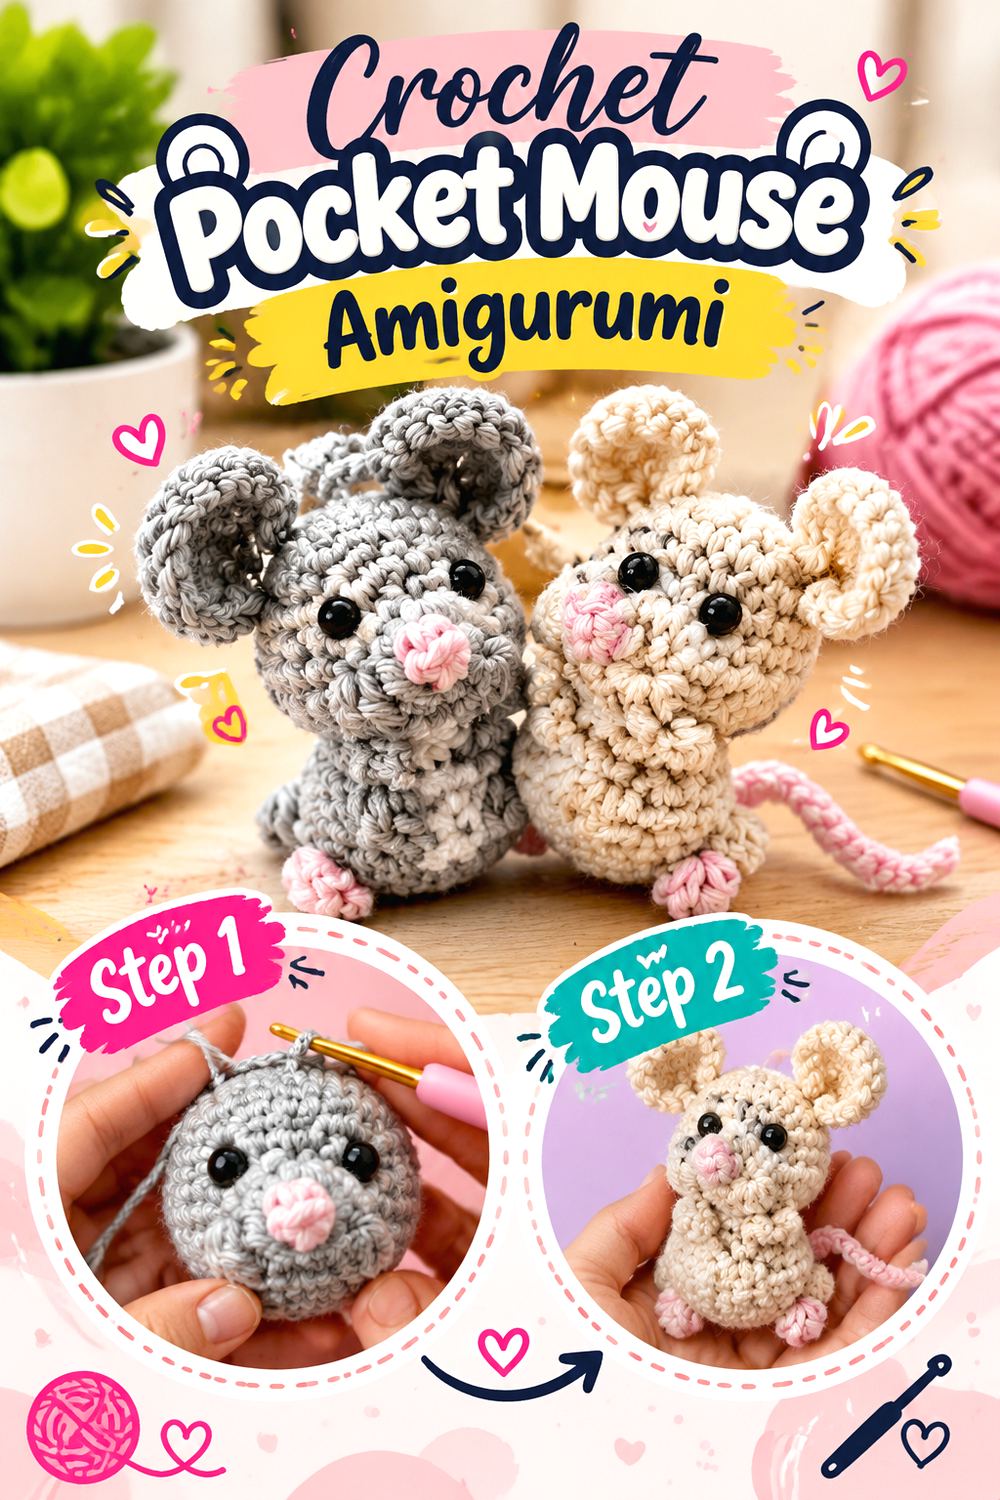
A tiny mouse brings scale variety to a collection dominated by dolls and larger animals. Pocket Yarnlings’ mouse uses an integrated approach in which several defining elements are incorporated into continuous construction rather than every feature being made as a separate piece. The designer also provides both a written pattern and an accompanying video.
For a vintage-toy interpretation, think more about storybook character than realism. Warm gray, oatmeal, brown, or faded cream with a restrained pink nose can give the mouse a quiet nursery feel. Its smaller size also makes accuracy in the ears and snout especially noticeable.
Small Scale Magnifies Tension Changes
A single loose section can alter the silhouette more visibly on a compact toy than on a large body. Maintain consistent tension around the snout and facial area, and pause if your fabric begins opening enough for stuffing to show.
If you move to a thicker yarn to create a larger version, remember that all details enlarge together. The result may feel less like a pocket figure and more like a conventional stuffed animal.
Avoid Overdecorating the Mouse
The ears, pointed face, and tail already create a strong identity. Tiny scarves, bows, or other extras can be appealing, but too many additions may bury the compact shape.
For an old storybook look, one subtle accessory is usually enough. If the mouse will be handled rather than displayed, keep the attachment method and potential small parts in mind before adding anything beyond the original construction.
Original Tutorial and Creator Credit
Creator/Site: Pocket Yarnlings
10. Crochet Nursery Horse Amigurumi
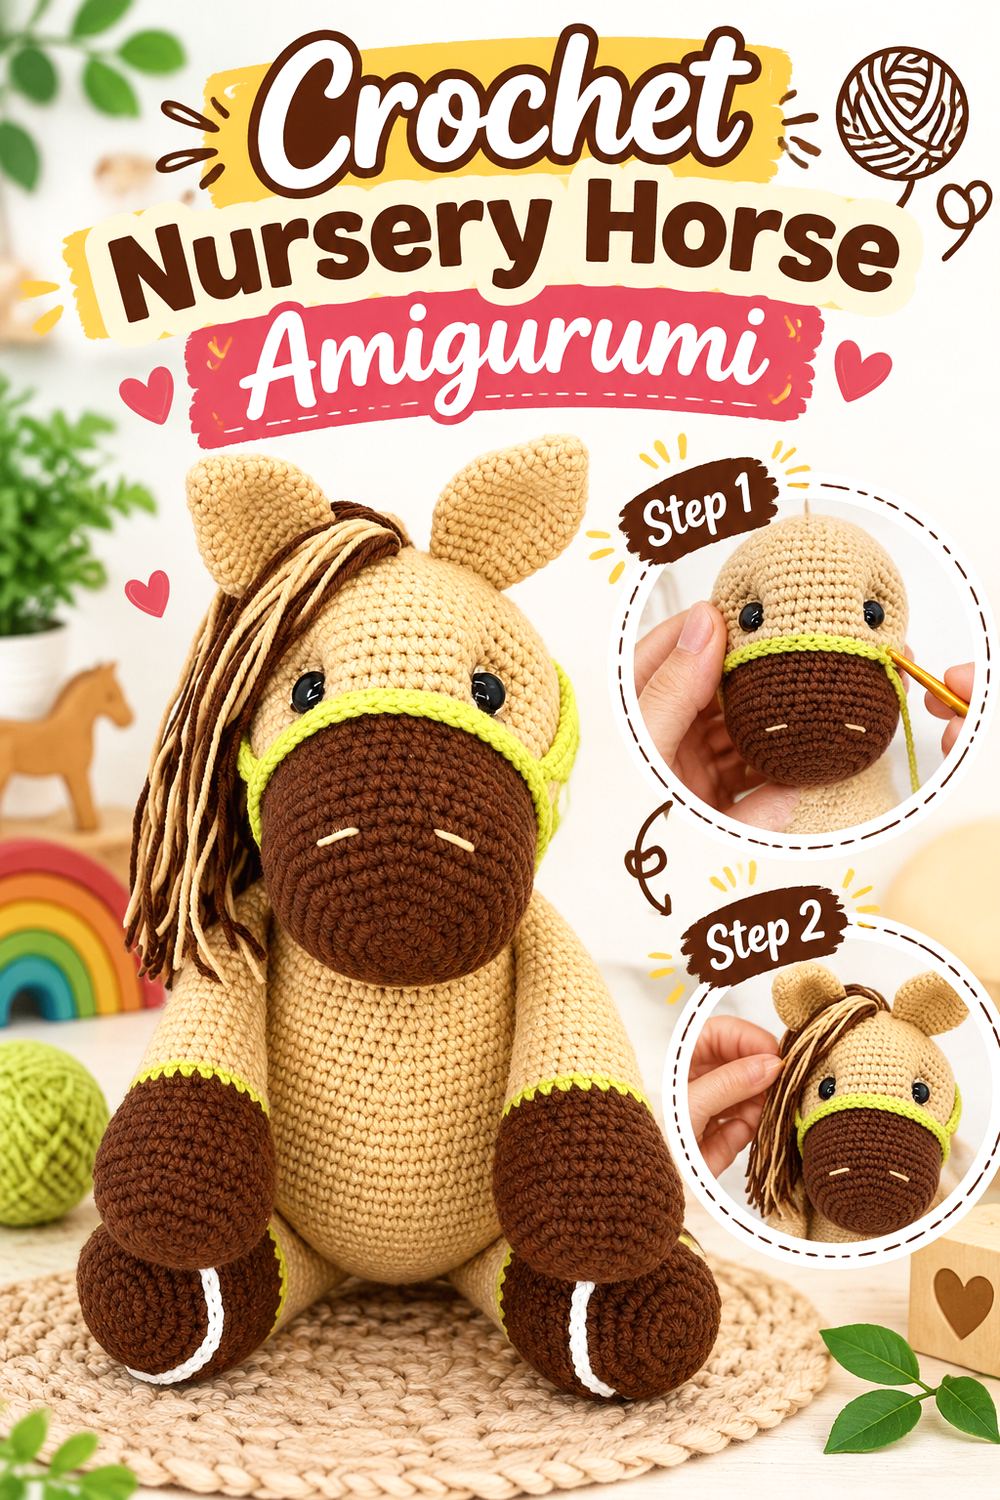
A crochet horse can create the feeling of an old playroom animal without becoming a literal rocking horse. Petra Salisbury’s Cuddly Stitches Craft design includes a shaped horse head, mane and tail, bridle, hooves, and seated stuffed-animal proportions, giving the project more surface detail than most of the simpler ideas in this list.
That detail makes it a good choice when you want a more elaborate keepsake. Brown and cream provide an obvious traditional direction, but a faded gray, chestnut, or muted toy-box palette can work as well. Because the mane, facial placement, and bridle all meet around the head, this project rewards careful finishing.
Treat the Mane Like Hair, Not Stuffing
The source attaches lengths of yarn to build the mane and allows the maker to adjust its thickness and final trimmed length. That makes the mane a major styling tool.
For a vintage nursery look, an intentionally controlled mane may feel more coherent than an extremely thick fringe. Attach enough yarn to establish the horse’s profile, then assess before continuing. More volume can always be added more easily than an overfull mane can be visually simplified.
Check the Bridle After Stuffing
Accessories that wrap around the head depend on the final dimensions of the stuffed piece. The source itself notes that fit may need adjustment depending on how the head is stuffed.
That is an important adaptation lesson: do not assume an accessory will fit identically if you change yarn, hook, or stuffing density. Test the bridle around the completed head before securing it permanently.
Decide Whether Decorative Hardware Fits the Recipient
The tutorial includes safety eyes and explicitly warns that embroidery should be considered instead for very young children because small components can pose a choking hazard.
Use that as a reminder to choose finishing around the actual recipient rather than the desired photograph. A display horse and a frequently handled nursery toy may reasonably use different facial treatments.
Original Tutorial and Creator Credit
Creator/Site: Cuddly Stitches Craft
11. Crochet Circus Clown Amigurumi
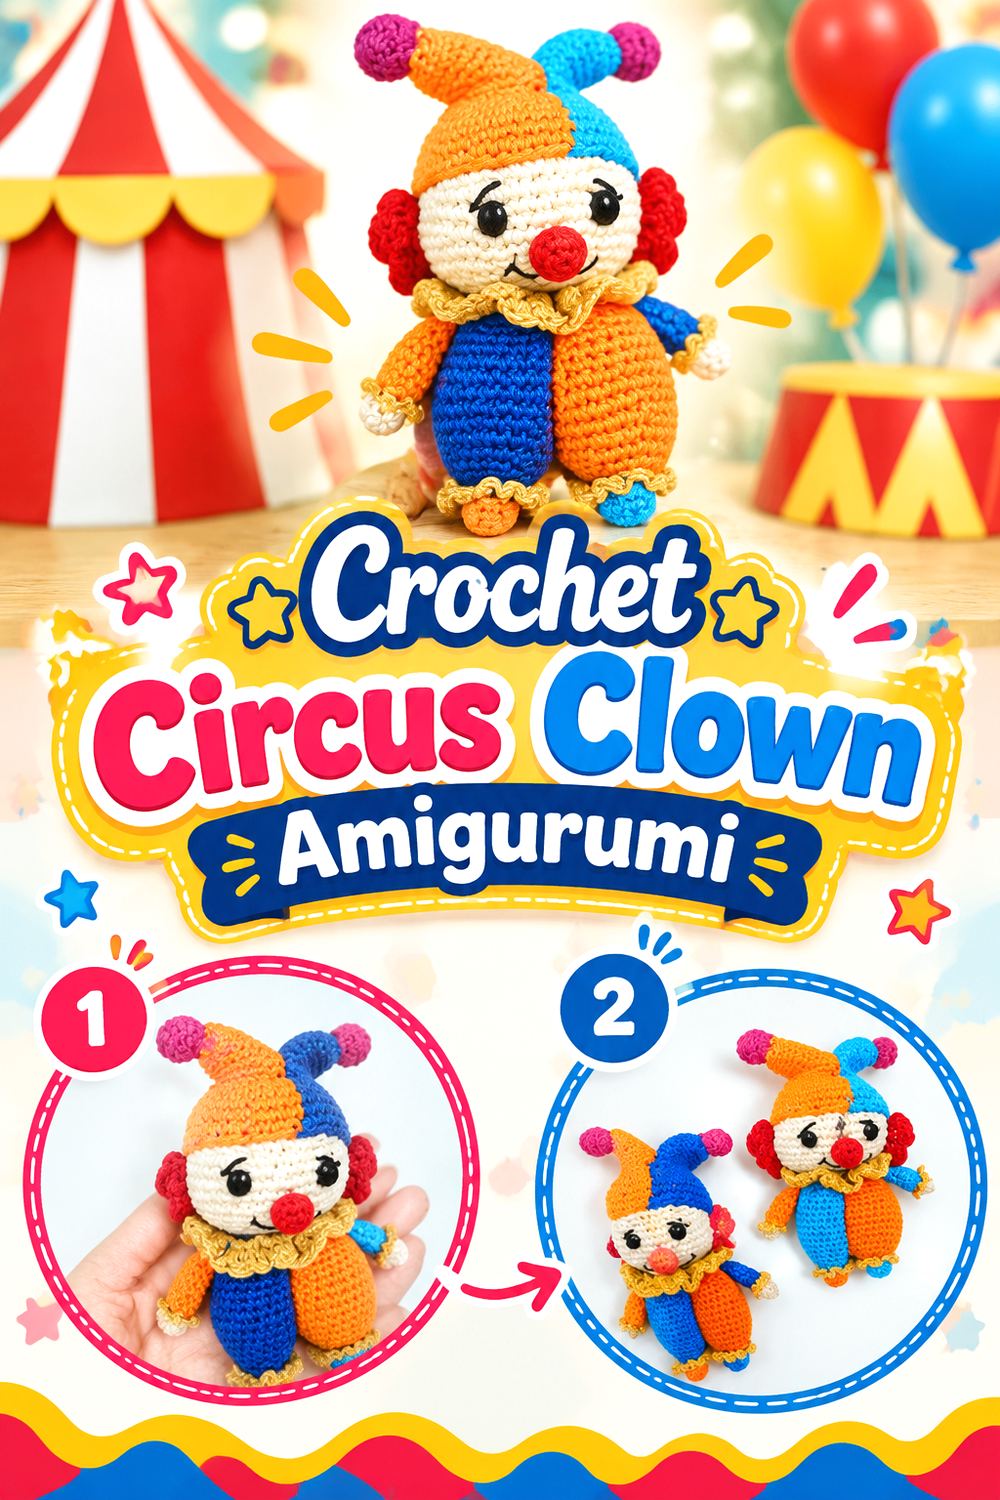
A clown introduces a distinctly different branch of vintage-toy styling: circus color, exaggerated costume shapes, and decorative facial character. Crochetwithsumi’s amigurumi clown tutorial uses crochet construction to build a full toy figure rather than a flat ornament or decorative appliqué.
The temptation with a clown is to use every available color. For a more nostalgic result, narrow the palette instead. Cream, muted red, faded blue, mustard, and a single green accent can still provide theatrical contrast without making the toy visually chaotic. This is also a project where the clothing and facial treatment should be planned as one composition rather than as separate embellishments.
Limit the Circus Palette Deliberately
Clowns can support contrast better than most toys, but unlimited color can erase the vintage direction. Choose a dominant body or costume color, one strong secondary color, and a few smaller accents.
Before crocheting every detail, place the yarns together in natural light. If no shade clearly leads the palette, consider removing one. A limited scheme can make ruffles, hair, and facial areas easier to read.
Judge the Face From a Distance
Highly decorated figures are easy to evaluate too closely. After placing the major facial features, set the head down and view it from several feet away.
The expression should remain clear without relying on tiny decorative marks. If hair, nose, eyes, and collar are all competing equally, simplify one area before continuing. This keeps the clown playful while retaining the controlled visual character associated with a keepsake toy.
Separate Display Details From Play Details
Ruffles, hair, buttons, and other circus-inspired additions provide personality, but each added component can create another point of wear. Decide early whether the finished clown is primarily shelf decor or intended for active handling.
For a frequently handled version, fewer secure textile details may be more practical than multiple small embellishments. That decision does not reduce the vintage character; proportion and palette can carry much of it.
Original Tutorial and Creator Credit
Creator: Crochetwithsumi
12. Crochet Curly Tail Pug Amigurumi
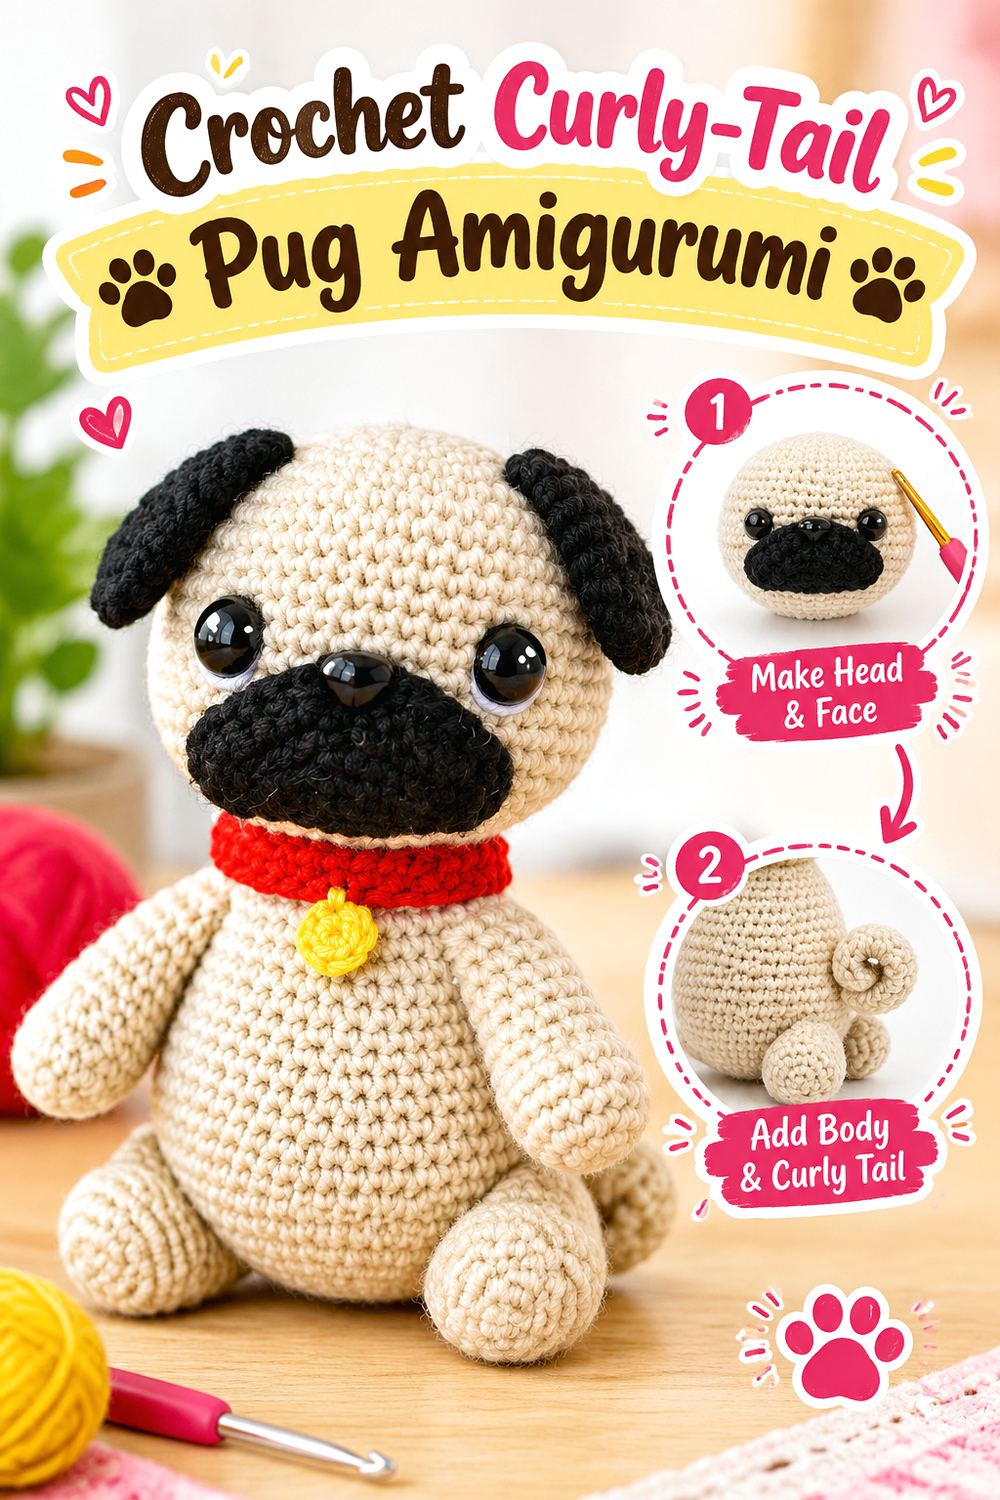
A compact pug adds a toy-dog silhouette without repeating the long-limbed construction of the monkey or doll. StringyDingDing’s Pug Dog pattern creates a short, broad amigurumi dog with a contrasting face, small ears, curly tail, and collar. The source pattern specifically forms the tail as a curl, which gives the rear silhouette a recognizable pug detail.
For a vintage treatment, tan and black already provide a strong traditional combination. A softened red collar or muted mustard tag can supply a controlled accent. Because the body is visually compact, facial contrast and leg placement will have more impact than adding extra accessories.
Keep the Dark Muzzle Area Clean
High contrast around a small face can become visually muddy if color transitions are inconsistent. Pay attention to where dark yarn meets the lighter head and body, and keep loose ends securely hidden.
Before attaching the ears or completing embroidery, check that the face still reads symmetrically. A compact head gives less room for correcting uneven visual weight with later decoration.
Preserve the Tail Curl
The curly tail is one of the project’s strongest breed-specific features. If a yarn substitution produces a much thicker or stiffer fabric, the curl may appear more substantial than expected.
Form and inspect the tail before permanent attachment. It should complement the body instead of disappearing against it or protruding so far that the toy no longer sits or displays naturally.
Original Tutorial and Creator Credit
Creator/Site: StringyDingDing
13. Crochet Kawaii Cat Amigurumi
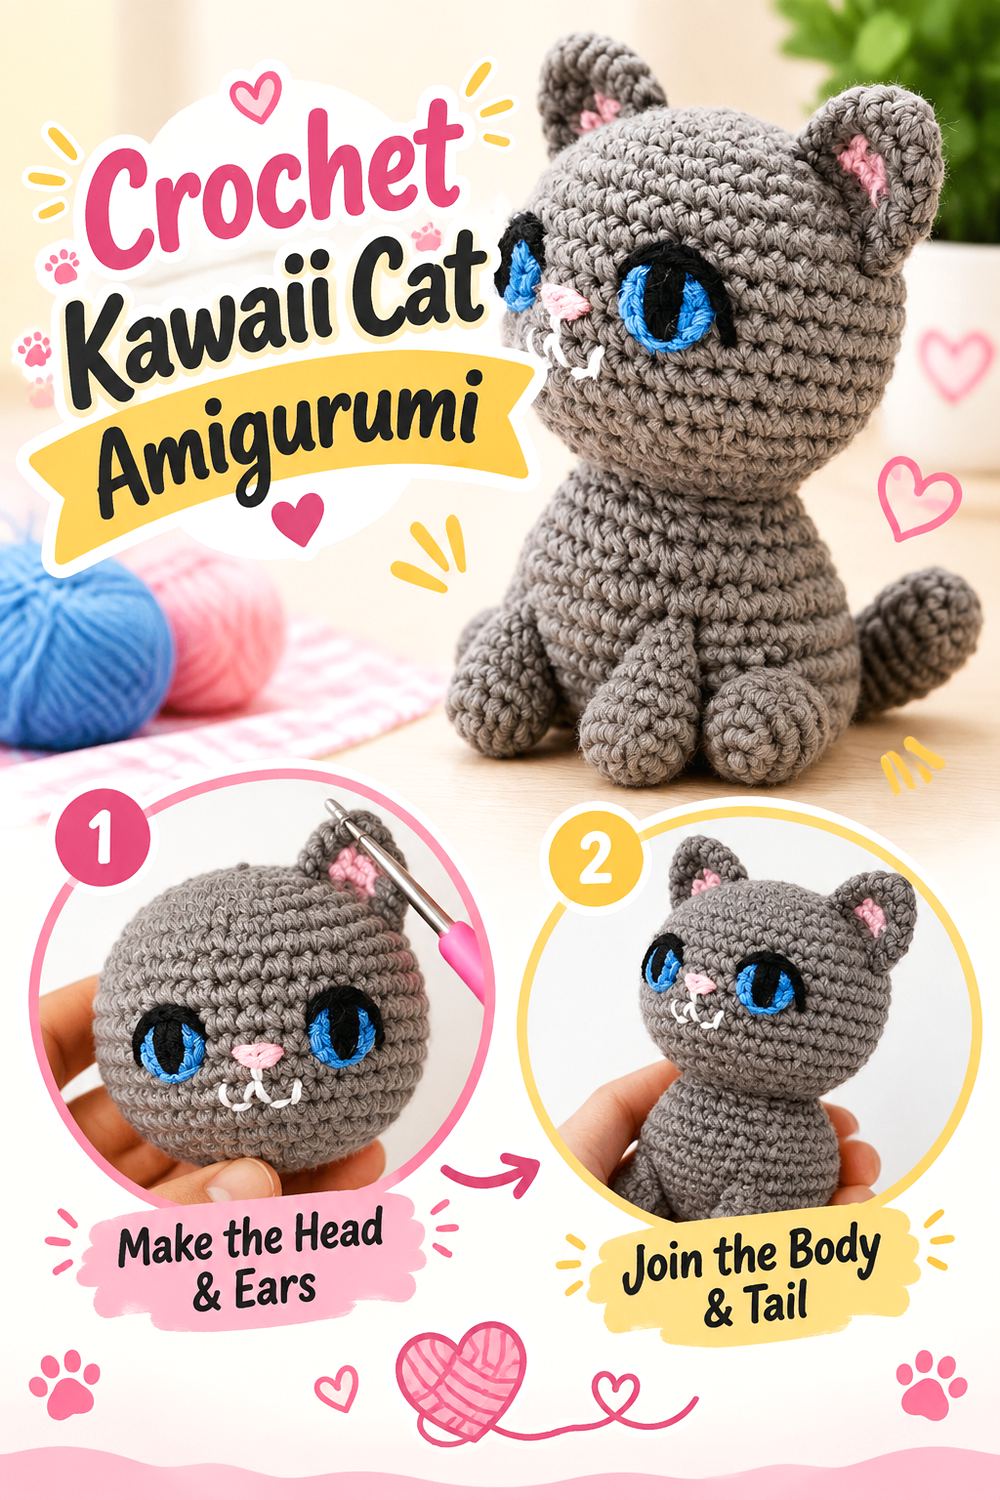
A small sitting or upright cat can resemble a simple mid-century nursery toy when the design is kept clean. Hooked On Patterns’ free cat amigurumi is intentionally straightforward and derives its body foundation from the designer’s bunny pattern, showing how a basic stuffed form can be transformed by changing defining animal features.
This makes the cat a useful final idea for readers who prefer shape economy over elaborate clothing or accessories. Try warm cream, smoky gray, ginger, or faded black rather than relying on complicated markings. The ears and tail will do most of the species-identifying work, so they deserve more attention than extra decoration.
Let the Ears Establish the Character
On a simplified cat, triangular ears have to do a surprising amount of visual work. Check that they sit at compatible heights and angles before securing them.
A slightly wider placement can create a different expression from narrow upright placement, even when the face is unchanged. Follow the tutorial’s intended arrangement first; customize only after you understand how the original silhouette reads.
Use Markings Sparingly
Complicated stripes and patches are not necessary for a vintage effect. One body color with a contrasting muzzle, paws, or tail tip can provide enough definition while preserving the simple toy-box aesthetic.
If you introduce several color changes, keep tension consistent at the transition points so the surface does not pucker. The cat’s charm depends on a smooth basic form more than on intricate surface patterning.
Original Tutorial and Creator Credit
Creator/Site: Hooked On Patterns
Choosing Between the 13 Vintage Toy Styles
If nostalgia is the main priority, start with the sock monkey, teddy bear, storybook doll, or clown; their silhouettes have especially strong associations with traditional toy collections. The lamb, elephant, bunny, duck, and horse work well when you prefer a softer nursery theme, while the mouse, pug, and cat bring smaller or simpler animal forms into the mix.
Construction preference can narrow the choice further. The flat-panel lion is the clearest alternative to conventional round amigurumi, while projects such as the elephant use integrated attachment techniques to reduce some sewing. The doll, horse, and clown place more emphasis on finishing and accessories. Choose according to the kind of work you enjoy, not merely which finished photograph looks most appealing.
Conclusion
A convincing vintage crochet toy does not require reproducing an antique pattern. Familiar proportions, restrained colors, carefully placed faces, and a few purposeful details can give a modern amigurumi project the warmth of an older handmade keepsake.
The 13 projects here offer genuinely different ways to approach that look, from a traditional sock monkey and bow-tie teddy to flat-panel construction, nursery animals, a detailed horse, and a circus clown. Whichever design you choose, establish the construction first and customize cautiously so changes in yarn, stuffing, or accessories do not undermine the finished shape. Refer to the original tutorials near each idea for the designers’ exact construction details and project-specific instructions.
Frequently Asked Questions
How can I make amigurumi look vintage without using old yarn?
Use new yarn in a restrained palette and let silhouette do most of the work. Cream, camel, muted red, mustard, dusty rose, sage, faded blue, and warm gray can suggest an older toy-box aesthetic without deliberately damaging or staining the finished piece. Classic features such as long limbs, simple collars, restrained embroidery, small bows, traditional muzzles, or basic doll clothing can reinforce the effect. There is no need to artificially distress a toy to make it feel nostalgic.
Can I change the yarn weight to make a vintage crochet toy larger?
Often, but treat the change as a full-project substitution rather than a guaranteed resizing formula. Thicker yarn and a suitably matched hook generally produce a larger piece, while thinner materials generally reduce scale. The new yarn can also change stiffness, stuffing requirements, ear weight, accessory fit, and seam bulk. Keep all major components in the same yarn system unless you intentionally want contrasting textures, and recheck accessories such as collars, bridles, or clothing against the finished body.
Are safety eyes suitable for every crochet toy?
No single eye treatment is right for every intended recipient. Safety eyes are used in many amigurumi patterns, but they are still separate components. For toys intended for young children or anyone likely to pull at or mouth small parts, embroidered facial features may be a more appropriate choice. Also inspect buttons, bells, beads, and similar embellishments. Follow relevant product guidance and consider how the finished toy will actually be used rather than assuming a component is appropriate because it appears in a pattern.
How do I stop stuffing from showing between crochet stitches?
Dense, consistent fabric is the first defense. If stuffing becomes visible, the fabric may be too loose for the chosen filling pressure, or the piece may simply be overstuffed. Add stuffing gradually and distribute it instead of forcing a large amount into one area. Changing to a smaller suitable hook can sometimes create a denser fabric, but follow the project’s gauge and construction needs. Pale yarn can make gaps particularly noticeable, so inspect the piece in good light before closing it.
Which vintage toy idea works best if I dislike sewing pieces together?
Look for projects that integrate several components during construction rather than making every limb separately. Jess Huff’s elephant explicitly uses incorporated attachments for several parts, while some other designs reduce major seams by joining body sections as they are crocheted. The flat-panel lion moves in the opposite direction and involves more assembly. Always check the original tutorial before choosing, because “low-sew” and “no-sew” can mean different things across designers.
How should I wash or care for a handmade amigurumi toy?
Care depends on the yarn fiber, stuffing, embroidery, hardware, and added decorations, so there is no universal washing method for all 13 projects. Start with the yarn manufacturer’s care instructions and check any project-specific guidance from the designer. Mixed materials can change what is practical; faux fur, buttons, safety eyes, beads, or shaped accessories may need gentler handling than the main crochet fabric. For a keepsake or display piece, regular light dust removal may reduce the need for frequent full washing.