
20 Crochet Visible Mending Patch Ideas for Clothes, Bags, and Denim
Crochet visible mending can turn a worn knee, snagged pocket, small hole, or frayed patch of fabric into a deliberate design feature. The most useful patch is not always the biggest or most decorative one: a narrow leaf or lightning bolt may follow a tear better than a circle, while flowers, fruit, and animal motifs can disguise broad or irregular damage.
These 20 ideas range from compact hearts and stars to dimensional-looking florals, woodland motifs, fruit, and character appliqués. The linked original tutorials teach the individual crochet motifs; the mending recommendations here focus on how those shapes may function when attached to existing fabric. Use the list to compare coverage, bulk, edge security, placement, and the amount of visual attention you want the repair to receive.
Quick List
- Crochet Classic Heart Repair Patch
- Crochet Simple Flower Mending Patch
- Crochet Daisy Wear-Cover Patch
- Crochet Sunflower Statement Patch
- Crochet Mushroom Pocket Patch
- Crochet Rainbow Arc Repair Patch
- Crochet Cloud Scallop Patch
- Crochet Cat Silhouette Patch
- Crochet Frog Character Patch
- Crochet Acorn Tear-Cover Patch
- Crochet Pumpkin Autumn Patch
- Crochet Bee Accent Patch
- Crochet Butterfly Wing Patch
- Crochet Strawberry Mending Patch
- Crochet Star Point Patch
- Crochet Lemon Oval Patch
- Crochet Owl Character Patch
- Crochet Lightning Bolt Tear Patch
- Crochet Watermelon Slice Patch
- Crochet Leaf Slender Repair Patch
Match the Patch Shape to the Damage First
Start with the damaged area rather than the motif. A nearly round worn spot gives you plenty of freedom, but a long split generally benefits from an elongated patch such as a leaf, lightning bolt, or narrow fruit shape. Irregular fraying can disappear more naturally beneath petals, cloud scallops, wings, or another outline whose edge is already intentionally uneven.
The crochet should extend beyond weakened fibers so you are attaching it to sound fabric, not merely stitching around the visible hole. If the underlying cloth continues to unravel, stabilize it before adding the decorative piece. High-stress areas such as knees, elbows, pocket corners, and bag bases may also need reinforcement behind the fabric. In those locations, think of the crocheted motif as the visible layer of a repair rather than automatically assuming it can provide all the structural support by itself.
Choose Yarn With Bulk, Stretch, and Washing in Mind
A patch that looks attractive on the table can behave differently once attached to clothing. Thick yarn adds obvious texture but may feel stiff on a lightweight shirt. Fine yarn keeps an appliqué flatter but usually creates a smaller motif unless the pattern or hook choice is changed responsibly.
Fiber behavior matters too. The repaired garment and crochet patch do not have to use identical fibers, but their care requirements should be compatible enough for realistic washing. Check the yarn label and the original tutorial before substituting materials. On stretchy knit fabric, avoid pulling attachment stitches so tightly that the garment puckers around the patch. On sturdy denim or canvas, a flatter, denser motif often sits more naturally. Buttons, beads, glued details, or other embellishments can also change both care and durability.
Make the Attachment Part of the Repair
Secure more than a few isolated points. Petals, ears, wing tips, stems, narrow corners, and scallops can curl or catch if only the main body is sewn down. Work around the motif with small, evenly distributed stitches while checking the fabric from the front so the attachment thread does not distort the garment.
For a hole rather than a surface stain or worn area, decide what should happen behind the opening. A backing fabric can contain frayed edges and keep skin or lining from showing through open crochet spaces. On a bag, consider what the interior will rub against. On clothing, check the reverse for scratchy knots or bulky yarn tails. Visible mending can be decorative, but the finished repair still needs to move, wear, and launder sensibly.
1. Crochet Classic Heart Repair Patch
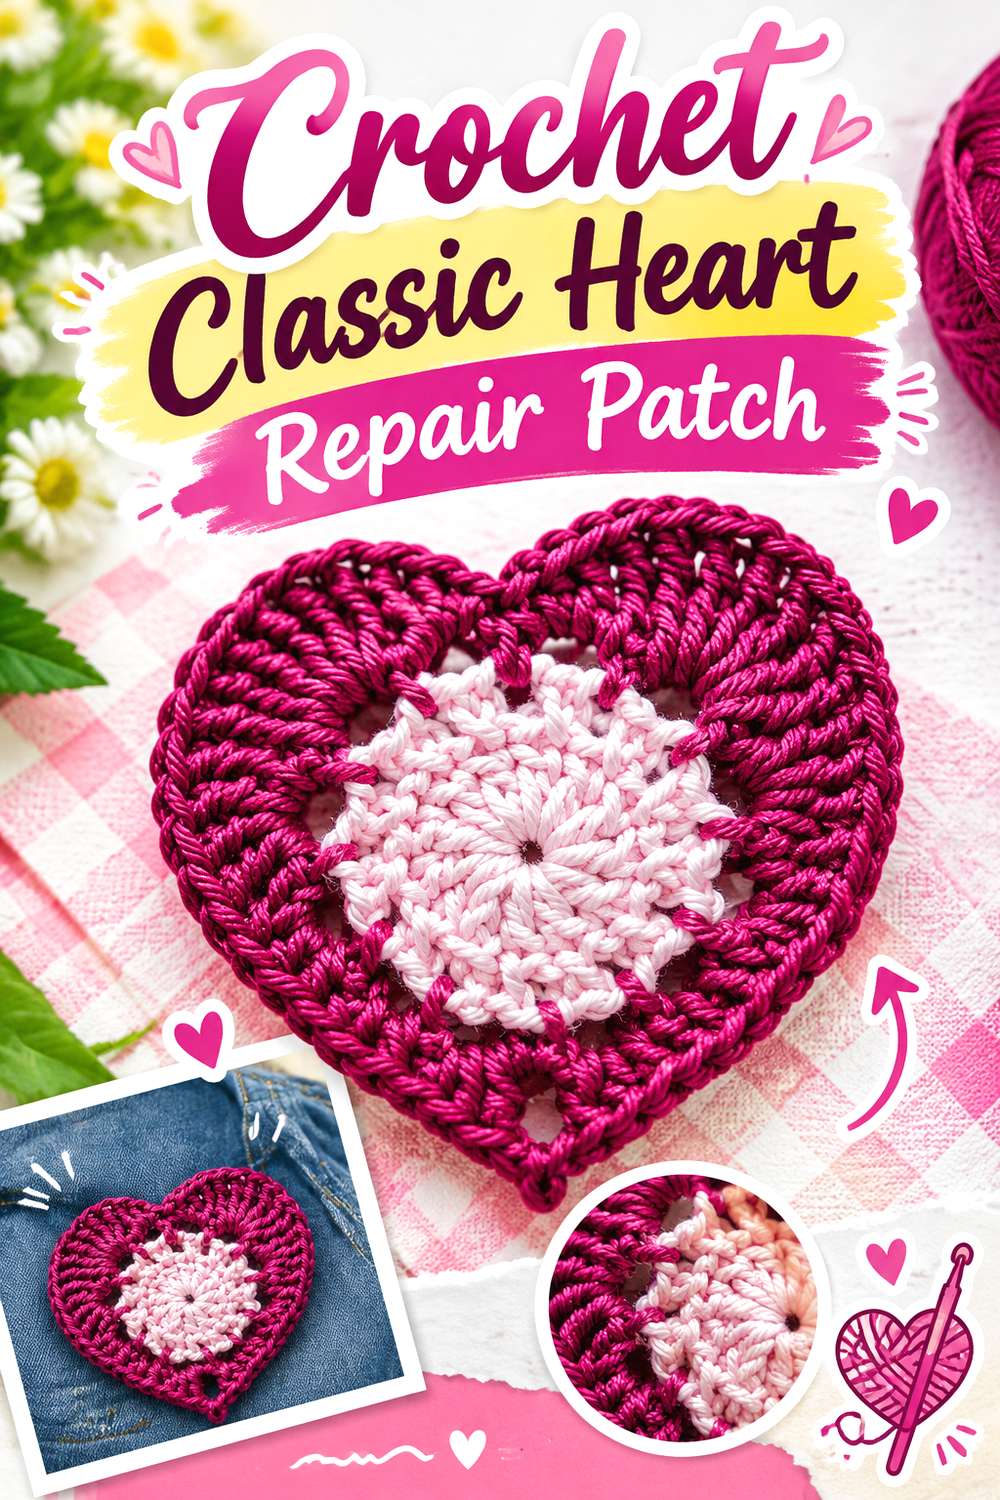
A heart creates an immediately recognizable repair without requiring the damage itself to be symmetrical. The rounded upper lobes can cover a wider worn area, while the lower point gives the patch a useful way to extend across a short split or taper toward intact fabric. The Crochet Leaf tutorial shows a classic flat appliqué with a defined center and contrasting edging, giving the motif enough visual structure to stand alone as an intentional embellishment.
This version suits jeans, cardigan pockets, tote bags, or other areas where you want the mend to read as decorative rather than disguised. Before committing, compare the motif’s final footprint with the entire weakened area, not just the open hole.
Aim the Point Along the Damage
If the worn area extends in one direction, rotate the heart so its bottom point follows that line. This can make a relatively compact motif provide more useful coverage without enlarging every side. Leave sound fabric beyond the damaged fibers for sewing. If the split continues below the heart, reinforce the underlying cloth instead of relying on the pointed end to stop further tearing.
Keep the Center Comfortable
A layered or color-edged heart may be thicker than the surrounding garment. That difference is usually less noticeable on denim, bags, or outerwear than on a thin shirt. Before sewing it permanently, pin or baste the patch and flex the fabric. If the motif feels rigid over an elbow, waistline, or other bending point, a flatter placement may be more comfortable.
Original Tutorial and Creator Credit
Creator/Site: Crochet Leaf
2. Crochet Simple Flower Mending Patch
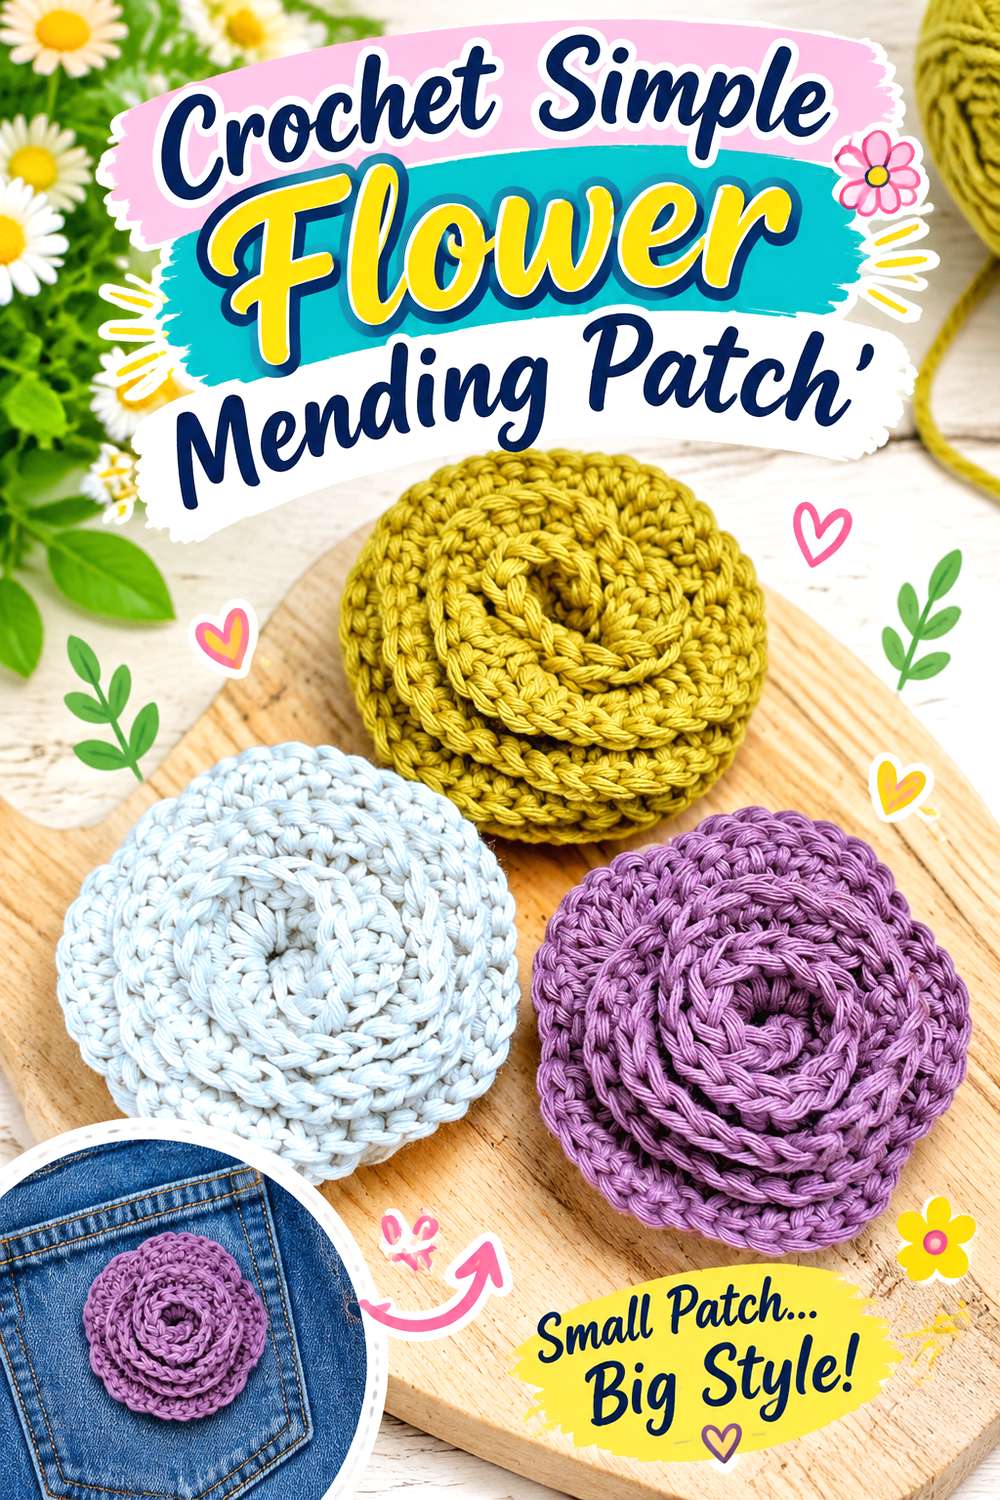
A compact flower is useful when the damage has no neat geometric boundary. Instead of forcing a circle or square over an uneven worn patch, the petals create a naturally irregular perimeter that can disguise small protruding frays. Truly Crochet’s flower tutorial presents a flat floral appliqué designed as an embellishment, making it a practical starting point for a conspicuous repair on a tote, jacket, hat, or pocket.
A flower also gives you flexibility in color placement. The center can coordinate with the garment while the petals provide contrast, or the whole patch can deliberately stand apart. For mending, prioritize complete coverage and secure edges over making the flower as small as possible.
Let the Petals Hide an Uneven Outline
Petals are particularly handy around damage that is wider in some directions than others. Rotate the finished flower before attachment and see whether the gaps between petals expose weak fabric. If they do, use an underlying reinforcement or choose a larger motif. The attractive outline should not come at the expense of leaving part of the worn area unsupported.
Secure Every Projecting Edge
Crocheted petals can curl when they are repeatedly rubbed inside a sleeve, under a bag strap, or against furniture. After positioning the flower, attach each petal rather than stitching only around the center. You do not necessarily need to flatten every bit of texture, but the tips should not behave like loose tabs that can snag during everyday use.
Original Tutorial and Creator Credit
Creator/Site: Truly Crochet
3. Crochet Daisy Wear Cover Patch
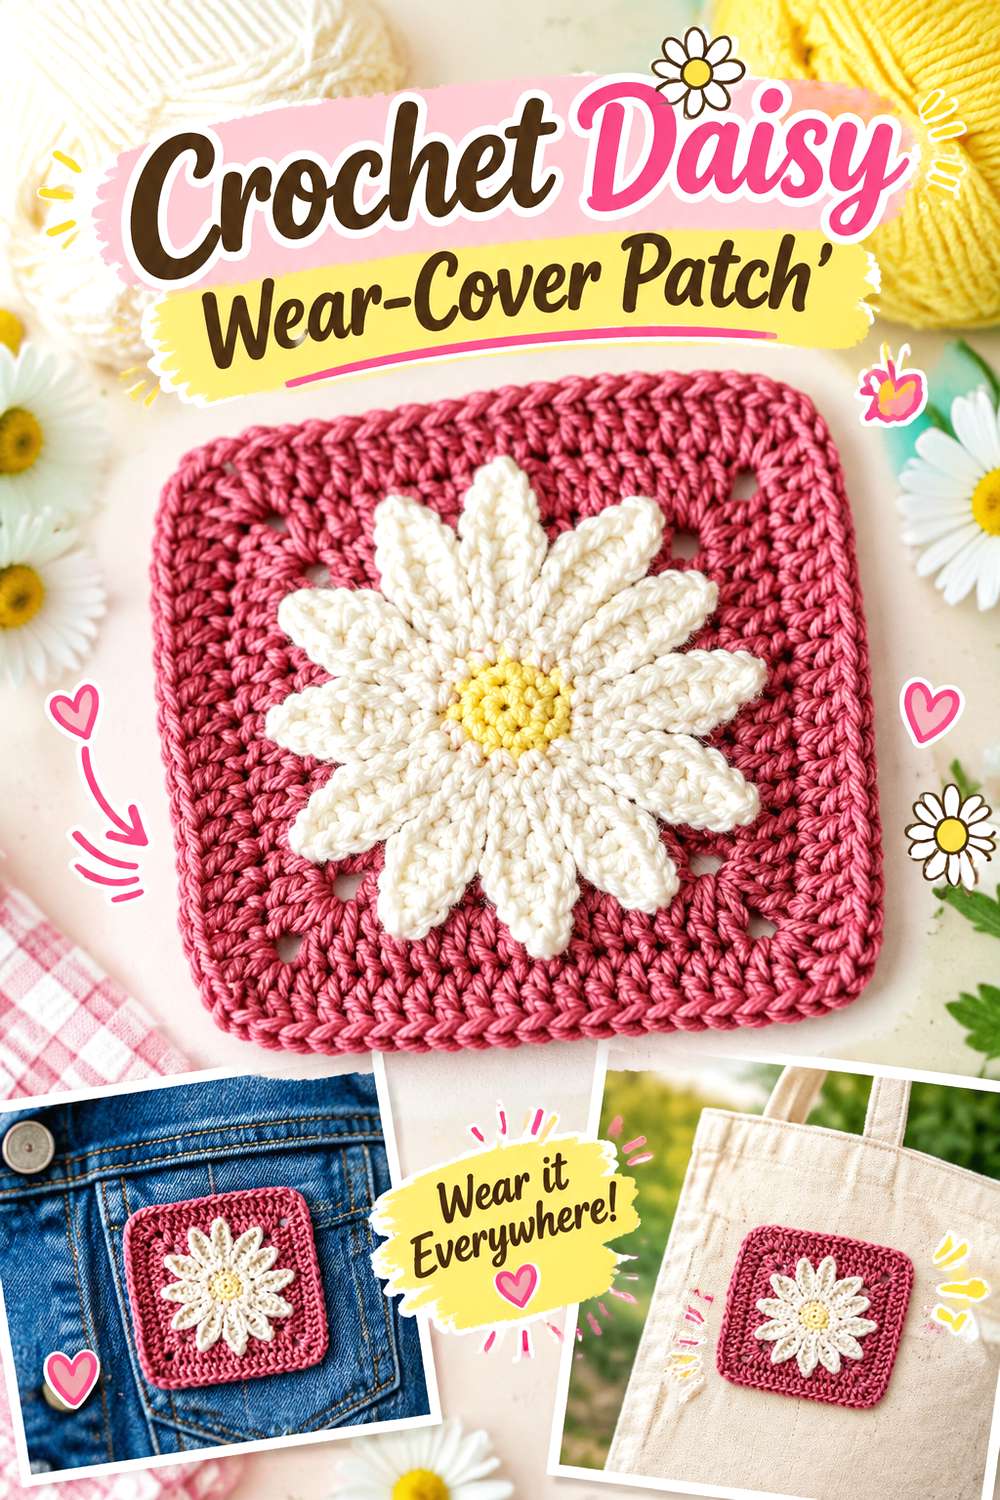
A daisy gives a broad repair plenty of visual width without making the entire patch a solid block. E’Claire Makery’s tutorial produces the flower as one piece and shows it as an appliqué for other crochet projects. Its long petals create a lively outline that can work especially well over a shallow worn area where the fabric is still largely intact but needs protection.
For visible mending, this design makes sense on areas where dimensional edges will not be constantly scraped. A sweater front, roomy tote, or decorative pocket panel is usually more forgiving than the underside of a sleeve. If the center of the damage is actually open, consider adding a backing beneath the daisy so the spaces between petals do not become unsupported openings.
Give Broad Wear Enough Coverage
A flower may look large because of its petal span while still leaving open space between those petals. Measure coverage by the solid area that will actually protect the fabric. If a worn patch reaches beneath several gaps, a small backing layer can do the structural work while the daisy provides the visible finish.
Check the Petals for Snagging
Long petals create movement and character, but loose tips can catch on handles, zippers, jewelry, or rough surfaces. Baste the daisy in position and handle the garment normally before finishing the stitching. If several petals lift dramatically, tack them closer to their tips or reserve the motif for a lower-friction location.
Original Tutorial and Creator Credit
Creator/Site: E’Claire Makery
4. Crochet Sunflower Statement Patch
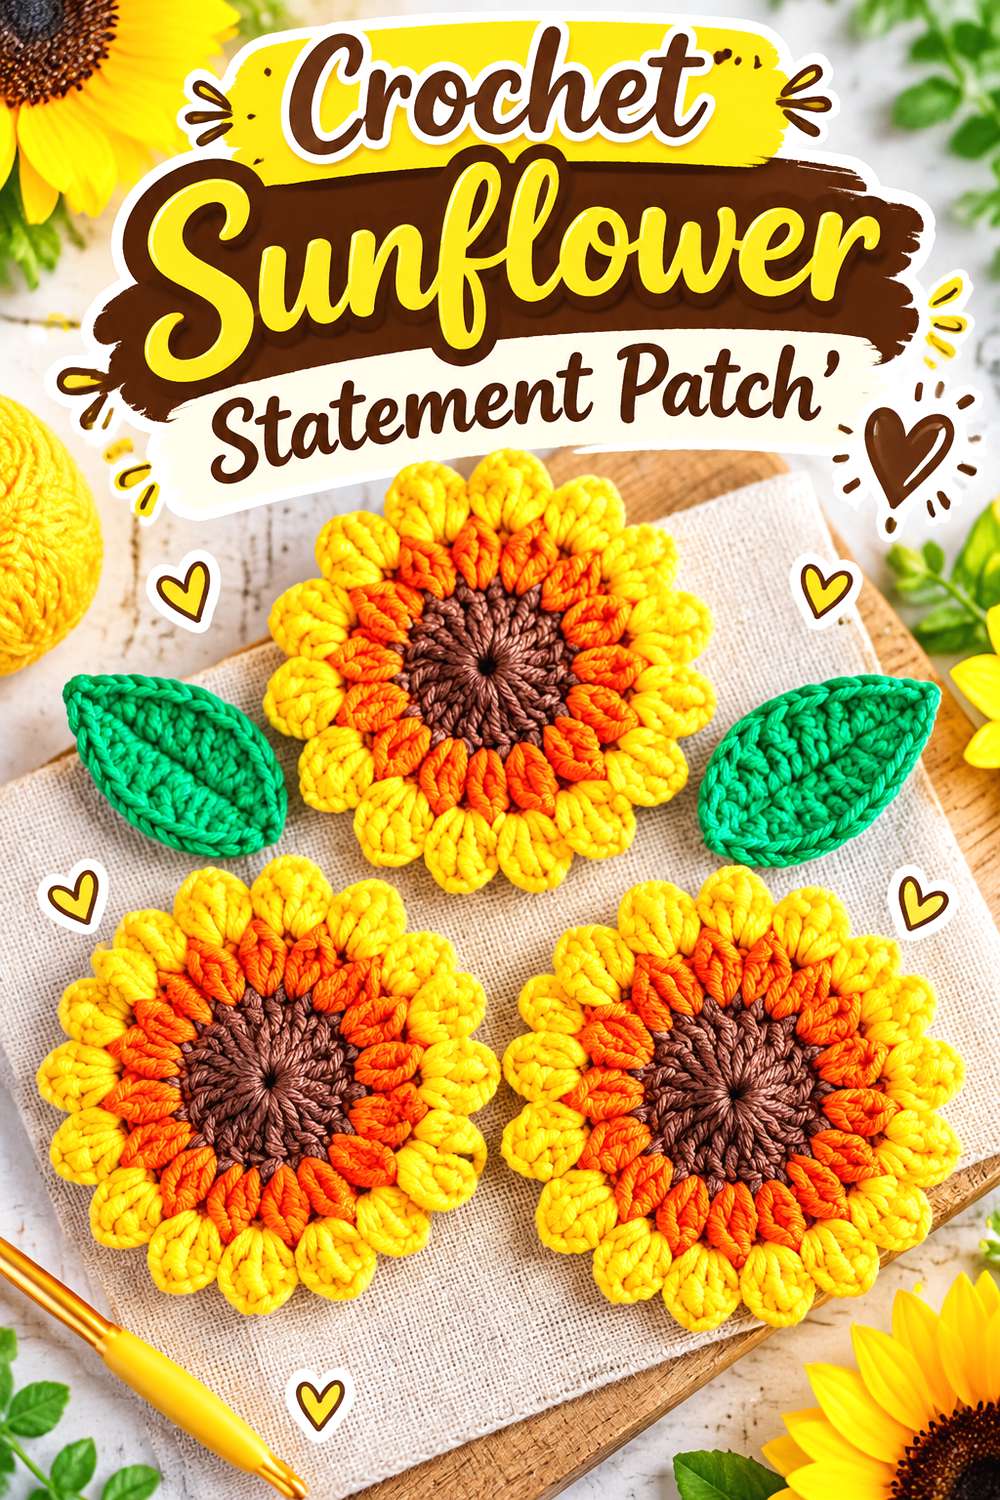
A sunflower works when you want the mend to become the dominant decorative feature rather than a small accent. Annie Design Crochet’s appliqué has a substantial central disk surrounded by petals, creating a strong circular silhouette with extra texture around the edge.
That makes it a good candidate for a noticeable worn spot on a denim jacket, tote front, cushion cover, or other sturdy surface. The center can hide a concentrated hole while the petals expand coverage beyond it. Because the motif visually carries more weight than a tiny flower, check proportion before attachment; a sunflower that overwhelms a narrow pocket or sits directly on a fold may look and feel less intentional.
Use the Center Over the Weakest Area
Position the sunflower’s denser middle over the most damaged portion rather than centering the motif purely for appearance. The petals can then extend onto stronger surrounding cloth. This approach helps the repair read as balanced while putting the greatest crochet coverage where it is most useful.
Control Bulk Before Sewing
A textured flower center can become noticeably thicker than the host fabric. Place the finished motif on the garment and press it lightly by hand to judge the difference. If the repair will be sat on, folded sharply, or worn beneath another layer, that extra thickness matters more than it does on a bag or jacket back.
Original Tutorial and Creator Credit
Creator/Site: Annie Design Crochet
5. Crochet Mushroom Pocket Patch
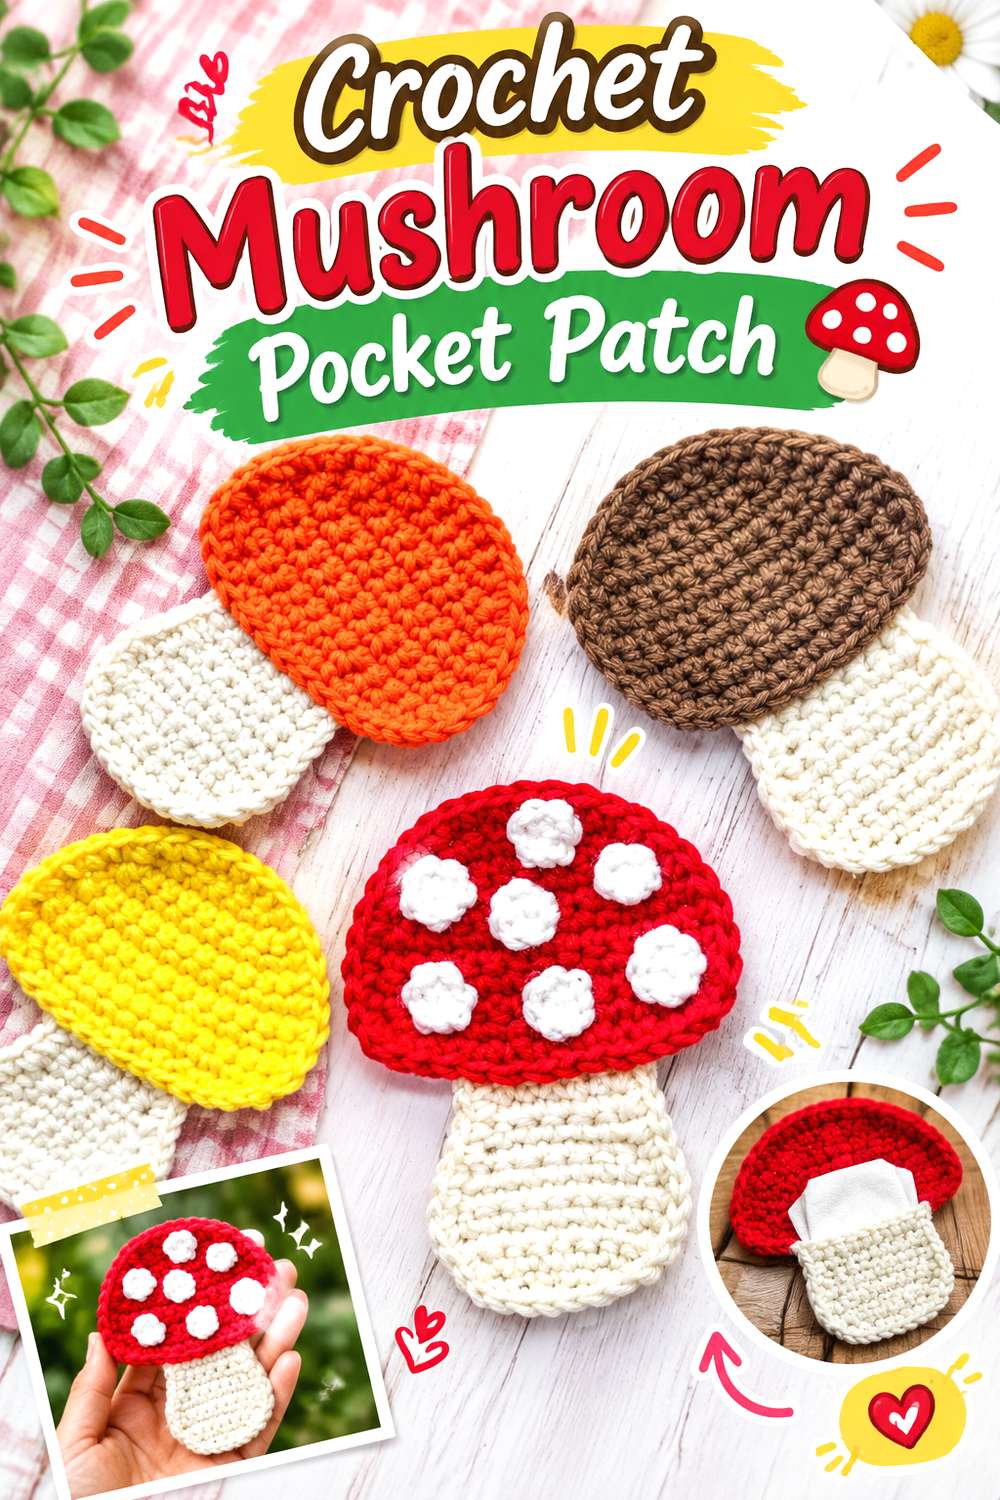
A mushroom creates two useful zones of coverage: a broad cap and a narrower stem. The Caffeinated Snail’s original appliqué tutorial builds the recognizable shape from separate cap and stem elements and adds surface details to the cap.
For visible mending, that geometry works nicely around pocket edges, vertical scuffs, and damage that is wider at one end than the other. The cap can span the main hole while the stem follows a smaller tear or worn line below it. This is also a motif where placement changes the mood considerably; one mushroom can look graphic and intentional, while several small ones could create a woodland cluster around scattered weak spots.
Turn the Cap Across a Horizontal Hole
If the main tear runs sideways, place the widest part of the mushroom cap across it rather than automatically positioning the motif by the garment’s centerline. A slight shift can provide better coverage while preserving the recognizable silhouette. Make sure the cap still extends onto sound fabric on both sides of the damage.
Prevent the Stem From Lifting
A narrow stem has less surface area for attachment than the cap. Stitch down its edges carefully, especially if the patch sits near a pocket opening or somewhere fingers may brush against it. If the underlying tear continues under the stem, reinforce from behind rather than expecting that narrow crocheted section to carry repeated tension alone.
Original Tutorial and Creator Credit
Creator/Site: The Caffeinated Snail
6. Crochet Rainbow Arc Repair Patch
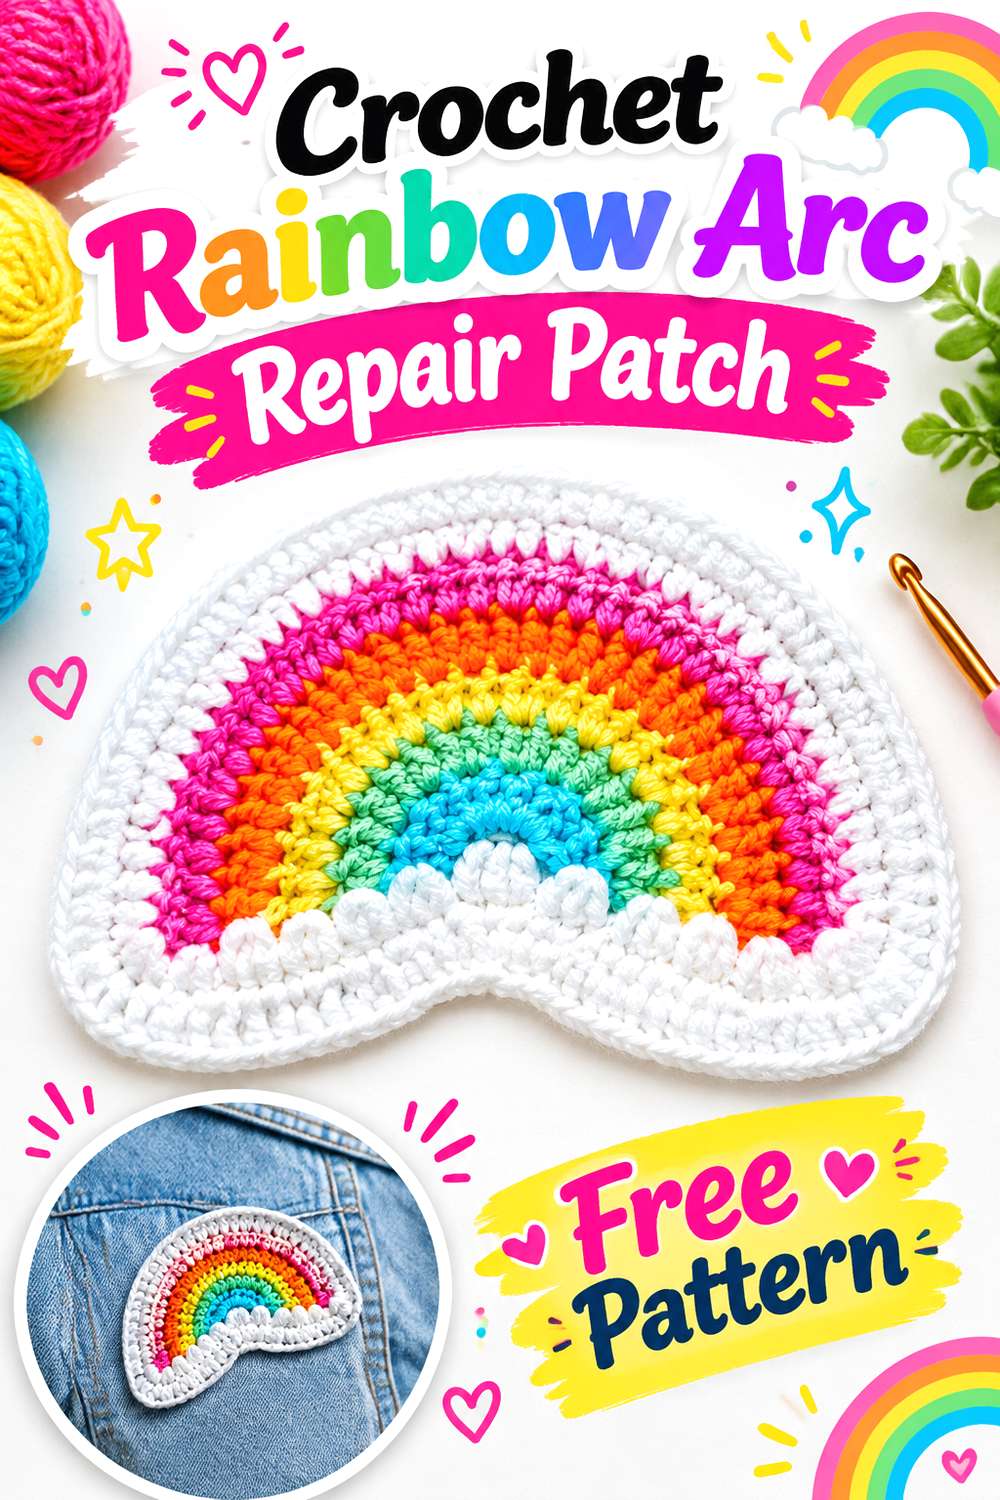
A rainbow naturally follows a curved line, making it useful for crescent-shaped wear, the upper edge of a pocket repair, or a patch that needs to bridge a wider area without becoming a full circle. Lovable Loops’ appliqué is worked into a recognizable rainbow form with multiple color bands and a decorative lower edge.
For mending, the color changes turn the repair into a strong graphic feature. That works especially well when the original garment already has several colors or when you deliberately want the repair to contrast. Before scaling the motif, remember that a larger rainbow also means more yarn carried through the patch and potentially more thickness across the repaired zone.
Align the Arc With Curved Damage
A rainbow can visually absorb damage that follows the contour of a pocket, neckline area, or curved abrasion. Rotate it until the solid bands cover the weakened cloth rather than simply centering the motif. If the hole falls below the arch, a backing can fill the structural gap while the rainbow remains the decorative top layer.
Watch the Color-Change Thickness
Multiple colors mean additional yarn ends and transitions. Weave and secure them so they do not create a concentrated lump on the reverse side. This is especially important on clothing worn directly against the body. A bag or jacket exterior is more forgiving, but loose ends should still be contained before the patch is sewn down.
Original Tutorial and Creator Credit
Creator/Site: Lovable Loops
7. Crochet Cloud Scallop Patch
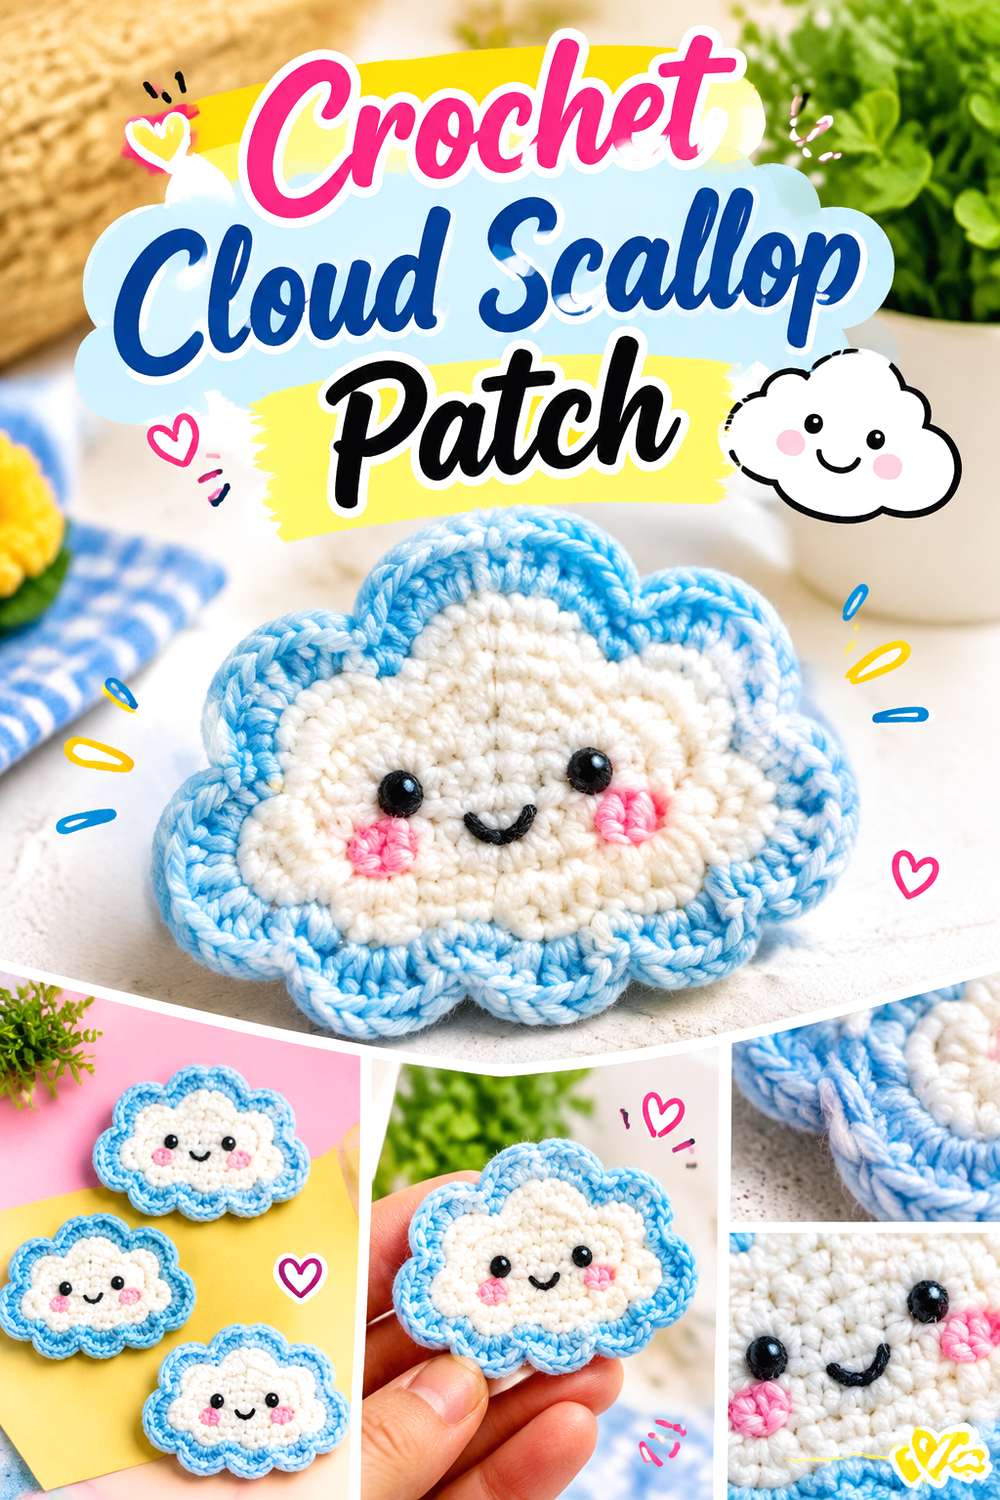
A cloud has one of the most forgiving silhouettes for visible mending because its rounded bumps naturally disguise an uneven repair edge. MummaJ Crochet’s cloud appliqué is a flat decorative motif with a series of soft curves rather than a rigid geometric outline.
That makes it suitable for a small sweater hole, a worn tote corner, or an area where you want the patch to blend into a playful composition with stars or a rainbow. The main consideration is coverage beneath the scallops. A cloud can look wide while some of its outer curves cover relatively little cloth, so judge the motif against the complete damaged footprint.
Break Up a Straight Repair Line
The scalloped edge is useful when you do not want the eye to follow the exact outline of the original tear. Place the fuller cloud lobes over the widest weak points and let the smaller curves extend onto strong fabric. The irregular perimeter can make a rectangular reinforcement underneath feel much less obvious.
Keep Bends From Becoming Bulky
A cloud can be tempting for elbows or knees, but those areas repeatedly flex. Test the finished motif by pinning it in place and bending the garment. If the patch bunches into a thick ridge, move it slightly away from the deepest fold or choose a flatter yarn combination rather than forcing the motif into an uncomfortable spot.
Original Tutorial and Creator Credit
Creator/Site: MummaJ Crochet
8. Crochet Cat Silhouette Patch
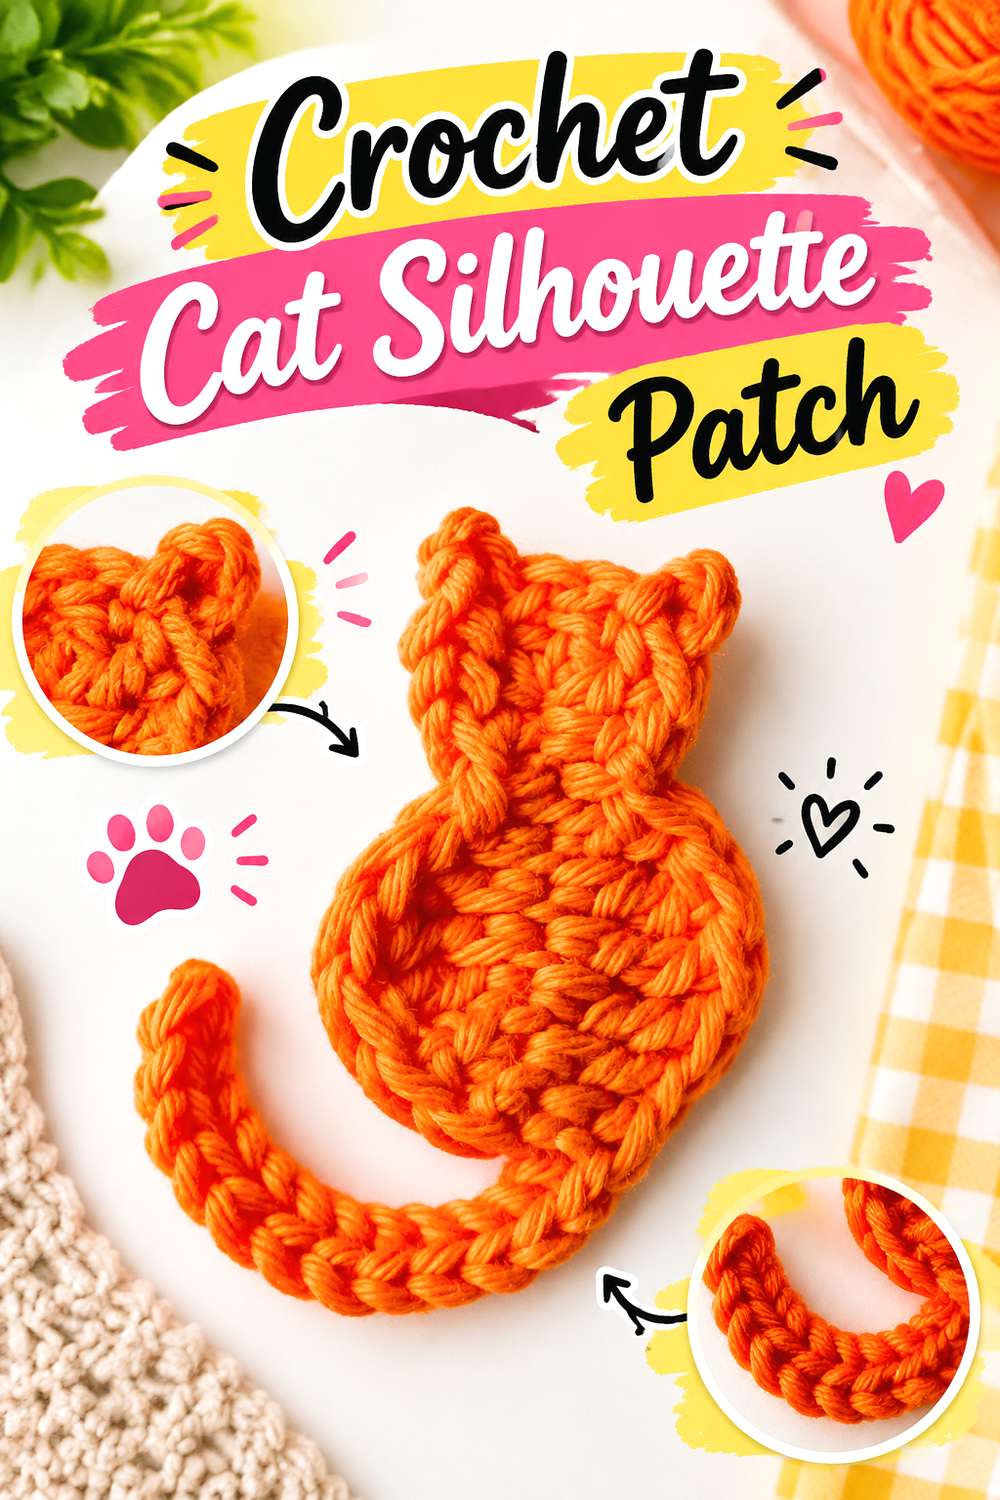
A recognizable animal silhouette can make a repair look more like customized clothing than damage control. Elendipity’s original cat appliqué is designed from a continuous foundation and avoids a collection of separately sewn body pieces, producing a compact feline outline.
For mending, the ears and curved body give you both character and useful directional coverage. A cat works particularly well on a pocket, bag panel, sweater front, or jacket where the entire shape can be seen. Avoid squeezing it into an area that cuts off the ears or forces the body around a thick seam, because recognizable silhouettes depend heavily on their outer contour.
Preserve the Ears When Positioning
The small ear points are visually important but provide limited attachment area. Keep them on solid fabric rather than directly above a large opening. Stitch them down carefully so they do not flip back after washing or snag under another layer.
Let the Silhouette Become the Focal Point
This design does not need to match the garment closely in color. A high-contrast cat can intentionally pull attention away from the original damaged area. If you prefer a quieter repair, choose a related color and let the outline provide the interest. Either way, make the placement look deliberate rather than merely centered over the hole.
Original Tutorial and Creator Credit
Creator/Site: Elendipity
9. Crochet Frog Character Patch

GoldenLucyCrafts’ frog appliqué builds a playful character around a heart-shaped body, with additional legs, facial details, and optional embellishments. That gives you more control over how simple or detailed the visible mend becomes.
As a patch, the main body can cover a small hole while the legs extend beyond it to make the repair appear intentionally larger. This style is best where the character can lie relatively flat and remain visible, such as a tote, jacket, blanket, or roomy pocket. If the repaired item is frequently washed or heavily rubbed, simplify loose decorative elements rather than assuming every detail has to be included.
Choose Character Details Selectively
Eyes, tongues, bows, and other small additions create personality but also add attachment points and potential snagging. For clothing that sees hard wear, the flatter version may be more practical. You can still preserve the frog identity through body shape and embroidered features rather than adding every possible piece.
Reinforce Under the Main Body
The crocheted body should cover the actual weakened area; the legs and other details are primarily decorative extensions. If the hole is larger than the solid central section, add a backing rather than counting the projecting pieces as structural coverage. This keeps the cute outline from determining a weaker repair.
Original Tutorial and Creator Credit
Creator/Site: GoldenLucyCrafts
10. Crochet Acorn Tear Cover Patch
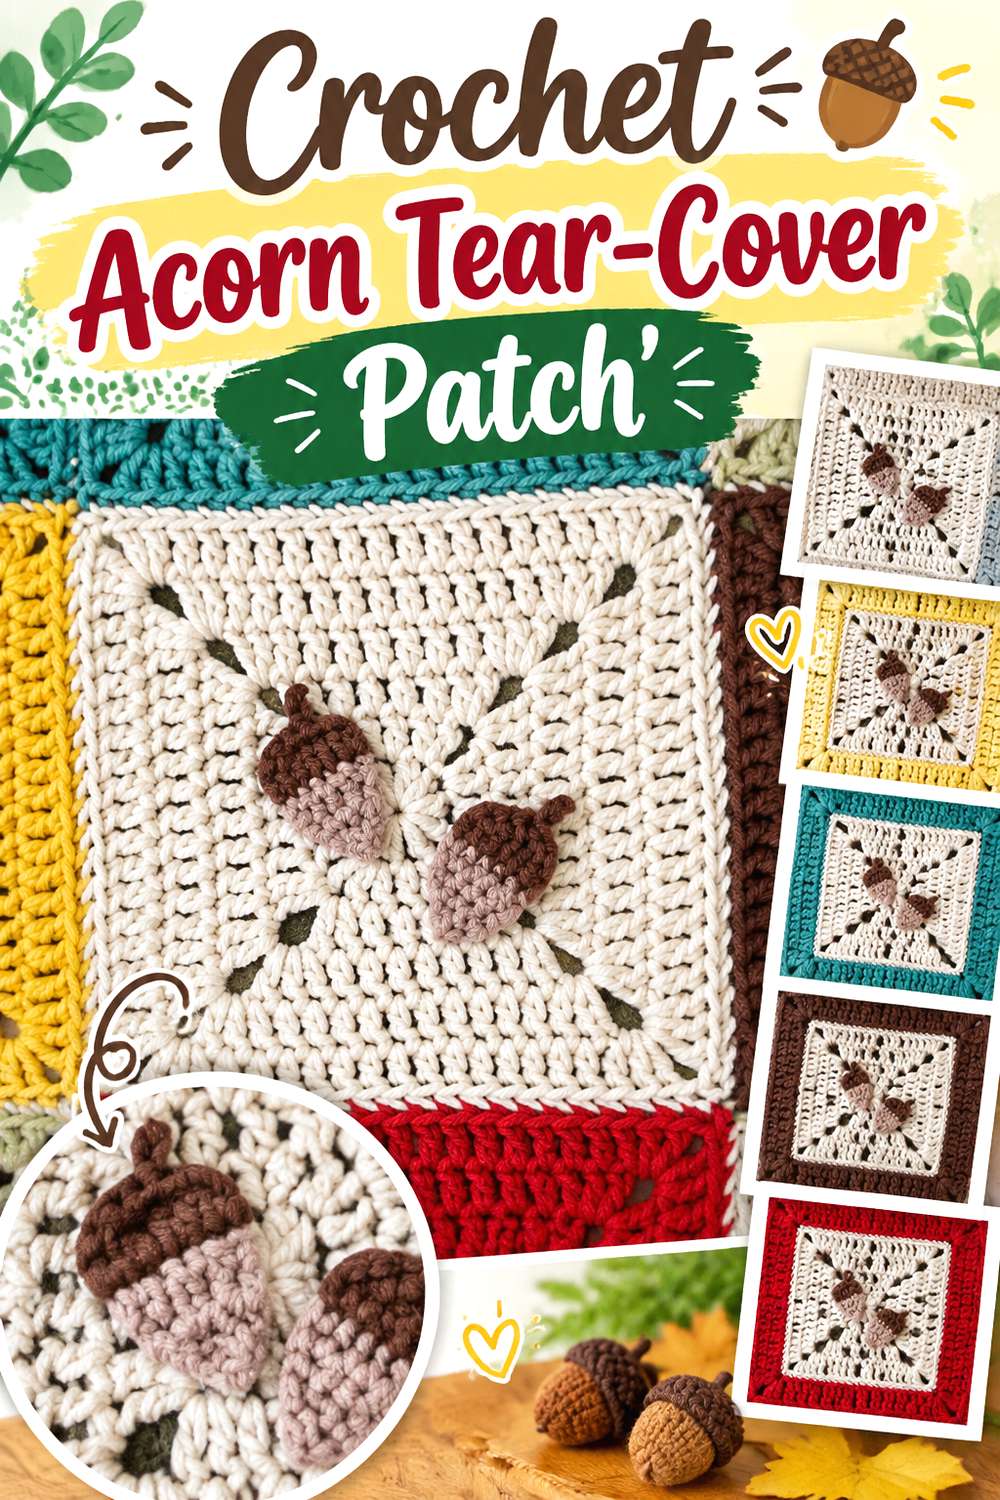
An acorn is compact at the bottom, wider across the cap, and finished with a short stem, giving it a useful vertical footprint for mending. Maria’s Blue Crayon’s tutorial presents a flat acorn appliqué with a contrasting upper section and stem.
This is a good autumnal option for a narrow vertical tear, a worn pocket corner, or a small hole that needs slightly more width at one end. The clear separation between nut and cap can also hide a change in fabric color around the damage. Because the stem is narrow, orient the broader body over the weak area rather than placing the decorative top directly on the hole.
Use the Wide Cap Strategically
If the damage spreads sideways near its top, the acorn silhouette can fit more naturally than a simple oval. Rotate or shift the patch so the cap covers the broadest worn section. Do not be afraid of slight asymmetry if it produces better structural overlap with sound cloth.
Protect the Little Stem
The stem helps the motif read clearly as an acorn, yet it is also the easiest section to catch or curl. Attach it completely rather than leaving it raised for texture. On clothing, check the backside after sewing because several attachment stitches concentrated in a narrow space can feel surprisingly bulky.
Original Tutorial and Creator Credit
Creator/Site: Maria’s Blue Crayon
11. Crochet Pumpkin Autumn Patch

A pumpkin gives you a broad rounded body without the perfectly even outline of a circle. Elisa’s Crochet describes this appliqué as lying flat while still having some thickness, a combination that suits decorative use on sturdy surfaces.
For mending, the segmented pumpkin look makes a useful statement patch for denim, canvas, jackets, or seasonal accessories. The body can conceal a nearly round worn area, while the stem visually extends the patch above the actual damage. Because a pumpkin reads strongly as a seasonal motif, it is especially suitable when you enjoy making the repair part of an autumn wardrobe rather than trying to keep it neutral year-round.
Cover the Hole With the Pumpkin Body
Treat the stem as decoration, not extra repair area. Center the broad crocheted body over the compromised cloth and leave enough healthy fabric around it for attachment. If the hole extends above the pumpkin, reinforce that portion separately rather than relying on a narrow stem to bridge it.
Consider Seasonal Longevity
A conspicuous pumpkin may be ideal on a fall tote or jacket you already wear seasonally. On an everyday garment, decide whether you will still enjoy the motif outside autumn. Visible mending lasts longer than a temporary decoration, so motif choice should reflect how you actually use the item.
Original Tutorial and Creator Credit
Creator/Site: Elisa’s Crochet
12. Crochet Bee Accent Patch

Kerri’s Crochet teaches a flat bee appliqué with a striped body, wings, and embroidered details. The finished motif packs several recognizable features into a relatively compact shape, making it useful when the damaged area is small but you want the repair to attract attention.
For mending, position the body over the actual hole and treat the wings as decorative extensions. A bee can work on a chest pocket, bag, hat, jacket, or alongside flowers in a larger repair composition. Because multiple colors and stitched details are involved, the reverse can accumulate yarn ends; keep those contained before attaching the bee to clothing.
Let the Body Do the Covering
The wings may add width, but they are not the strongest area to place over an open hole. Keep the denser body on the compromised cloth and let the wings sit on intact fabric. This provides more stable attachment points and reduces the chance of an open area showing around the wing edges.
Keep Embroidery From Becoming Abrasive
Facial or wing markings can add several thread ends to the back of the appliqué. Secure them neatly before sewing the patch onto the garment. If the bee will sit on thin fabric worn against skin, check for hard knots or thick overlaps rather than judging comfort only from the front.
Original Tutorial and Creator Credit
Creator: Kerri’s Crochet
13. Crochet Butterfly Wing Patch
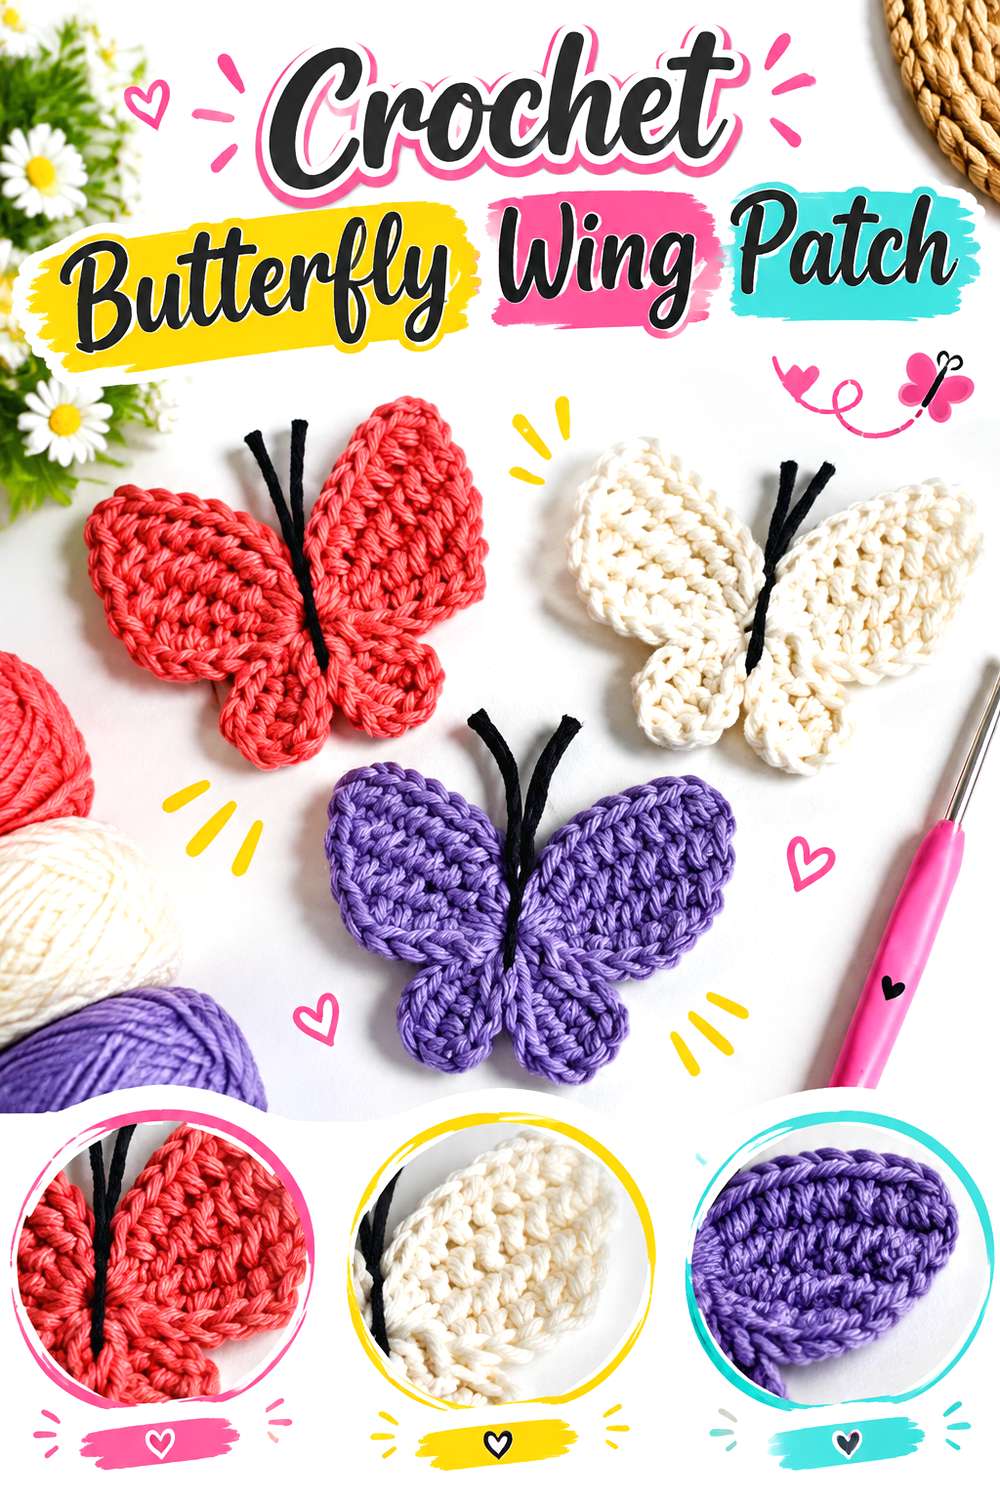
A butterfly is well suited to damage that spreads horizontally because its wings provide width on both sides of a narrow center. GratiaProject’s tutorial uses a Tunisian-crochet element to create a finished butterfly appliqué with clearly separated wing shapes.
For visible mending, this can turn a short horizontal snag or paired worn spots into a deliberate focal point. Center the butterfly body along the strongest remaining fabric and let the wings extend over the surrounding wear. The silhouette depends on the wings sitting clearly, so it is more successful on an open surface than where half the motif would disappear into a seam or pocket fold.
Spread the Wings Across Wide Damage
A butterfly can cover more width than its small center suggests. Before attaching it, compare each wing with the outer limits of the weakened fabric. If a gap between the wings exposes an actual hole, put reinforcement behind the opening so the decorative shape does not leave unsupported cloth visible.
Tack the Wing Tips Thoughtfully
The tips can be left with a hint of dimension on low-friction decor, but clothing generally benefits from more secure attachment. Stitch enough of each outer wing to prevent snagging while preserving the recognizable contour. Test the garment in motion because a wing that lies flat on a table may lift once the fabric bends.
Original Tutorial and Creator Credit
Creator: GratiaProject
14. Crochet Strawberry Mending Patch

A strawberry has a naturally tapered shape: wide at the leafy top and narrow toward the bottom. The Bumbling Busy Bee’s original video teaches a flat strawberry appliqué, making the fruit a useful option for damage that narrows in one direction.
On denim, a tote, apron, or cardigan, the berry shape can cover a small hole while creating an unmistakably intentional repair. It is also easy to integrate visually with floral or garden-themed mends elsewhere on the garment. Check whether the leafy crown adds more height than your repair location allows; a motif that runs into a waistband or seam may be harder to attach cleanly.
Point the Berry Toward the Narrow End
A tapered hole or abrasion can disappear more naturally if the strawberry’s pointed end follows the same direction. This helps maximize coverage without making the entire patch oversized. Keep the broad top on solid enough fabric to support both the berry and its leafy detail.
Decide How Much Surface Detail You Need
Seeds or other decorative marks make the strawberry more recognizable, but the patch can become visually busy on patterned fabric. For a prominent repair, embrace that contrast. For a quieter mend, let the silhouette and color do most of the work and keep any added stitching restrained.
Original Tutorial and Creator Credit
Creator: The Bumbling Busy Bee 🐝
15. Crochet Star Point Patch
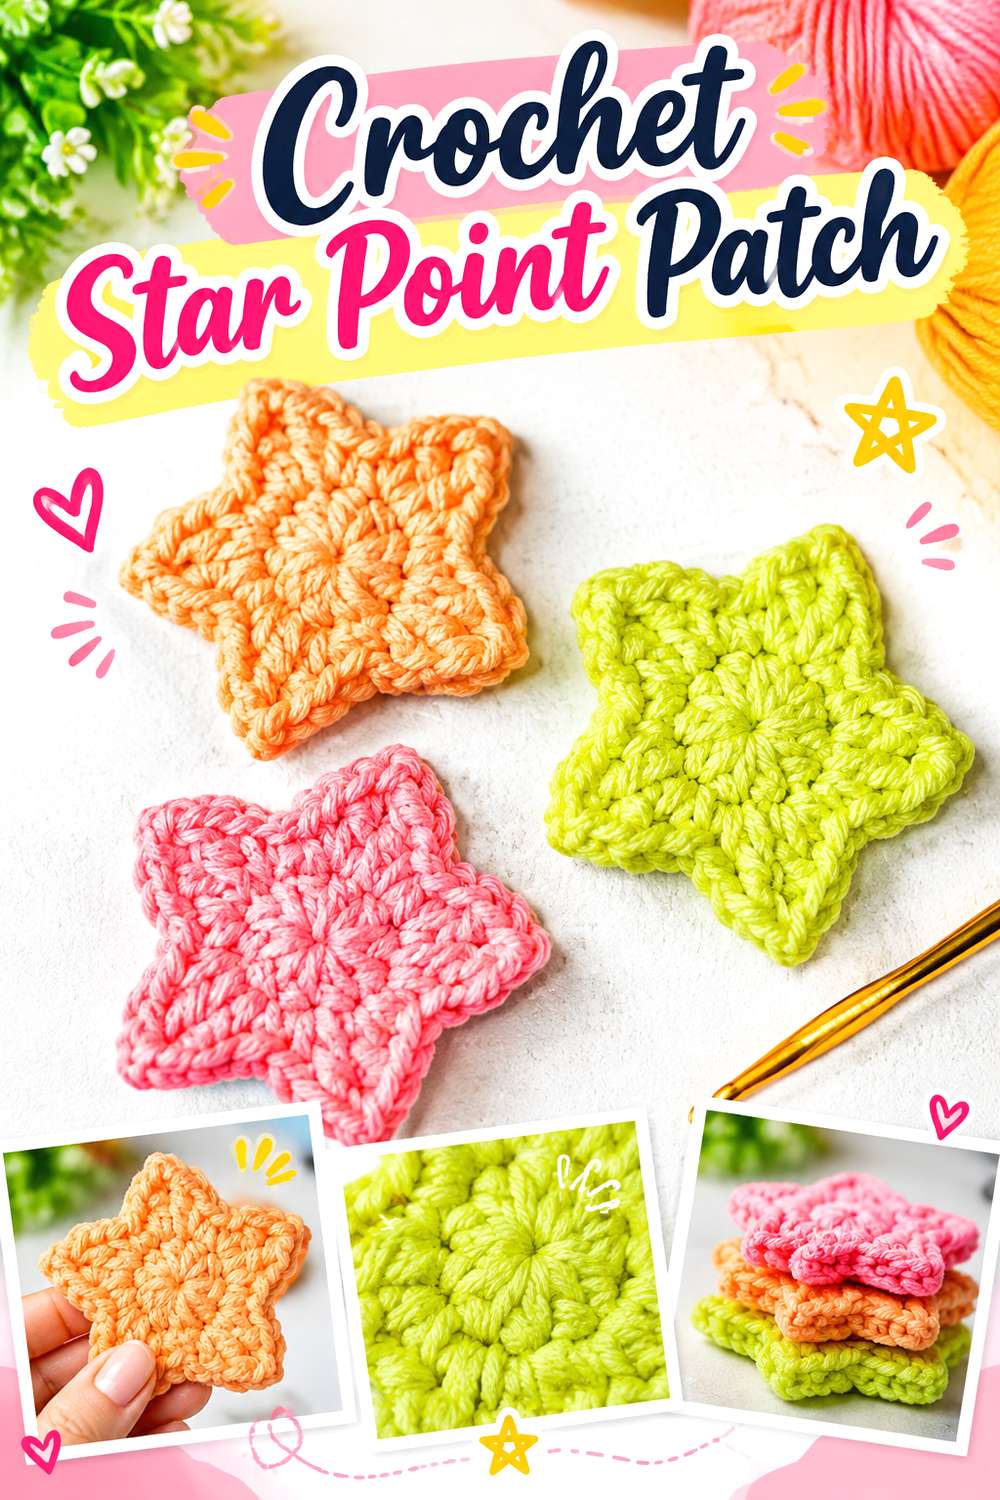
A star is compact but visually energetic, and its multiple points can spread beyond a small central hole without making the patch feel heavy. VivCrochets’ mini star tutorial creates a five-point appliqué with a clearly defined outline.
This shape works well for a tiny snag, burn mark, or localized worn spot on a jacket, bag, hat, or jeans. It can also be repeated in a small constellation when several defects appear close together. Because stars have narrow points, the center should cover the damaged cloth while the tips rest on strong fabric where they can be securely sewn.
Put the Solid Center Over the Hole
Do not choose placement based on where the points look most symmetrical. First make sure the central portion completely covers the weakened area. The star will still read correctly if it is rotated, so use that freedom to place each point over fabric that can hold attachment stitches.
Flatten the Points Before Final Sewing
Star tips can twist after crocheting, especially if yarn tension varies around the motif. Shape the finished star before attachment and confirm that all points sit in the direction you want. A neat outline makes a small visible mend look deliberate; uneven tips can make the repair appear rushed even when the stitching is secure.
Original Tutorial and Creator Credit
Creator/Site: VivCrochets
16. Crochet Lemon Oval Patch

A lemon sits somewhere between an oval and a pointed leaf shape, giving it more directional coverage than a circle while remaining broad through the center. RaffamusaDesigns’ tutorial offers flat lemon appliqués and discusses more than one size option, making it useful when you want to compare scale before choosing a repair motif.
The lemon works especially well over an oblong worn spot on an apron, tote, kitchen textile, pocket, or casual garment. Its stem and leaf can extend the design away from the damage without forcing the main body to become larger. For mending, place the solid fruit over the weakened area and regard the green details as visual accents.
Use the Oval Body for Oblong Wear
Longer holes often look awkward under a circular patch because the circle must become unnecessarily large. A lemon’s elongated body can follow the damage more efficiently. Rotate it horizontally, vertically, or diagonally according to the tear rather than assuming fruit must always sit upright.
Keep the Leaf Out of High-Friction Spots
The attached leaf adds charm but also introduces another projecting edge. On an apron front or tote, that is usually easy to manage. Near a pocket opening, cuff, or zipper, sew it down especially carefully or position the motif so the leaf points away from the area that receives the most handling.
Original Tutorial and Creator Credit
Creator/Site: RaffamusaDesigns
17. Crochet Owl Character Patch

Repeat Crafter Me’s owl appliqué uses a round body with separate eye details plus embroidered features for the beak and feet. The result is a compact character motif with a solid central area, which is exactly the portion most useful for covering damage.
An owl suits a small round or square worn patch on a backpack, jacket, blanket, or pocket. Because its identity comes from the face as much as the body shape, you can place the main crocheted circle over the repair and use the added details to make that structural decision look intentional. Keep the face level when positioning; a slightly crooked body may be charming, but misaligned eyes can make the patch look accidentally twisted.
Center the Repair Behind the Body
The owl’s eyes and embroidered feet should not determine coverage. Put the solid body over the weakened area first, then place the facial features relative to that position. If the damage is larger than the body, choose another motif or add structural backing rather than stretching the design beyond its useful footprint.
Simplify Details for Hard-Working Items
Backpacks and children’s outerwear may experience much more abrasion than a decorative blanket. Fewer raised elements generally mean fewer things to catch. Embroidered or firmly sewn features can preserve the owl expression without adding unnecessary dimensional parts, provided you follow the source for the actual motif construction.
Original Tutorial and Creator Credit
Creator/Site: Repeat Crafter Me
18. Crochet Lightning Bolt Tear Patch

A lightning bolt is one of the most practical decorative shapes for a long, narrow tear. Crochet Spot’s appliqué has an angular zigzag silhouette that can follow damage diagonally without requiring the wide coverage of an oval or flower.
This is a strong option for jeans, a jacket sleeve, a canvas bag, or another item where a sharp graphic motif fits the existing style. Because the bolt changes direction, it can disguise a tear whose edges are not perfectly straight. The narrow sections still need sound cloth beneath them, so a longer hole may require backing even when the entire opening disappears visually behind the motif.
Follow the Tear Instead of the Grain
Visible repairs do not have to align vertically or horizontally with the garment. Rotate the bolt until its angles echo the damage. A diagonal placement often looks more intentional and can give you more solid fabric around the edges for stitching than forcing the motif into an upright position.
Reinforce Narrow Turns From Behind
Where the bolt bends sharply, the crocheted patch becomes narrower. Those sections may not provide enough area to stabilize severely weakened fabric by themselves. A discreet backing patch can carry the structural load while the lightning bolt conceals the repair and supplies the graphic finish.
Original Tutorial and Creator Credit
Creator/Site: Crochet Spot
19. Crochet Watermelon Slice Patch

Hookok’s watermelon appliqué forms a semicircular slice with a contrasting rind and seed details, and the tutorial describes a folded construction that gives the fruit a finished appearance on both sides.
For mending, the half-circle shape is useful along a hem, pocket edge, bag opening, or other location where the damage sits close to a boundary. Rather than centering a full circular patch and losing part of it over the edge, a watermelon slice can visually relate to that line. Because the motif may be thicker than a single flat layer, check its placement carefully on clothing that needs to bend or drape.
Let the Straight Edge Work With a Seam
The flat side of the slice can sit parallel to a hem, pocket top, or panel seam while the curved rind covers the damaged area. This can make the patch look integrated with the garment’s construction. Avoid stitching directly through a bulky seam allowance unless your needle and fabric can handle it comfortably.
Account for the Double-Layer Feel
A folded or doubled motif may feel more substantial than a standard appliqué. That extra body can be useful on a sturdy bag but cumbersome on a lightweight shirt. Pin the watermelon in place and handle the item before sewing so you can decide whether the texture suits the location.
Original Tutorial and Creator Credit
Creator/Site: Hookok
20. Crochet Leaf Slender Repair Patch
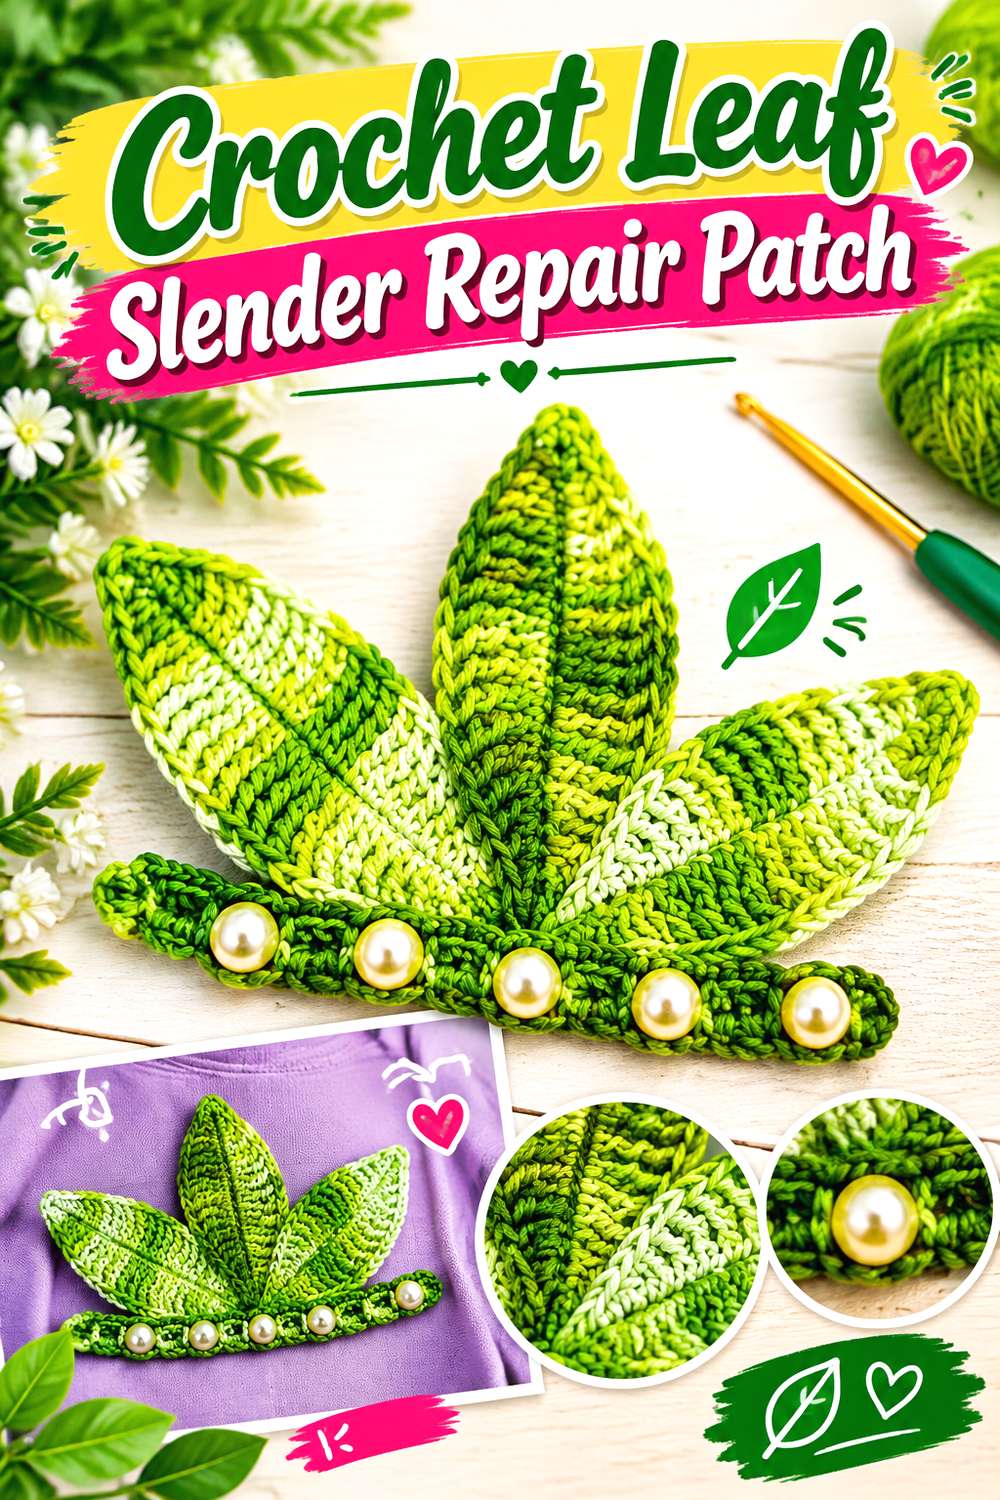
A crochet leaf is an excellent alternative when the repair is too long for a small flower but too narrow for a large decorative patch. Edinir Croche’s video demonstrates a leaf appliqué with a tapered outline and distinct pointed ends.
That form can follow a slim tear on jeans, a sleeve, tote, or pocket area while looking more organic than a simple rectangle. Leaves also combine easily: one can cover a single split, while several can form a branch-like composition around multiple worn spots. For an actual hole, keep the broader center over the opening and use the pointed ends to extend onto secure fabric.
Run the Leaf Along a Long Split
Rotate the motif so its center vein direction follows the damage. This usually provides more efficient coverage than placing a round patch over the same tear. If the hole is longer than the leaf’s solid section, use another leaf or a backing rather than stretching the motif and exposing weak cloth near its tips.
Build a Cluster for Scattered Wear
Several small worn spots can be awkward under one oversized patch. Separate leaves can turn them into a deliberate botanical arrangement while allowing each motif to sit exactly where reinforcement is needed. Vary the angles rather than lining every leaf up identically, but keep all attachment edges on healthy enough fabric to hold the repair.
Original Tutorial and Creator Credit
Creator: Edinir Croche
Quick Comparison: Which Crochet Patch Shape Fits the Repair?
| Damage or Placement | Useful Patch Shapes | Main Consideration |
|---|---|---|
| Small round hole | Heart, star, owl, bee | Put the solid center over the hole |
| Broad shallow wear | Daisy, sunflower, pumpkin | Check total solid coverage, not just overall span |
| Long narrow tear | Lightning bolt, leaf, lemon | Align the long axis with the weakened fabric |
| Curved worn area | Rainbow, cloud, watermelon | Use the motif’s natural curve rather than forcing a circle |
| Irregular fraying | Flower, mushroom, butterfly | Back open gaps if the decorative outline leaves spaces |
| Pocket or bag damage | Cat, frog, acorn, strawberry | Watch seams, openings, and projecting edges |
Conclusion
The most successful crochet visible mending patch is the one whose shape works with the damage rather than simply covering it with the largest motif available. Hearts and stars suit compact spots, flowers handle irregular edges, leaves and lightning bolts follow narrow tears, while fruit, animals, and woodland designs turn larger repairs into deliberate decoration.
Before sewing anything permanently, check that the crochet extends onto strong fabric, the yarn and garment can be cared for compatibly, and projecting details will not snag in normal use. Structural backing may still be worthwhile in high-stress areas. Once you have chosen the shape, use the linked original tutorials for the creators’ exact crochet construction details.
Frequently Asked Questions
Can a crochet appliqué repair a hole by itself?
Sometimes a dense motif over a small, low-stress hole can provide useful coverage, but not every appliqué should be treated as structural reinforcement. If the surrounding fabric is thin, fraying, or under repeated tension, stabilize it first or add a backing behind the hole. The crochet patch can then become the visible decorative layer while the reinforcement manages the stress more reliably.
What yarn is best for crochet visible mending patches?
There is no single fiber or weight that suits every garment. Consider how thick the host fabric is, how flexible the repaired area needs to remain, and how the item is washed. A heavy yarn can overwhelm a thin shirt, while a very delicate yarn may not give the presence you want on denim. Check both the yarn label and the original tutorial before changing materials.
How much larger should the patch be than the damaged area?
The important principle is that your attachment stitches should land in sound fabric rather than weak or fraying fibers. There is no universal measurement because holes and fabrics behave differently. Lay the finished motif over the area and check every direction, including the spaces between petals, wings, points, or scallops. If some damage remains exposed, use a larger motif or backing.
Can I put crochet patches on stretchy sweaters or T-shirts?
Yes, but attachment needs more care than on rigid denim or canvas. Do not stretch the garment while sewing the appliqué on, and do not pull your attachment stitches so tightly that the surrounding knit puckers. Pinning or loosely basting first lets you check how the fabric moves. A very stiff crochet motif may also feel uncomfortable on a soft, highly elastic garment.
Should I sew down every petal, wing, or point?
For garments and bags that receive regular wear, securing projecting edges usually improves durability and reduces snagging. You can retain some texture without leaving whole tips loose. Pay particular attention to star points, flower petals, butterfly wings, stems, leaves, and ears near pockets, cuffs, straps, and zippers. Decorative items that experience little friction can tolerate more raised dimension.
How do I wash clothing after adding a crochet patch?
Follow the care requirements of every material involved rather than assuming the original garment instructions still cover the whole piece. The patch yarn, backing fabric, embroidery, buttons, beads, or other additions may have different limitations. Check the yarn label and creator guidance for the crochet motif, and use the gentler compatible care method when the components differ.