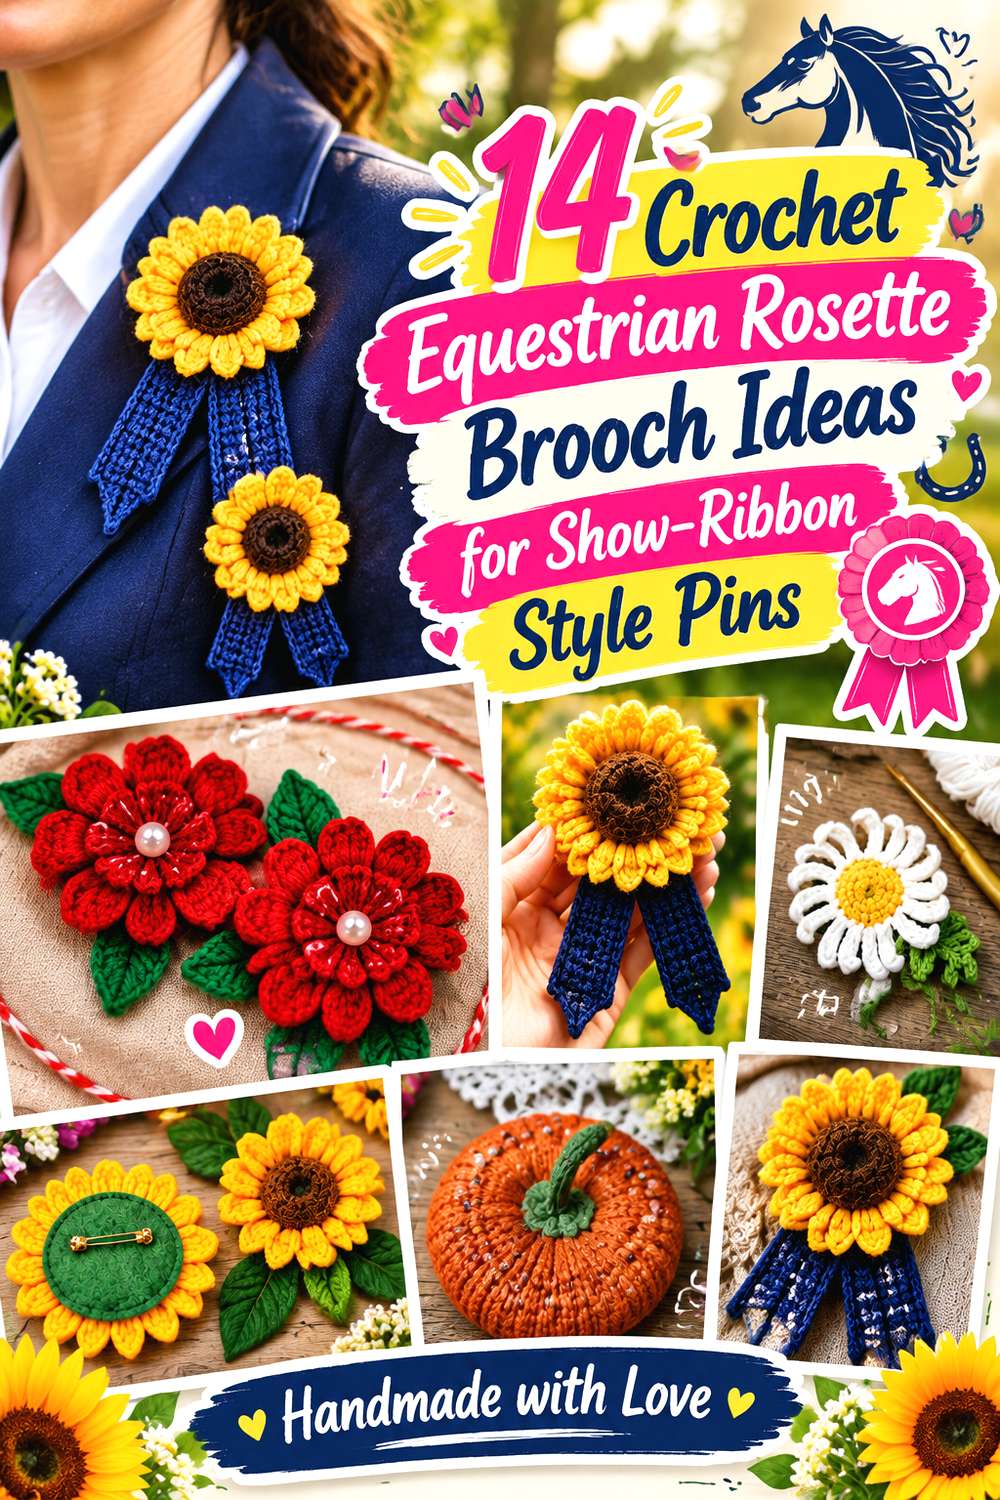
14 Crochet Equestrian Rosette Brooch Ideas for Show-Ribbon Style Pins
Equestrian rosette brooches can take more than one form. Some closely resemble traditional prize ribbons, with a circular center, textured outer ring, and hanging tails. Others move toward a decorative brooch, using pleats, looped petals, roses, daisies, poppies, or layered flowers to give the familiar rosette silhouette more personality.
The 14 ideas below deliberately explore both directions. The strongest award-style sources teach the ribbon or rosette structure directly, while several floral sources are included for their verified brooch or center construction. In those cases, equestrian-style tails are an adaptation to plan separately rather than a feature claimed by the original creator. That distinction lets you compare shape, depth, backing, weight, and finishing without treating a flower tutorial as a hidden substitute for a complete horse-show rosette pattern.
Quick List
- Crochet Pleated Equestrian Rosette Brooch
- Crochet Triple-Color Prize Equestrian Rosette Brooch
- Crochet Picot-Edge Equestrian Rosette Brooch
- Crochet Loop-Petal Equestrian Rosette Brooch
- Crochet Spiral Rose-Center Equestrian Rosette Brooch
- Crochet Rolled Rose Equestrian Rosette Brooch
- Crochet Flat Flower-Center Equestrian Rosette Brooch
- Crochet Beaded Thread Equestrian Rosette Brooch
- Crochet Double-Layer Equestrian Rosette Brooch
- Crochet Overlapping-Petal Equestrian Rosette Brooch
- Crochet Poppy-Center Equestrian Rosette Brooch
- Crochet Daisy-Center Equestrian Rosette Brooch
- Crochet Felted Sunflower Equestrian Rosette Brooch
- Crochet Classic Badge Equestrian Rosette Brooch
Decide Whether You Want an Award Rosette or a Floral Rosette
Start with silhouette rather than color. A classic award rosette depends on a strong circular face plus visible streamers or tails. A floral brooch gets most of its character from petals, dimensional shaping, or a botanical center, so adding large tails can make the finished piece visually crowded.
For a recognizable horse-show look, prioritize a relatively broad circular center and let the tails extend beyond it. For a more decorative equestrian accessory, a rose, daisy, poppy, or other flower can become the focal point while narrower tails supply only a hint of award-ribbon styling.
Several tutorials below teach only the verified flower or brooch center. Treat those sources as construction references for that component. They do not automatically establish the best tail dimensions, horse-show color conventions, or attachment method for your adaptation.
Structure and Backing Matter More Than Extra Decoration
A rosette can look balanced on a table yet droop when pinned vertically. The farther the flower projects from the garment, the more leverage it places on the pin and fabric. Dense centers, multiple crochet layers, beads, wire, and felted motifs can all increase that effect.
Before permanently attaching a brooch bar, hold the finished piece against the jacket, scarf, tote, or display surface you intend to use. A backing disk can help spread the load, but it should stay hidden from the front. Position the pin high enough on the back that the brooch hangs upright rather than tipping forward.
If you add crochet tails, attach them to the structural backing rather than relying on delicate outer petals to carry their weight.
Keep Decorative Brooches Separate From Horse Tack
These ideas are best approached as rider-worn brooches, costume details, keepsakes, display awards, or decorative accessories unless an original pattern specifically states another use. A sharp brooch pin should not sit where it can contact a horse, and loose streamers can create snagging concerns around tack, reins, stable fittings, or moving animals.
If you want a rosette for a bridle, saddle pad, halter, hobby horse, or competition display, verify the intended attachment method separately. Avoid assuming that a fastening designed for clothing is suitable for equestrian equipment. Around actual horses, minimizing loose hardware and dangling components is more important than copying the appearance of a conventional show ribbon exactly.
1. Crochet Pleated Equestrian Rosette Brooch
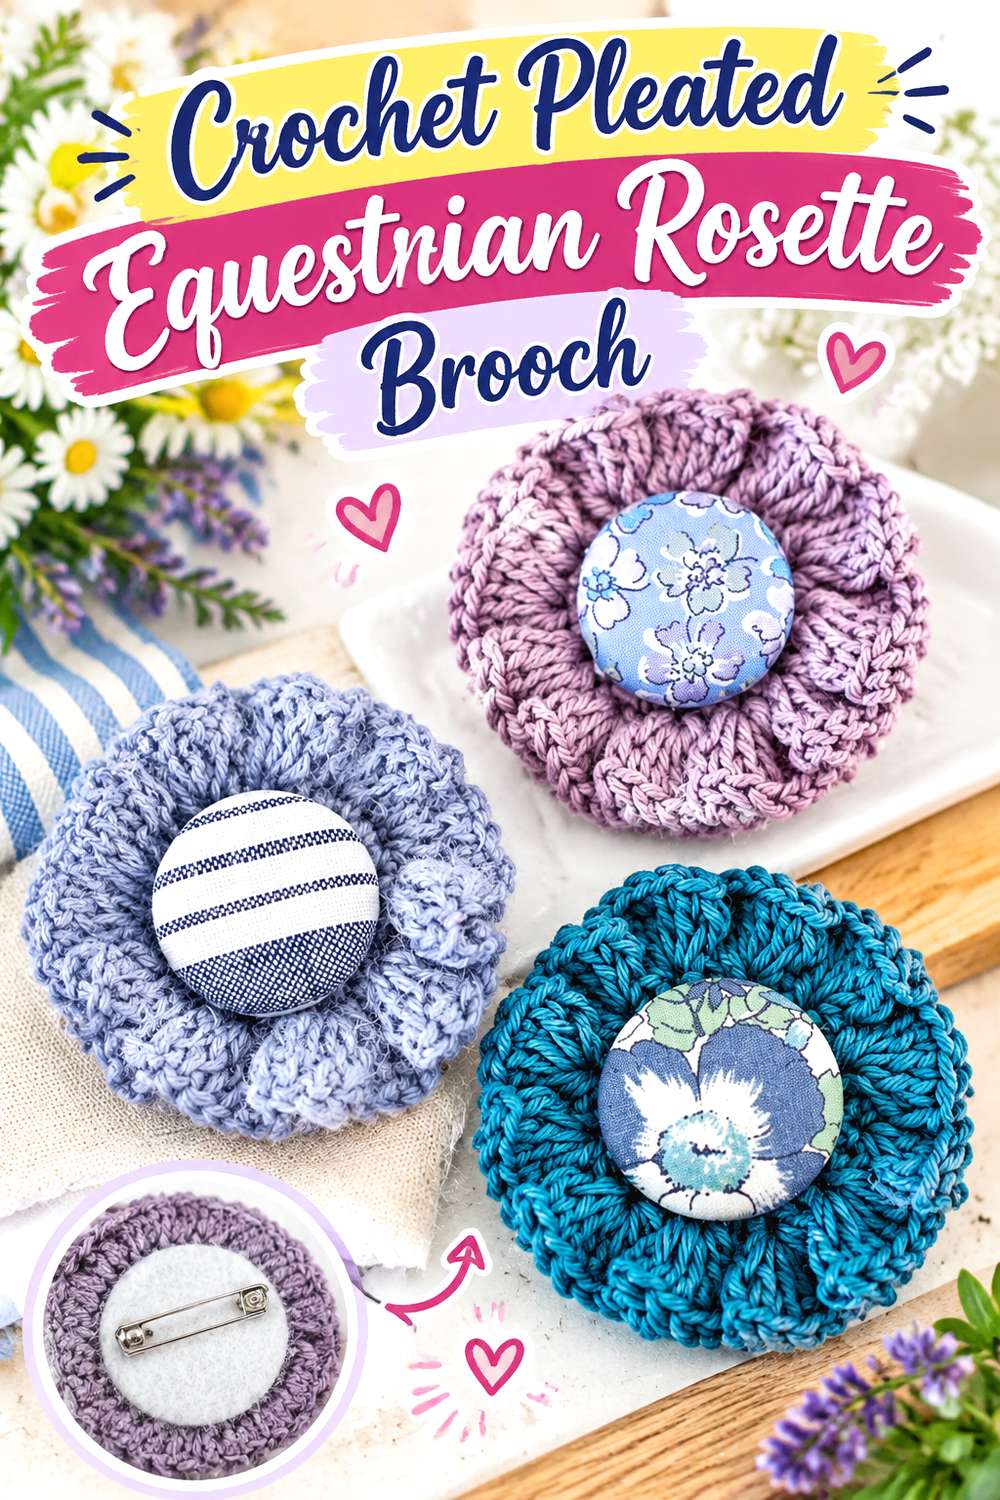
This version stays especially close to the circular face of a traditional prize rosette. Ronique’s original brooch uses a crocheted round with a pleated outer treatment and a covered button in the center, producing a compact badge-like form with visible radial texture. The tutorial also finishes the piece as a brooch rather than leaving the rosette as a loose appliqué.
For an equestrian interpretation, the pleated face can remain the main feature while one or two narrow crochet streamers are added behind the backing. Because the existing center already has strong visual structure, restrained tails will usually preserve its clean, medal-like appearance better than a very elaborate lower section.
Keep Pleats Visible Under the Center
The pleated edge is what gives this brooch its award-rosette character. A larger center embellishment may hide too much of that radial texture, while tails positioned too high can interrupt the circle from behind.
Complete the face first and judge its visible diameter before choosing any additional center or streamer treatment. If you adapt the tutorial, the goal is to preserve a clear circular hierarchy: center, pleated ring, then optional tails.
Backing Needs to Cover the Folded Edge
Pleated or highly textured crochet may create a less uniform reverse side than a flat disk. A neat backing can conceal attachment points and give the pin bar a more dependable surface.
Cutting or crocheting a backing should be treated as an adaptation rather than an assumed part of the source unless the tutorial provides it. Keep it smaller than the visible rosette so it does not peek out around the edge.
Choose Tail Length After Pin Placement
Do not determine streamer proportions while the rosette is lying flat. Temporarily position the pin, hold the brooch vertically, and then compare several possible tail lengths.
Longer tails create stronger show-ribbon recognition but also add movement and weight. Shorter tails allow the distinctive pleated circle to remain dominant, which suits a lapel or jacket where a full competition-size silhouette may feel excessive.
Original Tutorial and Creator Credit
Creator/Site: Ronique
2. Crochet Triple Color Prize Equestrian Rosette Brooch
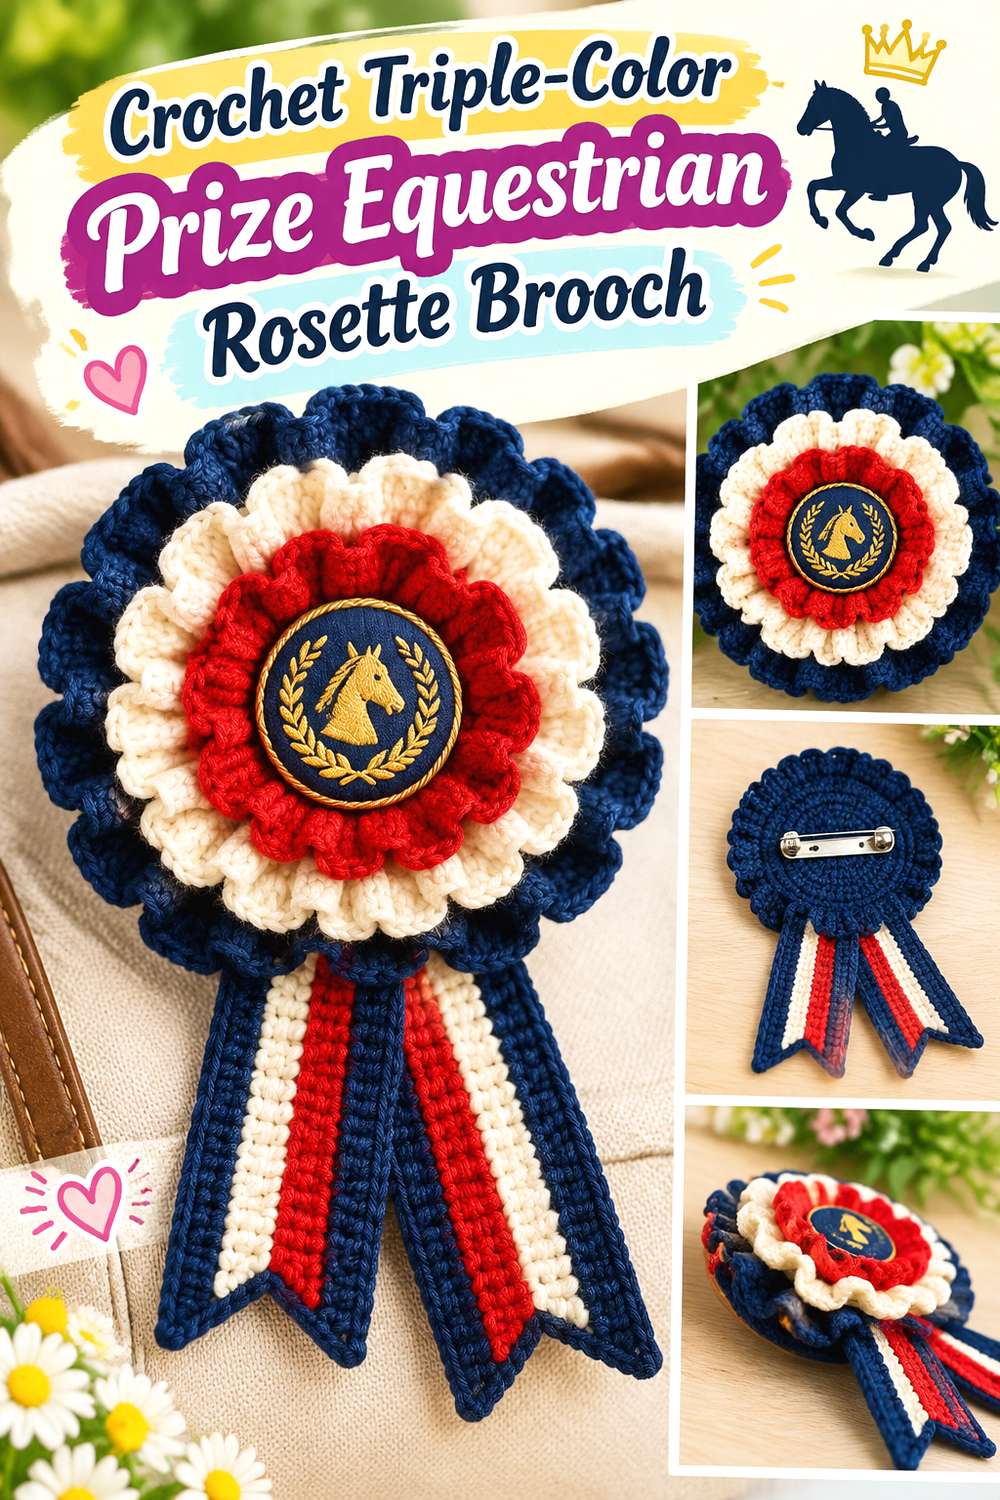
A recognizable prize-ribbon silhouette makes this one of the most direct starting points in the collection. Julia Chiang’s pattern for Clover Needlecraft combines a circular, color-blocked rosette with a hanging ribbon component, creating the visual language of a fair or competition award rather than a conventional flower brooch.
For an equestrian brooch, the design lends itself naturally to club colors, stable colors, or a restrained first-, second-, or third-place palette. If you add a brooch back for clothing, treat that fastening as a separate adaptation unless your chosen source version specifically includes one. The broad outer frill and distinct tail already do most of the visual work, so extra embellishment is not necessary.
Preserve the Three-Band Read
Multiple color zones are easiest to understand when each has enough visual space. If all three yarns are very similar in value, the layered rosette may read as one textured disk instead of a deliberate competition ribbon.
Lay the yarns next to one another before starting. Strong contrast is not mandatory, but each transition should still be visible if the color blocking is important to your version.
Prevent the Outer Frill From Flopping
The heavily textured outer round gives this prize ribbon its celebratory edge. When adapting it into a wearable brooch, check whether that edge remains upright once the piece is pinned vertically.
If the rosette folds forward, solve the support problem at the back rather than stiffening every visible stitch. A discreet backing can preserve the soft crochet surface while reducing collapse.
Let the Tails Carry the Award Silhouette
This design already has a strong rosette face, so the streamer is what immediately turns it into an award rather than simply a round motif.
If you alter the lower section, preserve a clear downward direction and avoid placing the tail so high that its top edge becomes visible through the rosette. Check alignment from the front before final assembly.
Original Tutorial and Creator Credit
Creator/Site: Julia Chiang / Little World of Whimsy on
3. Crochet Picot Edge Equestrian Rosette Brooch
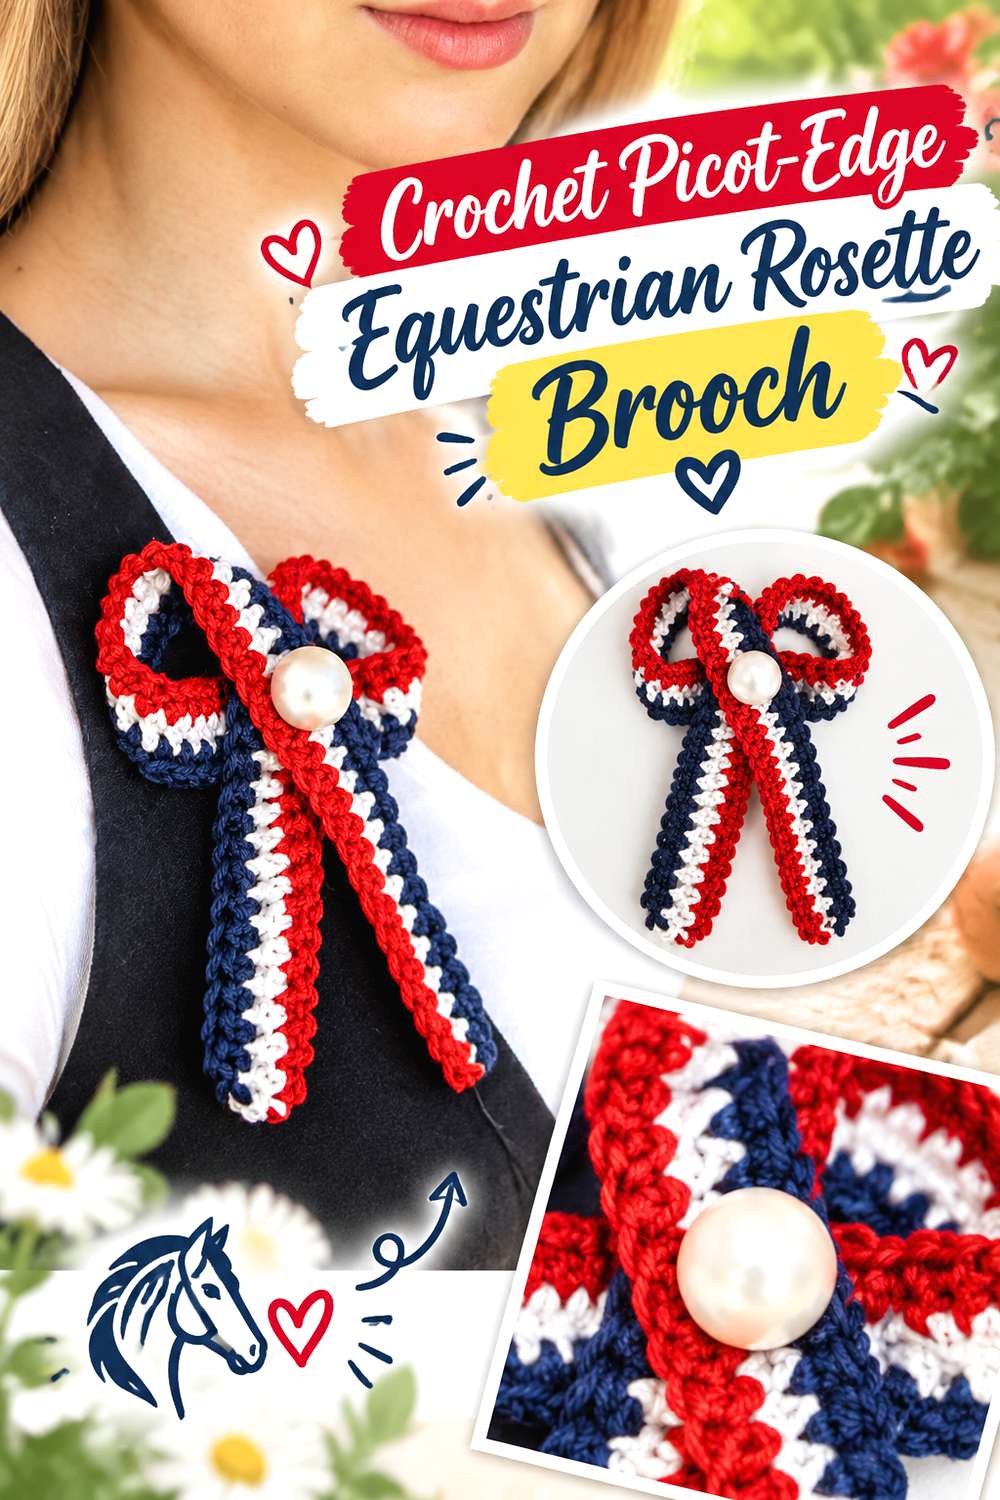
DROPS Design’s “May Colours” pattern is another strong match for traditional rosette styling. The finished design uses concentric color bands, an ornamental outer edge, a folded ribbon behind the circular face, and a safety pin on the reverse. That combination makes it particularly relevant when you want a crocheted badge that still reads clearly as an award ribbon.
The decorative perimeter creates a lighter, more open visual edge than a densely ruffled prize ribbon. That makes this option useful when you want the center colors to remain prominent. It can also inspire rosettes where the color order has meaning, provided you choose your palette intentionally rather than assuming competition colors are universal.
Picot Edges Benefit From Clean Blocking
Small decorative points attract attention to uneven spacing. If one section curls inward or sits flatter than the rest, the circular outline can appear irregular even when the center itself is correct.
Use only the blocking or finishing method appropriate for the yarn you actually choose. Do not apply heat or aggressive shaping without checking fiber requirements first.
A Safety-Pin Back Changes How the Piece Hangs
The source includes a safety pin on the reverse, which confirms that the rosette is intended to be attachable. A brooch bar can be an alternative for your own version, but either fastening should be positioned with the completed weight of the tails in mind.
Test the piece vertically before permanently securing the hardware. A fastening placed too low can encourage the upper edge to lean away from the fabric.
Substitute Yarn by Fabric Behavior, Not Just Color
The original pattern specifies a particular yarn, but substitutions can change stiffness, sheen, weight, and edge definition. A yarn that produces a much softer fabric may not hold the same crisp outer points.
Make a small sample if the replacement behaves very differently. Matching color alone is not enough when the whole identity of the brooch depends on a stable circular edge.
Original Tutorial and Creator Credit
Creator/Site: DROPS Design
4. Crochet Loop Petal Equestrian Rosette Brooch
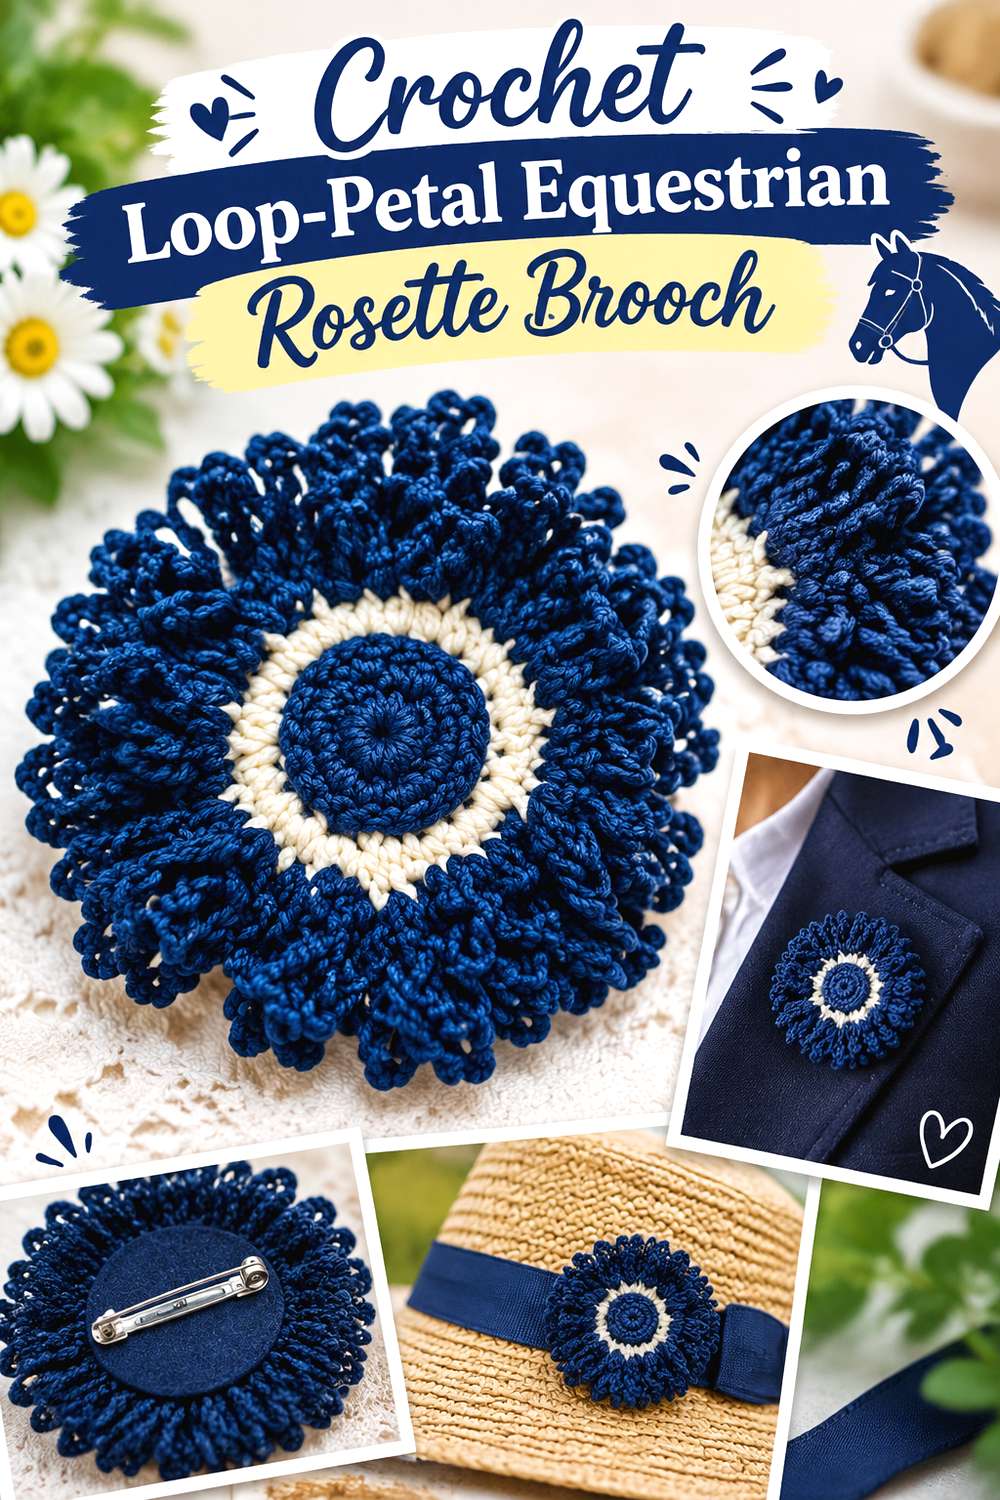
Emilee Gettle’s Crochet Spot rosette uses a circular center surrounded by long loop-like petals, giving the motif a radiating outline that feels lighter and more graphic than a dense pleated badge. The designer specifically suggests the finished rosette can be used as a pin for a hat or coat.
That makes it a useful direction for an equestrian-inspired brooch where you want the circular rhythm of a prize rosette without duplicating conventional ribbon pleats. Optional narrow tails could sit behind the motif, although they are an adaptation rather than part of the source design. This works best when the loops remain the unmistakable focal feature instead of becoming visually tangled with the lower streamers.
Loop Petals Need Enough Negative Space
Long loops create their effect through the openings between strands. Pushing additional decorations behind every loop can make the perimeter look confused.
Place any tails or backing so the outer ring can still be seen against the garment. A contrasting jacket or backing color may also help the loop structure read more clearly.
Use a Flat Backing for Coat Wear
A looped face can appear delicate even when the central crochet is secure. A small backing disk gives you somewhere to place the brooch hardware without stitching repeatedly through the decorative loops.
Keep the backing beneath the solid center rather than extending underneath the full petal diameter. That preserves the airy appearance.
Test the Center Before Adding Tails
This rosette already has a distinctive outline, so it may not need full-length competition streamers. Pin the plain motif temporarily to the intended garment first.
If it already supplies enough visual impact, consider short tails or none at all. If stronger equestrian signaling is important, add two narrow streamers and compare the balance again.
Original Tutorial and Creator Credit
Creator/Site: Emilee Gettle / Crochet Spot
5. Crochet Spiral Rose Center Equestrian Rosette Brooch
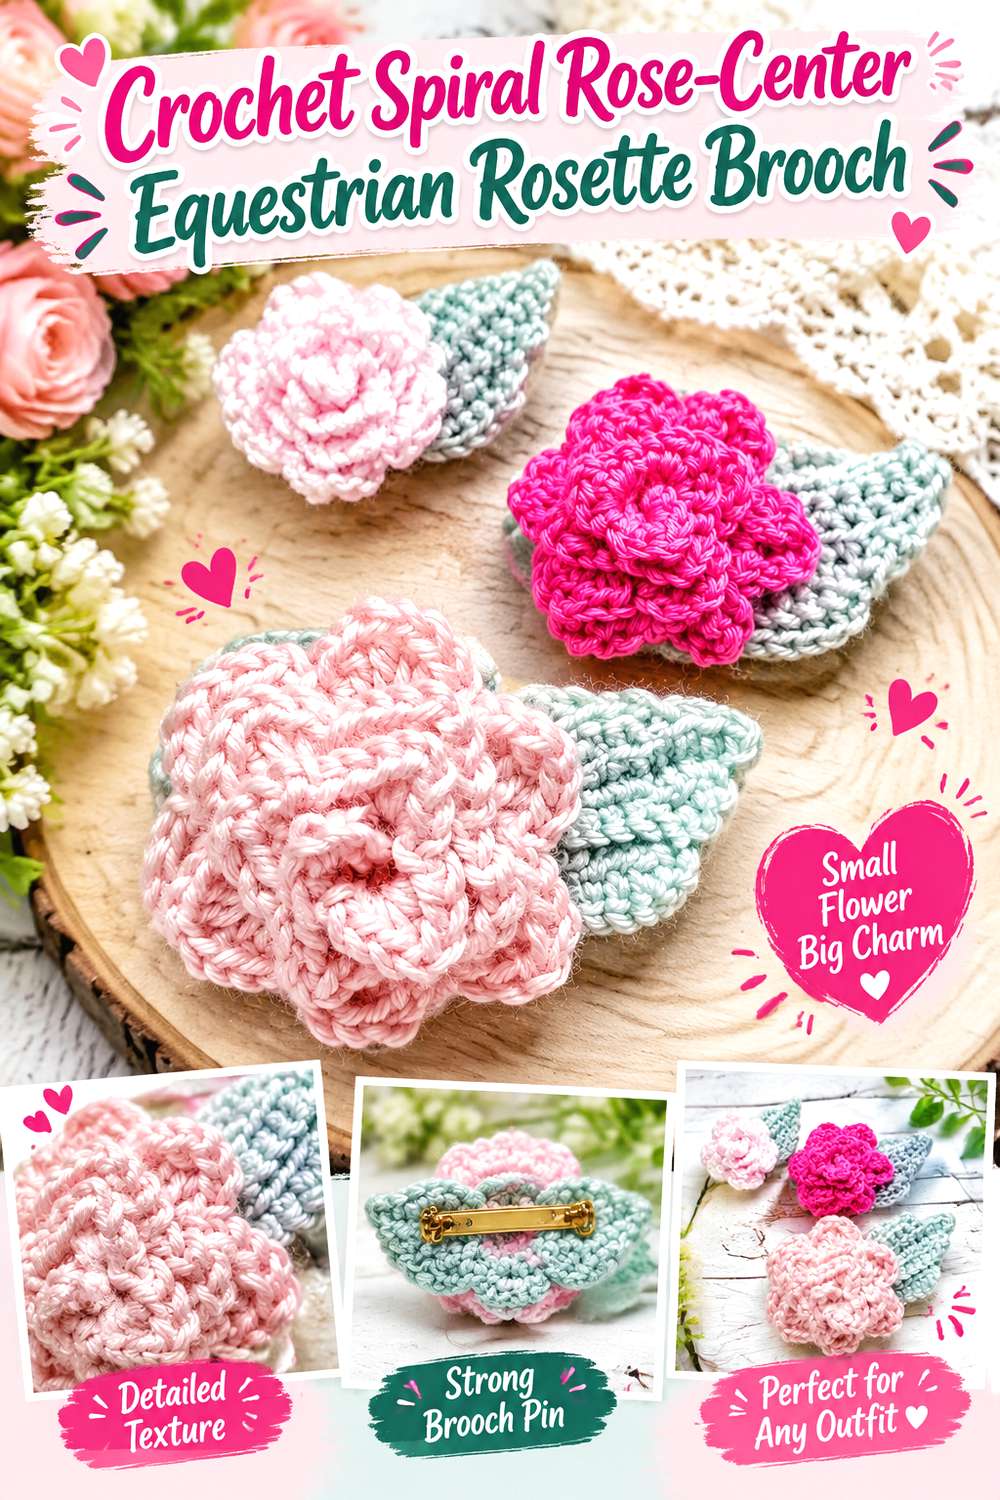
A rose center pushes the show-ribbon concept toward a corsage-like accessory. Rebekah Haas’s tutorial creates dimensional crochet rosettes from a shaped strip and demonstrates how yarn weight changes the scale of the finished flower. The original project is a rosette motif rather than a complete equestrian award, so use it as the verified center construction and plan any tails or pin backing independently.
This approach is useful when the brooch should feel handmade and floral first, equestrian second. Two restrained tails can provide enough award-ribbon reference without hiding the spiral. It also offers more freedom in scale than a tightly specified badge because the tutorial discusses several yarn-weight approaches.
Keep the Rose From Becoming Too Deep
A dimensional spiral that looks attractive in the hand can protrude noticeably from a tailored jacket. Excess depth also shifts more weight away from the fabric.
View the completed rose from the side before deciding on backing. If it projects farther than you want, do not compensate by adding an oversized backing that becomes visible from the front.
Give the Spiral a Firm Center Anchor
Rolled flowers depend on secure internal attachment. The brooch pin should not become the only thing holding the flower’s shape together.
Finish and secure the rose according to the original tutorial first. Only after the flower is structurally complete should you treat it as the center of a larger rosette brooch.
Add Award Tails Without Hiding the Bloom
A spiral rose has directional movement that can disappear if broad streamers cover its lower petals. Keep any added tails behind the central flower and slightly narrower than the widest portion of the bloom.
This gives the brooch a show-ribbon reference while preserving the source project’s defining spiral.
Original Tutorial and Creator Credit
Creator/Site: Rebekah Haas Crochet
6. Crochet Rolled Rose Equestrian Rosette Brooch
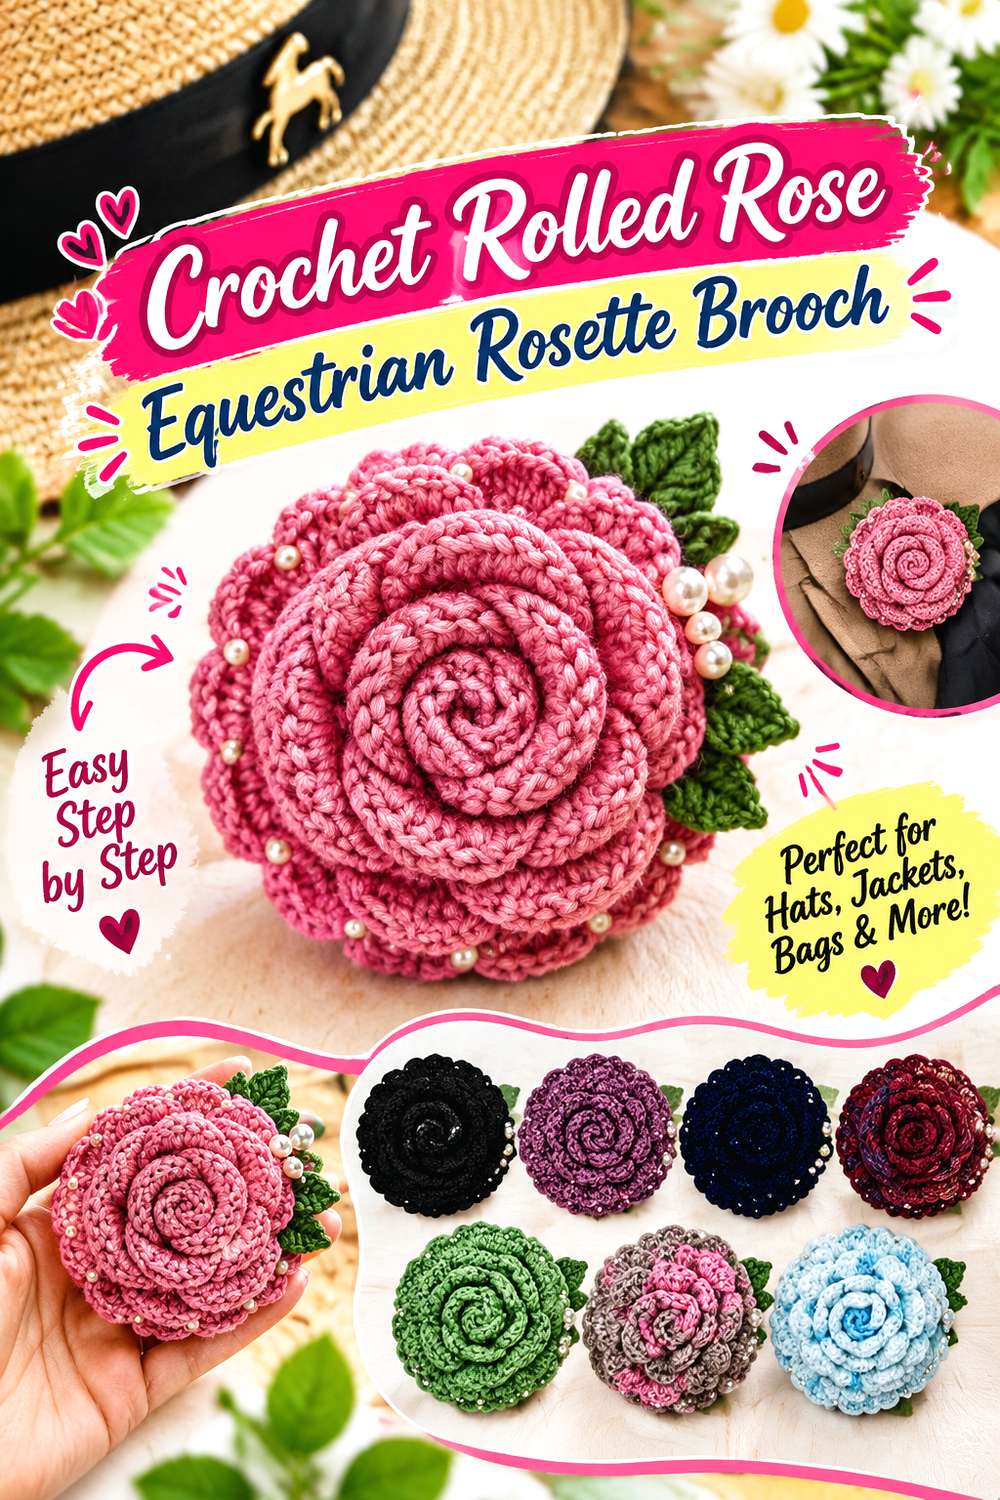
The rose-brooch tutorial from szydełko already treats the crocheted rose as a wearable pin, with suggested uses on garments and accessories. That makes it a stronger starting point for a floral equestrian brooch than a loose flower motif because the source itself establishes brooch use.
For a horse-show interpretation, keep the rose as the center and place a discreet pair of crochet streamers behind it. Compared with a pleated award badge, this version feels softer and less formal. It can work well for a riding-club keepsake, themed event, or decorative jacket pin where an unmistakable first-place ribbon is not required.
Soft Roses Need More Back Support
Rounded rose petals often produce a softer edge than a dense award-rosette disk. That does not mean the flower needs to become rigid, but the pin hardware should sit on a stable section.
A compact felt or crochet backing can help keep stitches from pulling unevenly where the brooch bar is sewn.
Scale the Bloom to the Garment
The same rose can feel understated on a coat and oversized on a light blouse. Judge the finished flower against the actual fabric rather than choosing size from a photograph alone.
Heavier outerwear generally tolerates a more substantial brooch, while fine clothing may sag under a dimensional center plus crochet tails.
Keep the Tail Attachment Separate From Rose Shaping
Do not sandwich streamers into the rose while you are still securing its petals unless the original tutorial specifically uses that method.
Complete the flower first. Then attach any equestrian-style tails to a backing layer so future adjustments do not disturb the rose itself.
Original Tutorial and Creator Credit
Creator: szydełko
7. Crochet Flat Flower Center Equestrian Rosette Brooch
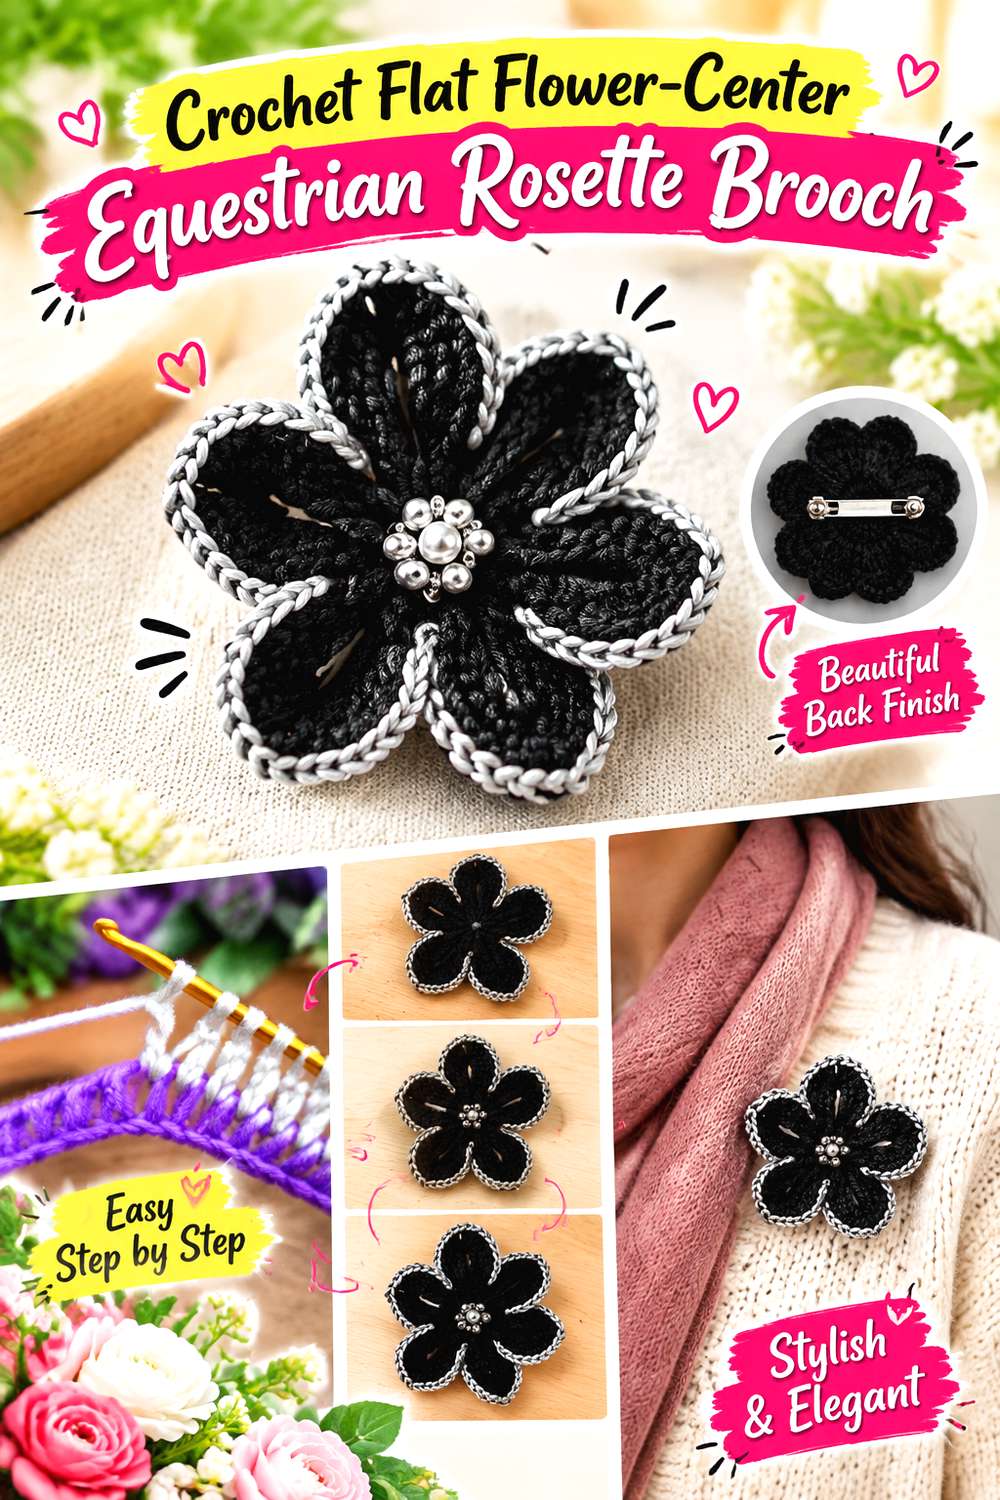
Patronarte’s flower-shaped crochet brooch provides a comparatively clean floral face. Instead of relying on a tall spiral rose, this direction keeps the center flatter and therefore closer to the profile of a traditional badge.
That lower profile makes it attractive for equestrian styling: a pair of straight or shallow V-shaped tails can be added behind the flower without creating an excessively bulky brooch. Use the tutorial for the flower brooch itself, then treat the streamers as an optional separate component. Because the center is visually simpler than the rose versions, color placement or a contrasting center can become the main design tool.
A Flat Flower Makes a Cleaner Badge
Less depth usually means less forward pull when the piece is worn vertically. That is helpful on jackets where a large flower might otherwise tilt away from the fabric.
Do not assume “flat” means structure is irrelevant, however. The pin still needs to be attached across enough solid crochet to avoid distorting individual petals.
Center Contrast Does More Work Than Extra Bulk
If the flower feels visually quiet, try changing the center-to-petal contrast before adding another full layer.
A well-defined center can reinforce the circular award-ribbon look while keeping the brooch lighter. This is especially useful when the streamers already introduce a second design element.
Reinforce Only Where the Pin Bar Sits
Full-surface stiffening can change the hand of the crochet unnecessarily. Focus support at the structural attachment area instead.
A compact backing beneath the center is usually less intrusive than making the entire flower rigid, though the best method still depends on yarn, stitch density, and intended garment.
Original Tutorial and Creator Credit
Creator: Patronarte
8. Crochet Beaded Thread Equestrian Rosette Brooch
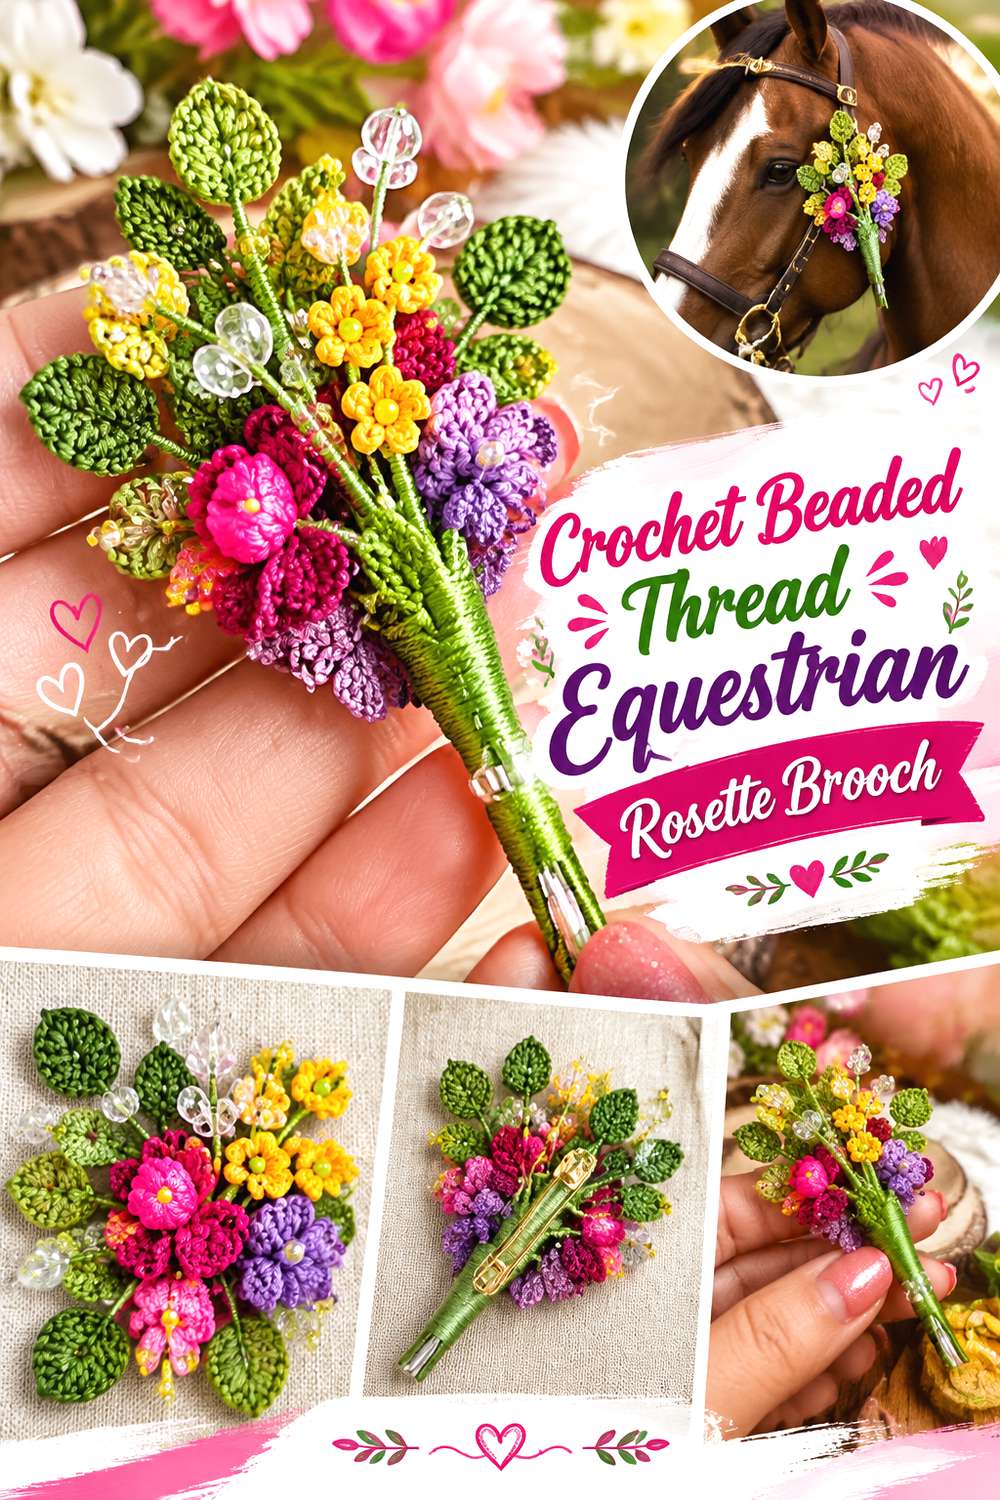
Sure It’s flower-brooch tutorial takes the concept in a finer, more jewelry-like direction. The listed materials include crochet thread, a small hook, beads, wire, a brooch pin, and finishing supplies, signaling a markedly different construction character from the chunkier yarn rosettes in this collection.
For equestrian styling, this is the dressier option: think presentation-day accessory or decorative keepsake rather than a soft yarn replica of a conventional show ribbon. Narrow tails in a complementary crochet fabric could extend the rosette silhouette, but they should remain secondary to the detailed center. Because beads, wire, and other mixed materials affect weight and care, adaptation deserves more caution here.
Fine Thread Creates a Different Kind of Rosette
Thread crochet produces smaller, sharper detail than many yarn-based brooches. Simply enlarging the design with a much heavier yarn may change its entire character.
If you want a larger equestrian brooch, consider whether scaling the backing or adding restrained tails preserves the delicate center better than changing the flower itself.
Beads and Wire Change Care Requirements
Mixed-material brooches should not automatically follow the washing method of the yarn alone. Beads, wire, glue, starch, or metal pin backs can react differently to water, heat, or agitation.
Treat the brooch as an accessory and check the guidance for every material used before cleaning it.
Use This Style for Dressy, Not Rugged, Wear
Fine protruding details are more vulnerable to crushing and snagging than a dense flat badge. That makes this idea better for controlled wear, display, or gifting than for situations where the brooch will rub against equipment.
Store it where petals and wire-supported details are not flattened under heavier items.
Original Tutorial and Creator Credit
Creator: Sure It
9. Crochet Double Layer Equestrian Rosette Brooch
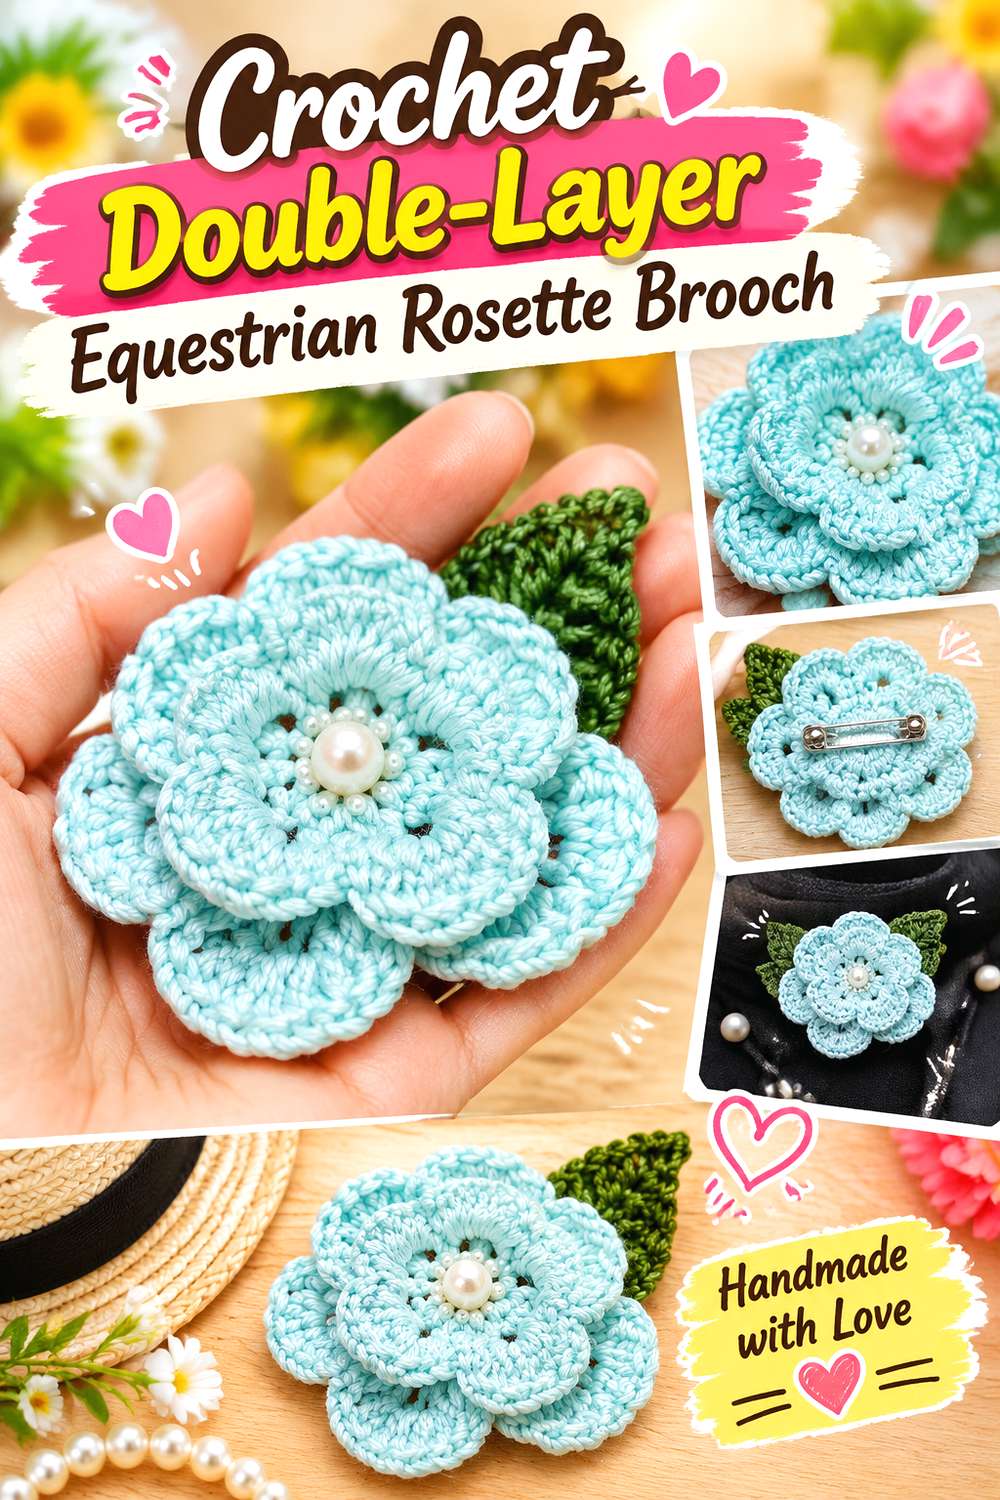
Meisie Zhafira’s tutorial explicitly presents a double-layer crochet flower as a pin or brooch. The layered face gives you more depth than a flat motif but remains visually organized around one circular center, which makes it a natural bridge between a flower pin and an award rosette.
For an equestrian variation, allow the two crochet layers to create the rosette face and add only enough streamer detail to establish the show-ribbon association. This approach suits makers who like the depth of traditional multi-tier rosettes but prefer petal texture to ribbon-style ruffles. Keeping the flower face symmetrical is especially important because misalignment becomes more obvious once tails establish a vertical axis beneath it.
Double Layers Create Depth Without Long Tails
The stacked flower already provides a sense of dimension, so long streamers are optional rather than necessary.
For a compact jacket brooch, short tails can preserve the award idea while allowing the double-layer center to remain the largest visual element. A display piece can handle a more dramatic lower section.
Offset Petals Before You Secure the Back
Two petal layers often look fuller when the upper petals sit between the lower ones instead of directly covering them.
Use the orientation shown by the tutorial as your construction guide. If you experiment with positioning, inspect the flower from the front before fixing the brooch backing permanently.
Watch the Side Profile on Fitted Jackets
Layered petals can stand away from the garment even when the overall diameter is modest. Check the side view while wearing the jacket.
If the brooch tips outward, moving the pin hardware higher on the backing may help more than adding another layer of stiff material.
Original Tutorial and Creator Credit
Creator: Meisie Zhafira
10. Crochet Overlapping Petal Equestrian Rosette Brooch
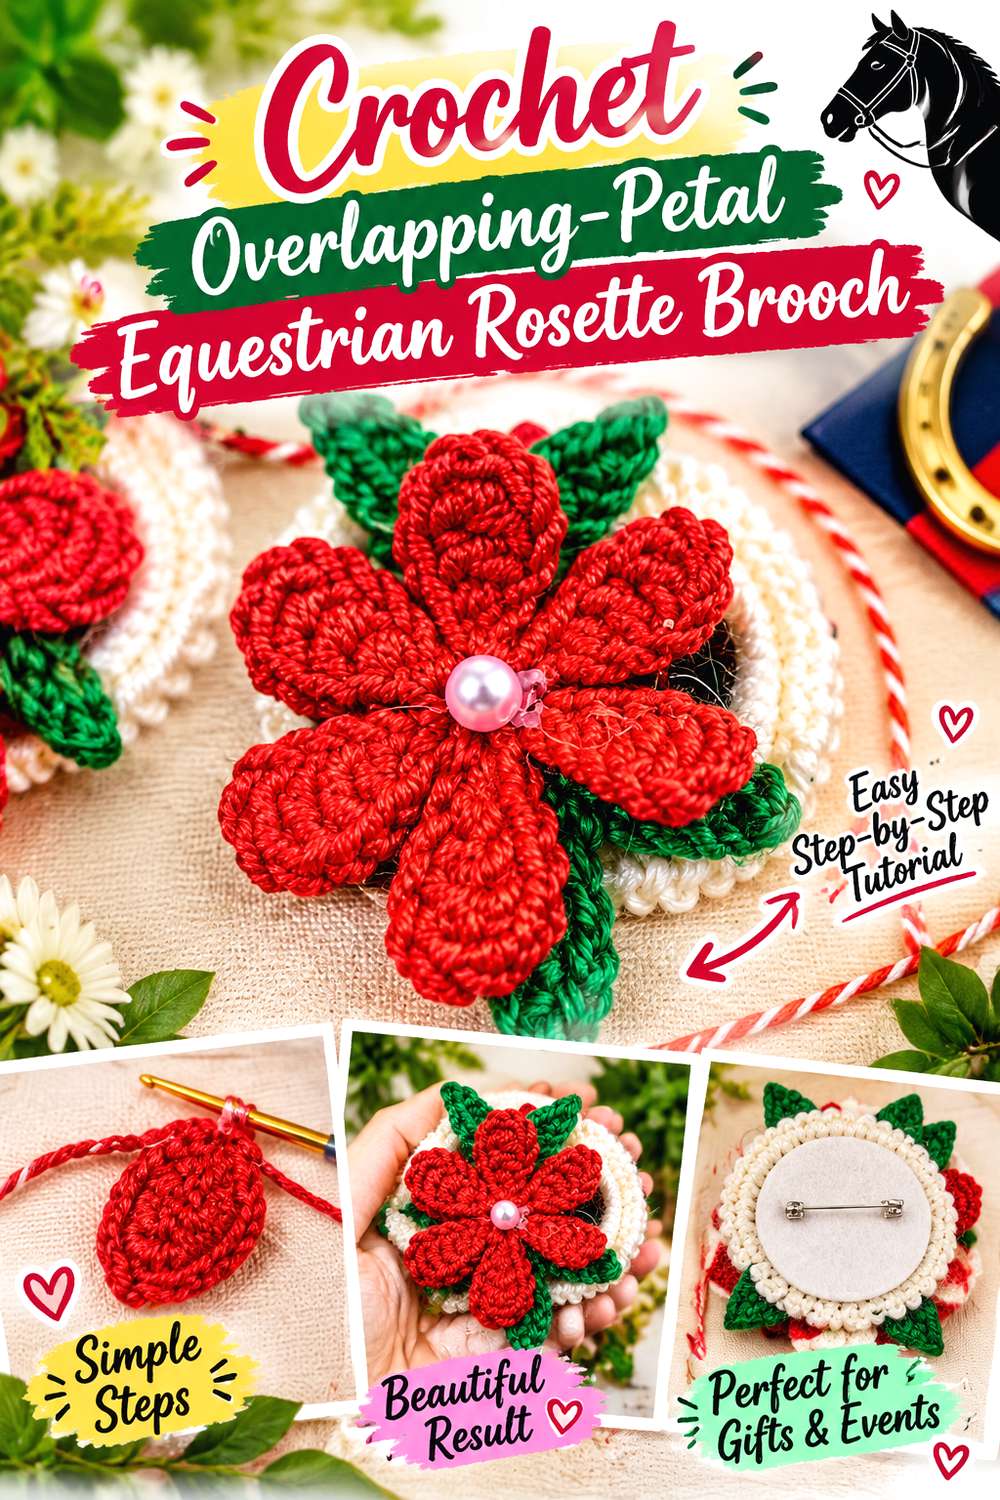
Crochet Your Life’s flower brooch uses overlapping petals to create a substantial 3D center and discusses mounting the finished flower on a brooch base. The tutorial also presents center options, including a simpler treatment or beads.
That makes it an appealing starting point for a statement equestrian brooch where the flower itself substitutes for the pleated ribbon head of a conventional rosette. Two simple streamers can be added behind the brooch base as a separate design choice. Because overlapping petals create both thickness and visual movement, restraint elsewhere is valuable; a complicated tail pattern may compete with the center instead of supporting it.
Overlapping Petals Need a Stable Brooch Base
The more petals overlap, the more the center can concentrate weight away from the garment. A stable brooch base keeps that load from relying on only a few outer stitches.
Before attaching streamers, make sure the flower itself sits securely and does not rotate around the pin hardware.
Bead Centers Can Shift the Balance
Even small embellishments can add concentrated weight to the front of a dimensional flower. If you choose a beaded center, recheck how the brooch hangs before adding anything else.
A design that is balanced without beads may behave differently once the center becomes heavier.
Check How the Brooch Sits Before Final Sewing
Hold or pin all major components together temporarily: flower, backing, hardware, and any proposed tails. Then view the piece from the front and side.
This simple checkpoint can reveal a top-heavy center, off-axis tails, or a brooch bar positioned too low before those problems are difficult to correct.
Original Tutorial and Creator Credit
Creator: Crochet your life
11. Crochet Poppy Center Equestrian Rosette Brooch
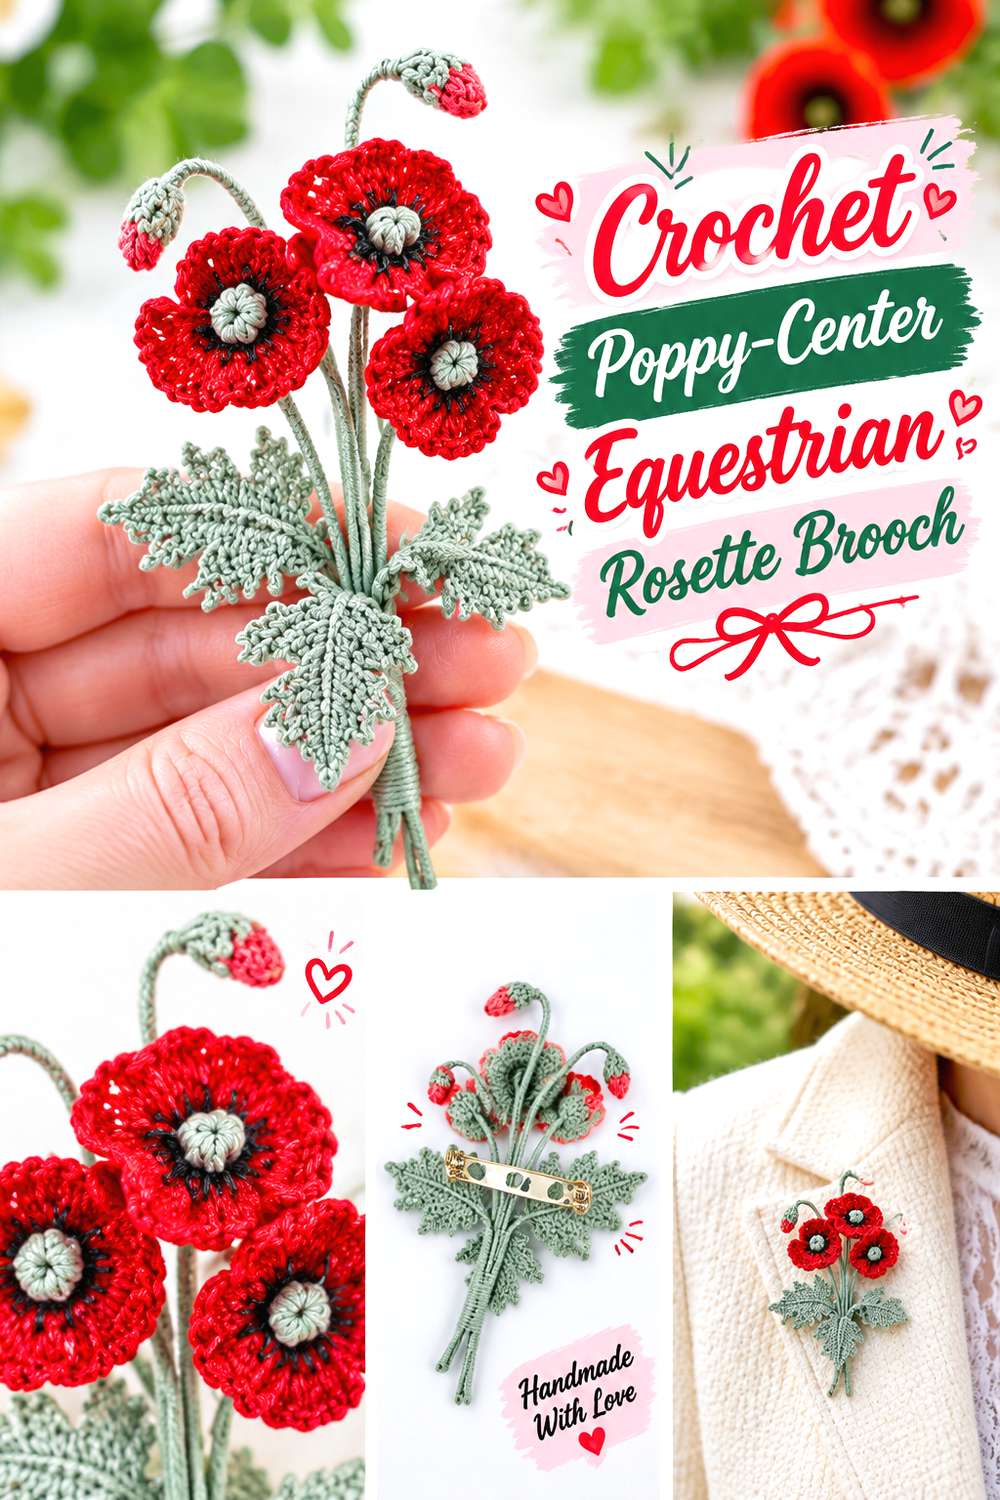
TinyLimeCraft’s poppy tutorial moves well beyond a generic round flower, with distinct petals, center detail, leaves, and fine structural components. The source is a botanical brooch rather than an equestrian award, so its best role here is as a verified statement center for a more elaborate rosette adaptation.
A poppy-centered show brooch can feel ceremonial and sculptural, especially when paired with short, quiet streamers rather than another highly textured outer ring. This is one of the least conventional options on the list and should be chosen because you want a botanical focal point, not because you need an exact crochet replica of a competition ribbon.
Botanical Detail Should Not Disappear Behind Streamers
Leaves, petals, and the flower center already create an asymmetrical outline. Broad tails positioned too close to the face can hide those carefully shaped components.
Place any added streamers behind the smallest structural backing possible and check that the botanical silhouette remains readable.
Fine Components Need Protected Storage
Detailed flowers are more susceptible to crushing than a flat award disk. A storage box that keeps other accessories from pressing on the petals is more suitable than dropping the brooch loose into a crowded drawer.
If the flower incorporates wire, avoid repeatedly bending it back and forth when reshaping.
Keep Sharp Hardware Away From the Horse
This advice matters for every brooch in the article, but especially for designs with additional wire or metal components. Wear the accessory where it cannot brush against the horse or interfere with tack.
If the event requires an accessory attached to the horse itself, choose a fastening specifically suited to that purpose rather than repurposing the brooch pin.
Original Tutorial and Creator Credit
Creator: TinyLimeCraft
12. Crochet Daisy Center Equestrian Rosette Brooch
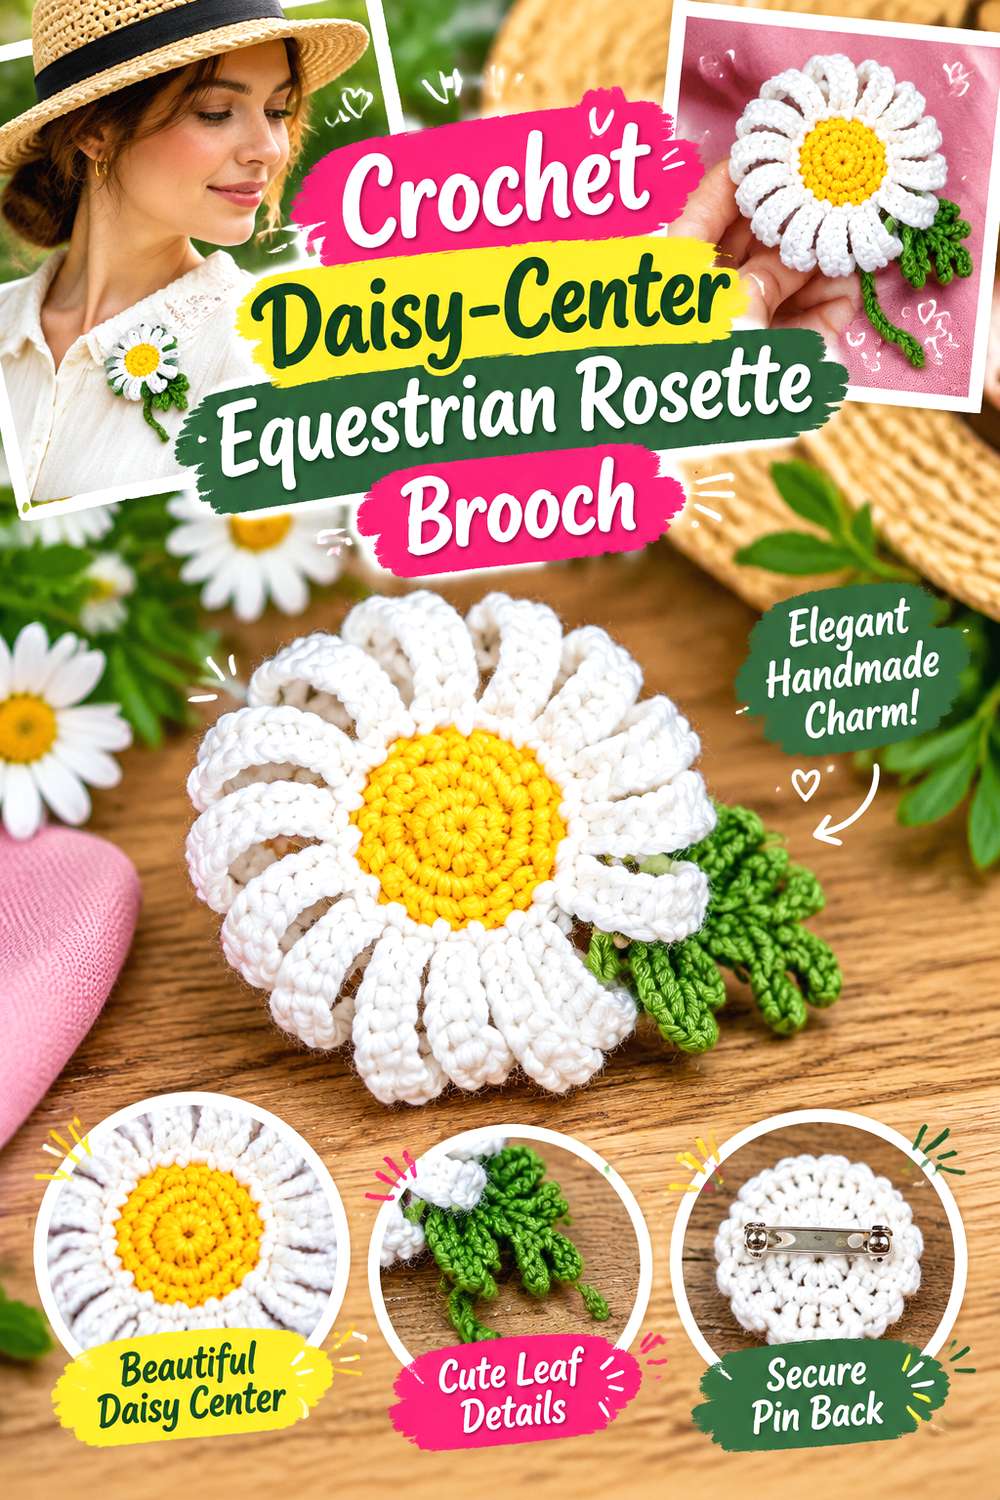
Olga Lukoshkina’s tutorial teaches a round chamomile or daisy brooch, giving this idea a clean radial flower shape rather than the curled movement of a rose. The evenly distributed petals make the center naturally compatible with the symmetry of an award rosette.
For equestrian styling, a daisy center works particularly well with a simple pair of tails because the flower already has a strong circular outline. It can also create a lighter visual mood than the dense pleated and ruffled options. Use the tutorial for the brooch itself, then decide separately whether adding tails actually improves the finished accessory; the daisy may be strong enough to function as a rosette-style pin without them.
Daisy Centers Read Best With Controlled Contrast
A distinct center helps the radial petals remain obvious from a distance. If the center and petals are nearly identical in color, some of that geometry may disappear.
For a subtle equestrian palette, consider changing value rather than introducing a completely different hue. The goal is clarity, not necessarily maximum contrast.
Radial Petals Expose Tension Differences
Repeated petals invite direct comparison with one another. Noticeable size changes from petal to petal can make a circular brooch look lopsided.
Follow the tutorial’s construction carefully and periodically lay the flower flat to compare the developing outline rather than waiting until the entire piece is finished.
Keep the Backing Smaller Than the Flower Face
A daisy benefits from clear gaps around and between petals. A large backing can show through those spaces and make the flower look heavier.
Limit reinforcement to the solid central area whenever the construction safely allows it.
Original Tutorial and Creator Credit
Creator: Olga Lukoshkina
13. Crochet Felted Sunflower Equestrian Rosette Brooch
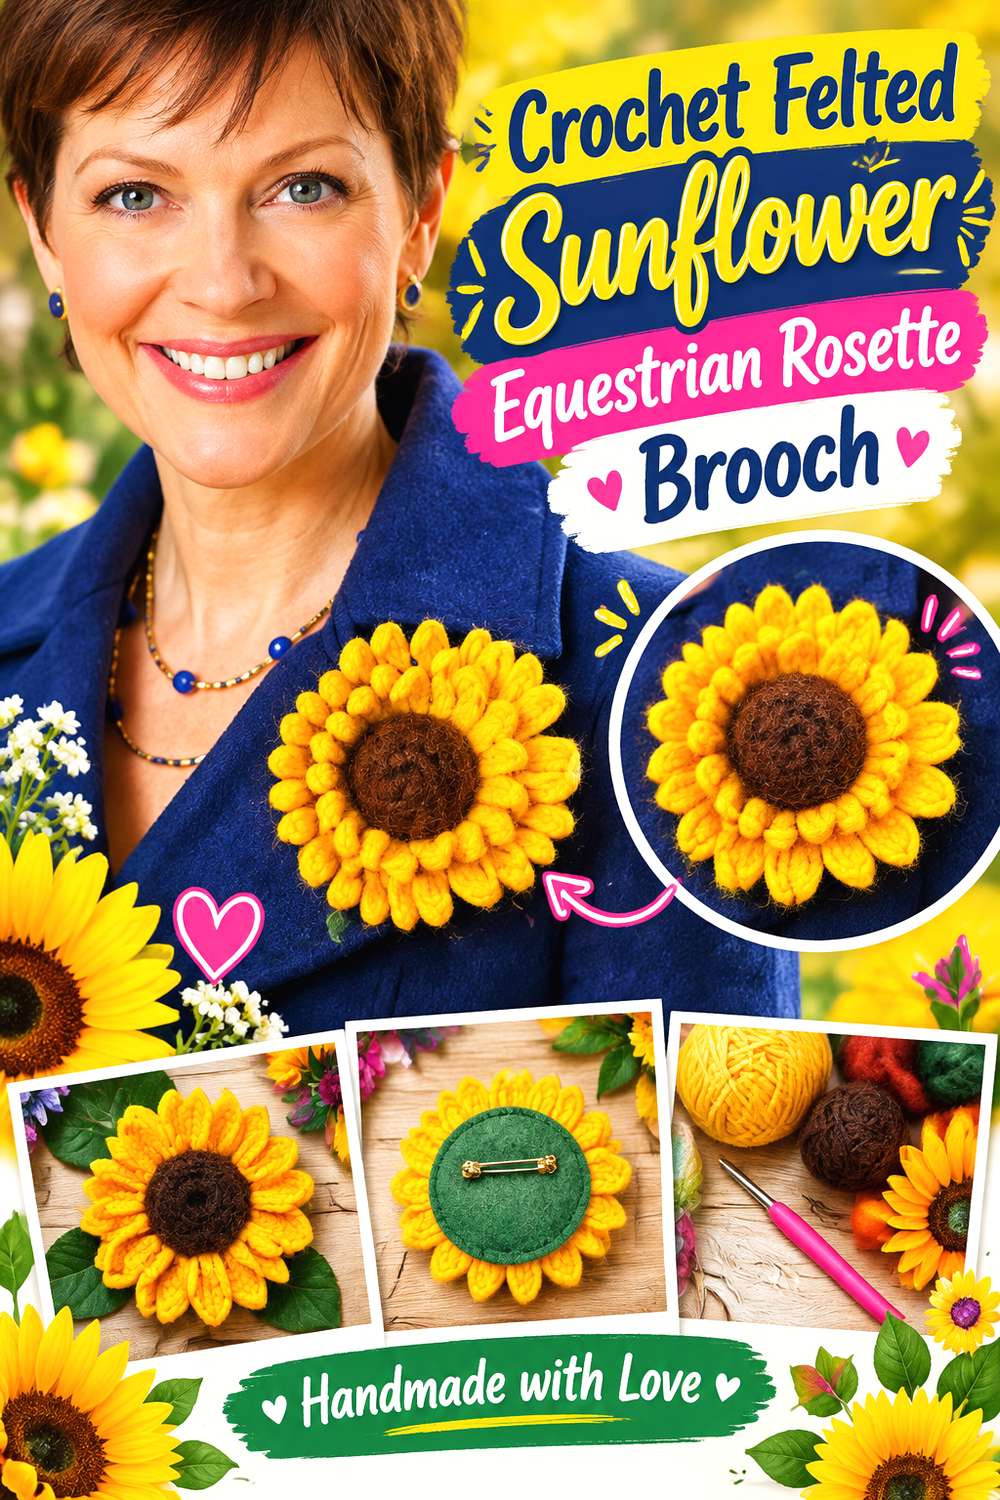
The Crochet Crowd’s sunflower tutorial stands apart because the crocheted flower is felted. Felting changes both the appearance and behavior of the fabric, creating a denser surface that is visually different from exposed crochet stitches. The source specifically presents the flower for fashion or decorative use.
As an equestrian brooch, the sunflower could become a substantial center with understated crochet tails behind it. This is especially distinctive for autumn shows, country-fair styling, or a rustic riding-event accessory. However, felting is not simply a finishing trick you can apply to any yarn; fiber choice and the resulting size change need to be considered before adapting the idea.
Felting Changes Both Size and Surface
A flower should be evaluated after felting, not from its pre-felted dimensions. The fabric can become denser and lose some visible stitch definition.
Complete the source process before measuring for a backing or deciding how broad your streamers should be. Otherwise, the surrounding parts may be proportioned to a center that no longer exists at that size.
Felted Wool Needs a Different Substitution Plan
Not every fiber behaves the same way under felting conditions. A yarn chosen only because it matches the desired color may fail to produce the intended surface.
Confirm the fiber content and the tutorial’s felting requirements before substituting. When in doubt, make a small swatch rather than risking the complete flower.
Heavier Flowers Need Stronger Garment Support
A dense felted flower can behave differently from an airy crochet motif. Test it on the actual jacket or coat before attaching long tails or additional decorations.
If the garment pulls noticeably, reducing the tail weight or using a broader structural backing may produce a more wearable result.
Original Tutorial and Creator Credit
Creator: The Crochet Crowd
14. Crochet Classic Badge Equestrian Rosette Brooch
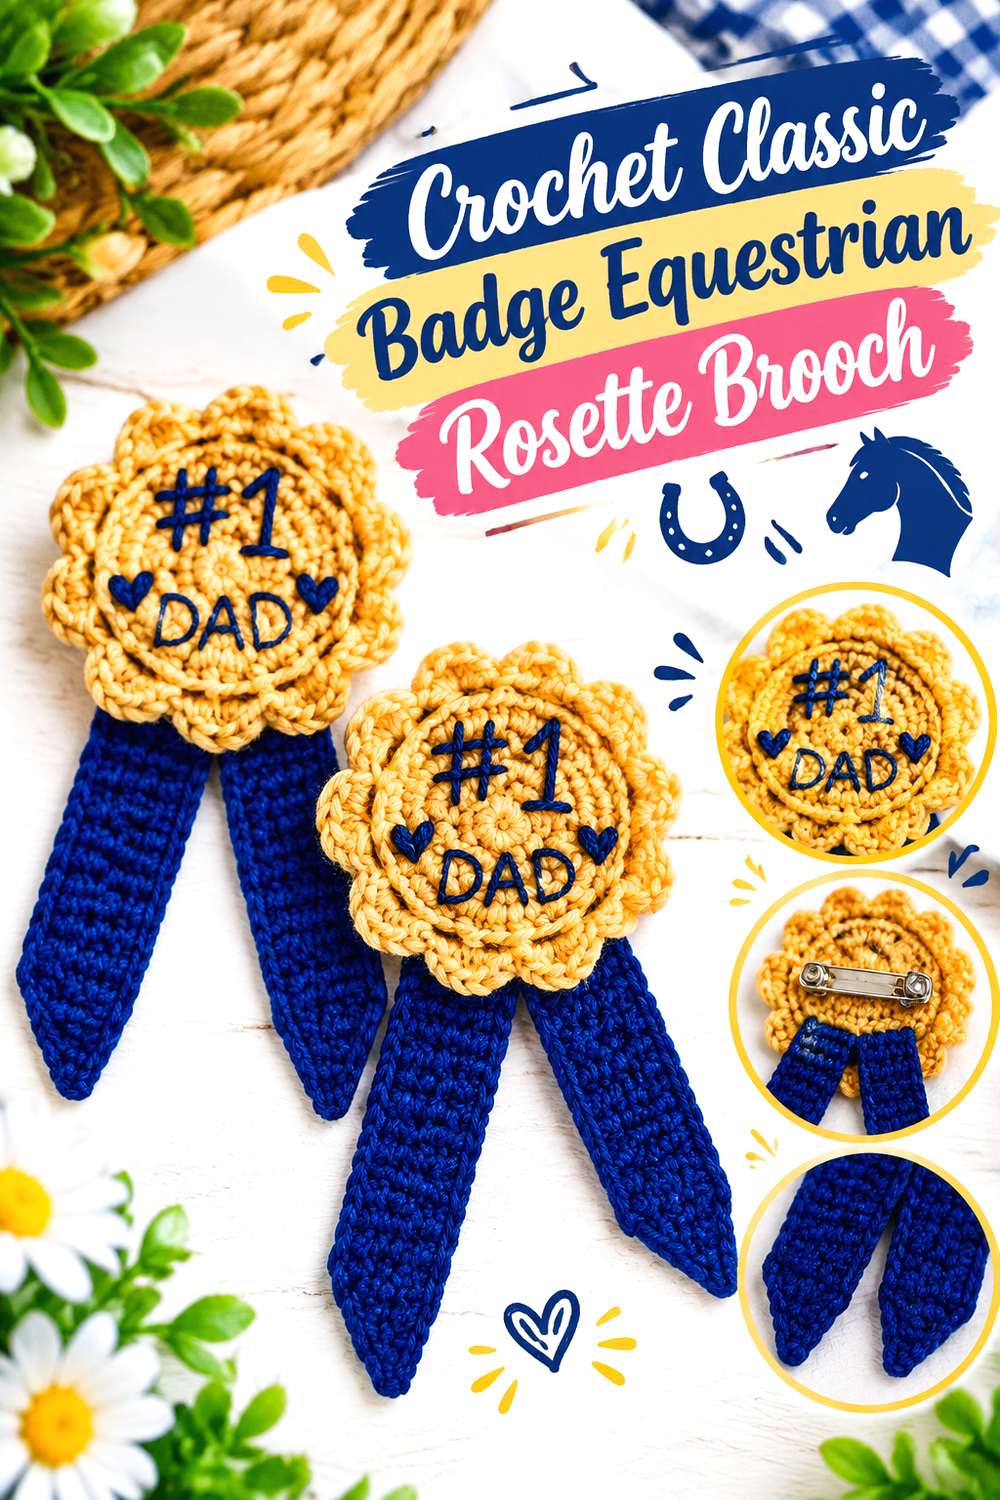
ToyGurumi’s Father’s Day badge tutorial brings the list back to an unmistakable award-ribbon format. The source is framed as a crocheted Father’s Day badge or ribbon, so the occasion is different, but the broader badge silhouette makes it relevant for an equestrian-style adaptation.
Instead of carrying the Father’s Day message into your project, use the tutorial’s verified badge concept as the construction reference and choose a neutral or competition-inspired center treatment for your own rosette. This is the option for readers who want a more literal award shape after exploring the floral alternatives above. Keep personalization removable from the construction logic so the finished brooch still works as an equestrian accessory rather than a repurposed holiday badge.
Badge Proportions Should Read From a Distance
A classic rosette works because the viewer can distinguish the circular head from the lower ribbon section immediately.
Before adding small surface decoration, step back from the work. If the overall award silhouette is not obvious, more center detail is unlikely to solve the proportion problem.
Center Messaging Is Optional for Equestrian Styling
A celebration badge may use wording or symbols that suit its original occasion. An equestrian adaptation does not need to reproduce them.
A plain crochet center, contrasting disk, embroidered initial, or removable decorative element can preserve the rosette format without implying a particular placing or award that was not actually earned.
Pin Placement Controls Whether the Tails Twist
Straight tails make misalignment easy to spot. Temporarily pin the brooch hardware in place and hold the badge vertically before sewing it permanently.
If the ribbon section rotates, first check the backing and pin angle rather than trying to force the crochet tails into a new position.
Original Tutorial and Creator Credit
Creator: ToyGurumi
Which Equestrian Rosette Style Should You Choose?
For the closest connection to a conventional prize ribbon, start with the triple-color prize rosette, DROPS picot-edge rosette, pleated Ronique brooch, or classic badge version. Their circular award structure does not depend on additional explanation.
Choose the loop-petal, double-layer, or flat flower options when you want a recognizable circular badge with a more textile-driven edge. Roses, daisies, poppies, overlapping flowers, and the beaded brooch work better when the goal is a decorative equestrian accessory rather than an exact competition-ribbon replica.
The felted sunflower is the most substantial rustic option, while fine-thread and wired flowers demand the most careful storage. Whatever style you choose, solve the backing and pin balance before adding extra tails or embellishments.
Conclusion
The most convincing crochet equestrian rosette brooch is not necessarily the one with the most layers. A clean award silhouette can come from pleats, concentric color rings, picot edging, looped petals, or a simple badge-and-tail arrangement, while roses, daisies, poppies, and other flowers create a more decorative interpretation.
Choose the center first, then assess its depth and weight before deciding whether tails will improve the design. Keep rider-worn brooch hardware away from the horse and use a purpose-appropriate fastening for anything intended for tack. For exact construction, shaping, materials, and finishing details, follow the original tutorials credited with each project rather than trying to reconstruct them from the summaries here.
Frequently Asked Questions
What yarn works best for a crochet equestrian rosette brooch?
The best choice depends on whether you want crisp structure or softer dimensional petals. A relatively smooth yarn can make concentric rings, picots, and badge edges easier to read, while softer yarn may suit roses and other floral centers. Do not substitute by color alone. Compare fiber, thickness, stitch definition, and weight with the tutorial you are following, especially for felted or fine-thread designs where changing materials can substantially change the finished result.
How can I add tails to a flower-brooch tutorial?
Finish the flower according to its original tutorial first. Then treat the tails as a separate adaptation attached to a stable backing behind the flower rather than sewing them randomly into decorative petals. Arrange the unfinished components vertically before final assembly so you can compare length, spacing, and angle. This also allows you to remove or resize the streamers without damaging the original flower construction if the first proportions look too heavy.
How do I stop a crochet rosette brooch from drooping?
Check three things: the weight of the center, the stiffness of the backing, and the position of the brooch pin. A pin placed too low can allow the upper edge to tip forward, while a heavy flower may pull lightweight clothing out of shape. A discreet backing can distribute the load, but it should not become so large that it shows around the crochet. Test the completed brooch on its intended garment before permanently fixing the hardware.
Can I use a safety pin instead of a brooch bar?
Some original rosette patterns use a safety pin, while purpose-made brooch bars are common on decorative pins. Either can work when securely attached and appropriate for the fabric, but the fastening should support the completed weight without distorting the crochet. Check that no sharp point remains exposed during normal wear. For valuable or delicate garments, also consider whether repeated pinning may leave visible holes.
Can these crochet rosettes be attached directly to a horse or tack?
Do not assume a clothing brooch is suitable for a horse. A sharp pin back, loose streamer, bead, wire component, or poorly secured attachment may create unnecessary snagging or contact risks around an animal and equipment. If you want a rosette specifically for a bridle, halter, saddle pad, or other tack, choose an attachment system intended for that location and riding context. The brooch versions here are primarily suited to people, keepsakes, costumes, bags, or display.
Can I change traditional rosette colors?
For a decorative brooch, absolutely—color can be chosen to suit a riding club, stable, outfit, event theme, or personal preference. If you are trying to represent an actual competition placing, however, check the convention used by that organization or event rather than assuming one color always means the same result everywhere. For non-award use, concentrate instead on contrast: the center, outer ring, and tails should remain visually distinct enough for the rosette structure to read clearly.